As I dive into 2 sided machining and beyond having a trammed Shapeoko seems important. I feel like there should be an easily solution where you can adjust screws to tram along X and and Y. I don’t think you can really get into thousandths of an inch in X by just bumping the mount and along Y you maybe can with aluminum shims, but wouldn’t turning a screw be a lot nicer?
I feel like it can’t be that hard to design a plate / bracket of sorts with screws to tram X and Y for a Shapeoko Pro with Z plus? Does such a thing already exist and I am wasting my time wanting to create one?
On Shapeoko 3 and 4 there are the v-wheel eccentrics to adjust the tram. I dont have a pro or HDM so not sure how you tram these because they dont have v-wheels.
I use 1-2-3 setup blocks to get the mount trammed. The X direction is easy with the v-wheels but the Y direction must be done with shims at the top and/or bottom of the router mount.
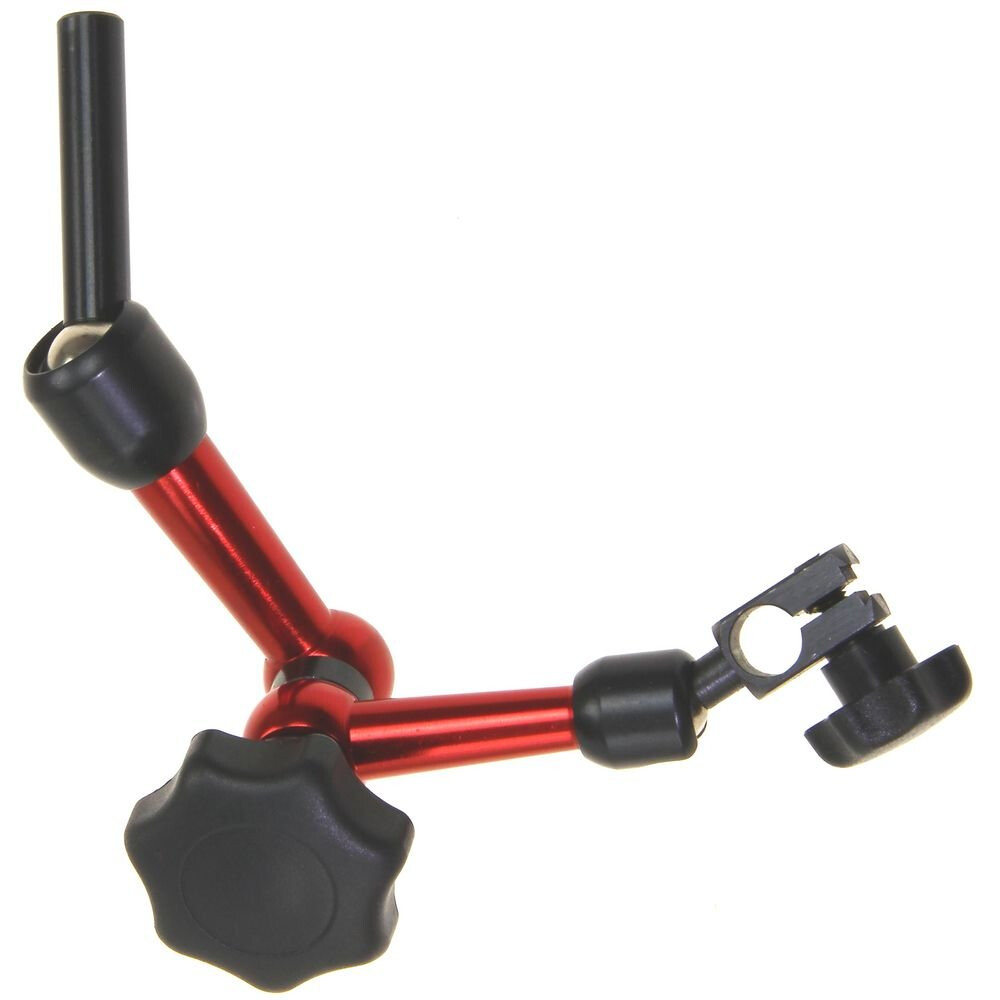
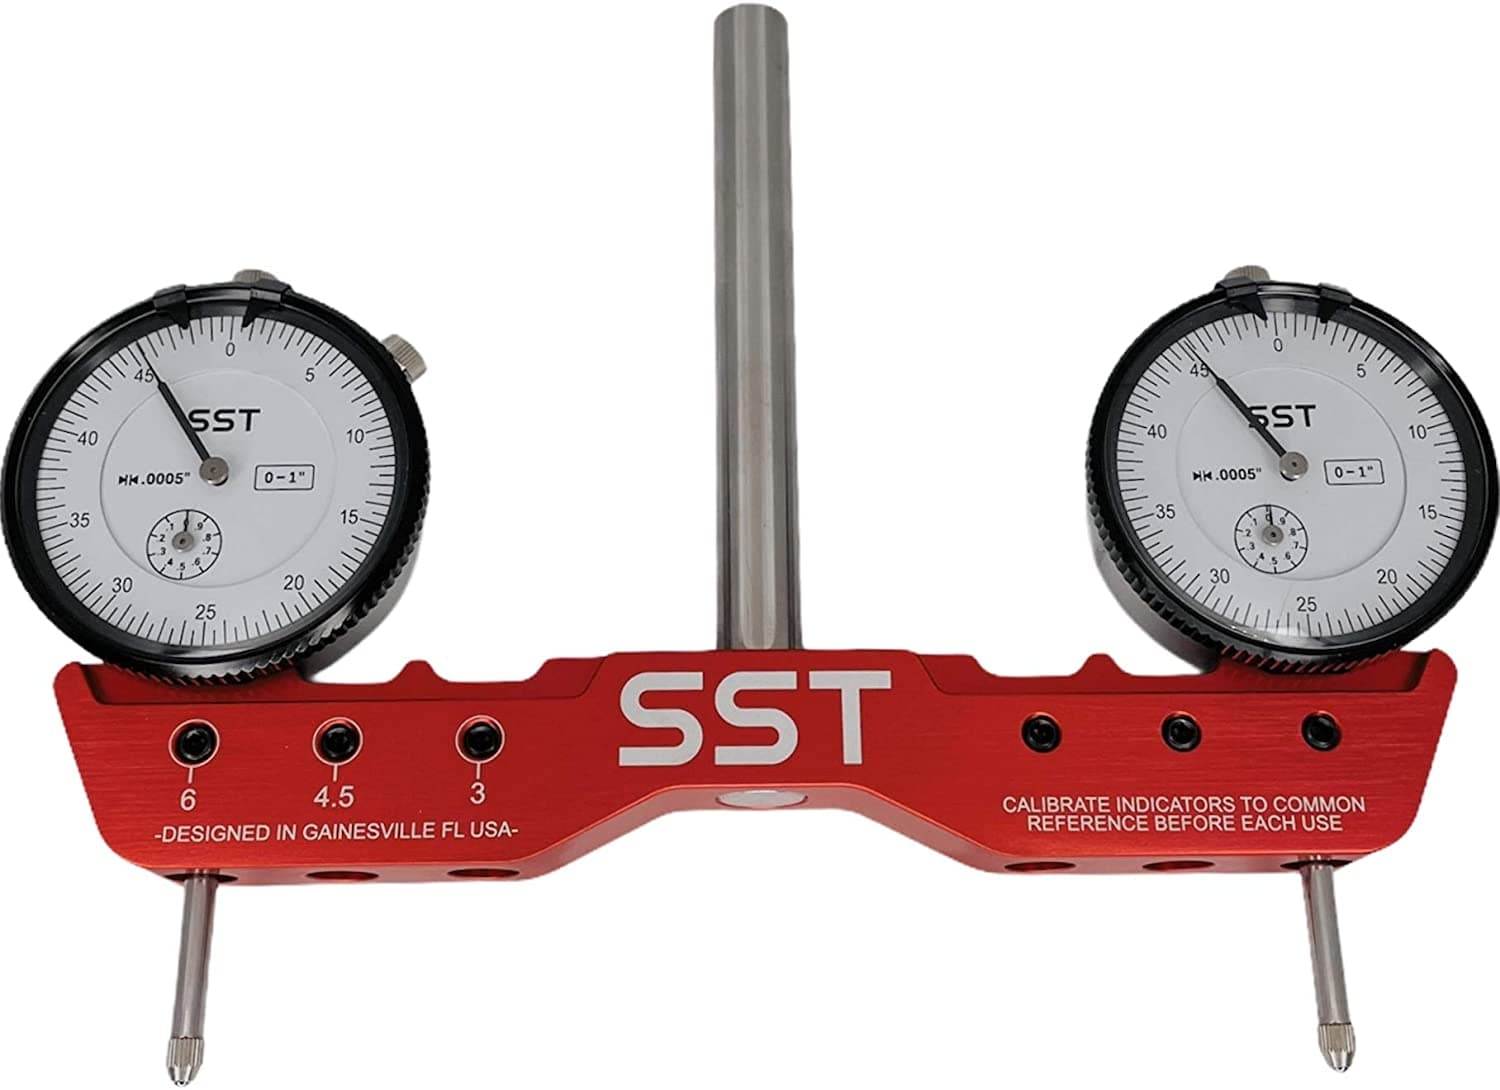
They also sell dual indicators that fit into the router to test the level of the router mount. Here is one of the many commercial models. You can also make your own with a dial indicator, 1/4" pin and a clamp to secure the dial indicator.
I have trammed my Pro and used some of those techniques, but given it doesn’t have an eccentric nut (as far as I am aware), I find it quite challenging to actually precisely tram along X. I’ve gotten pretty close at .3mm (0.0118in) difference over ~14in, but I’d like to ideally get within a few thousandths of an inch. I don’t think that’s really possible without some sort of screw adjustment. I imagine it should be possible to add a plate of sorts with screws, or maybe add an eccentric nut myself. Is there an easier way to tram the pro z plus mount within a few thousandths?
If @Luke is around he may well be the best person to comment on whether a mechanical adjustement for tramming is sensible. He did come up with the “EZ tram” plate back in the Beaver days, it used eccentric nuts to allow left/right tramming. Front to back tramming is a greater challenge, and I have a feeling that the shim approach ends up being the best compromise between accuracy and cost of the mechanical parts in a Z axis produced in large numbers.
That was a cool concept but to be honest it caused more problems then it solved.
The easiest way is to get the mount snug then gently tap it into place. I’ve done this many times now and it’s easy to do with a pro tam and sheet of borosilicate glass
I only seem to be able to get it tram within 10 thou with that method. Although it’s less tapping it and more me lifting and holding. Maybe I need to bore out some of the holes in the router mount to get more slop to work with?
My tired, tested and repeated many times method is worth a go.
Set the machine up. Powered on with pro tram fitted.
Glass on the bed.
Step 1- Loosen all the 4 spindle mount screws by about 1 turn. Tighten the top two about half a turn so you feel a good amount of bite and there is friction between the Z plate and spindle mount. The finger tight the lower screws.
Tram nod first using a foil shim behind the mount. Once happy crank it down and check nod. You can potentially shim between the Z/X plate depending on model.
From there repeat step 1 and tram the yaw - left/right. Gently tap the spindle with a rubber mallet to adjust the yaw. Crack down and check.
I ended up caving and buying the pro tram mini. Turns out I was basically spot on (within a thou) along Y and was out of tram by 10 thou along X. With the pro tram mini it was way easier to adjust and get it within one thou with minimal effort. Expensive but made the process take 5 minutes!