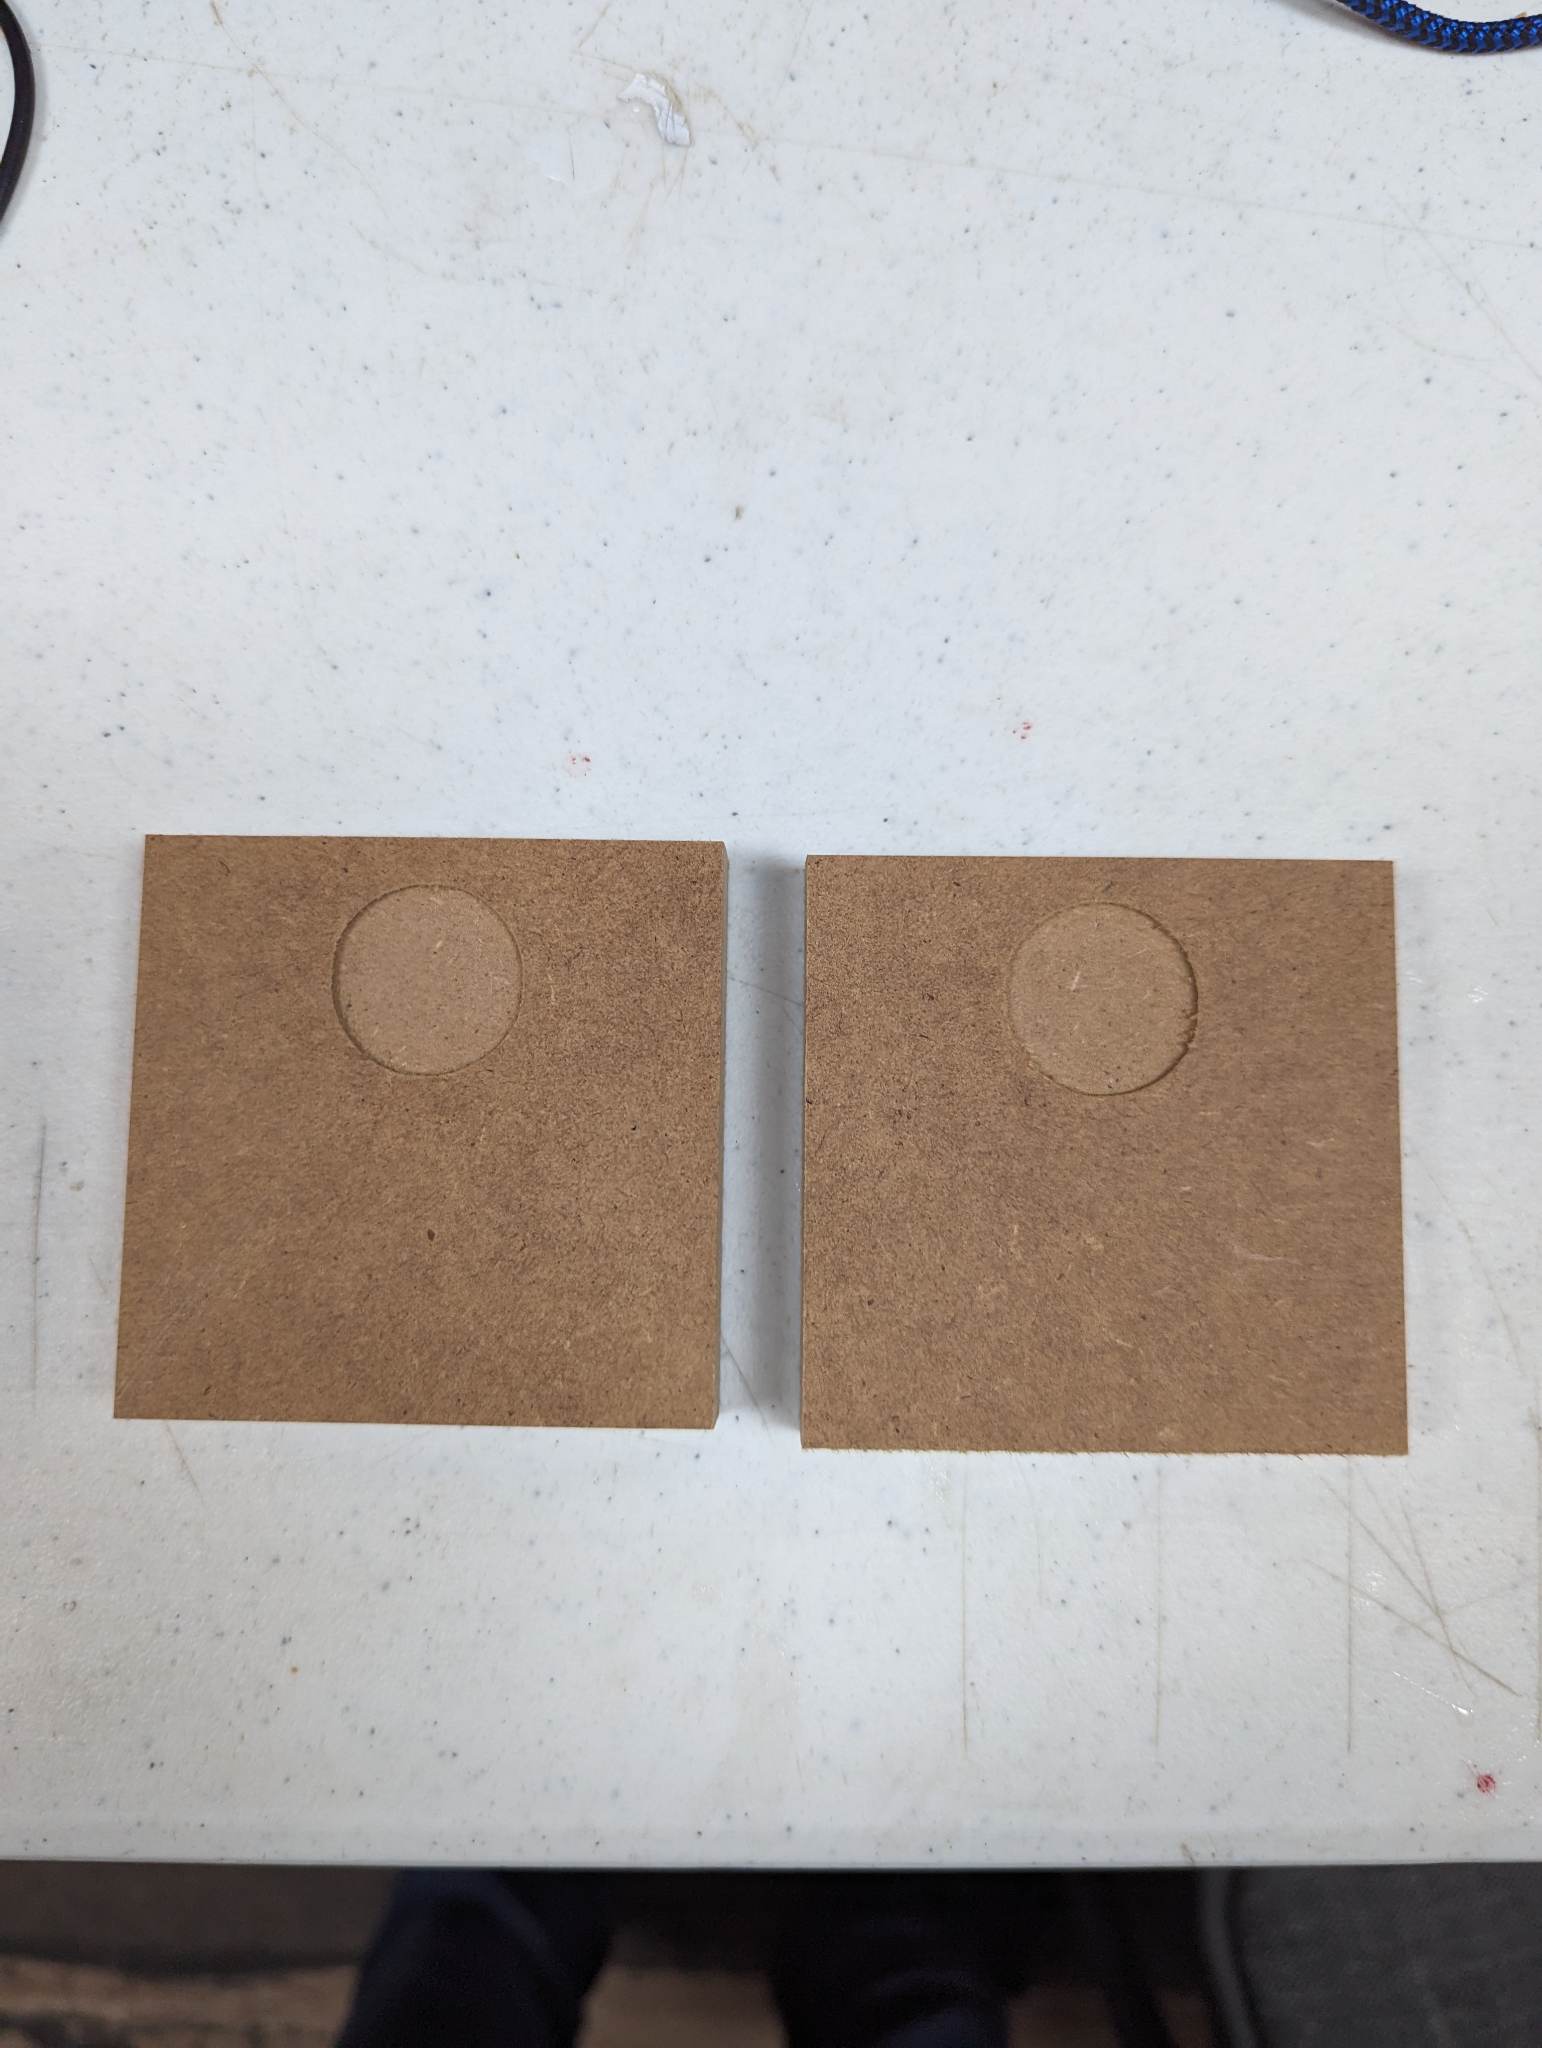
Shapeoko 3 XXL cutting some shapes with a 0.05 pocket (just barely deep enough for something that’s about the thickness of a penny.) Machine cuts the pockets first using the pocket command and then the shapes using a contour command however the pockets are offset from where they should be in the file.
Material is secured well with hold downs and double sided tape, its a consistent offest.
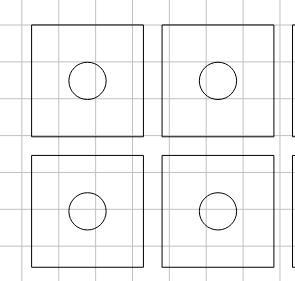
3/4 off how? the only thing that matters is that the circles are center of that square, which they should be. I used the internal dialogue boxes to make them center.
clicked on the square>selected Move in the design tab>changed anchor point to center>made note of values>clicked on circles>selected Move in the design tab>changed anchor point to center>changed values to match the same as the square.
This should mean that they are perfectly center of the square for sure, unless im misunderstanding how the program is working.
And no, the zero is staying the same all the way through, the machine is running them together. I mean to say that im not cutting, stopping and then moving on to the other toolpath, the program and machine are doing it automatically.
Process is as follows for machine: Cuts all pockets>moves on to cut all contours immediately after that
Could you be exceeding the travel limits of the machine? If you ran out of Y travel, then the machine will lose steps and everything after that will be offset.
Please post a .c2d file, step-by-step notes on how you are securing your stock and setting zero relative to it and managing all tool changes, and a photo showing an attempt at cutting still in place on the machine and we will do our best to assist.
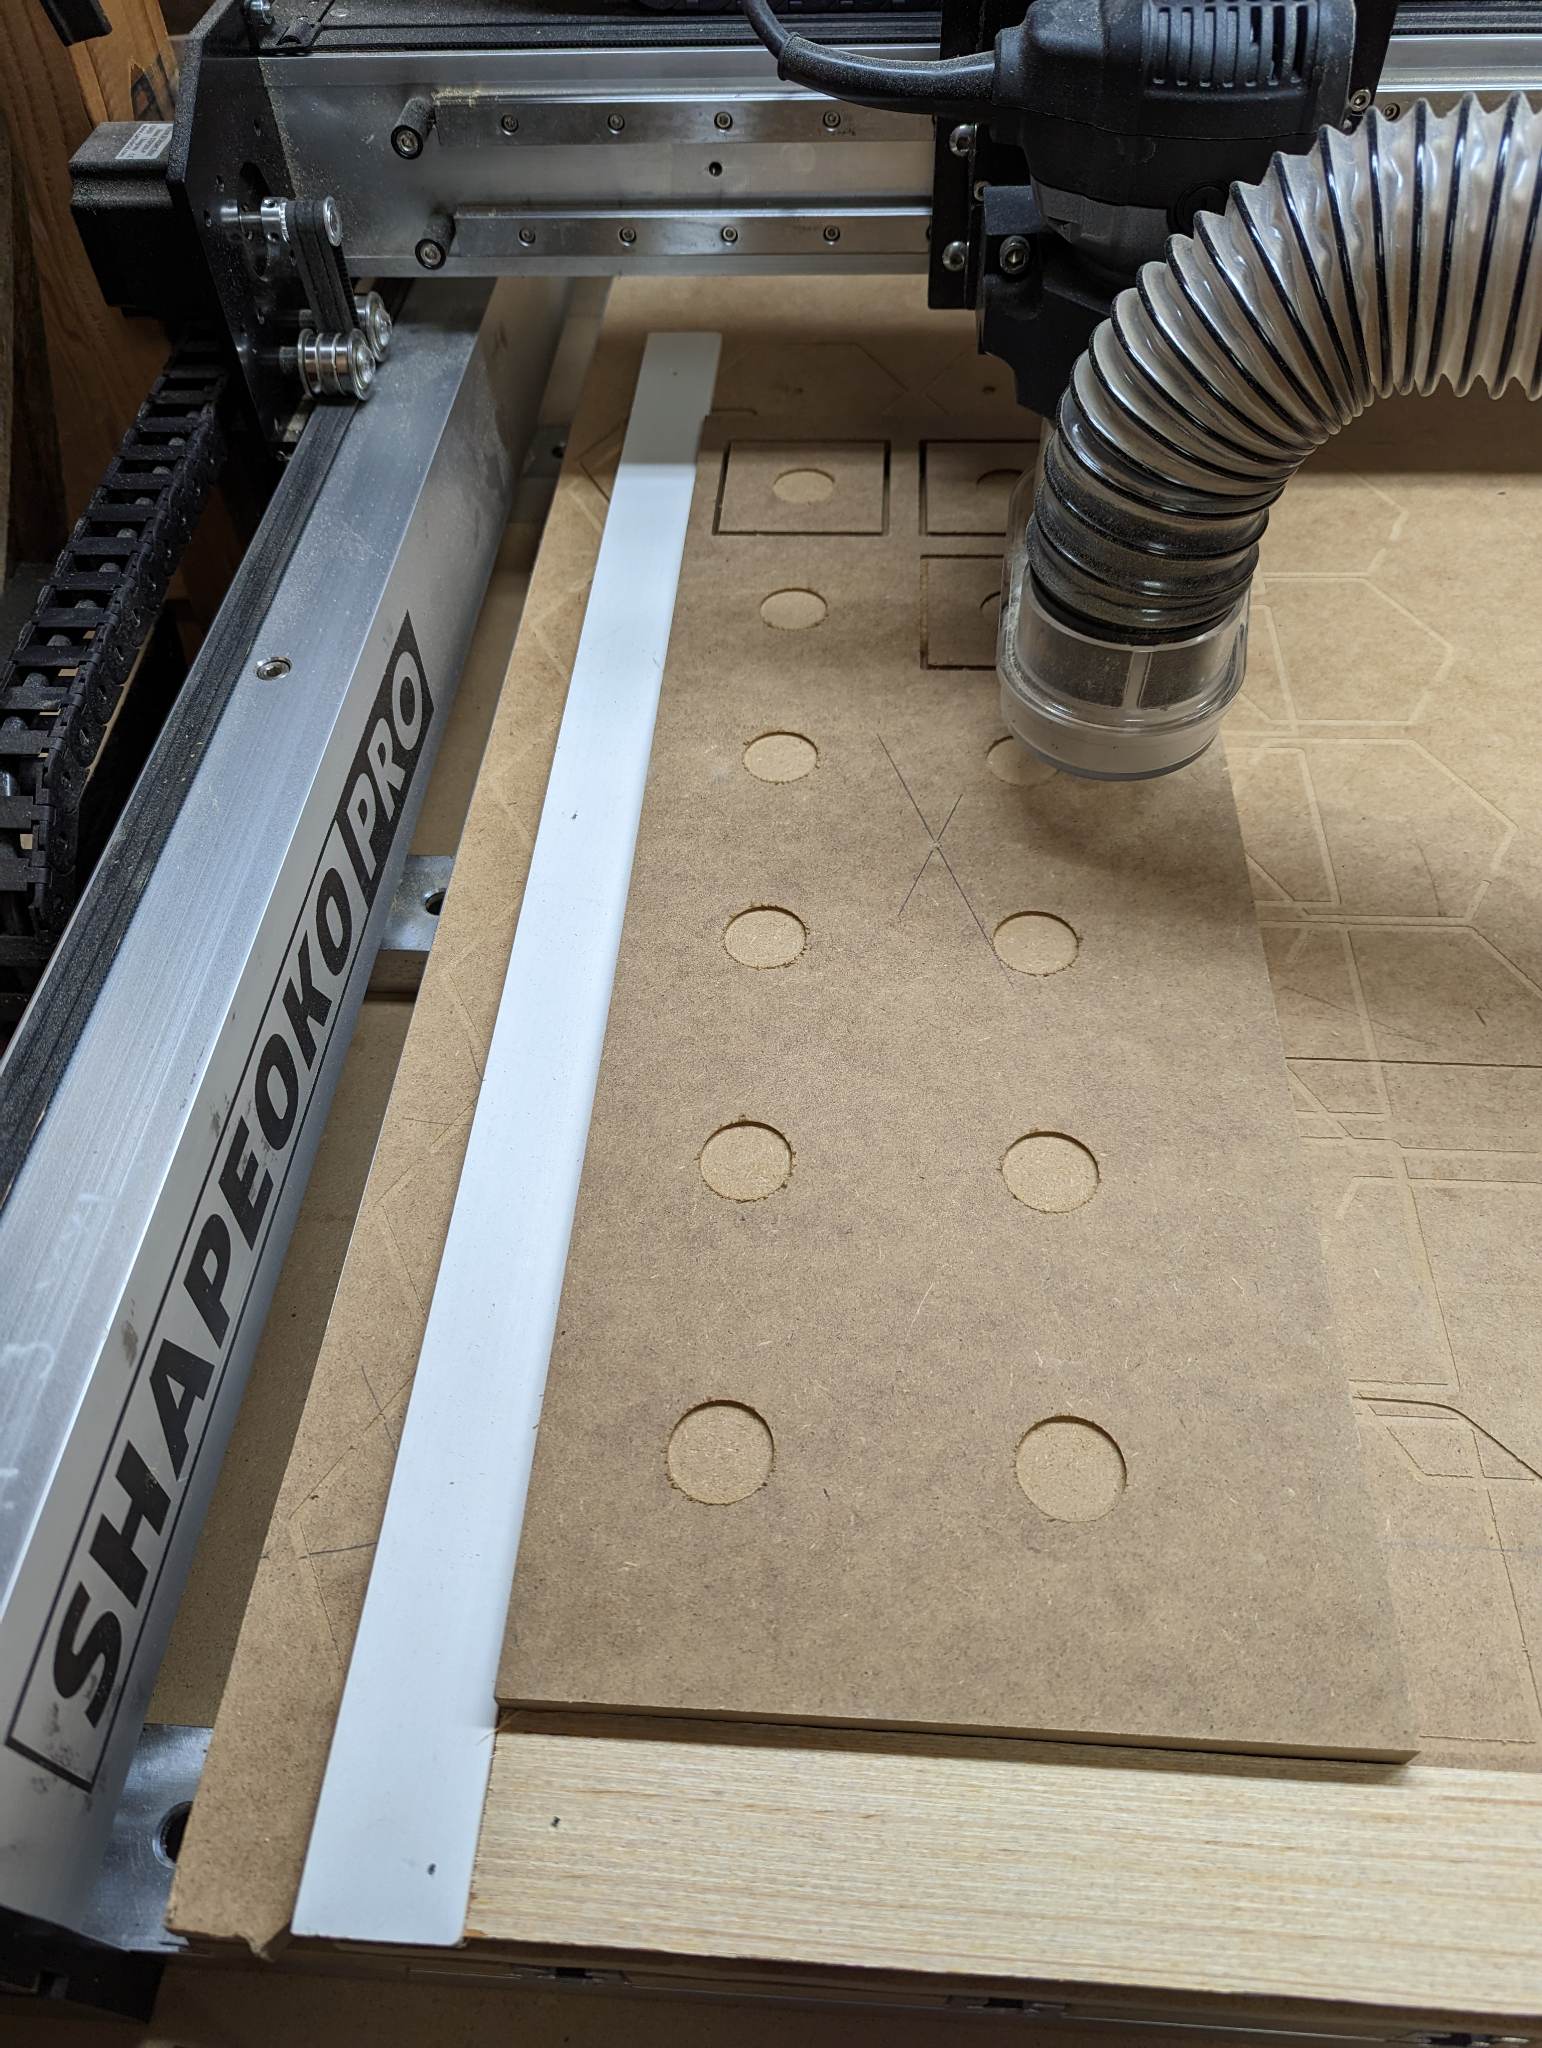
Ok, so i spent the last 30 minutes meticulously checking and taking photos of a test cut.
And the test cut worked flawlessly.
The only difference was WHERE i placed the material to be cut.
I believe, according to my measurements, you cant have any cuts within ~3.5 inches of the rails of the machine. I was definitely inside that 3.5inches with the contour cuts from the OP based on where I was securing my material on the wasteboard. so I will try a full cut with my new 3.5inch buffer from the rails tomorrow and report results
You need to figure out exactly what machine you have. When you send the configuration that sets the maximum movement during jogging that a machine can have. However that maximum movement is not restricted by the gcode. So if you were to write a file that was a mile wide the machine would try to move a mile. Because there are mechanical limits a Shapeoko cannot move that far.
Identify exactly what machine you have by looking at the C3D site and see if your machine looks like one of the ones they are currently selling. If you dont see your machine there then it could be a Shapeoko 3. The actual base size does not equal actual size it can cut. On a Shapeoko 4 you cannot reach all the way to the back and a couple of inches on each side due to the mechanical limitations the way the machine works. Now you can send the configuration but you can add just a little because C3D gives a little cushion to you dont crash into the rails in jogging mode. When you send the configuration you are not really configuring the machine as much as you are configuring Carbide Motion.
Post a picture of your machine for help with identifying it.
The easiest way to determine your cut envelope is to draw it on the table.
Move your spindle to the 4 corners, as far as the machine will mechanically go, and mark those points.
Connect the dots. Or mount a marker/pen in the spindle & draw it.
If your top row of circle pockets was about 1/4" away from the Y travel limit, and the path to cut the squares started at the top edge of one of the squares, the machine would have tried to move to 1" past the circles, but hard stop 3/4" short. The machine should have made an awful grinding/straining sound at this point. But now the machine thinks it 1" away, and it’s only 1/4" away. Now all the rest of that path/program is shifted 3/4"
So moving the material 3.5 inches away from the rails and 2 inches away from the front or back seems to have solved the problem. It was a travel distance problem.
Added two strips of 1/8 scrap material to the waste board to space the material away from the “non cuttable area” as a bonus it allows me to square the cut material super easily
The downsides of bradding those pieces like that are you can’t resurface the spoilboard without pulling them up and you can’t put a piece larger than you cutting area down. Sometimes you need that but the actual cut is still within the envelope.
@gdon_2003 created a nice long L bracket file which I modified to support the spacing on the Pro. This is held down with T Nuts and allows you to have that square corner anywhere you want.
When I got my SO3 a youtube channel for Myers had a plan for a supplemental spoilboard with an L fence on the left and front sides that had a cutout for the BitZero. After a while I removed the fence and made a short L bracket. That worked but being only 6 inches you could skew the work piece while tightening the cam clamps. So I made the longer L bracket so I could see if the material moved during tightening. This has worked well. When I have to remove the bracket when I replace the btacket I put a 1/4 inch bit in and jog back and forth with the bolts loosely tightened to make sure the bracket is square to the router. The bolts have enough movement to attach the bracket out of square with the router.
How about square it up once, then machine 3-4 dowel holes through the square & into the wasteboard?
Do it with the XY zero at the SW quick motion spot & setup will be really quick & easy.
That is a good idea. However I try to move my L bracket around to get more even wear on the spoilboard. Using the same location over and over is simple but tends to wear out the spoilboard in a single location. Back in October 2022 I made a new spoilboard and started using the bottom of material so I get less wear on my spoilboard using the bottom of material but I still get some super glue residue and have to scrape and/or sand to remove it. In the last few years I tend to use painters tape and super glue more on small projects. If I am going to cut outside the material I use the L bracket to place the material and then remove it to not cut through my L bracket.
The idea is good but can be somewhat problematic using the same spot over and over.
Does anyone else use a sacrificial piece BELOW the workpiece when doing through cuts? I have some scrap 1/4 baltic birch plywood that I usually use to avoid spoiling my spoilboard. I always machine from the same L bracket, and my spoilboard (with threaded inserts) remains pristine.