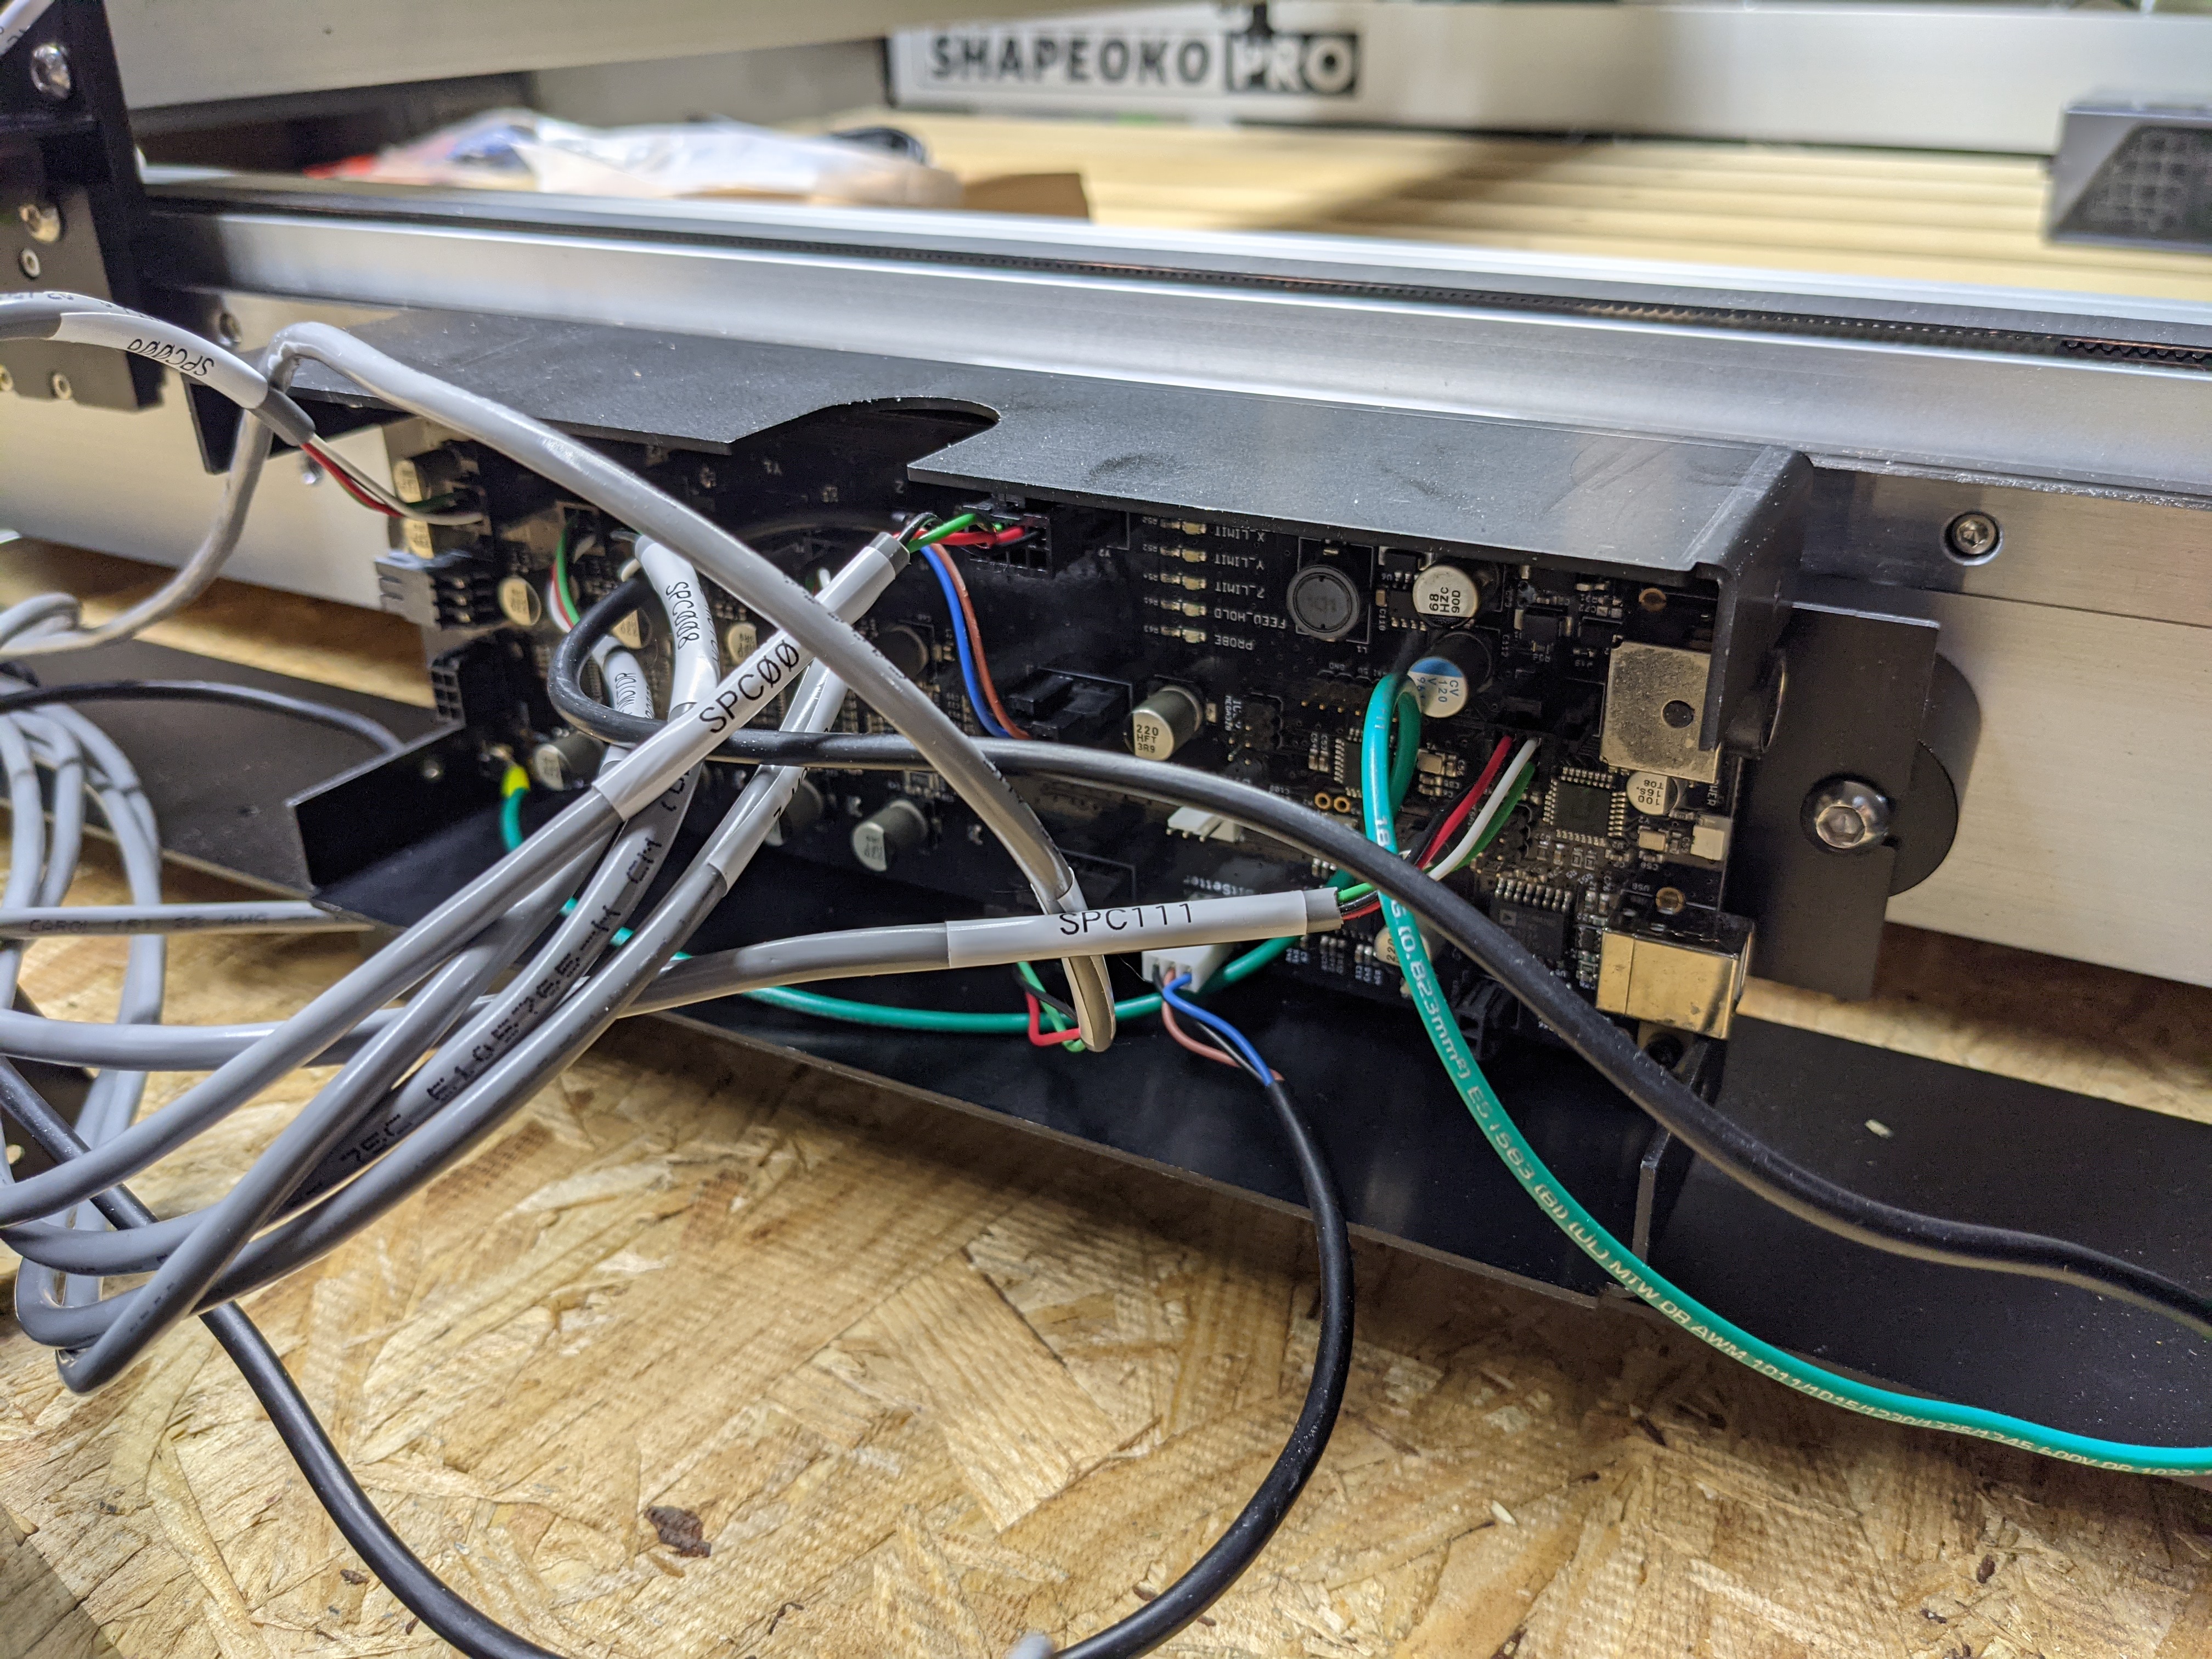
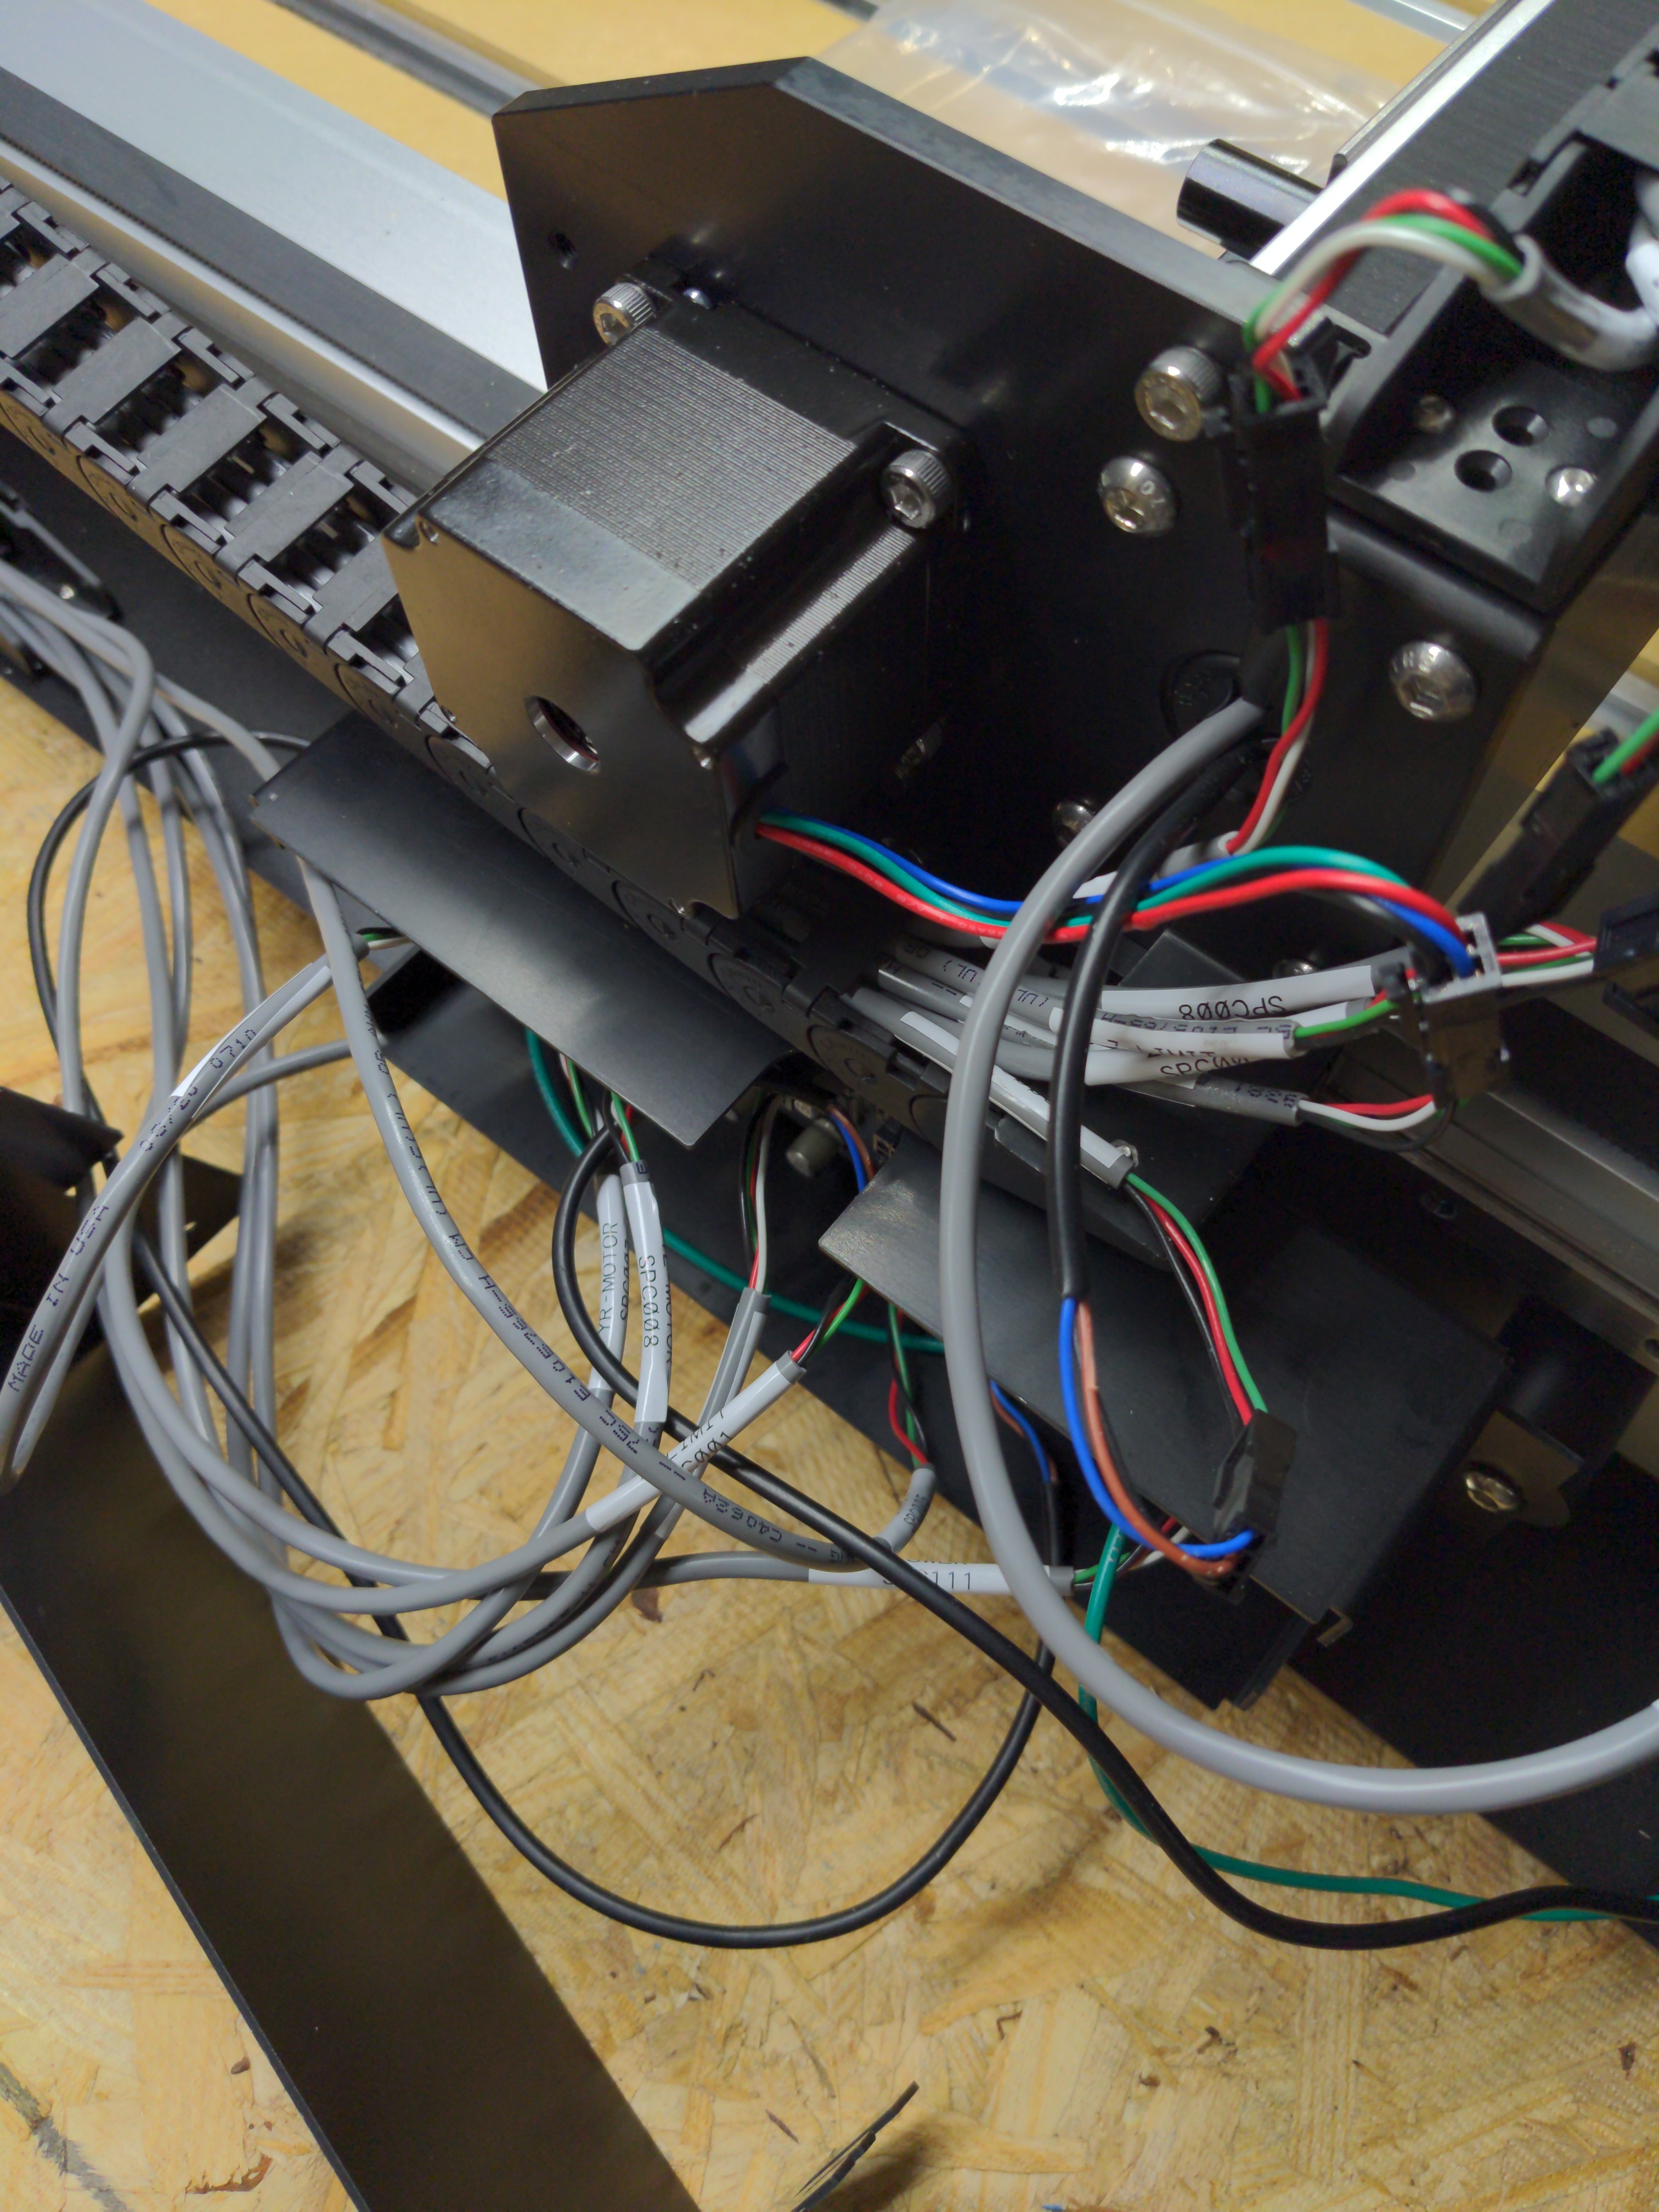
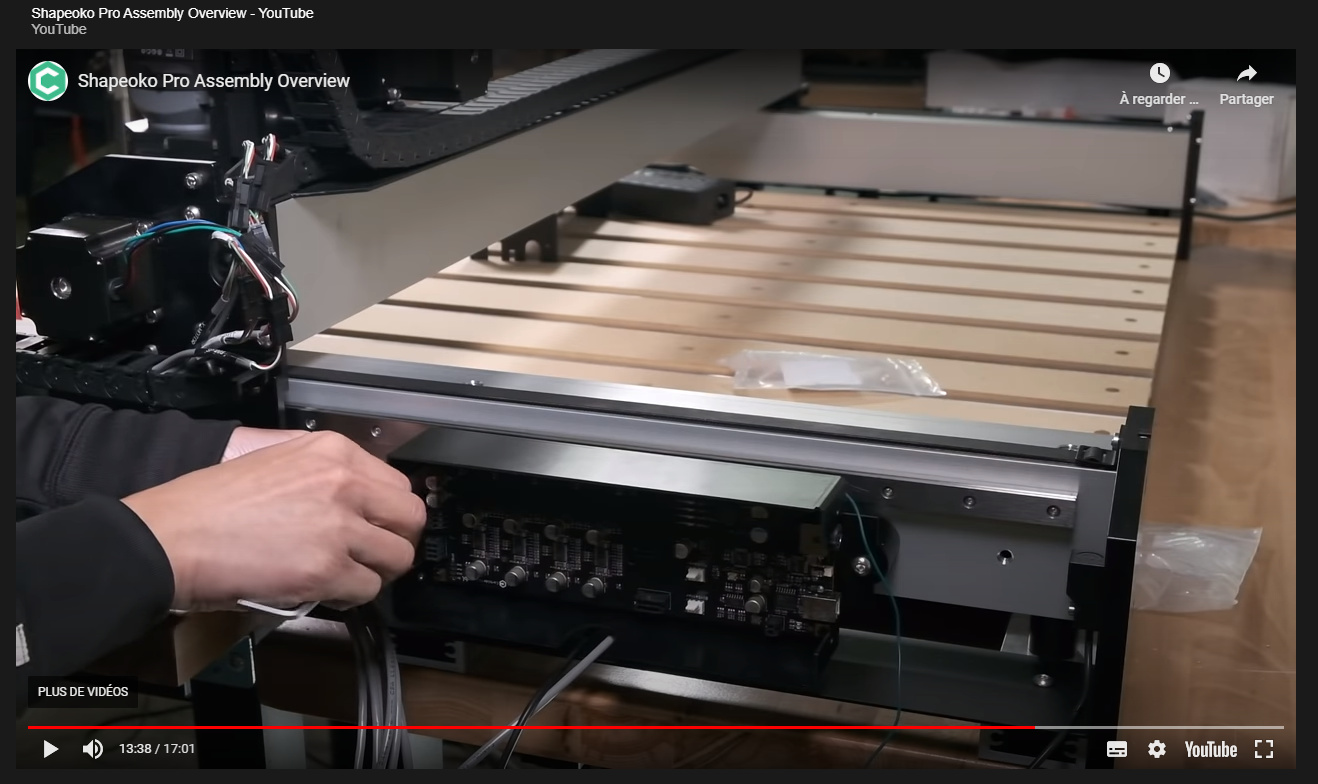
I think our electronics enclosure might be mounted to the board upside down? The usb and power are facing the back of the machine, but the cutout for the cables is on top, which looks like it’s going to interfere with the z axis drag chain. In the assembly video the cable port is definitely not on the top, and I’m guessing it’s on the bottom.
Am I missing something? Should I just remount the board?
ETA: It looks remounting the board is not an easy option. It looks like the heat sink is glued to the PCB and the enclosure. Trying to decide if we should close up the enclosure with the cables out the top and try to zip tie the cables out of the way of the gantry or leave the lid off and zip tie them out of the way without going out of the top cutout.
I’ll contact support, just wanted to post here to see if there was an obvious answer.
That’s what I was referencing. On Winston’s, there is no semi-circle cutout on the top of the enclosure box. In assuming it’s on the bottom for cables to feed out, where they can’t get in the way of the gantry. On mine, the semi-circle cutout is on the top.
Flipping the board inside the enclosure seems easy enough, but everything else was so meticulous that I wanted to make sure we weren’t missing something obvious.
contact support@carbide3d.com for the definitive answer?
I’ve been wrong on controller orientation once recently, I would not like to give you any incorrect information.
Update: it looks like the heat sink is glued to the PCB and the enclosure. Trying to decide if we should close up the enclosure and try to zip tie the cables out of the way of the gantry or leave the lid off and zip tie them out of the way without going out of the top cutout.
My board arrived the same way. Tech support said I could try using a heatgun to soften the glue on the heatsink and flip the board around so the power and USB point to the rear with the notch being in the bottom. They also offered to replace it if I didn’t have a heat gun. I’d recommend contacting them.
It’s not likely to be glued, but there is likely to be thermal pads that are sticky. The drivers need to dissipate heat, and that’s usually how a lot of places do it, including the Original Shapeoko. It should let loose if you’re careful.
I just got my Pro and noticed that they put the board into the housing upside down from what is normal in the pictures you see. The pictures here are just like mine. I did the easy thing and turned the box upside down. I tried to dismount the controller board but it is stuck to the case with thermal glue for dissipation. I did not want to even try to detach it. (Which does beg the question of what to do when you buy something from 3D which would require you to remove your board like the BitRunner instructions for older boards). That thermal glue was stupid if we ever need to do something like that.
Anyway, upside down just has me plug the USB and power in from the front instead of the back when mounted. Not a big deal right now, and my cable are now easily hidden and/or managed.
Hope this helps or at lease you know that it has happen to others also.
You don’t need to remove the board for the BitRunner. It just plugs into one of the connectors. I have one in use with my Pro. BitRunner, BitZero and BitSetter. It was super easy to configure.
You need to read what I said. I said “(Which does beg the question of what to do when you buy something from 3D which would require you to remove your board like the BitRunner instructions for older boards).” Notice the word older boards. I said nothing about doing it for the pro. The take away is if they had done it before “ie Historically for other parts”, they might do it again on some other type of addition. Thus the board being mounted in like it is would be a hindrance.
They also seem to have learned from that and have connectors for just about everything the GRBL controller can actually do. The GRBL controller has limitations (which is fine all things considered). I suspect they don’t want to have to walk someone through adding pins to a board ever again.