It is kind of cool but you still lose significant Z travel and would be impossible on the regular Z carriage. The fact that you can pull the spindle up in the mount only mitigates the issue and looking at pictures of large spindles, I think that there is not much room for moving it up.
@gmack Please post you step by step guide to programming thread milling ops. I’m a still new to F360 an do not want to risk screw up my stock. 1000 X 1000 X 12MM T6061 aluminum plate was not cheap.
@BartK is clearly your guy for F360 guidance. Personally, I’d be tempted to do some testing on something less expensive (like Baltic Birch and/or smaller pieces of Al) before going too far.
I’ll have to look into that. I’ve plenty designs where I really need longer end mills and they tend to chatter a lot.
@DCFYI This is the method I’m using and had no problems at all.
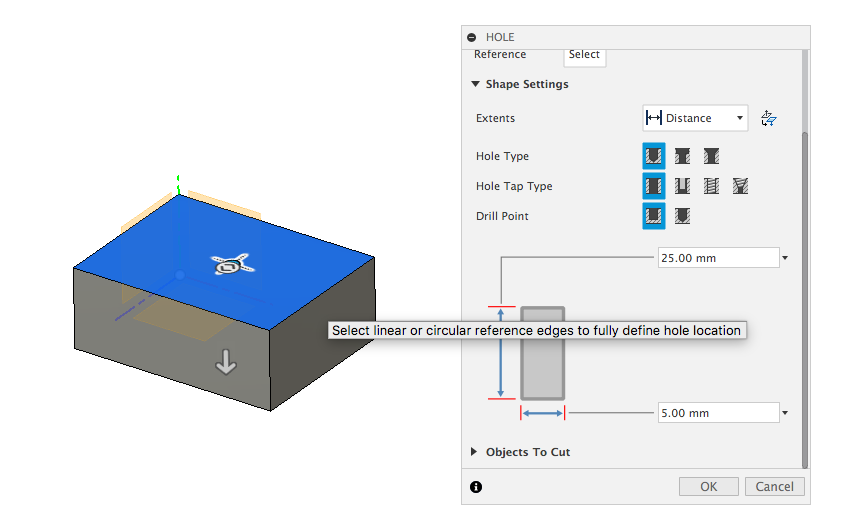
- In DESIGN environment create a 5mm hole.
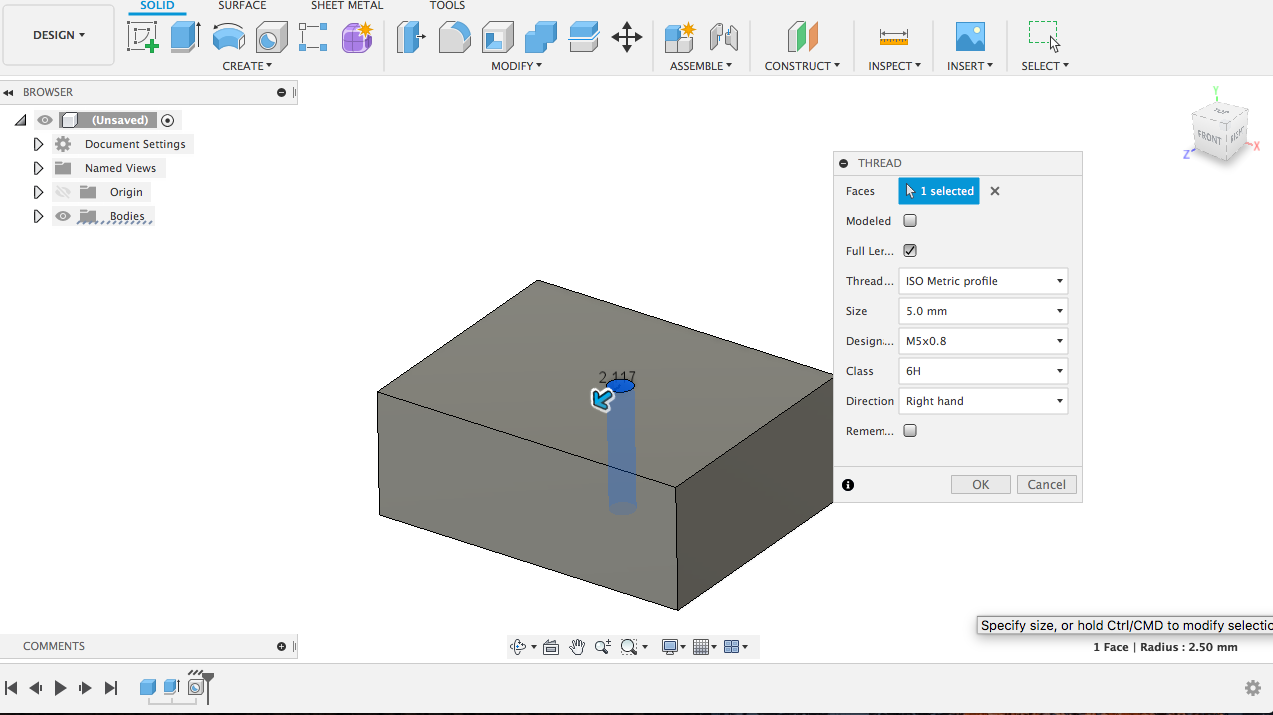
- Use ‘thread’ function to create a 5mm thread. Your 5mm hole will automatically adjust to the thread’s minor diameter.
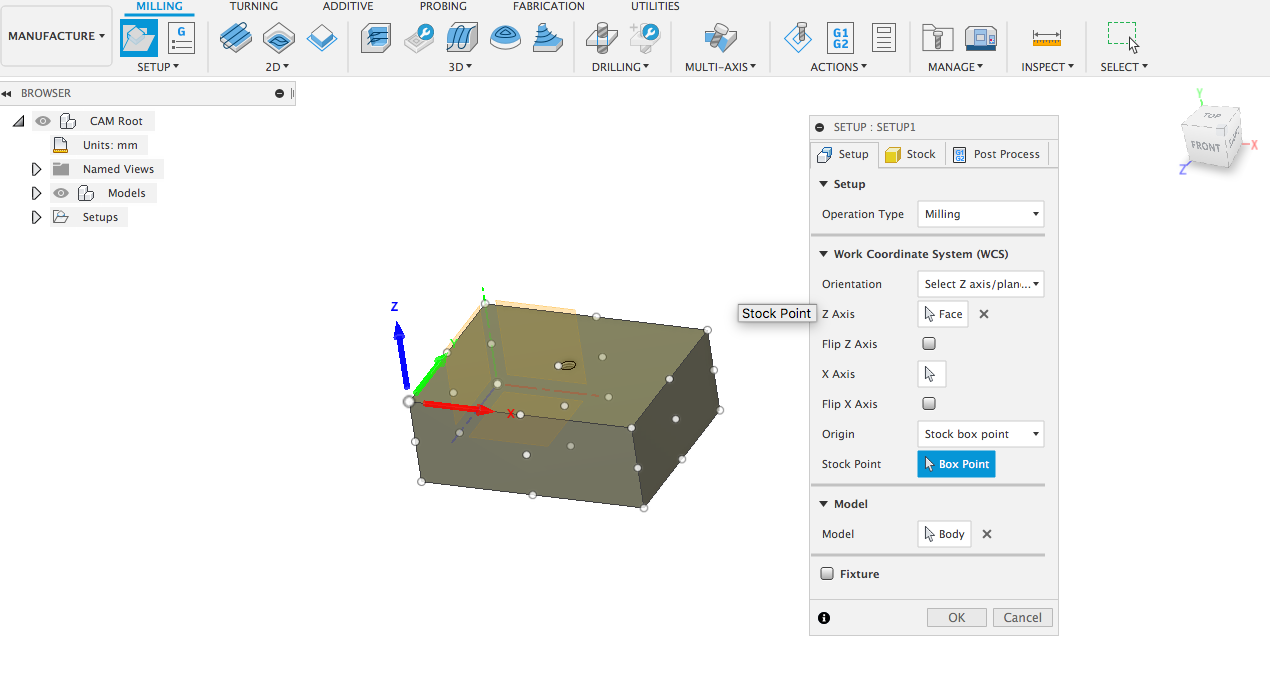
- Switch to a MANUFACTURE environment and create a new setup. I’m assuming you have some experience with F360 CAD/CAM so I’ll only explain the thread milling essentials, simply because I don’t have the time for a whole F360 introduction.
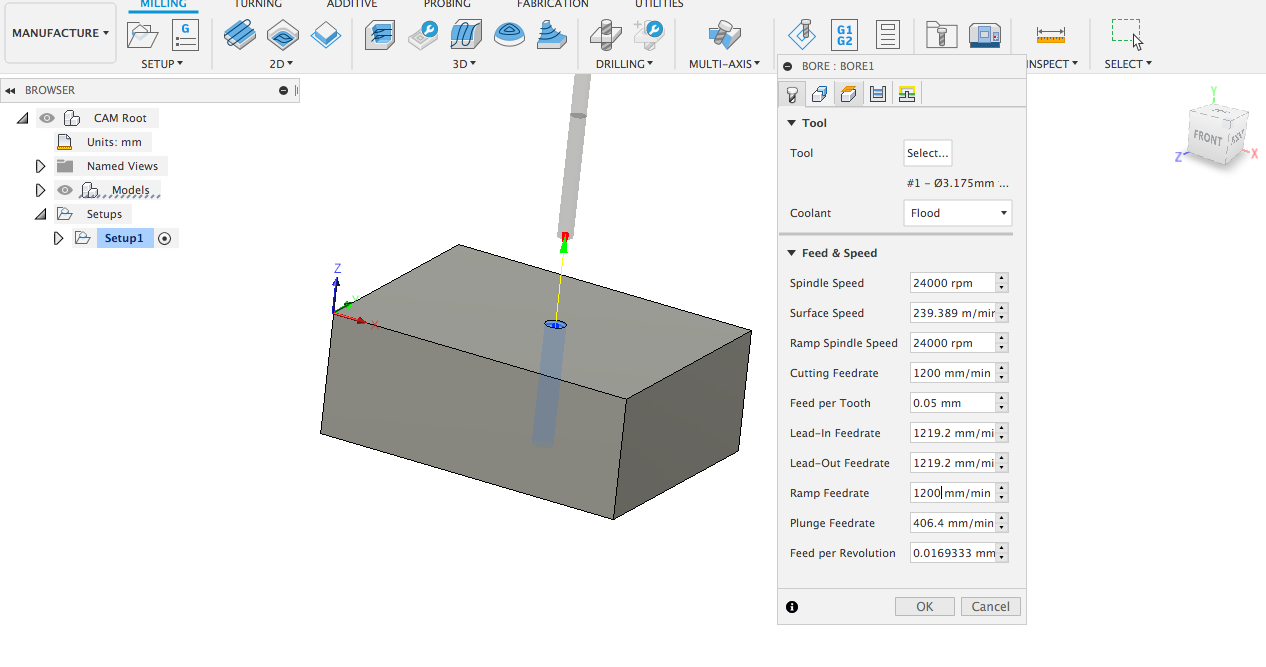
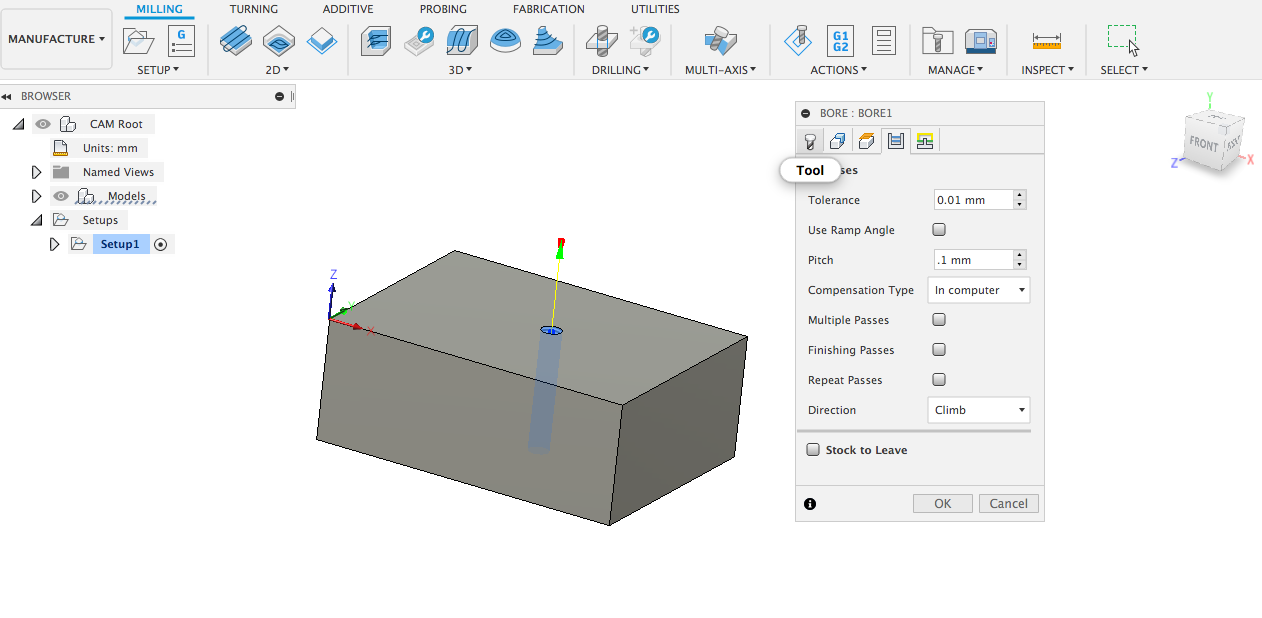
- First you need to drill a hole, so 1/8" end mill and BORING operation work best for me. You might want to change "RAMP FEEDRATE’ to something closer to 600mm/min. And set the ‘PITCH’ to 0.1mm or 0.2mm
Now that you have your hole you’ll need to cut the thread.
-Add a new tool to the library. And this is how I have it defined.
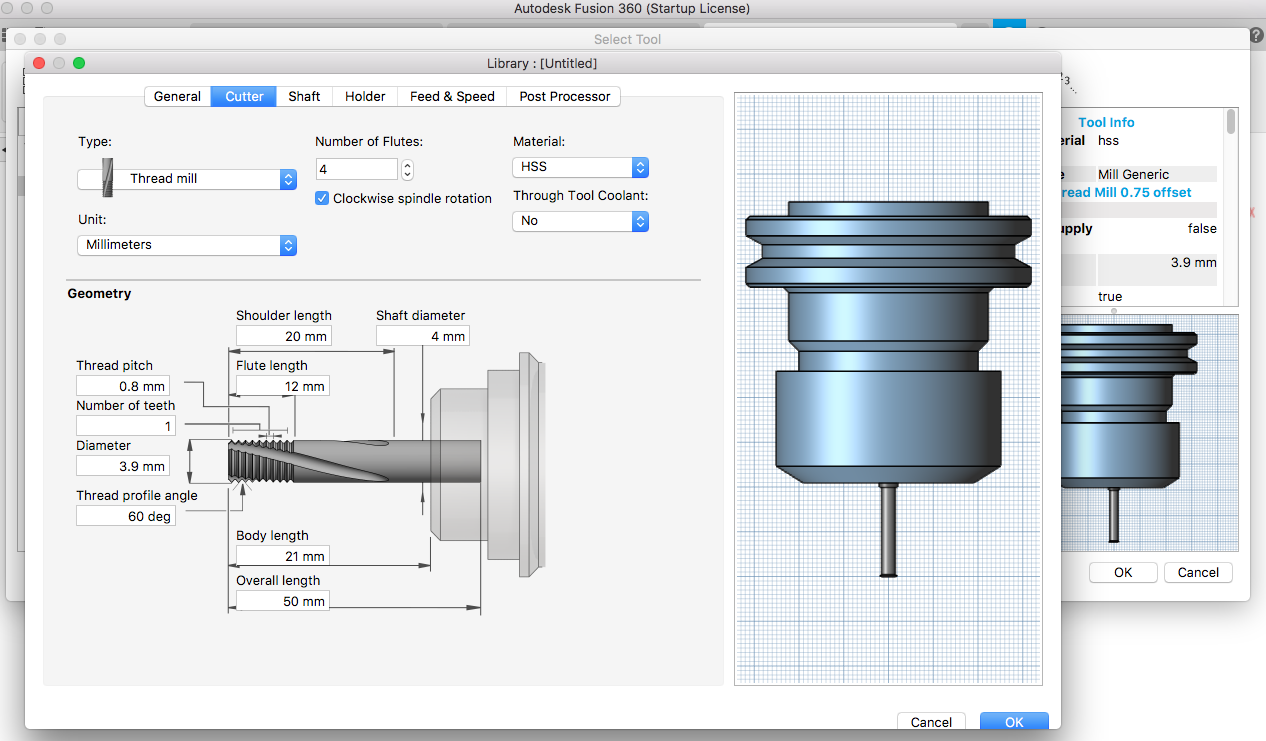
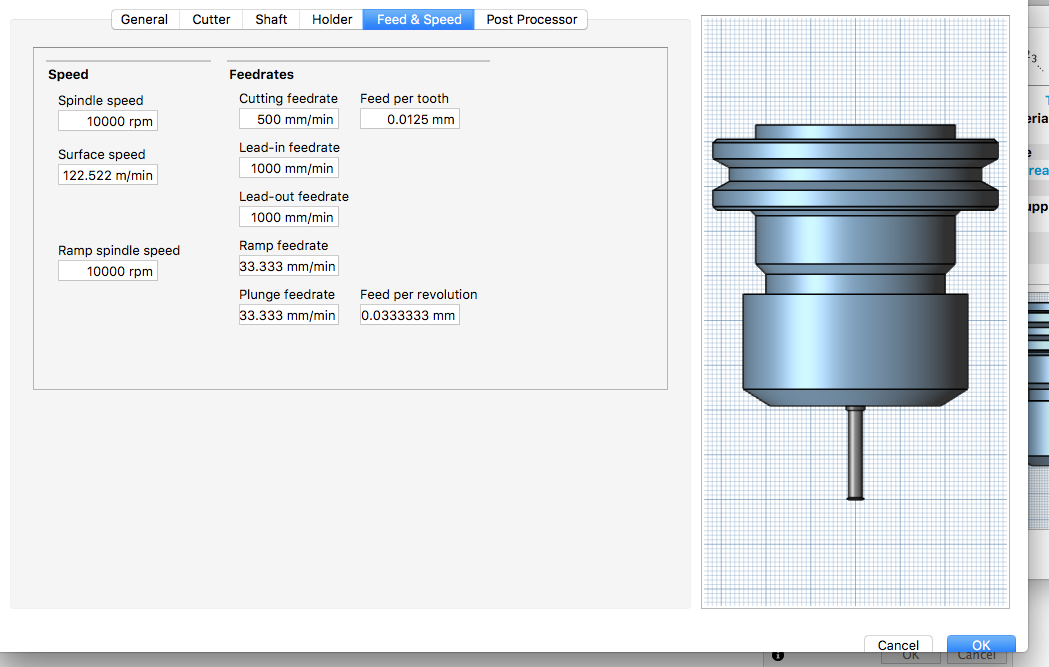
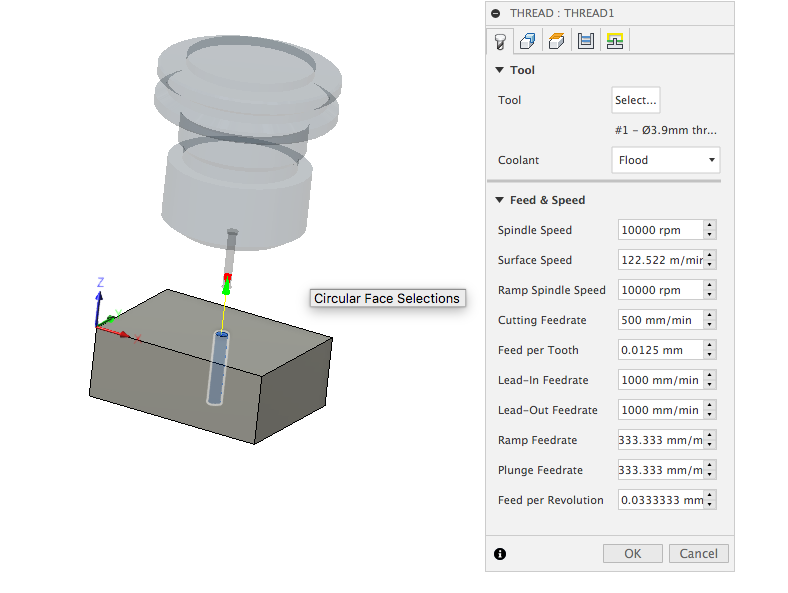
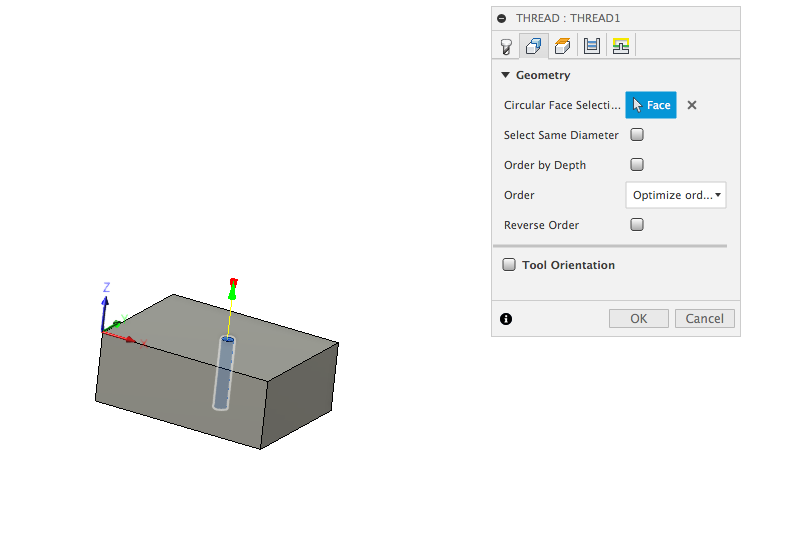
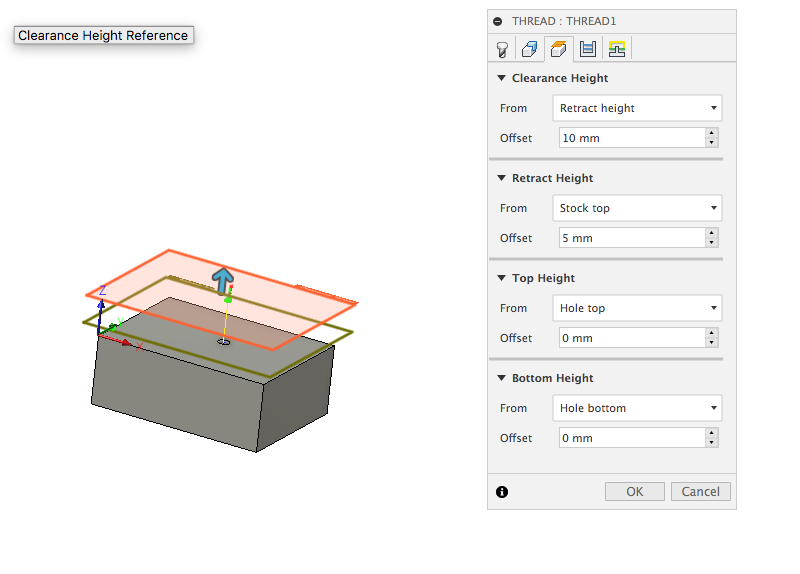
- Choose a THREAD operation, from 2D operations drops-down menu and select your tool and hole that needs threading. These are all the tabs with settings that I’m using.
-
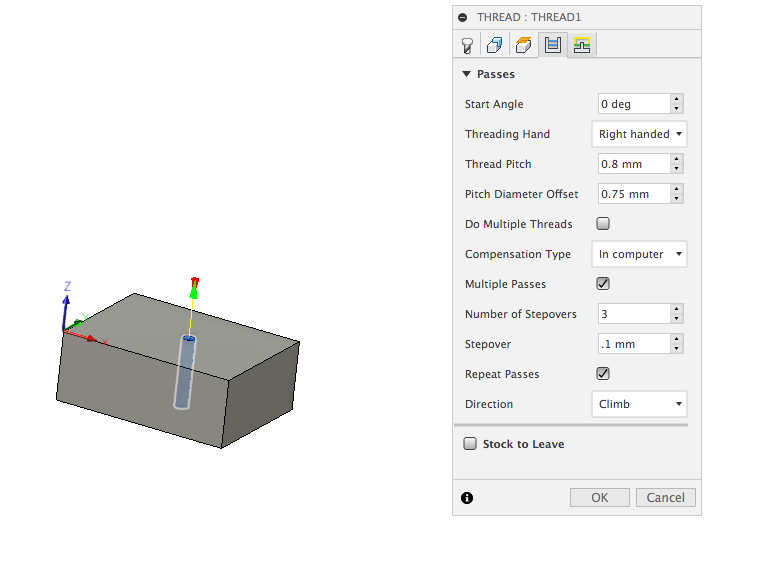
-This is probably the most important tab. You’ll have to specify ‘pitch diameter offset’ because it’s never given. 0.75 works for me with m5 holes, but you might need to tweek it a little, depending on the accuracy of your machine. I’m usually choosing multiple passes and 3 stopovers of 0.1mm. Used to do 2 stopovers of 0.2mm but 3 stopovers is a safer option.
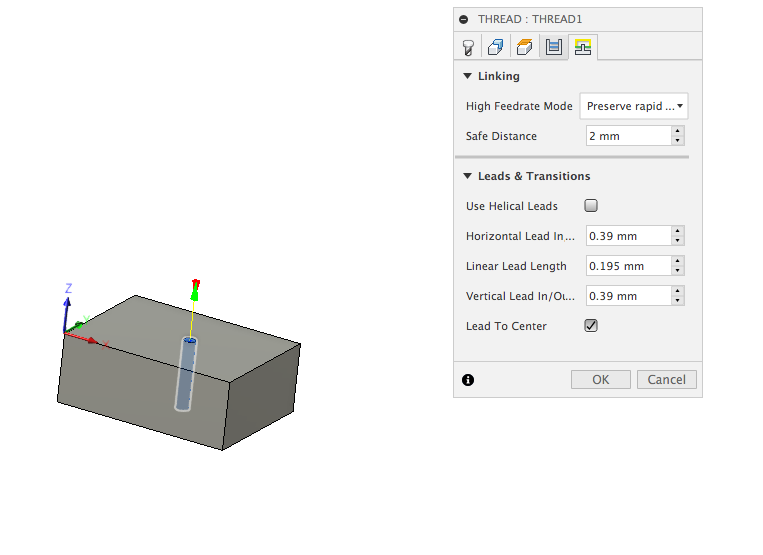
- Lastly, make sure to check ‘lead to center’ box and that’s pretty much everything you need to know about thread milling m5 holes.
This is the technique that worked very well for me, but before you try milling 150 threads in aluminium, you might want to try some hdpe. It machines super easy. Hope this helps.
6 Likes
This awesome! Thank you so much.
1 Like
@BartK do you have a link to the thread cutter you used?
Purchased them from beavercnc when it still existed. Maybe @Luke could chime in and provide a source for good thread mills.
1 Like
@BartK. Thanks again for the advice. I plan to air cut first. If all goes well I plan to cut a version MDF. BTW I’m taking the NYC CNC Fusion 360 online course right now, scheduled to take NYCNC’s hands on machining course March. Might even take the advanced fixturing and CAM course. In time I hope to become a resource for others who need help with F360.
3 Likes
2 Likes
Thank you. Believe Kennametal is exactly the brand Scott was using. I actually found a couple of YT videos with routers peck drilling holes with HSS drill bits, so I’m going to pickup some inexpensive ones from Amazon and give it a shot some time next month.
1 Like
This topic was automatically closed 30 days after the last reply. New replies are no longer allowed.