Hi,
I’m trying to cut the attached STL on my Nomad but I can’t figure out how to cut the underneath of the key cap, the tools I have don’t seem to be narrow enough and/or long enough to cut to the full depth of the key cap. Am I trying to do something impossible or am I just missing the right end mill?
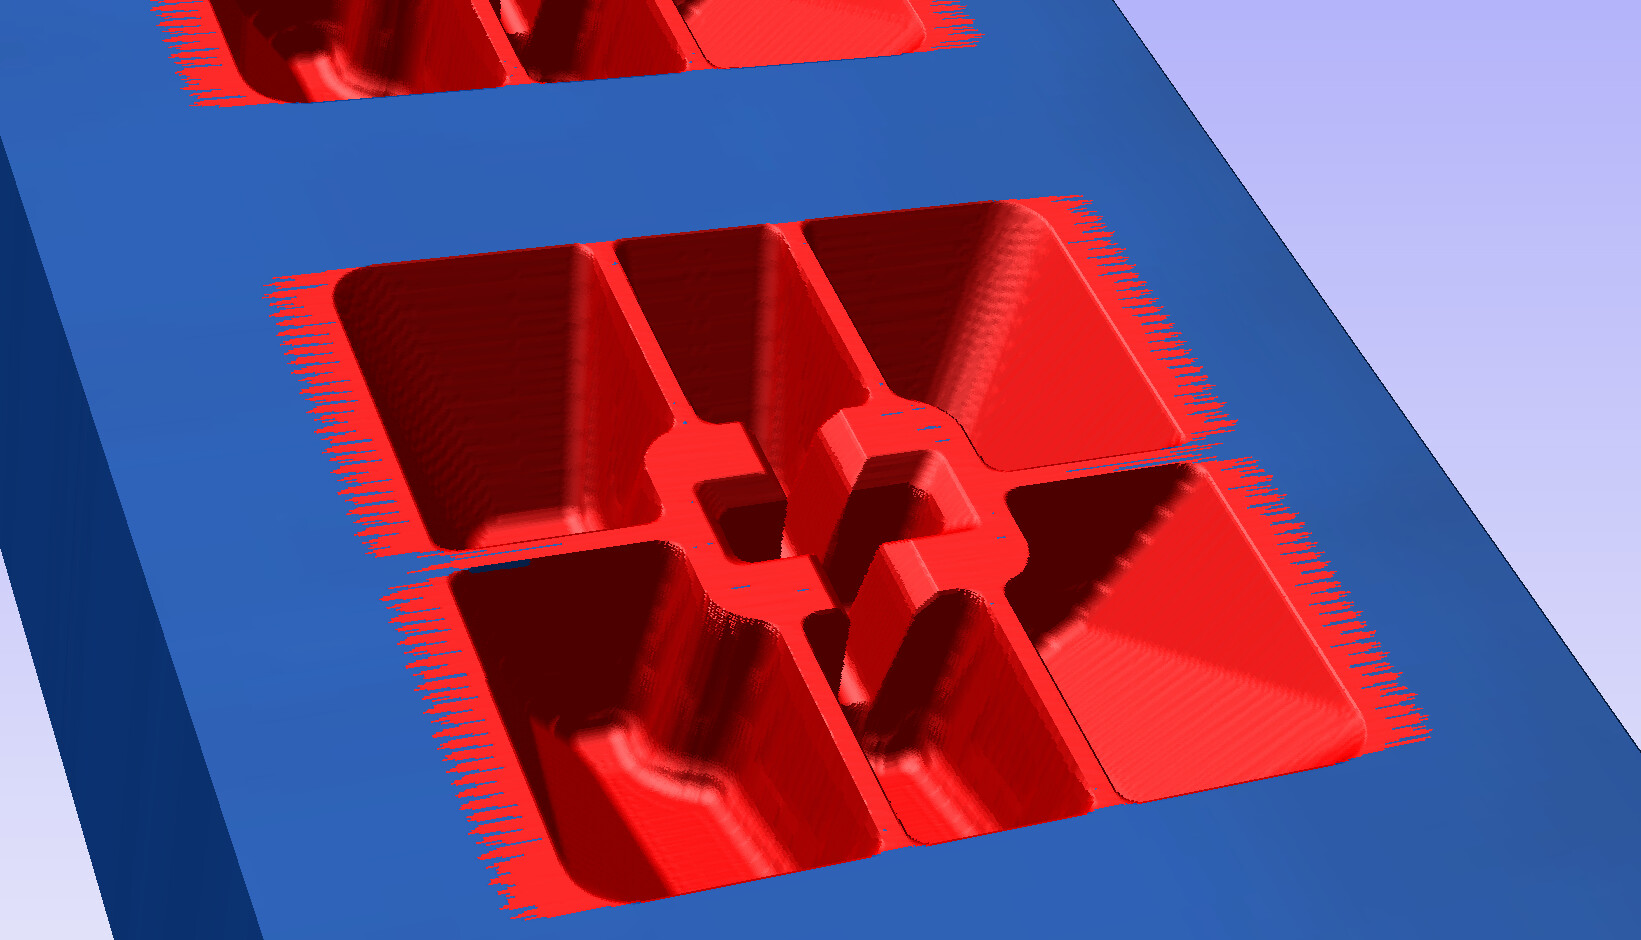
updownkeys.stl (289.3 KB)
In terms of the tools I have, I have the Nomad End Mill Starter kit
Looks like the width between the parts that hold onto the stem is 1.217mm wide. Also might be hard to do the inside corners.
The # 122 tool should be thin enough to fit between the area, but the cutting depth isn’t long enough.
There might be a specialty bit out there, but it’s probably going to be a bit pricey and fragile as heck.
When I was looking to do keycaps, I initially was going to get a jig to cast resin stems into the machined wooden keycap (so I’d CNC the keycap out of wood). I ended up 3d printing stems and then glueing them into a recess I had made in the model. It worked mostly okay. I did these for the escape keys, which dont get a lot of use, so not sure how well it’d stand up on a up/down arrow key (which I use quite a bit more).
Hope this helps.
You will need a specialty CAM tool and matching tooling to make that.
It’ll be at least a two-sided cut — did you get the Flip Jig?
Maybe check in w/ @TDA at Precise Bits?
Thanks, I had a feeling this might be the case, it’s been fun trying though and I’ve learnt a lot of ways not to use the flipjig ![]() (I did eventually figure it out). A two part solution might work, though I’m tempted to pick up a resin 3d printer and make them that way instead.
(I did eventually figure it out). A two part solution might work, though I’m tempted to pick up a resin 3d printer and make them that way instead.
Usual preface, I’m with PreciseBits so while I try to only post general information take everything I say with the understanding that I have a bias.
It’s defiantly not impossible. For a single tool cut you’d be looking at high aspect ratio tools or necked/reach tools.
High aspect tooling is what it sounds like, a high length of cut to cutting diameter. In micro tools it’s usually limited to around 15:1. The issue is that with that much fluted length you are getting a very fragile tool. The longer the length of cut the weaker.
Necked or reach tool are basically where you grind a cylinder starting at the end of the fluted section that is slightly smaller than the cutting diameter (how much depends on expected deflection and/or chip clearance). These tools can go much more extreme as they are more rigid. Though, they are still weaker than a non-necked tool with an equivalent length of cut. I think the most we’ve done on reach tooling that was actually used was 25:1.
Making the assumption that this is for a Cherry U4/U6, that center cross should be 1.2mm so even 10:1 would give you that though the reach tools will be a lot more rigid. Tip style and step over will determine if you actually replicate that curve or have steps in it.
The other option would be a tapered tool / carving tool. These tools start at a small diameter and grow at a specific angle (usually listed as a half or draft angle as opposed to the included angle typically used for “V” cutters). These you can get with much longer cutting flute without the tool getting as weak. The only thing you have to watch for is that the angle is steep enough that you don’t end up crashing it to reproduce your curve (most software will actually make a stepped cut to avoid this). The other issue with this is that you will need a second tool to cut the cross as the tapered tool obviously can’t cut a straight wall.
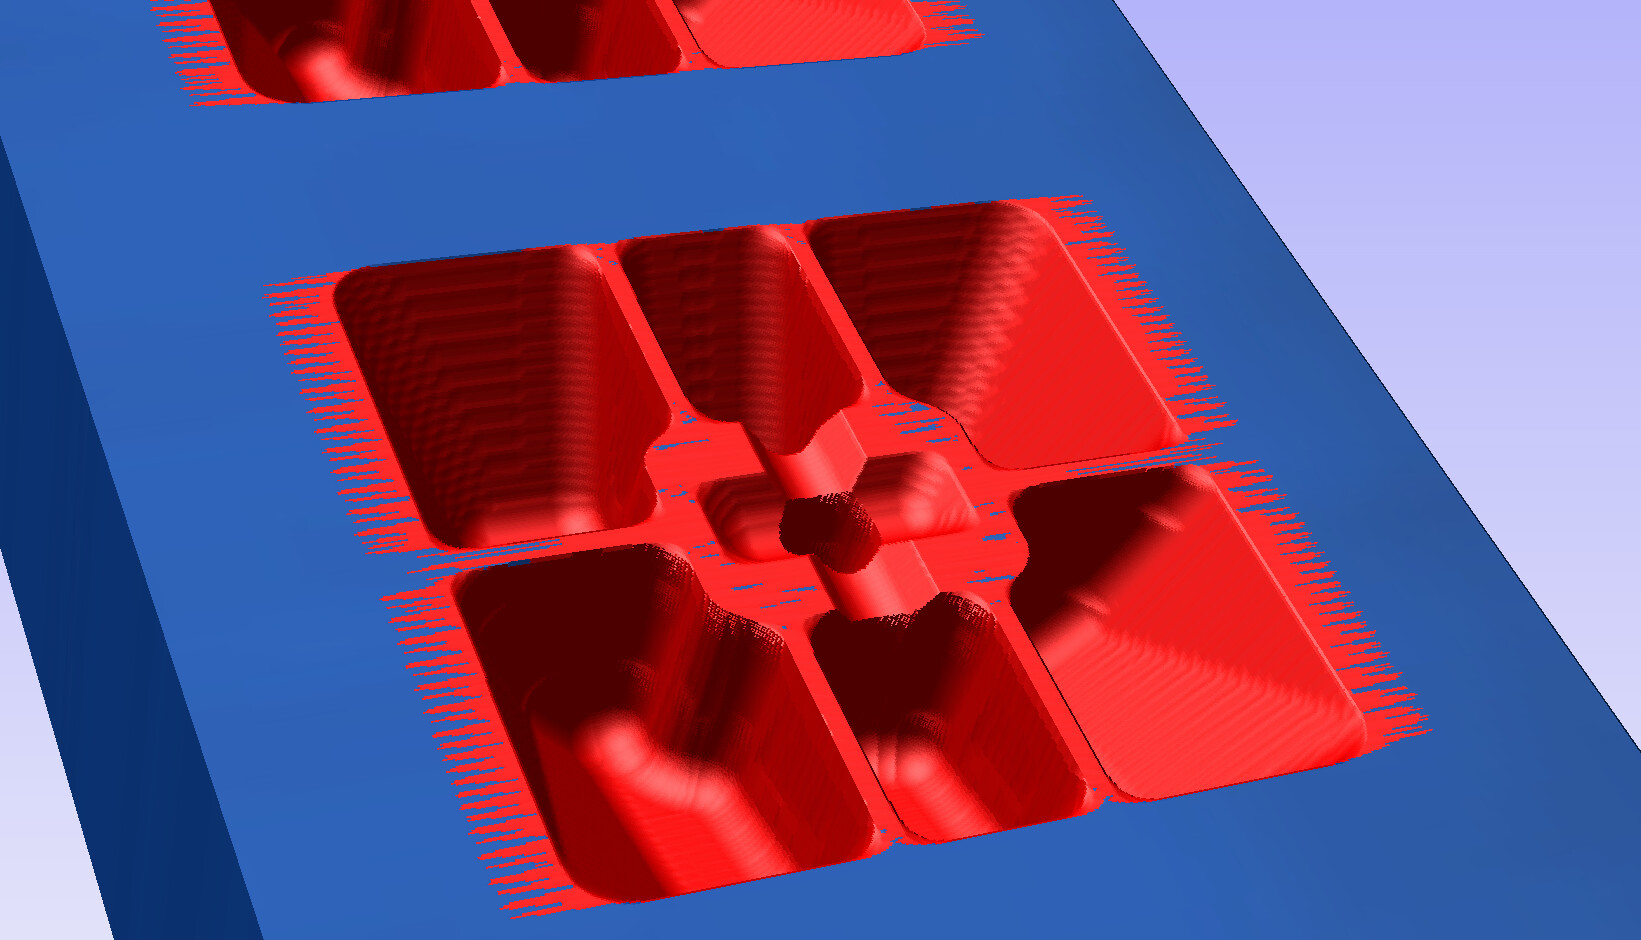
Here’s some examples of what I mean. I just did these in Aspire real quick as that was what was on this machine with tooling data. Going to be really vague on what these are as it’s not needed for the point and I don’t want to be advertising. I will say though that these are using real tools that exist and that similar/similarish ones are available from multiple sources.
These were all done as raster so they show the worst case scenario. You could also get a lot better tool paths in something like Fusion.
0.0625" Fishtail, 10% stepover.
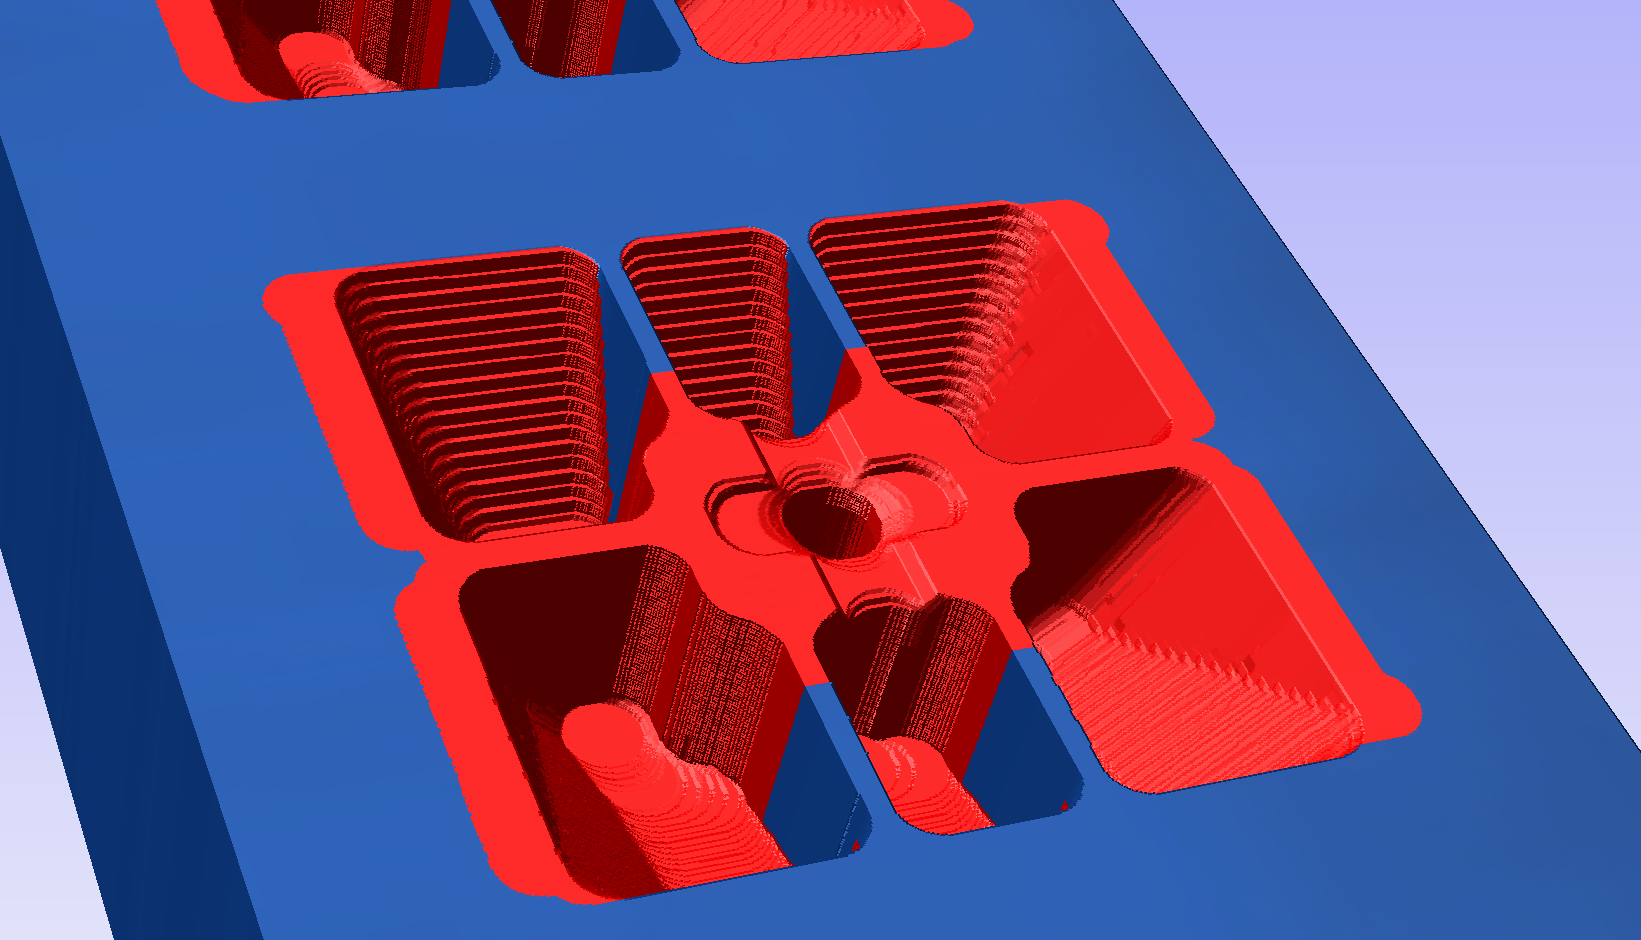
0.0200" Fishtail, 10% stepover.
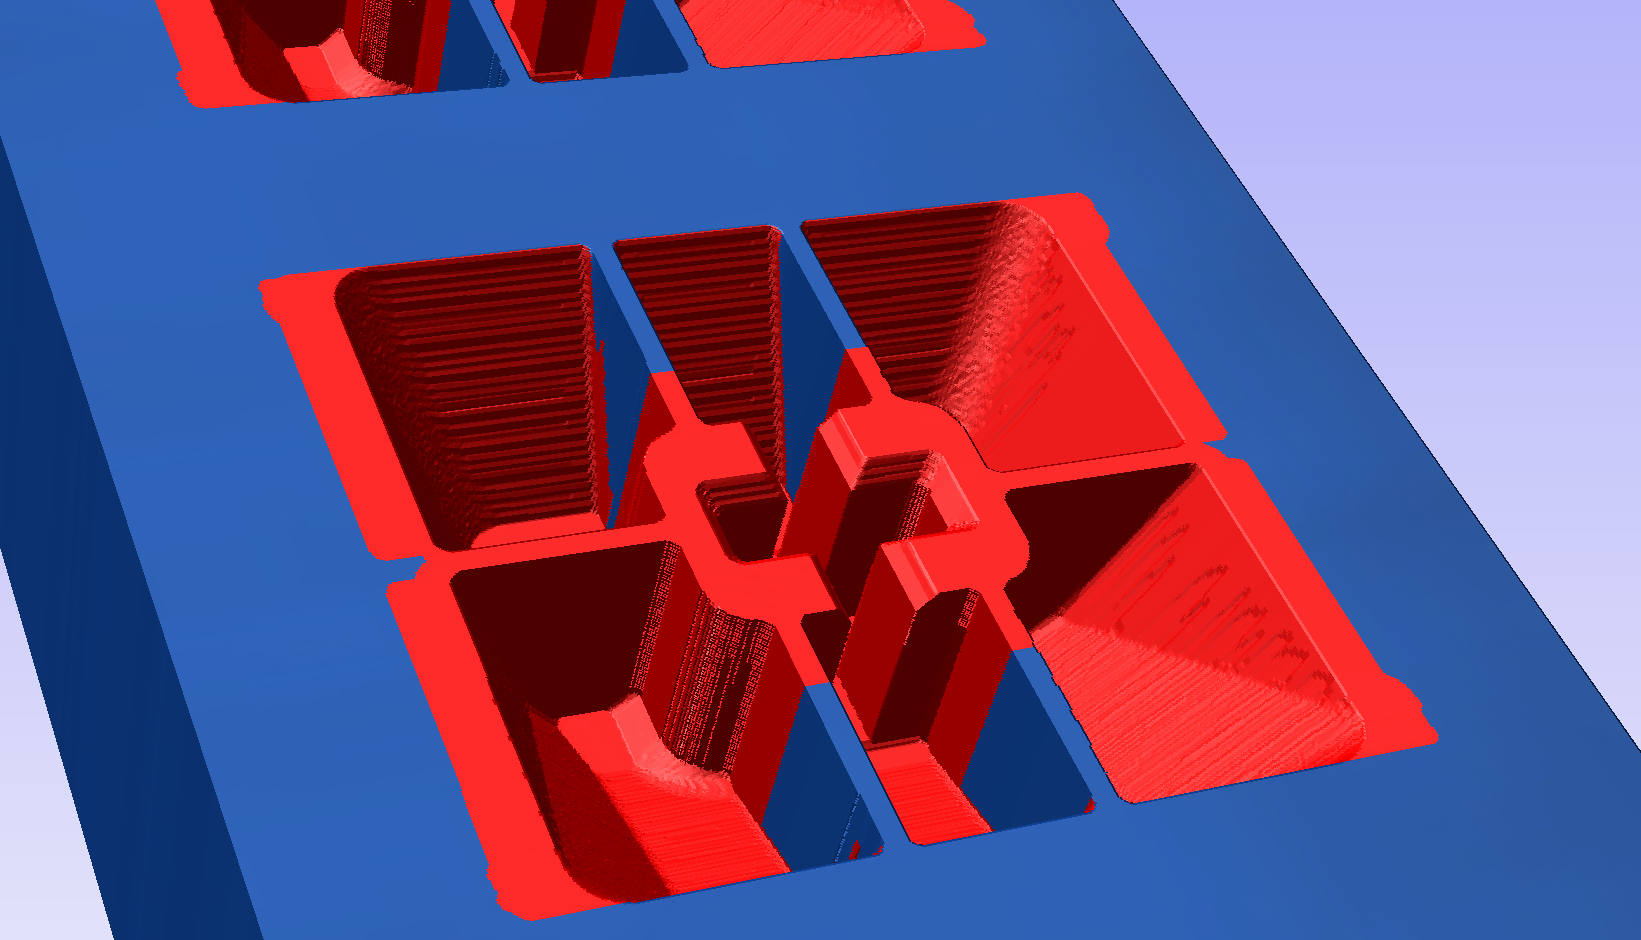
0.125" Tapered ball, 8% stepover.
0.0625" Tapered ball, 8% stepover.
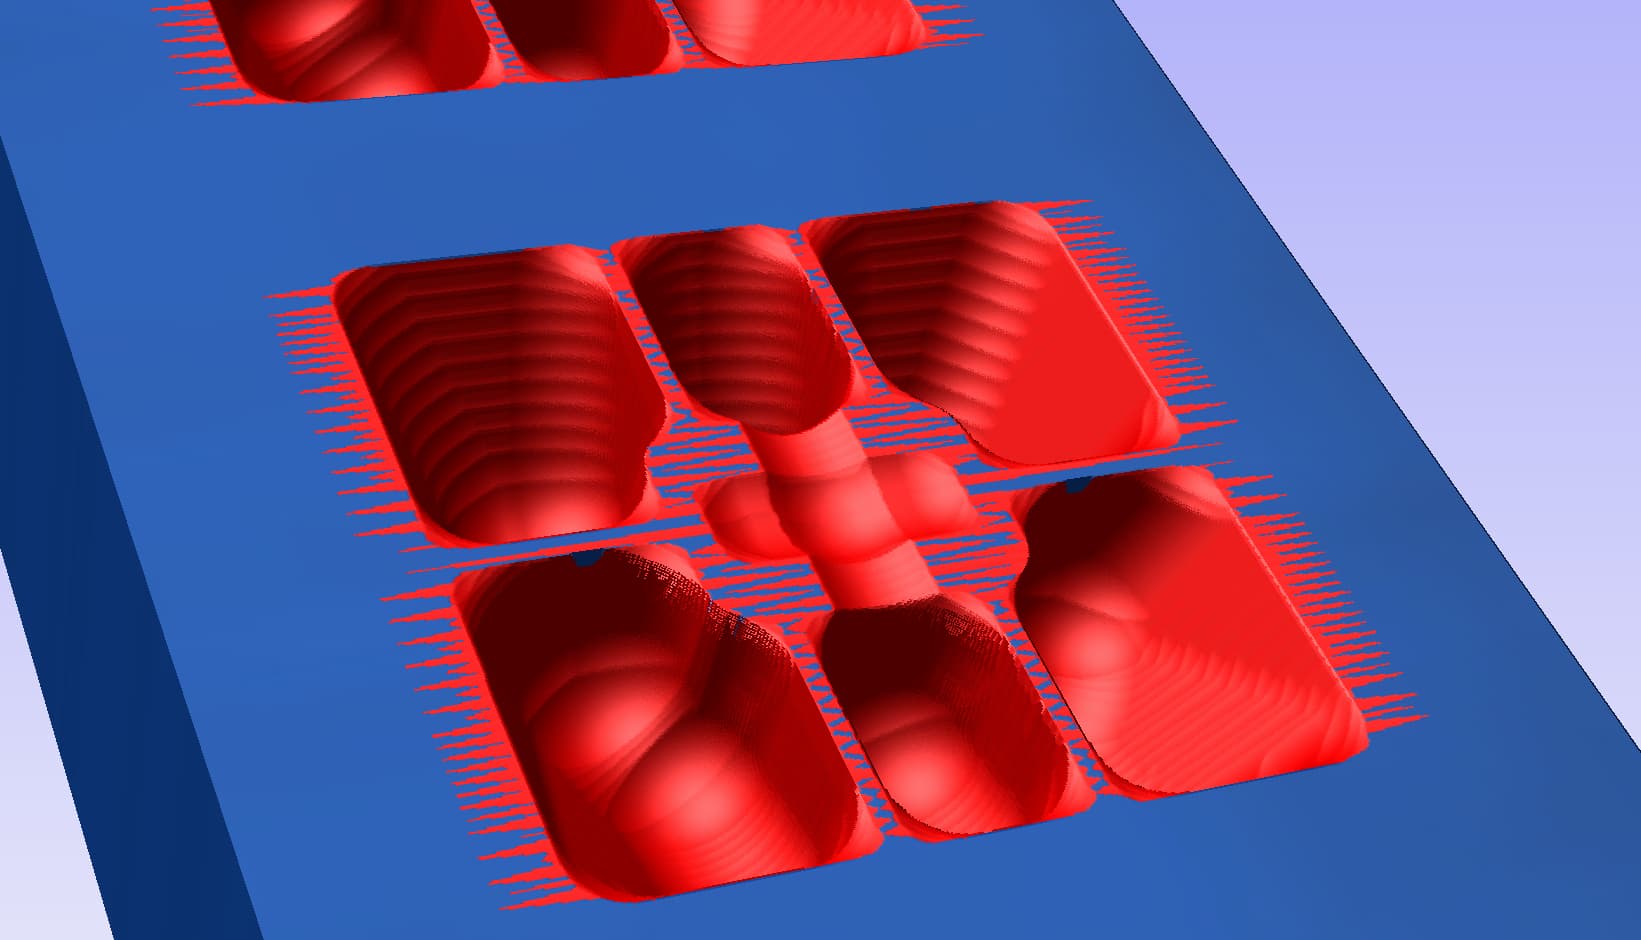
0.0313" Tapered ball, 8% stepover.
Personally I’d use a tapered ball-nose. If for nothing else than I could feed it ridiculously fast.
If you do go this direction remember that you need to increase your feeds to account for chip thinning as you are most likely going to be taking a very small stepover.
In terms of real world examples I only know of 1 of our customers that actually cut the caps themselves (as opposed to cutting molds for them). They were using tapered ball-nose cutters to cut them out of solid copper, brass, and aluminum with through cuts with tiny stubs for backlighting. I don’t want to even guess at how much they were charging for those…
Hope that helps. If there’s anything I can expand on or help with let me know.
3 Likes
This topic was automatically closed 30 days after the last reply. New replies are no longer allowed.