My parents introduced to me the dice-and-paper game Qwixx, which they had recently discovered. It’s pretty fun, but I’ve never been a fan of games that use consumable score papers – I just can’t help but not want to use them up, and it doesn’t matter how large a surplus I may actually have. Obviously, there was only one logical solution: Grab some wood and make some custom wooden game boards. Woo-hoo! Project time!
First things first, I had to decide what to use as markers. Conveniently, there are many, many options for bingo marker chips available on the Internet. After looking around a bit, I ended up choosing a bag of 900 bingo marker chips that includes six different colors of transparent chips. Looking around, I found a bag of 100 transparent colored dice that included the same six colors. (I already had plenty of white dice on hand.)
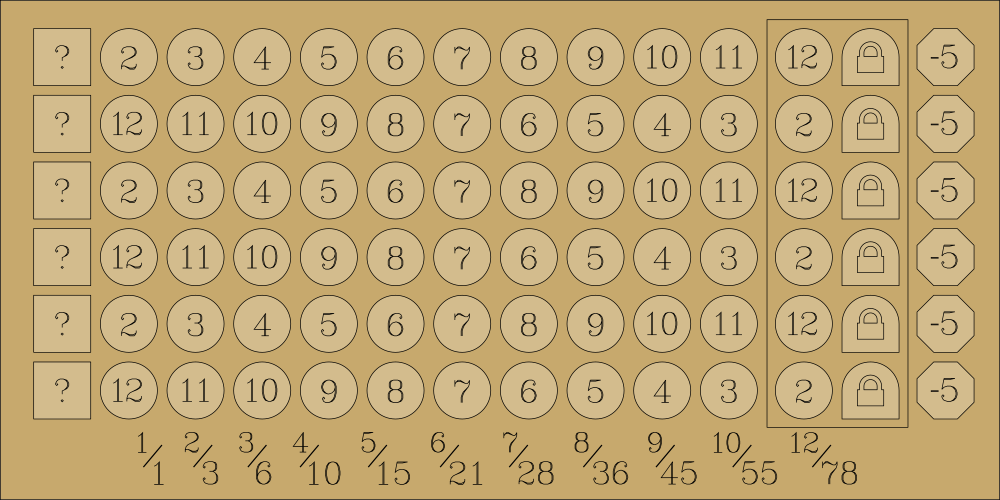
So, with the pieces on order, I could now work on the design of the game boards. The standard game’s score sheets have four rows in fixed color order with the first two in ascending order and the last two in descending order. I figured having six colors of bingo marker chips available was a fine reason to upgrade the game from four rows to six. Without the constraint of printing score sheets, there was no reason to have the colors in any particular order, so I added a column on the left side so each player can assign the six colors in any order they’d like. I also figured the penalty boxes should be proportional to the number of colors in play, so I moved them to the right side. And of course, to please my aesthetic sensibilities, I interleaved the ascending and descending rows. After pulling everything together in Inkscape, I ended up with my design.
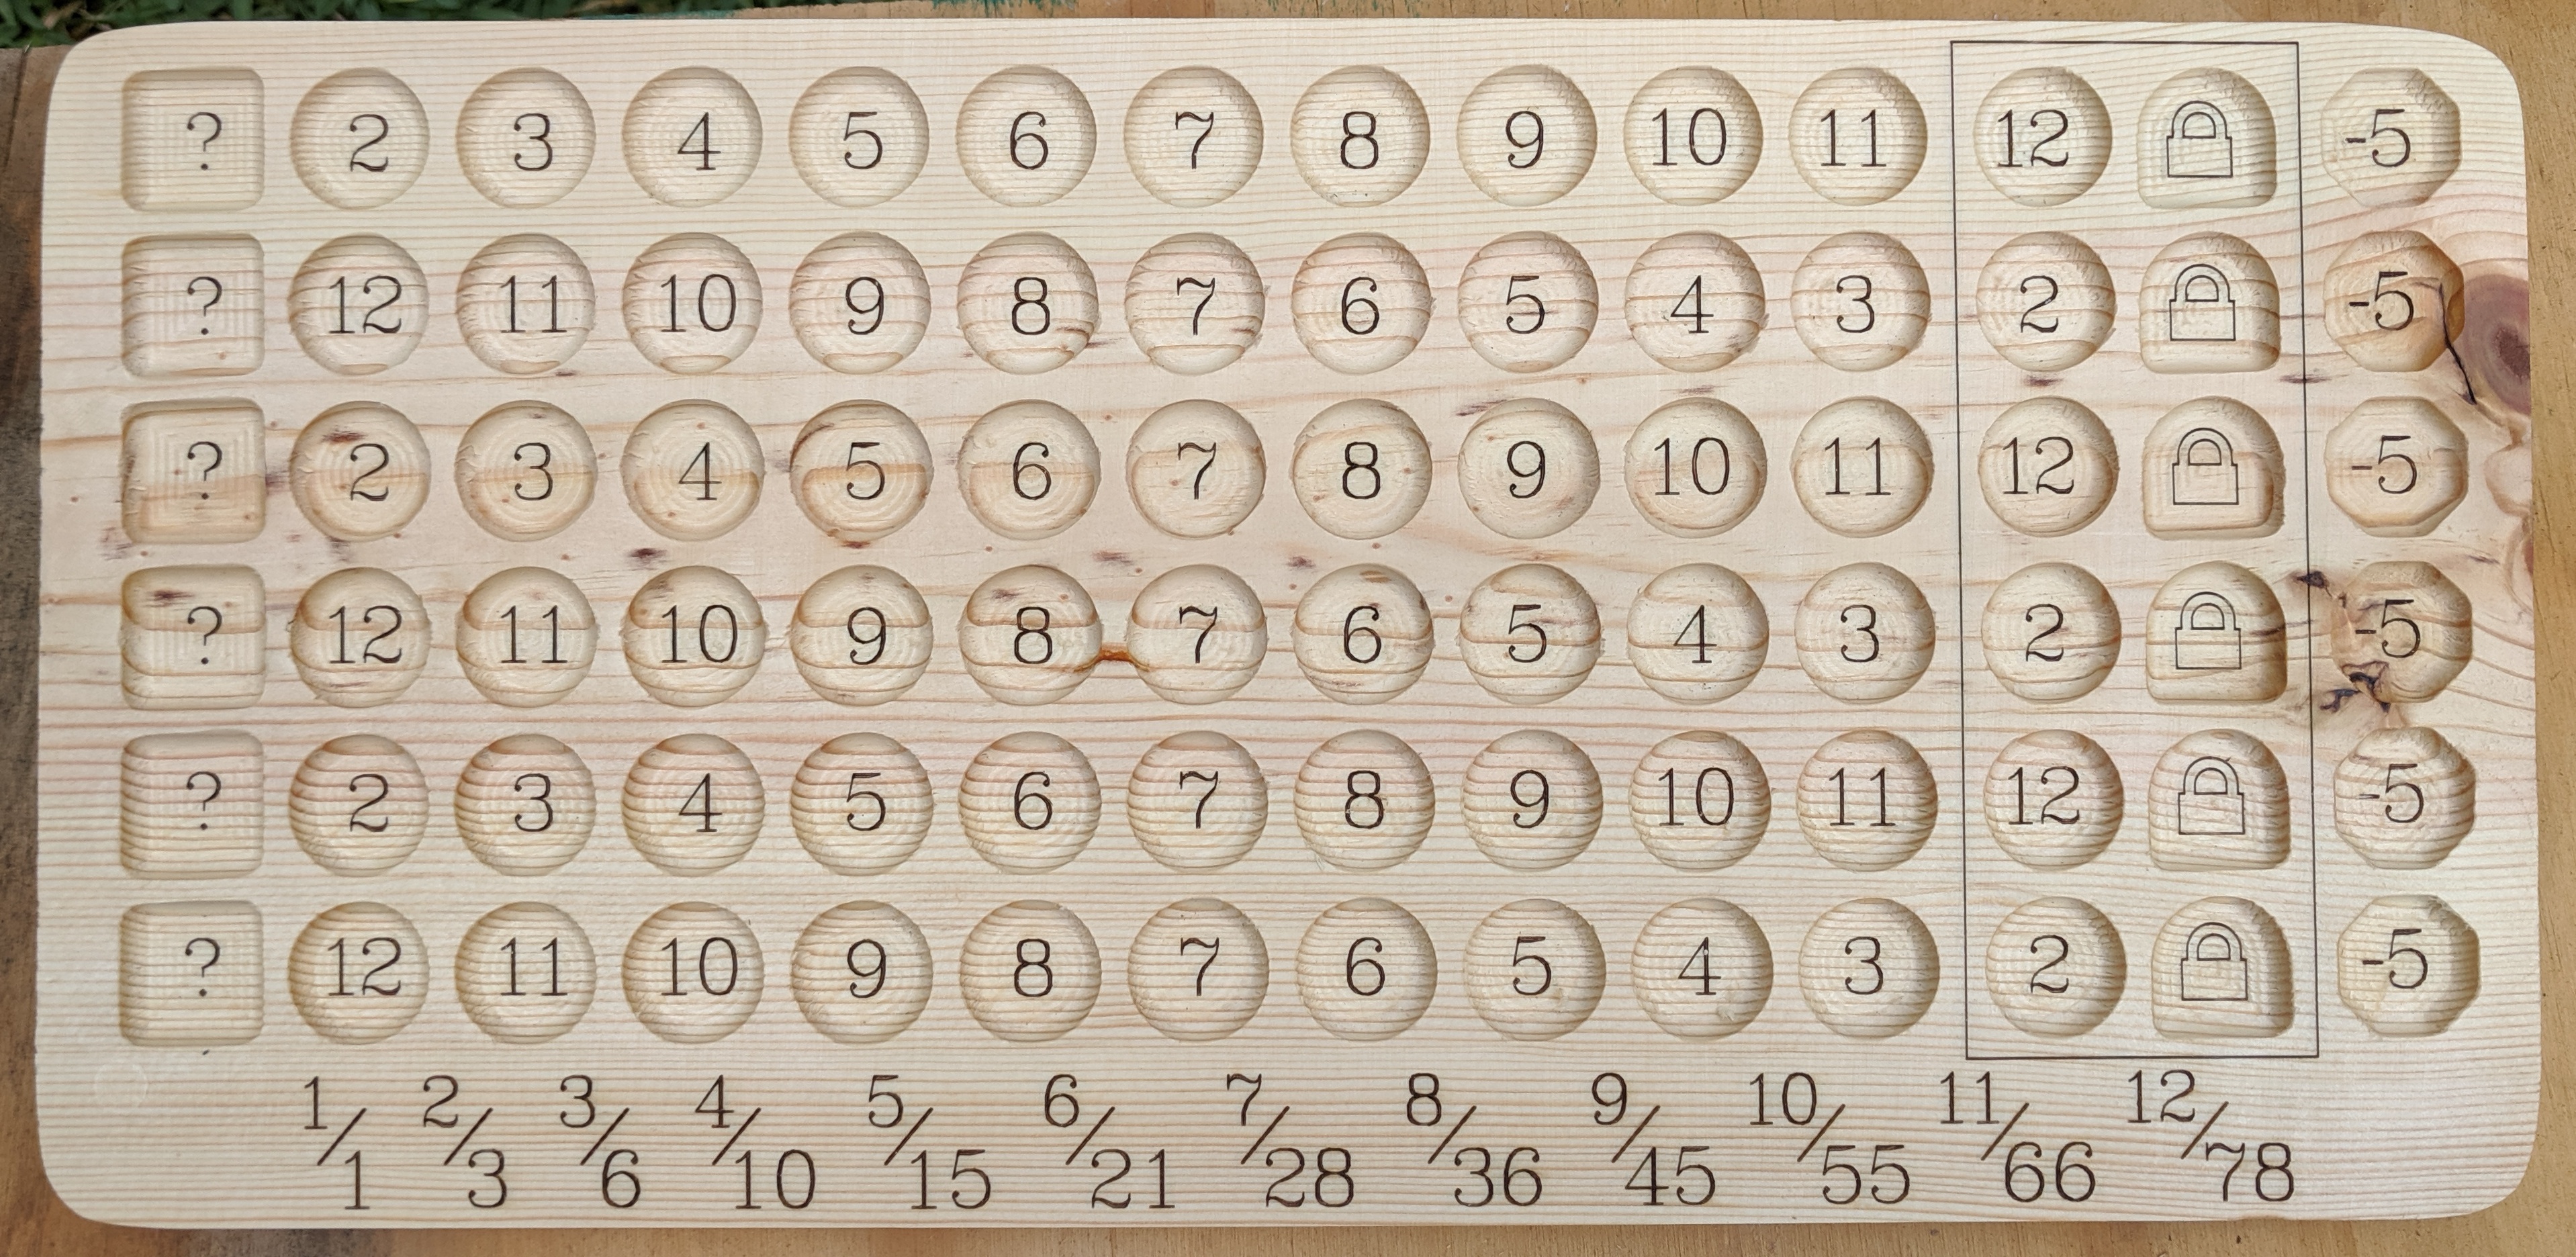
To make the boards, I started with some 1x8 stock (just cheap wood from Home Depot). I planed it down to 1/2" thick, then cut 15" long blanks. I then took the SVG design, removed all the text (and lock graphics), and loaded it up in Carbide Create for a quick and dirty pocketing operation. I pocketed all the light areas with a 1/4" ball nose using 1.5mm stepover and a single 3mm deep pass. That left a nice rounded bottom edge on each, with just a bit of a wavy concentric texture on the bottom.
Once all the boards were routed, I reconfigured for the laser and ran everything through again. For the text, I’d used the J Tech laser plugin in Inkscape to create two flat G-code files, one for everything in the bottom of the pockets and one for everything on the surface. I then combined the two files, adding the two lines to move move Z down 3mm before the pocket set and then back up for the surface set. It took about 14 minutes per board to burn everything in, which gave me plenty of time to do a little quick sanding to de-fuzz each board before the photons flew.
As they came off the laser, I did some quick shaping on a benchtop belt sander. When the set was done, I gave them all a bit of spray lacquer – not enough to make them super-slick and shiny, but enough to seal in any smoky aroma and bring out the look of the wood grain just a little. I made a dozen boards from two 8’ long 1x8s. I went through the entire rack at Home Depot to choose boards with character, and I intentionally chose not to just select clear wood when cutting the blanks, so each game board has its own unique look.
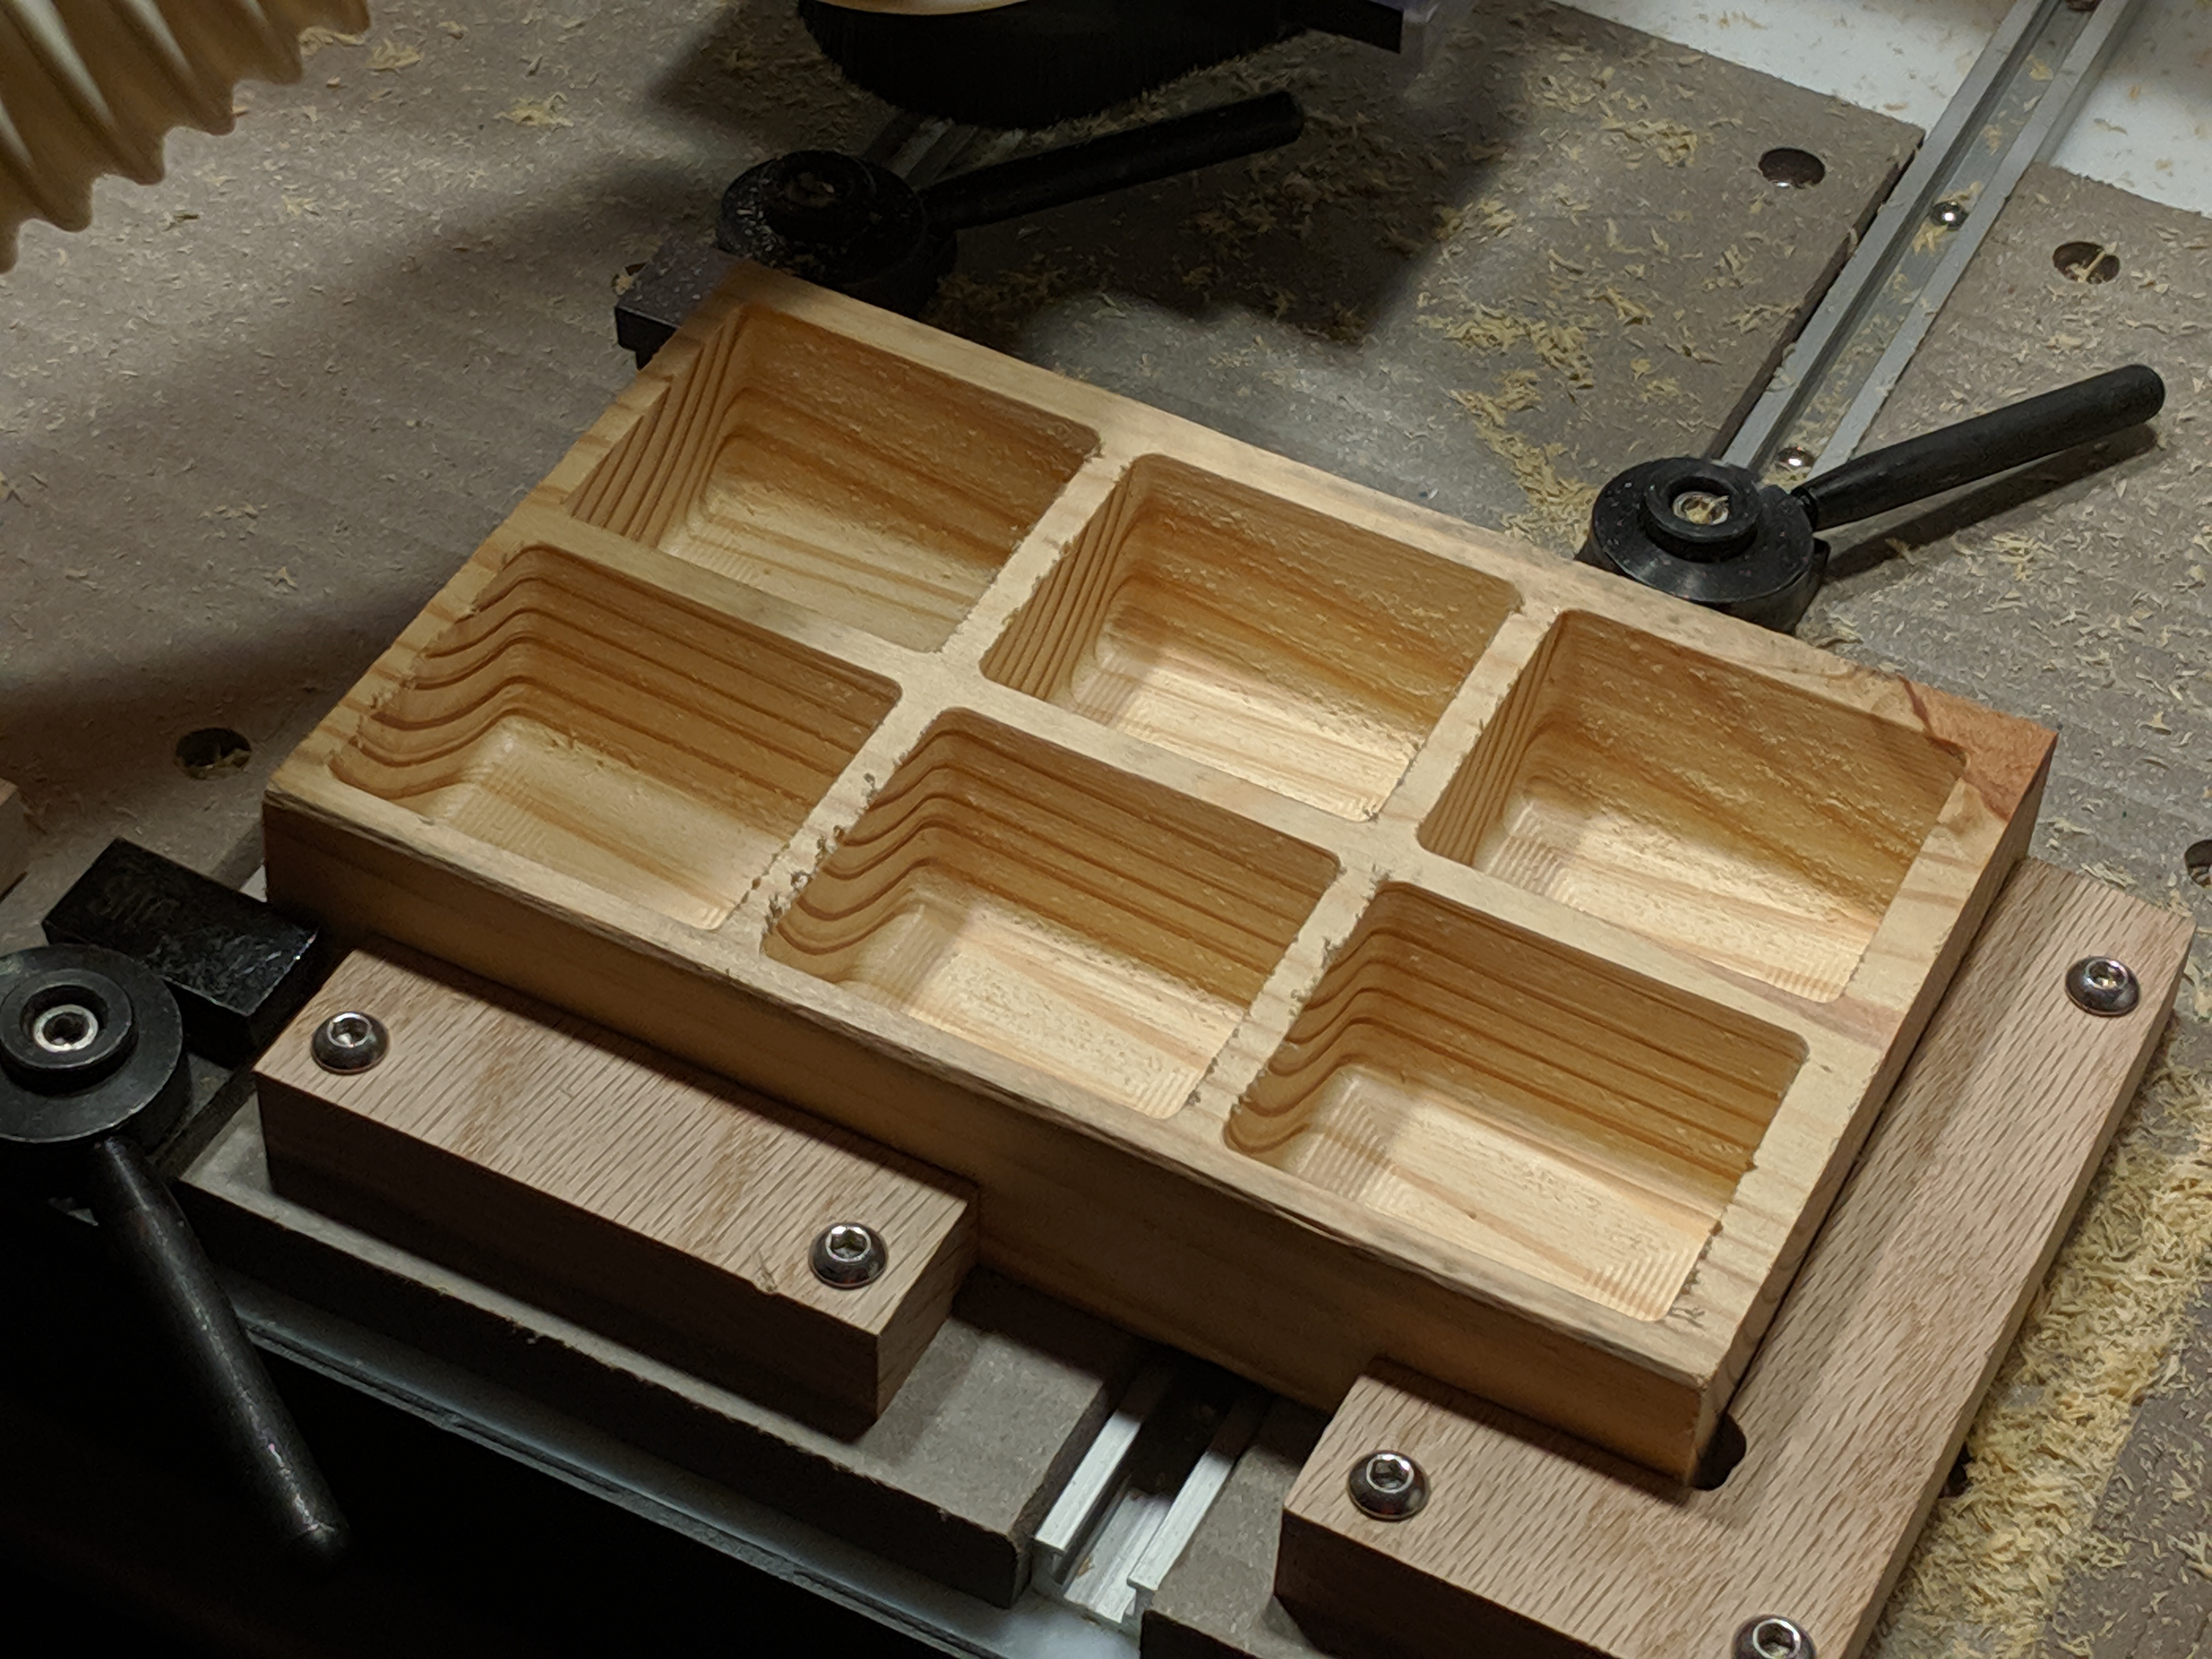
I checked out the boards with some markers, and they worked quite nicely, but it was readily apparent that I needed to something for chip management. It would be annoying to have to find the right color in a random pile each turn, so a nice six-pocket chip holder would be quite convenient. I didn’t want to do straight sides, as sloping sides would make scooping chips easier, so instead of a simple 2.5D Inkscape/Carbide Create approach, I went full 3D in Fusion 360. I used 75° as the slope for the sides of the pockets parallel to the long axis and also added some nice rounding to the bottom edges, then cut it all with a 1/4" ball nose and did the usual sanding to soften edges and corners.
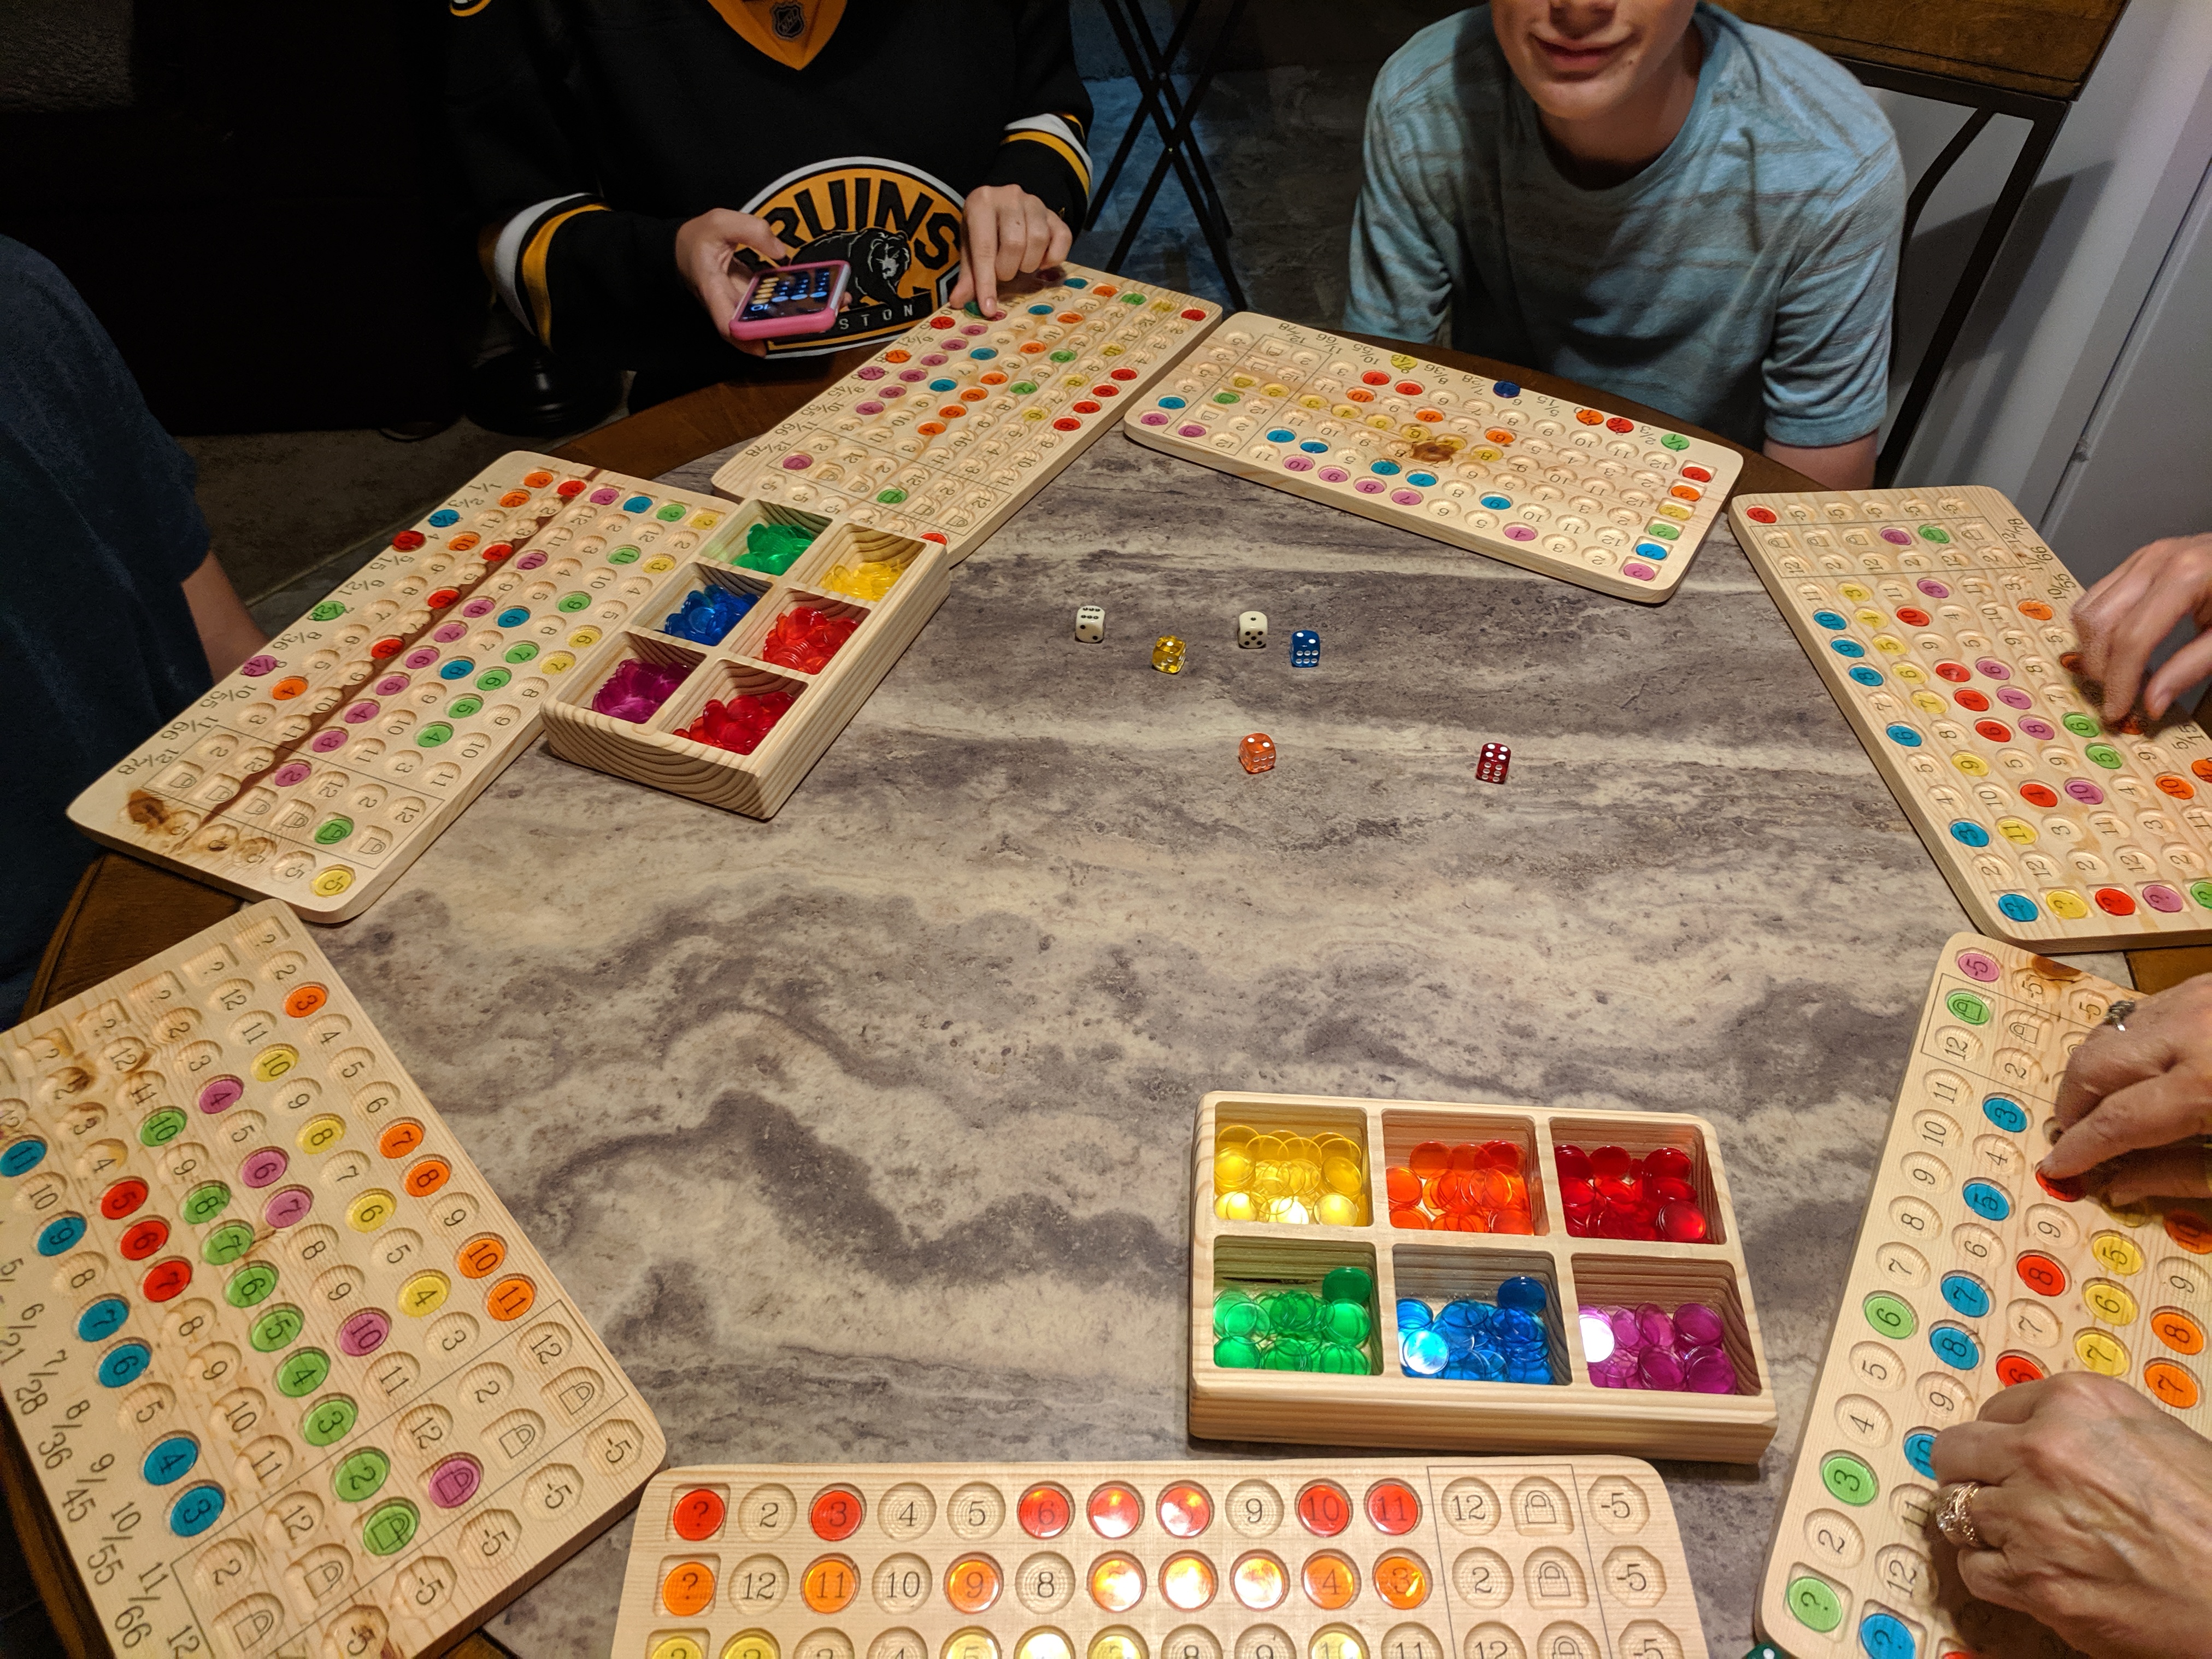
So, a couple chip holders, a dozen game boards, a 900-pack of bingo marker chips, six matching colored dice, and a couple white dice, and everything was together. After I delivered everything yesterday, we ended up having seven of us (myself, my parents, several nieces and nephews, et cetera) playing, and it worked quite well. It’s definitely an upgrade from little printed score sheets, and having 50% more colors in play was fun (although you could always play with a subset if you wanted).
Well, I’d call that a success and a nice Mother’s Day present, to boot. 