Carving for Epoxy. Looking to do my first epoxy pour on what will be a jewelry box top, have some questions.
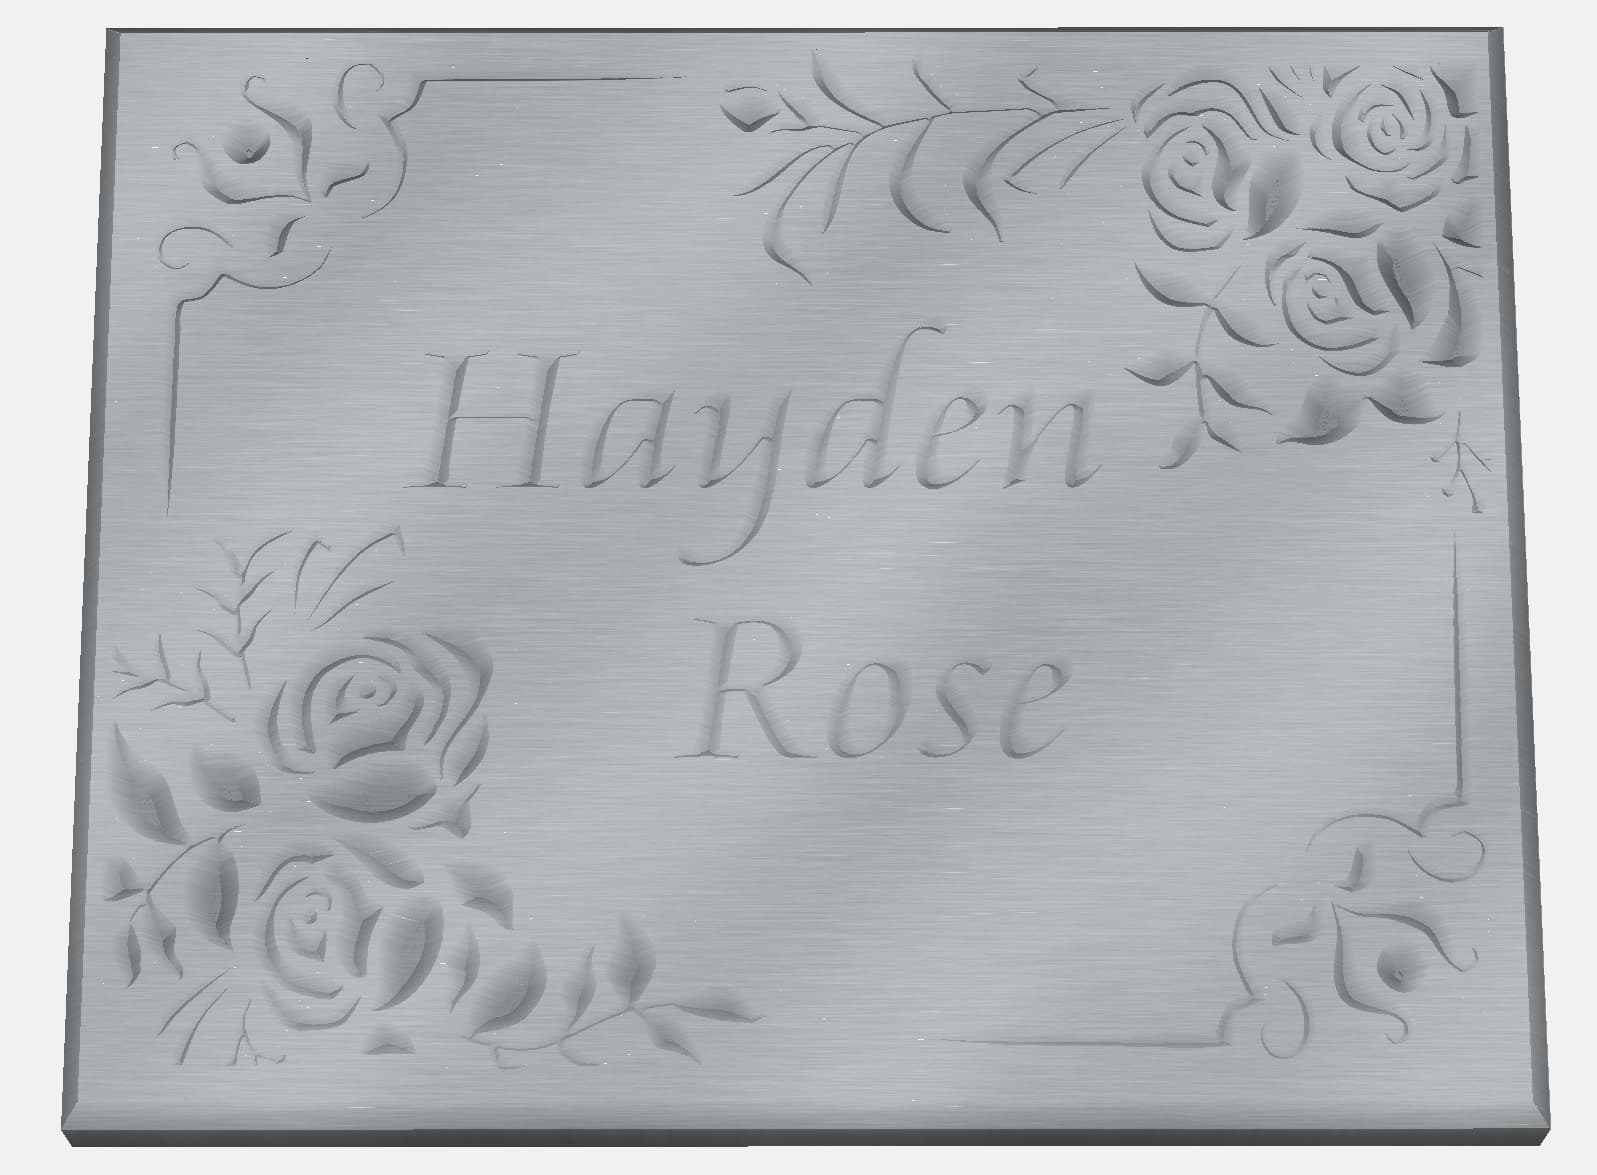
Can I fill in thin v-carve lettering or will it just fallout?
If I use an end mill, i would need to use a 1/32 bit, and it will take forever on my S3.
Still using CC basic.
How proud do you pour the epoxy?
My spindle isn’t perfectly flat to the base (need to shim head a little) but it hasn’t mattered yet
What is the best/easiest way to dial down the cutter during a project.
In past I have done both, re design the starting depth in CC and reload file, or recently just edited my Z position down a little.( quick jog to 6mm above and raise the number so it thinks it’s higher).
The epoxy will stick if using like Table Top epoxy. Table Top epoxy cannot be poured more than .25" thick. I fill the epoxy until it is just overflowing the carving. Make sure your project is level so it does not run off and on to your bench.
To remove the epoxy I have a Jet drum sander. I remove the epoxy until there is just a skim coat left and then use a random orbit sander to remove down to the wood. Just dont over sand or very fine lines will disappear. I have tried a planner but it is way too violent and will make a mess of your project. You can use your Shapeoko to machine off the excess but as with my drum sander leave a skim coat and finish with a sander. Trying to get all the epoxy off can lead to erasing part of your design. When you sand off the epoxy it will look dull as dish water. However once you apply a finish it will shine up. I usually go to 220 and maybe 320 max. Going to a higher grit wont improve the appearance of the epoxy and is a waste of time and sand paper. The epoxy will clog up your sand paper so you might have to use 2 sheets per grit.
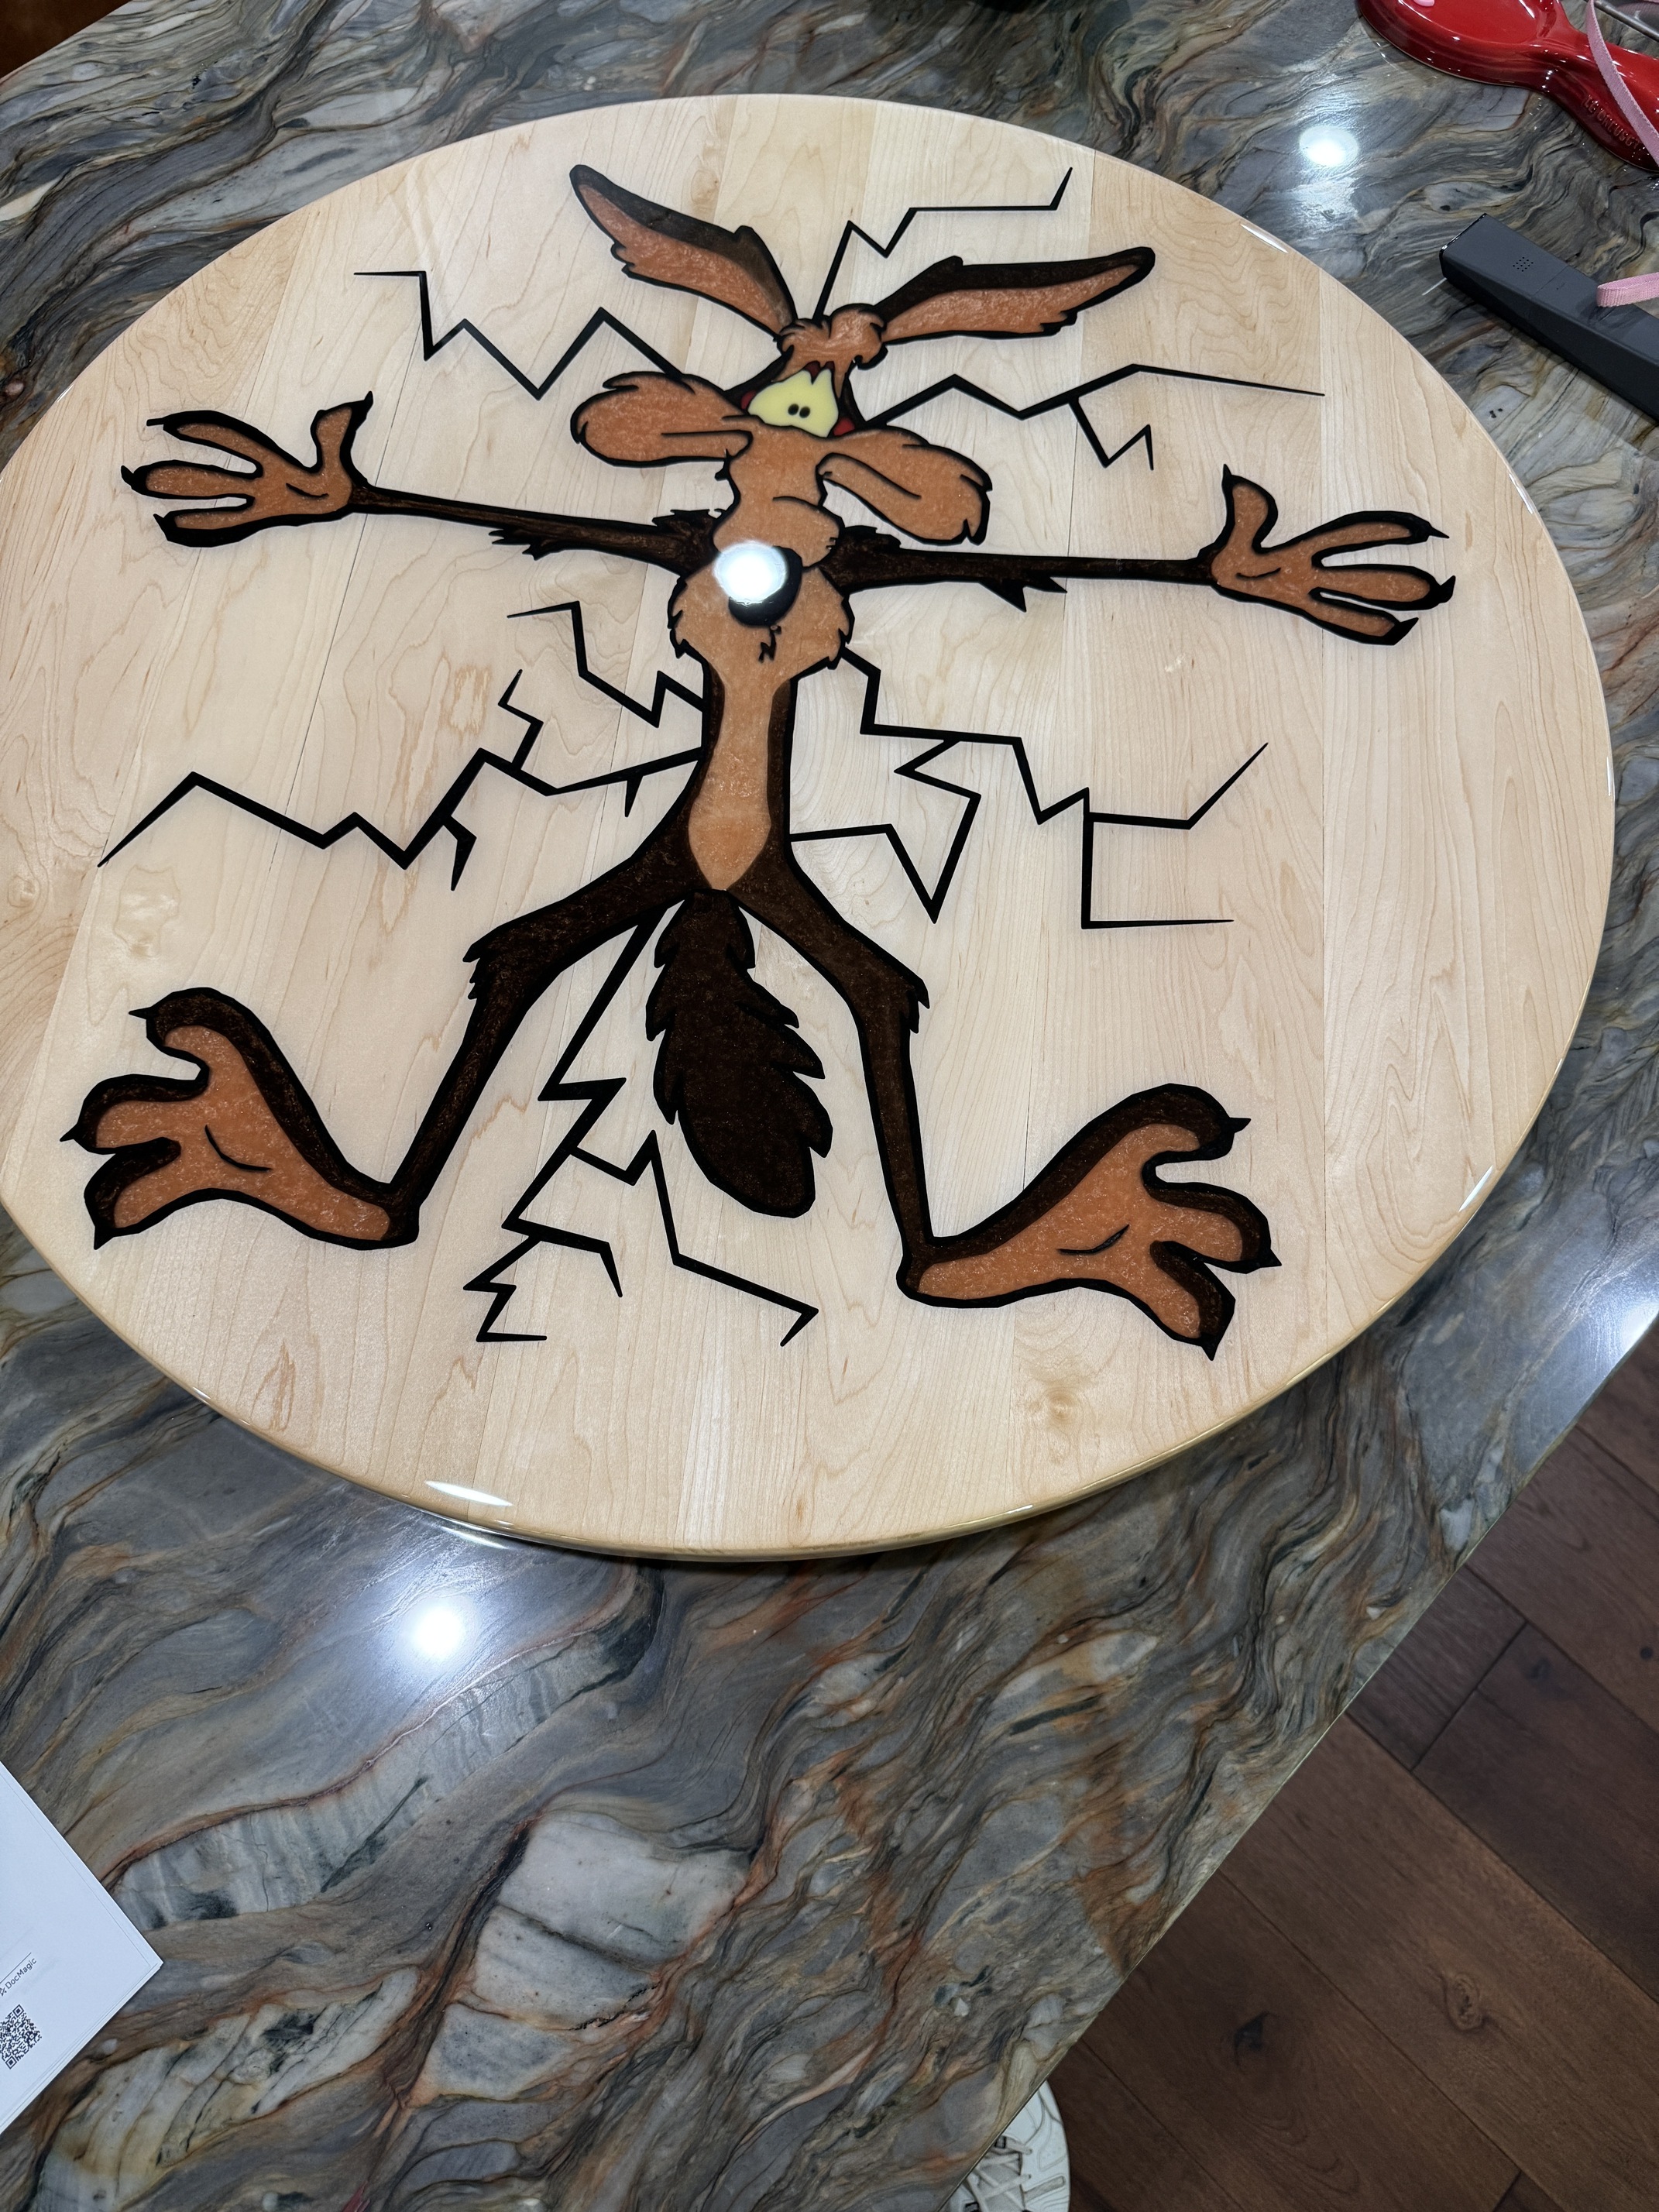
To minimize the sprawl of epoxy for inlays I use a caulk gun and lay a small bead down around the inlay design. This peels off easy and allows you to fill the epoxy above the surface of the board. The epoxy usually shrinks when it cools off and is cured so if you fill it just level with the surface when cured it will be below the surface. The fix when this happens is to mill the board even lower than you wanted, which will remove details as Guy speaks of.
I’m currently fighting with an epoxy pour for a Christmas project. I’m on version 2 with a few trials in there. The problem…color epoxy bleeding into the woodgrain. Yes I’m an idiot for using a white wood with a black epoxy.
My current version I’ve carved it, poured a little bit of clear epoxy into the carves, and then recarved the vees on the CNC. (One side-note problem here, when I reset the CNC with my bit zero, there must have been a fraction of an inch of new epoxy on the edge somehow and I didn’t get a perfect carve.) I’ll pour the black epoxy today and see what happens.
I’ve tried sanding sealer, lacquer, and now epoxy to fill the pores.
Btw, I am using a collective “I” here. My wife is the finishing person and I am the carver.
So, we will see what happens. If this doesn’t work, I’m going to use hdu on this one and WE (she) will paint it.
As an endnote, Cathy says if this doesn’t work, we will physically light these on fire and burn them…taking a video and sending it to my daughter (who this gift is for). She said it in her “joking but I’d really like to do it” voice. Or maybe she will just get the “coal” from the wood in her stocking.
Cathy also says she now hates wood and only wants to do hdu from now on.
Last minute Christmas gift creation ranting. (There should be an angry Santa emoji).
Edit: Sometimes it takes several coats of some type of sealer to prevent the grain wicking action to be counter acted. Elmers works, I have even sightly watered it down, this allowed the glue to wick into the grain farther and help block the epoxy creep. This conclusion also resulted in a healthy woodpile for the campfire….
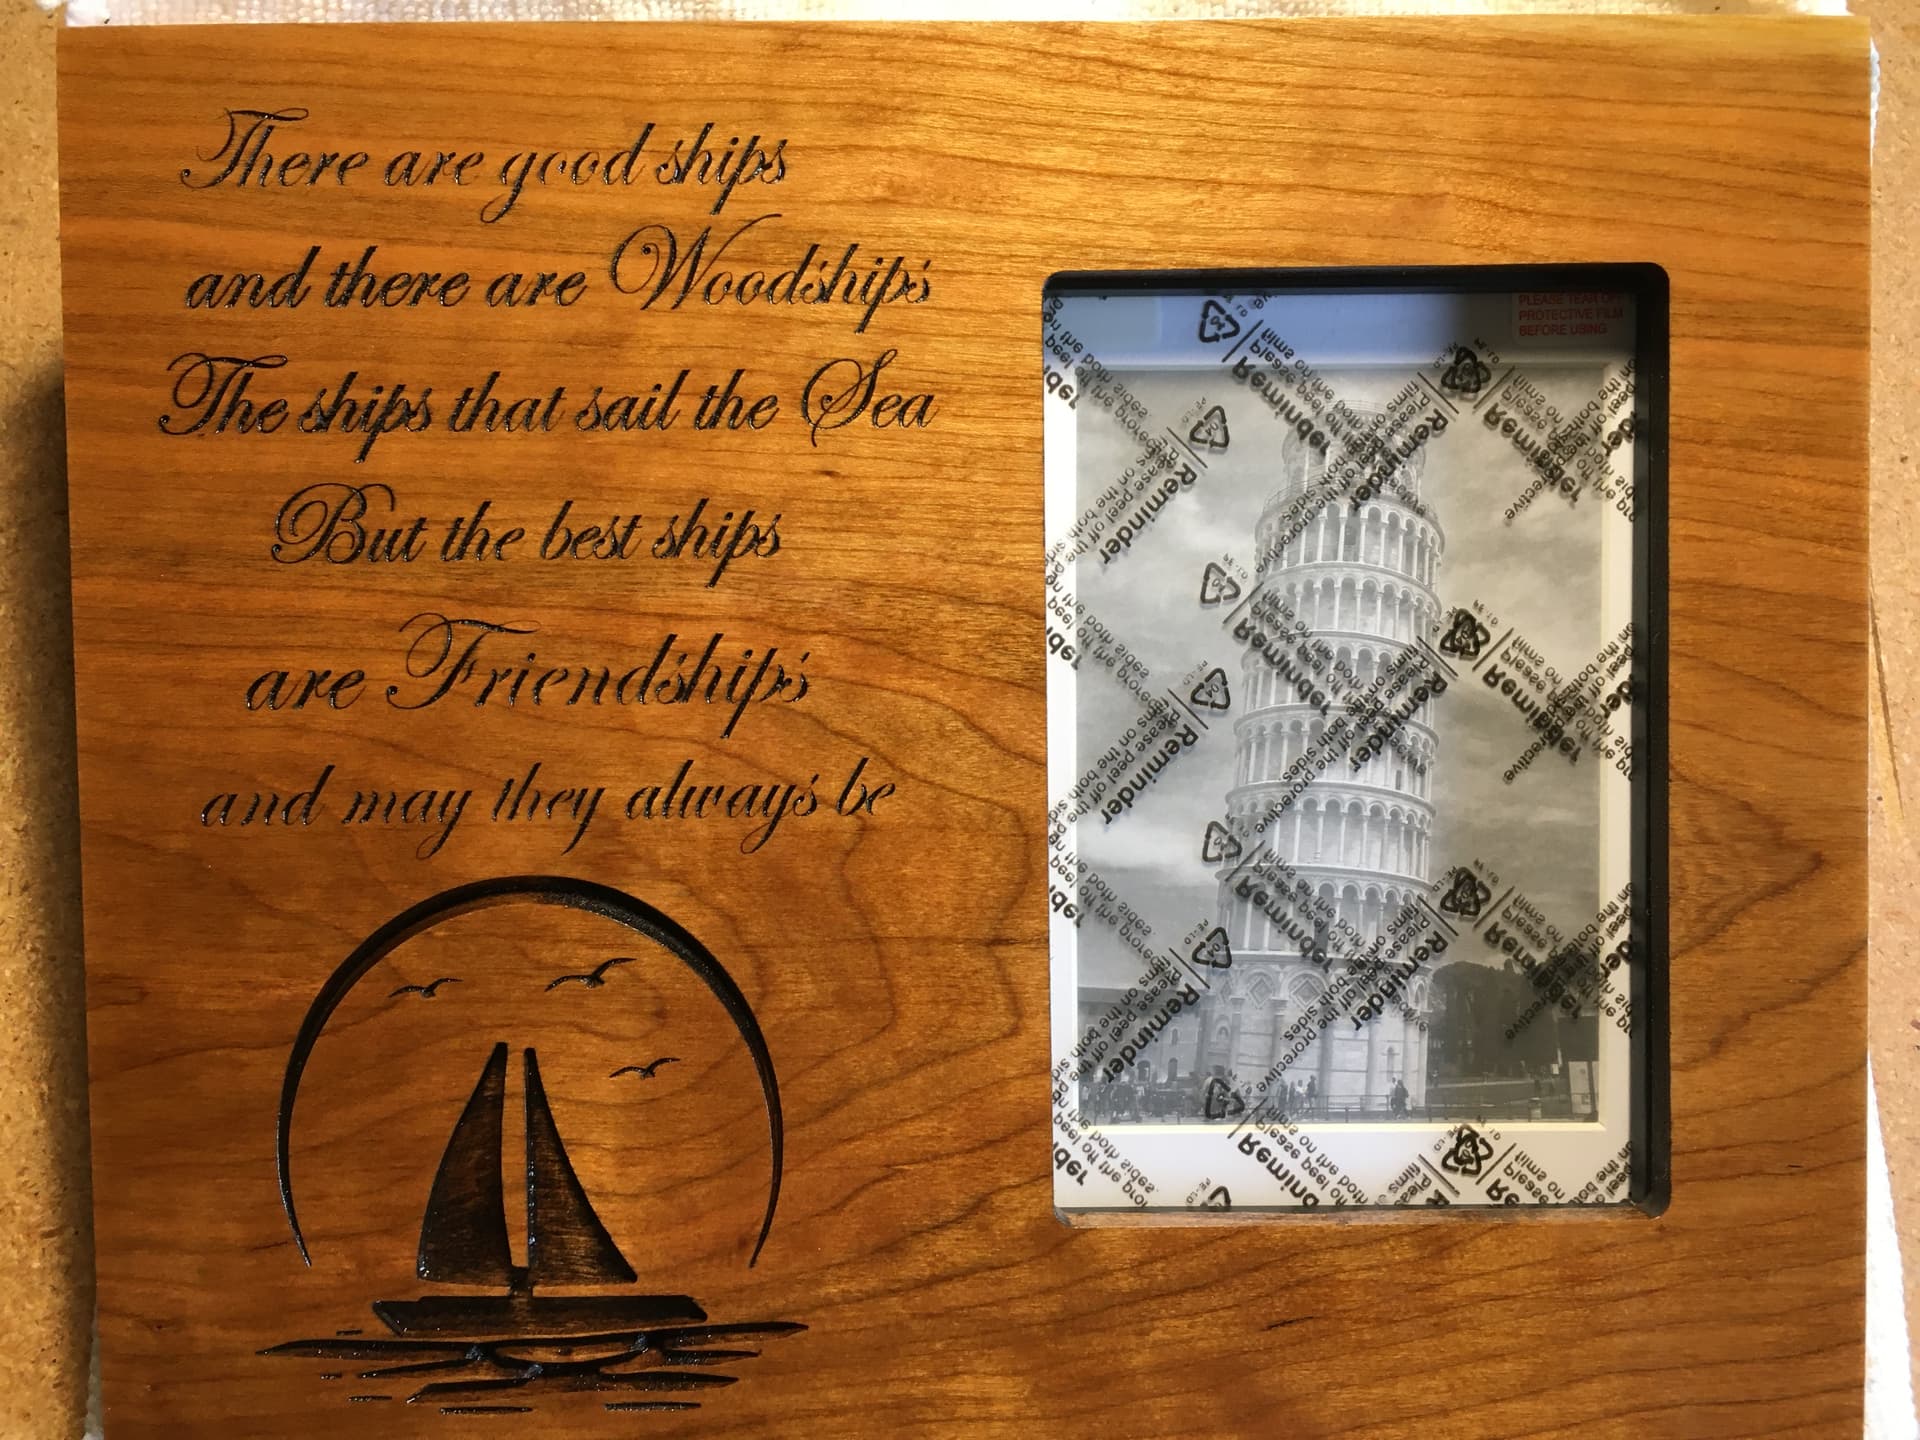
What type of wood are using? I plan on using a white/pearl epoxy on either cherry or walnut. When I paint my carvings I generally give it a coat of poly, then carve it. This seals the top and lets me get the paint off because I am a messy painter and don’t stay in the lines. I have also done dark stain to darken the image, without changing the wood color much with 2 coats of urethane before carve.
That process allows you to remove the paint from the surface, however if you look at the capital letters W, B and F you can see some grain wicking of your paint. To help prevent this it’s common to seal the carved out design with a clear drying sealer of some sort. Elmers glue is a simple one that works for me. Most paint has a fairly “short” drying time compared to most epoxy’s used in this type application. The longer cure time allows the wicking action of the grain to pull more in if not sealed.
And as always, the wood species has allot to do with the severity bleeding effect.
I tried a soft a wood hoping to help reduce the warpage…Poplar. And of course in the process discovered that that was an extremely poor choice!
Now that I’m thinking about it, black spray paint would almost accomplish the exact same thing . Much faster drying time. I did that as a trial on one of my very first projects and it worked great.
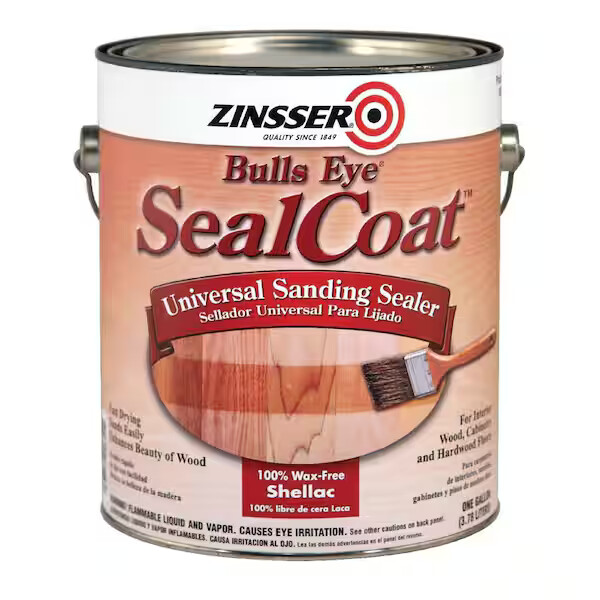
To keep the halo effect from paint/epoxy I apply 1-2 coats of Zinsser Universal Sanding Sealer (dewaxed shellac). This seals the end grain that is exposed during carving. After you let it dry 30 minutes or so you can proceed. Then with epoxy/paint you just sand off the overage and you are set. Shellac will slightly darken the wood but during sanding it is sanded off and you are back to the wood color you had. Oil finishes will darken/yellow most wood. Water based finishes leave the color alone but it does raise the grain on the first coat. The dewaxed shellac is compatiable with water or oil based finishes.
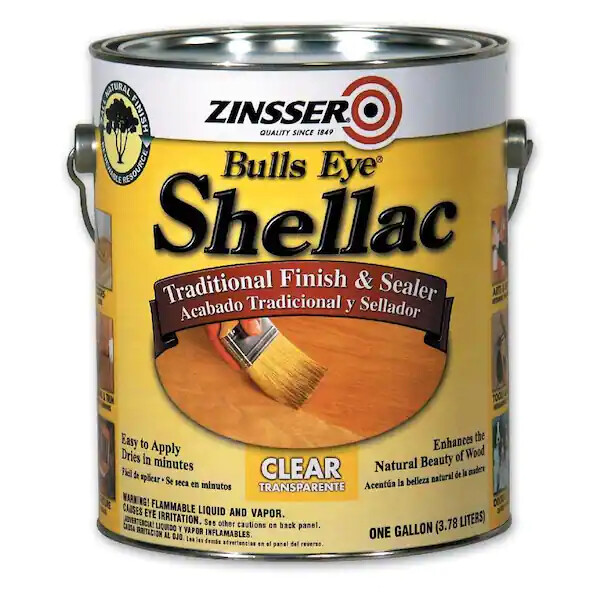
Zinsser also makes a shellac you can use for a top coat. Shellac is not as durable as oil based finishes like polyurethane but for plaques or things that wont get handled it is a great finish and easy to use.
The Zinsser shelac comes in clear and amber. However even the clear will slightly darken your wood.
I like wipe on polyurethane but it takes longer to finish because of drying time. Water or oil you need to sand at 400-600 after each coat to smooth it out and take out the nibs/dust that will appear.
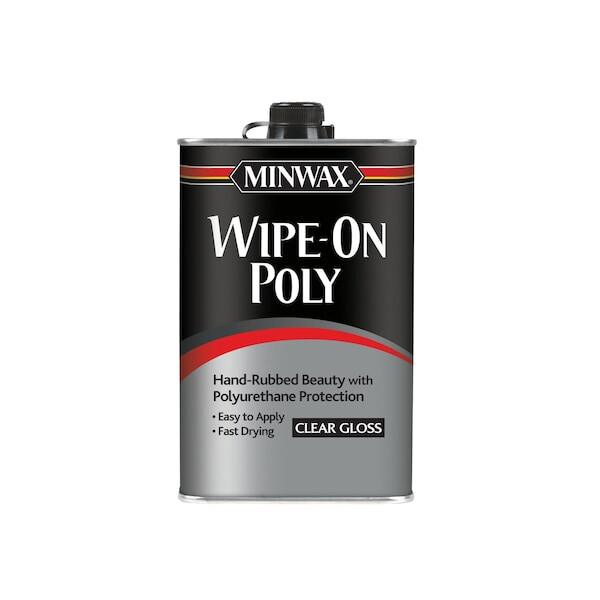
The wipe on poly from Minwax comes in satin and gloss. I prefer the satin.
I carve my wood to .25”, then spray the entire board with 3 coats of Bulls eye wax free shellac. My last project, I only sprayed one layer where I was going to pour, and the black epoxy got into the spaces where I glued the maple boards together.
Something a friend introduced me to is taking uncoloured resin and brush it into the carve first. This seals the wood. Then do your colour pour after the seal has hardened.
I tried UV cured resin on some projects in the hope that it would make the dry time quick. Turns out that it doesn’t work if the epoxy is colored, the top would harden but the bottom would not.
However, a clear thin coat for sealing may be a great use case for it. It would likely dry in less than a minute. May give that a try this week.