Those are currently on sale:
1 Like
Thanks @WillAdams, but sadly, by the time I get it delivered to the UK, pay import duty and VAT, it costs a bit more 
Hi Peter,
When not using a tool length probe (which is what the BitSetter is), you will need to have one G-code file per cutter used in your design (you may still group multiple toolpaths using the same tool inside a common G-code file). Note that there will still be a single .c2d file, because this is the design file, and it has all toolpaths. It’s only the G-code (.nc files) that need to be generated separately, and that’s to allow you to reset Z zero for each tool in between jobs.
You could use an endmill that is small enough to support milling both holes and channels, and then you don’t have to bother with the multi-tool workflow. But of course, quite often this is not the optimal approach because you will end up using a small tool to clear out large amounts of material, which will take a long time.
Honestly, the “one file per tool” workflow is a good way to start learning, before moving to a BitSetter workflow that “just” automates the re-zeroing between tools for you. It’s a productivity feature.
Same story for the BitZero: it definitely helps automating the zeroing process, but I still find myself using the good old “eyeball X/Y and use paper method for Z” often. I recommend you get comfortable with the machine and the workflow, then consider getting the BitSetter/BitZero in a few months if you feel the zeroing operations are actually holding you back in your work.
2 Likes
Thanks, @Julien. That’s good advice.
Now, where’s my wallet 
So, the t-tracks and clamping kit from Axminster have arrived, I also popped into their store and bought a ProGrip clamp and a couple of hold down clamps, and my delivery of threaded inserts and countersunk screws from Amazon arrived yesterday.
I wonder what I’ll be doing over the next couple of days…?
I’ve got to be honest, though. I can’t help but feel a little jaded with this whole spindle to baseboard thing. With the tracks cut I’ve little more than a couple of mm’s left in the board, so I’m going to need a second board to support the top one - making it a 36mm deep waste board - which I will then need to secure to the base board. How would I do that, having three boards (base- , spacer and waste boards) to hold together and not damage the base board?
I’m beginning to wonder if my ambitions with the waste board aren’t exceeding my abilities! Even if I went for the Carbide3D T-Track system (which I’m not) that couldn’t be reached with the bit, either.
Put some threaded inserts into the baseboard to hold the middle layer in place — that should have threaded inserts in it, some of which are used to hold the spoilboard using nylon, alu., or brass hardware.
1 Like
and these would have to be hand drilled, as the cutter won’t reach the board!
Also, wouldn’t I have to remove the base board to insert the threaded inserts from underneath?
If you source longer endmills you could reach things.
If you place the holes appropriately you don’t need to remove the wasteboard, or you could just use holes and screws.
1 Like
As Will says you want some of the inserts in your base board, those can be inserted from the top as you don’t need them recessed in the base board.
My M4 inserts which hold down the T-Tracks are directly in the base board too, I just put the tracks in place between the spoil board strips and marked the hole locations through the tracks then drilled those holes by hand.
I mounted my T Tracks directly onto the base board so they were well recessed from the spoil board surface, giving me a few shots at re-surfacing before running out of clearance.
For the M6 holes you can put the spoilboard on top and then use a 1/4" cutter which should reach the spoil board to drill out your pattern, you want a little over 6mm anyway (but still a router cutter, not a drill bit). I would then drill through the rest of the way by hand and put the M6 inserts into the baseboard. Ideally the holes go all the way through to allow the clamping bolts to stick out the bottom, the steel straps will obstruct some of these. It’s not that hard to replace the base board if you have to, it’s only MDF and not very complex. I would suggest using some poly lacquer on it to seal it from moisture though as your machine is outside (garage?).
Once you’ve got the M4 and M6 inserts in the base board with matching holes in the strips of spoilboard above the M6 inserts you can figure out how you want to mount the extra board on top for using small cutters. I’d start with, say, one or two strips of between T-Track width as those pieces may well be smaller than the machine. You can then use the same M6 hole drilling pattern you used for the spoil / base board holes & inserts for these to give a long reach down to the inserts.
Don’t think of these extra layers as permanent but as additional jigs that you use on the machine, like a cross-cut sled on a table saw.
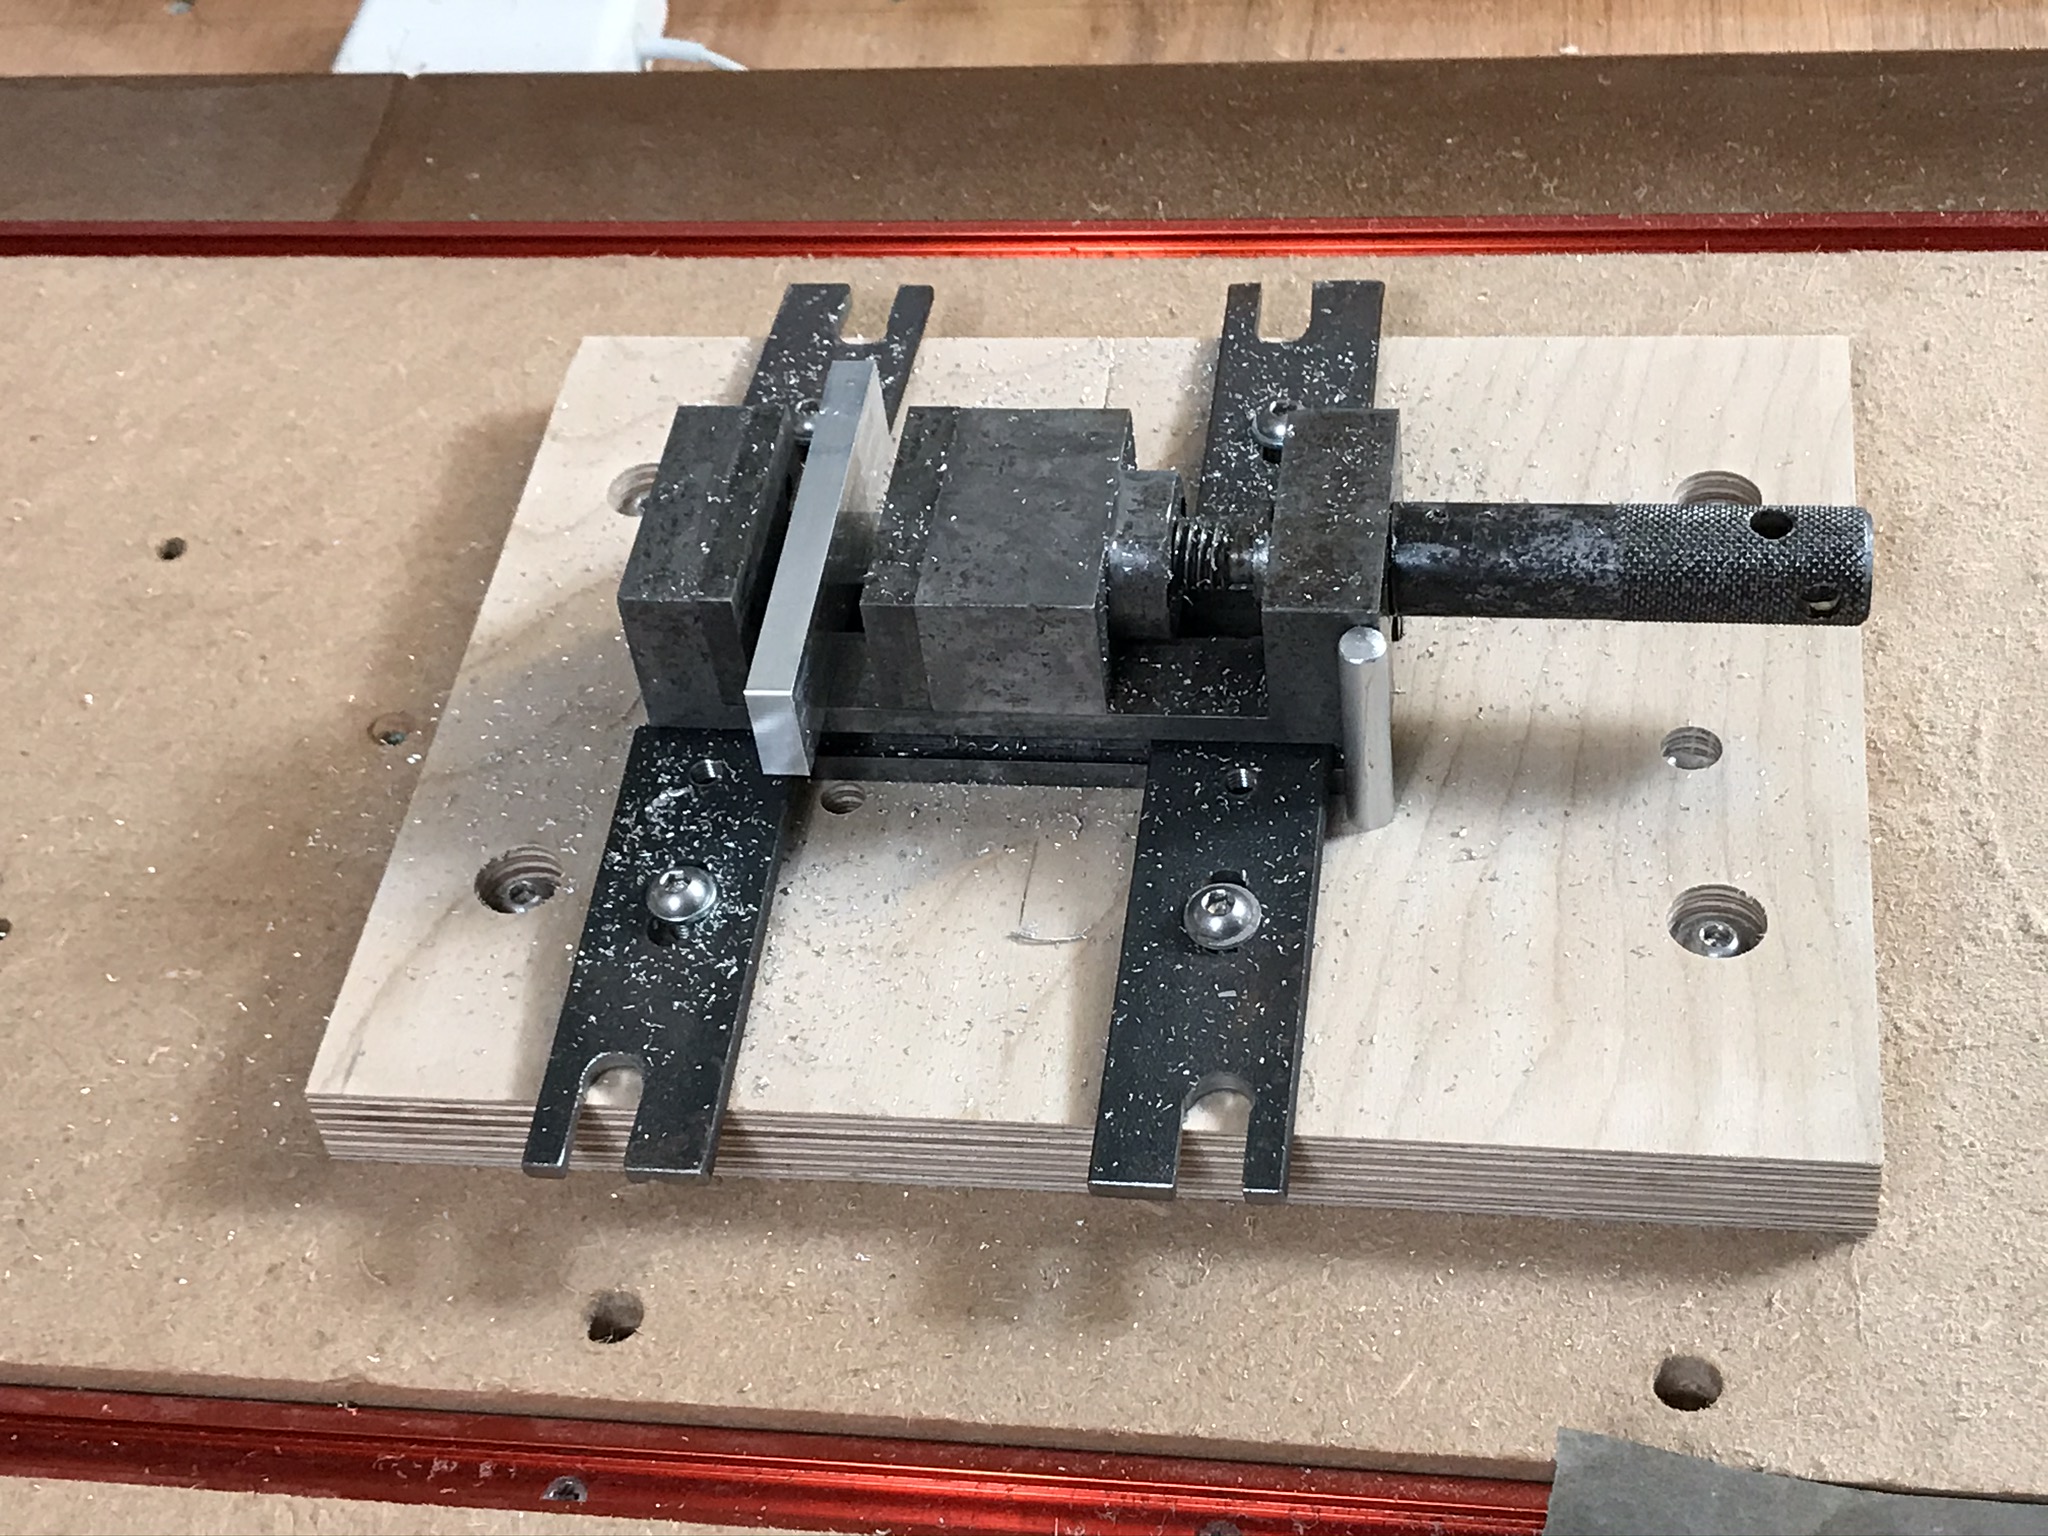
What I would also suggest is sticking a sparse grid of 8mm or 10mm holes in for locating pins which you can use to line up workpieces or for repeatably aligning jigs / upper spoilboards etc. on the machine, here’s one of mine with ;
- 10mm pegs locating the bit of ply to the spoilboard
- M6 bolts holding it down to the threaded inserts in the base
- a couple of 8mm holes for alignment pins for the little vice
- M6 threaded inserts in the bottom of the ply to hold the vice clamps down
It was surfaced flat by the machine to give a flat surface for the vice to sit on and the whole thing comes off in a couple of minutes.
3 Likes
@WillAdams and @LiamN, your comments are really helpful and I’ll get on with following your advice very soon (I’ve still got real work to finish off!)
I was concerned about putting any holes in the baseboard in case that affected stability/warranty, etc., but I guess not. And as you said, @LiamN, they can always be replaced.
I am wondering about using longer, 1/4" bits in the main, but I’ve got quite a collection of 1/8" at the moment, based on the advice of the retailer. I suppose I could use them for more detailed work in the future, when I’m a bit more ‘savvy’ and confident.
Essentially I could use the board I’ve cut the T-track grooves and holes for the threads as the ‘spacer’ board, and the work pieces would sit on top of that. Of course ( one light on!)
I could cut the waste board into separate pieces as spacers between the T-tracks, so I would only need to replace them one at a time, rather than as a whole piece. I could then secure them to the base board from the top, with a bolt at each corner so they could be removed easily ( two lights on!)
I think I’m getting there…
2 Likes
Actually, I would recommend starting out w/ 1/4" tooling, and then once comfortable with the machine, branching out to the smaller (and commensurately more delicate) tooling.
1 Like
And the only one I’ve got is the #201 that came with the XXL, so I guess I’ll need to look for a few more.
Any ideas/recommendations, please? UK suppliers preferred , although I guess this is based on what I’m going to do - so let’s say boxes and signs for the moment 
Thanks again.
List of UK resellers at:
https://wiki.shapeoko.com/index.php/Vendors#UK_2
If one is starting with just a 1/4" collet:
- three 2-flute 1/4" square endmills (such as the #201 endmills from Carbide 3D — one will be included with the machine, a pack of two will fill one out with: 1 for initial experimentation/roughing, 1 for finishing passes, and 1 spare. Downcut endmills such as the Carbide 3D #251 https://shop.carbide3d.com/collections/cutters/products/251-25-downcut-flat-cutter may be a good option for folks cutting wood.
- two 2-flute 1/4" ball end endmills (such as the #202 endmills from Carbide 3D) — if one wishes to do 3D modeling or cut parts which have rounded profiles along the bottom (often a good idea in woodworking for increased strength)
- two 90 degree V-bits such as the #301 from Carbide 3D — if one wishes to do V-carving or cut joints which use this angle
Add 1/8" endmills if doing fine/detailed work:
From: http://www.shapeoko.com/forum/viewtopic.php?f=35&t=6921&p=64848#p64848
- five 2-flute 1/8" straight endmills (such as the #102 endmills from Carbide 3D [11]
- two 2-flute 1/8" ball end endmills (such as the #101 .125" Ball Cutters from Carbide 3D)
- two smaller straight endmills (say 2 mm or so) (such as the #112 0.0625" endmills from Carbide 3D)
Additions:
- V-carving bits (say 30 and 60 degrees) — these are excellent if doing text
The following are special-purpose and only suited for specific usages.
- a stub 1 mm or 0.8 mm straight endmill
- possibly a small stub ball end too
My suggestion however would be to start by taking a survey of the endmills which are available (might be able to find a local reseller) and check which shaft sizes are prevalent, then source precision collets in those dimensions, then begin buying endmills.
(you should also buy a nice pair of wrenches, low profile 13mm and 22mm stubby)
1 Like
For some more variety, there were a couple of other threads recently;
And there’s always the option of buying Trend or Yonico on Amazon too
1 Like
I’ve gone through and reviewed those threads and updated the list and alphabetized it.
Any further additions would of course be welcome.
1 Like
Great,
One thing I will say, the finish on Aluminium from the APT-Tools single flute aluminium cutters is very good, especially for the price, at which you can afford to make some mistakes 
1 Like
Perhaps I was being a bit optimistic: I was rather hoping a search for #201 would get results, but no. There are no listings in any of those sites for Carbide 3D end mills, so I guess a more detailed understanding of coating types and material, etc. before I look, would be in order!
And prices vary quite a bit, too!
Yep, prices vary a lot, so does the quality of the cutter. For some things a good cutter is important, for others you can get away with something cheaper and rougher.
Robotshop has many of the shiny things from Carbide;
https://www.robotshop.com/uk/catalogsearch/result/?q=carbide3d&order=relevance&dir=desc
Thanks, @LiamN. Not a lot in stock, though but that’s across the board: No one has Carbide 3D stuff in stock.
What are you looking to make?
What sorts of materials and cuts?