Hi Guys,
I own several cncs but just decided to purchase a Shapeoko Pro because I had an original one years ago and it was one of my best experiences, just too small a cut size so I sold it.
I currently have some new projects requiring me to cut minimum 5 feet lengths (2’x5’ to be exact). So I am designing a unique sliding table to attach to my spoil board and wonder if any of you have done the same. Next challenge will be to create the toolpath with registration markers to continue the cut seemlessly. I know this is being done successfully with the x-carve pro. Any advice you guys may have is appreciated. I’ll share my results once I begin testing my table.
Hi Michael,
Welcome (back!) to the community. Cutting arbitrarily long pieces of stock can be done easily using the “tiling” method, you shouldn’t need any specific spoilboard/mechanism, just use registration holes as part of the CAM. That said I’m curious about your sliding table concept now.
1 Like
I’m interested as well. Later this summer, I will be carving a geometric pattern into two large doors (each 80"x24"). There is very little room for misalignment in the tiling. I’ve been concerned about the amount of potential material waste I’m going to experience in trying to get this perfect (from throwing out the chaff). I’d be very interested in Tiling solutions or this sliding jig, which might take some variability out of the process.
- Gary
Whatever the solution it all boils down to the tolerance of the repositioning when sliding the stock between carves.
For me the registration holes & dowels method has always worked great, but it does mean that there must be a spare area somewhere in the stock to mill those holes, so it won’t work when e.g. you want to tile a piece that is already at its final dimensions (say, one of Gary’s doors).
When I cut that ikea table I had no way to use registration holes,
So I aligned the table left edge to the machine’s Y axis and then used a few gator clamps butted again the left side of the table (barely visible on that pic, not the green clamps), which allowed me to slide the piece while maintaining a known translation axis. Then it’s a matter of a few pencil marks on the table to realign the slided piece exactly XX inches further along Y.
I guess I’m saying that a sliding wasteboard mechanism would need to have sub-mm tolerance in its movement to ensure perfect tiling, so that’s a nice challenge ![]()
2 Likes
Thanks for the comments guys. I’m currently new to Vcarve Pro and have been using it for 2 months now, so still a lot to learn plus my fabrication methods are a bit unorthodox, so I’m experimenting different ways to achieve some"standard method" results in a new way. Chiseled letters for example.
I’m also going to jump into Carbide Create Pro and give it a go.
For Julien: I’m planning to share my progress photos here. Are we allowed to share our website links as well? I think people here might find the work I do for some Orlando theme parks really interesting.
1 Like
Sure, the forum rule is that as long as you don’t post anything blatantly commercial it’s fine. We sure love to see examples of pro work done on Shapeoko and Nomads.
1 Like
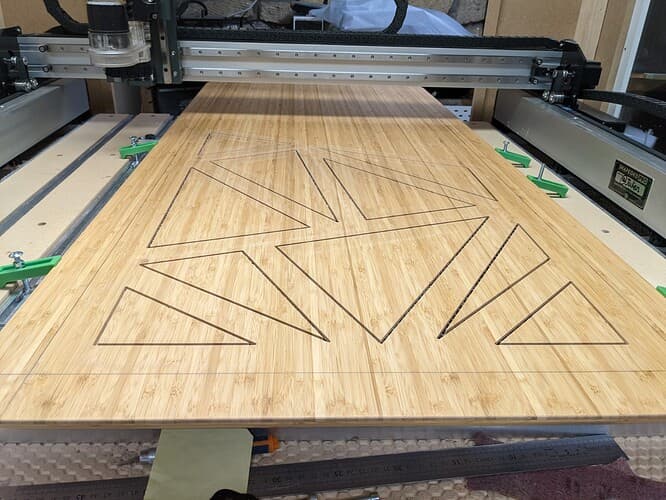
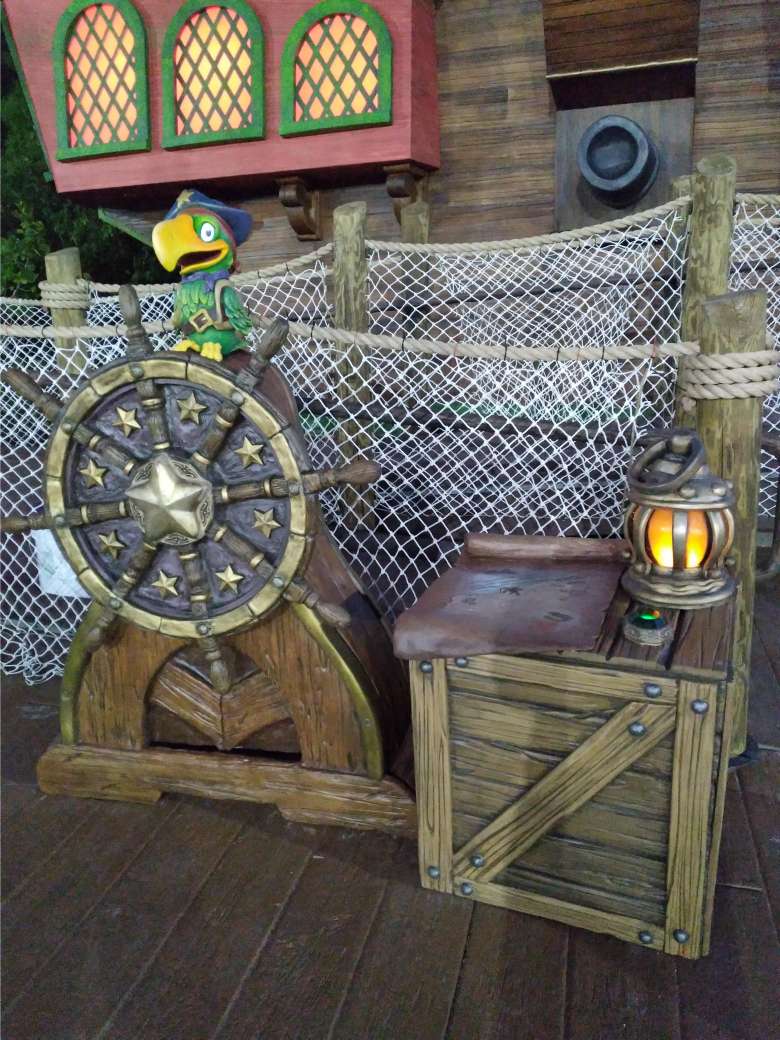
Thank you Julien. I will certainly be sharing our new production work created on the Shapeoko Pro soon. Below is one image of my work and the kind of props we’ve created using cnc’s. I’m excited to begin putting our new machine through it’s paces. -Michael
3 Likes
If you were going to be doing enough tiled jobs to warrant the work of a sliding wasteboard assembly, there’s a jig I put together for one workpiece where I didn’t want to try to peg it and I didn’t have nice straight sides for alignment.
How about just getting a big sheet of MDF and using it as a pegged, tiling wasteboard.
- Cut the MDF to the width of the Shaepoko wasteboard, length some multiple of the length of the Shapeoko
- Bore a set of 4 corner alignment peg holes in the Shapeoko wasteboard
- Place the new tiling wasteboard on the Shapeoko, edge level with the front, then run the same peg hole boring job (having reset z zero)
- You can now peg the tiling wasteboard in this position, position 1
- Slide the tiling wasteboard forward until the rear holes line up with the front peg holes in the Shapekoo wasteboard, peg it in place and bore two new rear holes
- You can now peg the tiling board in place, with 4 pegs in two positions a known Y distance apart
- Repeat until you run out of board
This would allow you to set up a longer piece by clamping, taping, screwing or otherwise fixturing it to your tiling wasteboard and not have to bother with the alignment peg holes in the workpiece each time.
2 Likes
This topic was automatically closed 30 days after the last reply. New replies are no longer allowed.