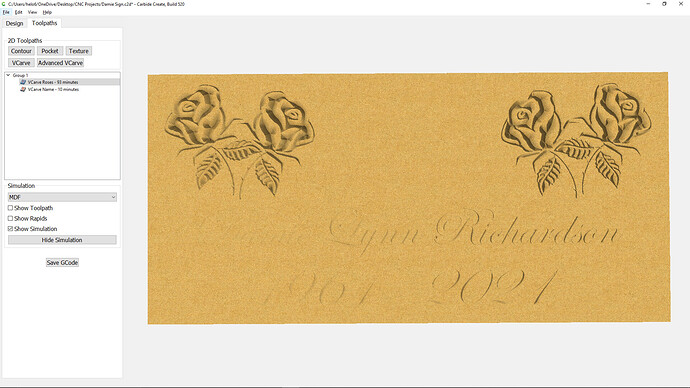
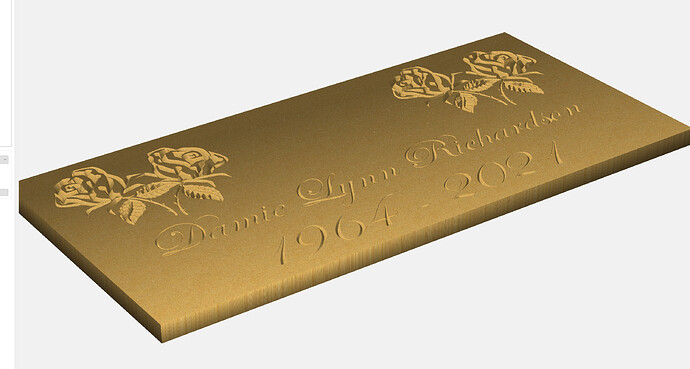
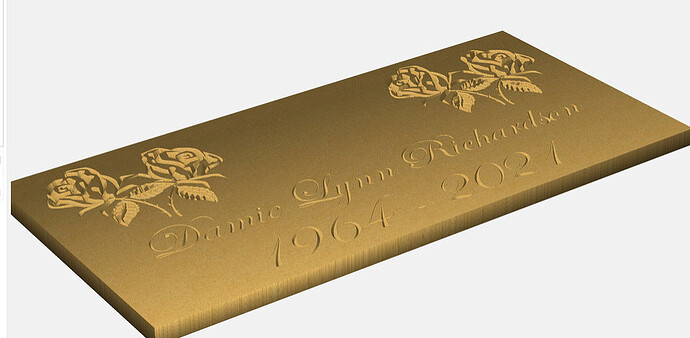
Created a sign in Carbide Create, Simulation shows some fading in the project (See Attached). Tool path shows that it is cutting the images, but when I tried cutting the sign it was actually doing what the simulation was showing. Suggestions.
What bit are you using? Try changing the v bit
60 degree for the roses and 90 degree for the lettering. Tried different ones and the simulation shows the same.
I can attach the file if that will help.
Might have something to do with the depth of cut. I have had the same thing happen in the past. Sometimes it was the bit and depth of the cut. Another time I did a test cut and it came out just fine.
Please do attach the file or send it to us at support@carbide3d.com
Here is the file, thanks
Damie Sign.c2d (2.3 MB)
Just got the machine and my first project.
Rotating the view around changes the “lighting” making different features show up better/worse. It looks like it should carve OK.
Exactly, it shows it should cut but it doesn’t. It’s like everything on the right side is correct but the left side is not. When trying to cut the left side of project the bit will most of the time not even touch the wood.
I knew there was going to be a learning curve on this, but I thought that with the lettering being right out of the Carbide program and pretty straight forward for setting it up it should work. Now the roses I pulled off the internet but they were already svg files so they should have worked as well. I do appreciate the support.
Okay so it looks good in preview but isn’t cutting. Normally when that happens it’s because the workpiece isn’t flat. Or the work piece is warped some. If it’s not the board itself that isn’t flat. Then it’s your waste board needs to be faced.
OK, thanks, The stock is flat and the machine is brand new out of the box, so I’m sure it can’t be the waste board.
I made an NC file of the text only to be able to clearly see the expected depth. The depth appears uniform in NC Viewer, as uniform as the different line weights permit.
The lettering is very shallow so the carving will be extremely sensitive to the flatness of the waste board and workpiece. Have you surfaced your waste board? Is the material dead flat? Can you run a surfacing pass on the workpiece to ensure the best results for V carving? With the 90 degree bit the deep parts of the lettering on the left side are only 0.080" deep.
A new machine will have a nice smooth base board but flatness and uniform thickness are not expected from a new piece of MDF. Start with the ritual first project of making a spoil board and then surfacing it so you have a known good reference plane to mount your workpieces.
A 90 degree bit for fine lettering is going to result in a very shallow cut. For text this delicate I would use the shallowest angle v bit you have, a 30 degree bit would be my choice.
same text with a 30 degree bit.
OK, thanks for the input, a Carbide Rep has the file as well, I will see if they come up with the same thing. I don’t have a surfacing bit yet but looks like a new purchase coming my way.
The biggest thing is that it is cutting exactly what the simulation depicts, having trouble getting past that.
There are several things that can cause this problem:
Stock not flat
Waste board not flat
Waste board not square to the x, y rails
Slipping z axis drive pully
I have has this happen and i always go back to the basics to find the root cause
Tom
Attached is a doc about spoil board considerations. Included is a section on flattening the spoil board.
spoilboard_considerations.pdf (1.3 MB)
Hello, BBvr! I think that has been disproved, no? The simulation shows this:
which looks perfectly fine. The simulation is… erm… simulating… light hitting the grooves. From certain angles, the grooves will have more light in them and look shallower. But just look shallower.
It is just coincidence that your workpiece looks like the simulation when the simulation is in a particular orientation.
VCarving is highly susceptible to variances in stock height. The machine needs to be actually flat, not apparently flat.
If you still have that exact stock on your table, then try zeroing your Z axis to a point on the left hand side - a point you said it barely touched when carving - then raising the Z-axis by 0.025mm. Then, turn the machine off and move - very slowly - the X axis to the right manually. If the board is flat, the bit will not touch the board as it moves across.
I agree. Cutting with V Bit is very tricky. I think making sure the work piece is level left to right should give you better results. Sounds like your work piece is higher on the right than on the left. Just a few mm makes a difference when doing a V cut. Especially when doing narrow text where the required depth to cut is very small. What I’ve done is when setting the Zero axis just set the zero a few mm below the top of the work piece. That will correct for any leveling of the work piece. Of course that will make the cut a little deeper on the right side that the left side if your work piece is not level. But for my design it doesn’t make a noticable difference.


