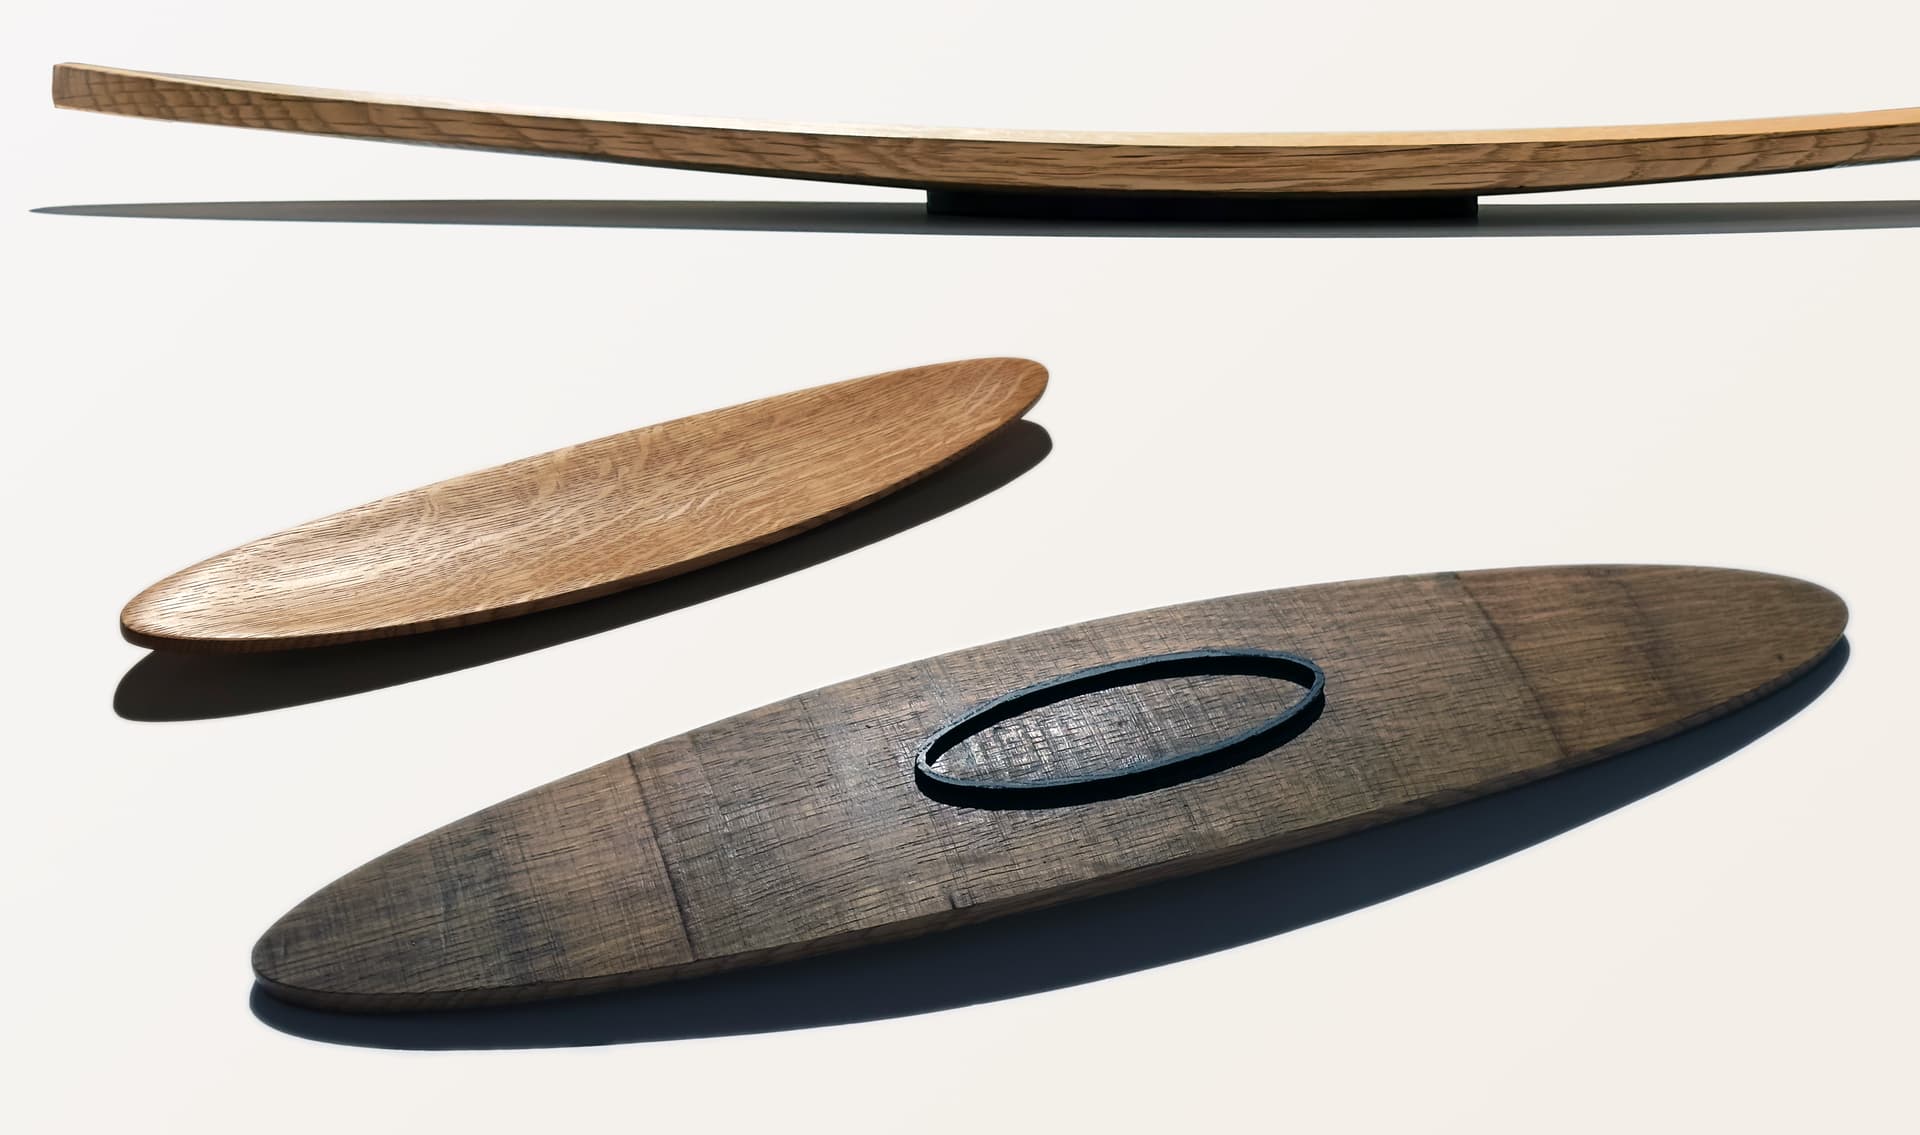
I’m using a Shapeoko 4 with an upgraded 3-phase spindle, 1/8" 2-flute bit, and I am cutting a shape that has straight sides and only 1/8" finished width and 10mm depth in end grain torrefied oak. I am modeling in Carbide Create Pro, and will be driving the machine with Carbide Motion.
Ignore the grain direction shown here, I will be cutting into end grain, so the sides of the oval all have long-grain in the Z-axis.
I will be using ramping, and I am aiming for a really precise finished size (thickness of the oval ring) as it will fit into a mortise part-way, with no shoulders to hide any inaccuracies. Any recommendations for feeds and speeds?
Considerations:
This timber is very brittle, but I think I have given myself the best possible outcome by orienting the grain the way I have. I will be using a 2 mm onion skin (orange peel?) to hold the piece still as it nears final depth.
Follow up question to the above – is there any “official” way to make a spring pass or finishing pass (but not in the 3D sense of the word) in Carbide Create? Or do you just duplicate/re-use a cutting path?
I’m thinking here of pocket and outline 2D paths here. I do know about the 3D tool.
Love it!! I frequently lie to the software/machine.
One cool thing about end grain, it soaks up sealer like a sponge. With this brittle material I would consider soaking the crap out of it with sealer before cutting. The sealer will bind the fibers together and should give you a much cleaner cut.
Another thing to consider is CC contour paths always cut conventional rather than climb. If you’re trying to dial in a precise dimension, climb cutting would be better. Here’s how I’d try it…
offset your outside vector 0.130 (your 0.125 cutter plus 0.005 finish stock)
contour inside the new vector to depth
do the same (opposite) with the inside vector
measure the thickness. If shooting for 1/8, it should be 0.135" (0.005 on each side)
adjust for discrepancy, and do the same offsets 0.125, or whatever the adjusted dimension is.
cut the offset vectors again. Full depth in 1 cut.
measure & cut the same path again if a little full.