I cut out a small wooden box using the toolpath parameters shown in the screen shot below. The interior of the box seems to have one more cut path around the edge near the walls, as shown in the second photo below. It results in a small groove on the bottom of the box near the wall that goes all the way around the interior of the box. I must not be understanding correctly how one of the settings works. Have you seen this or do you know something to try so the bottom of the box is all at the same Z level and I do not get the extra cut near the wall?
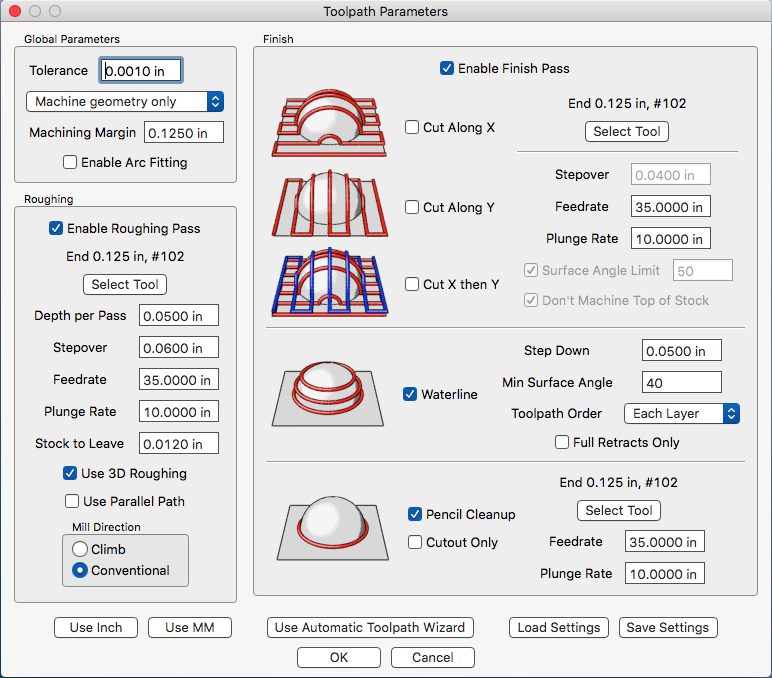
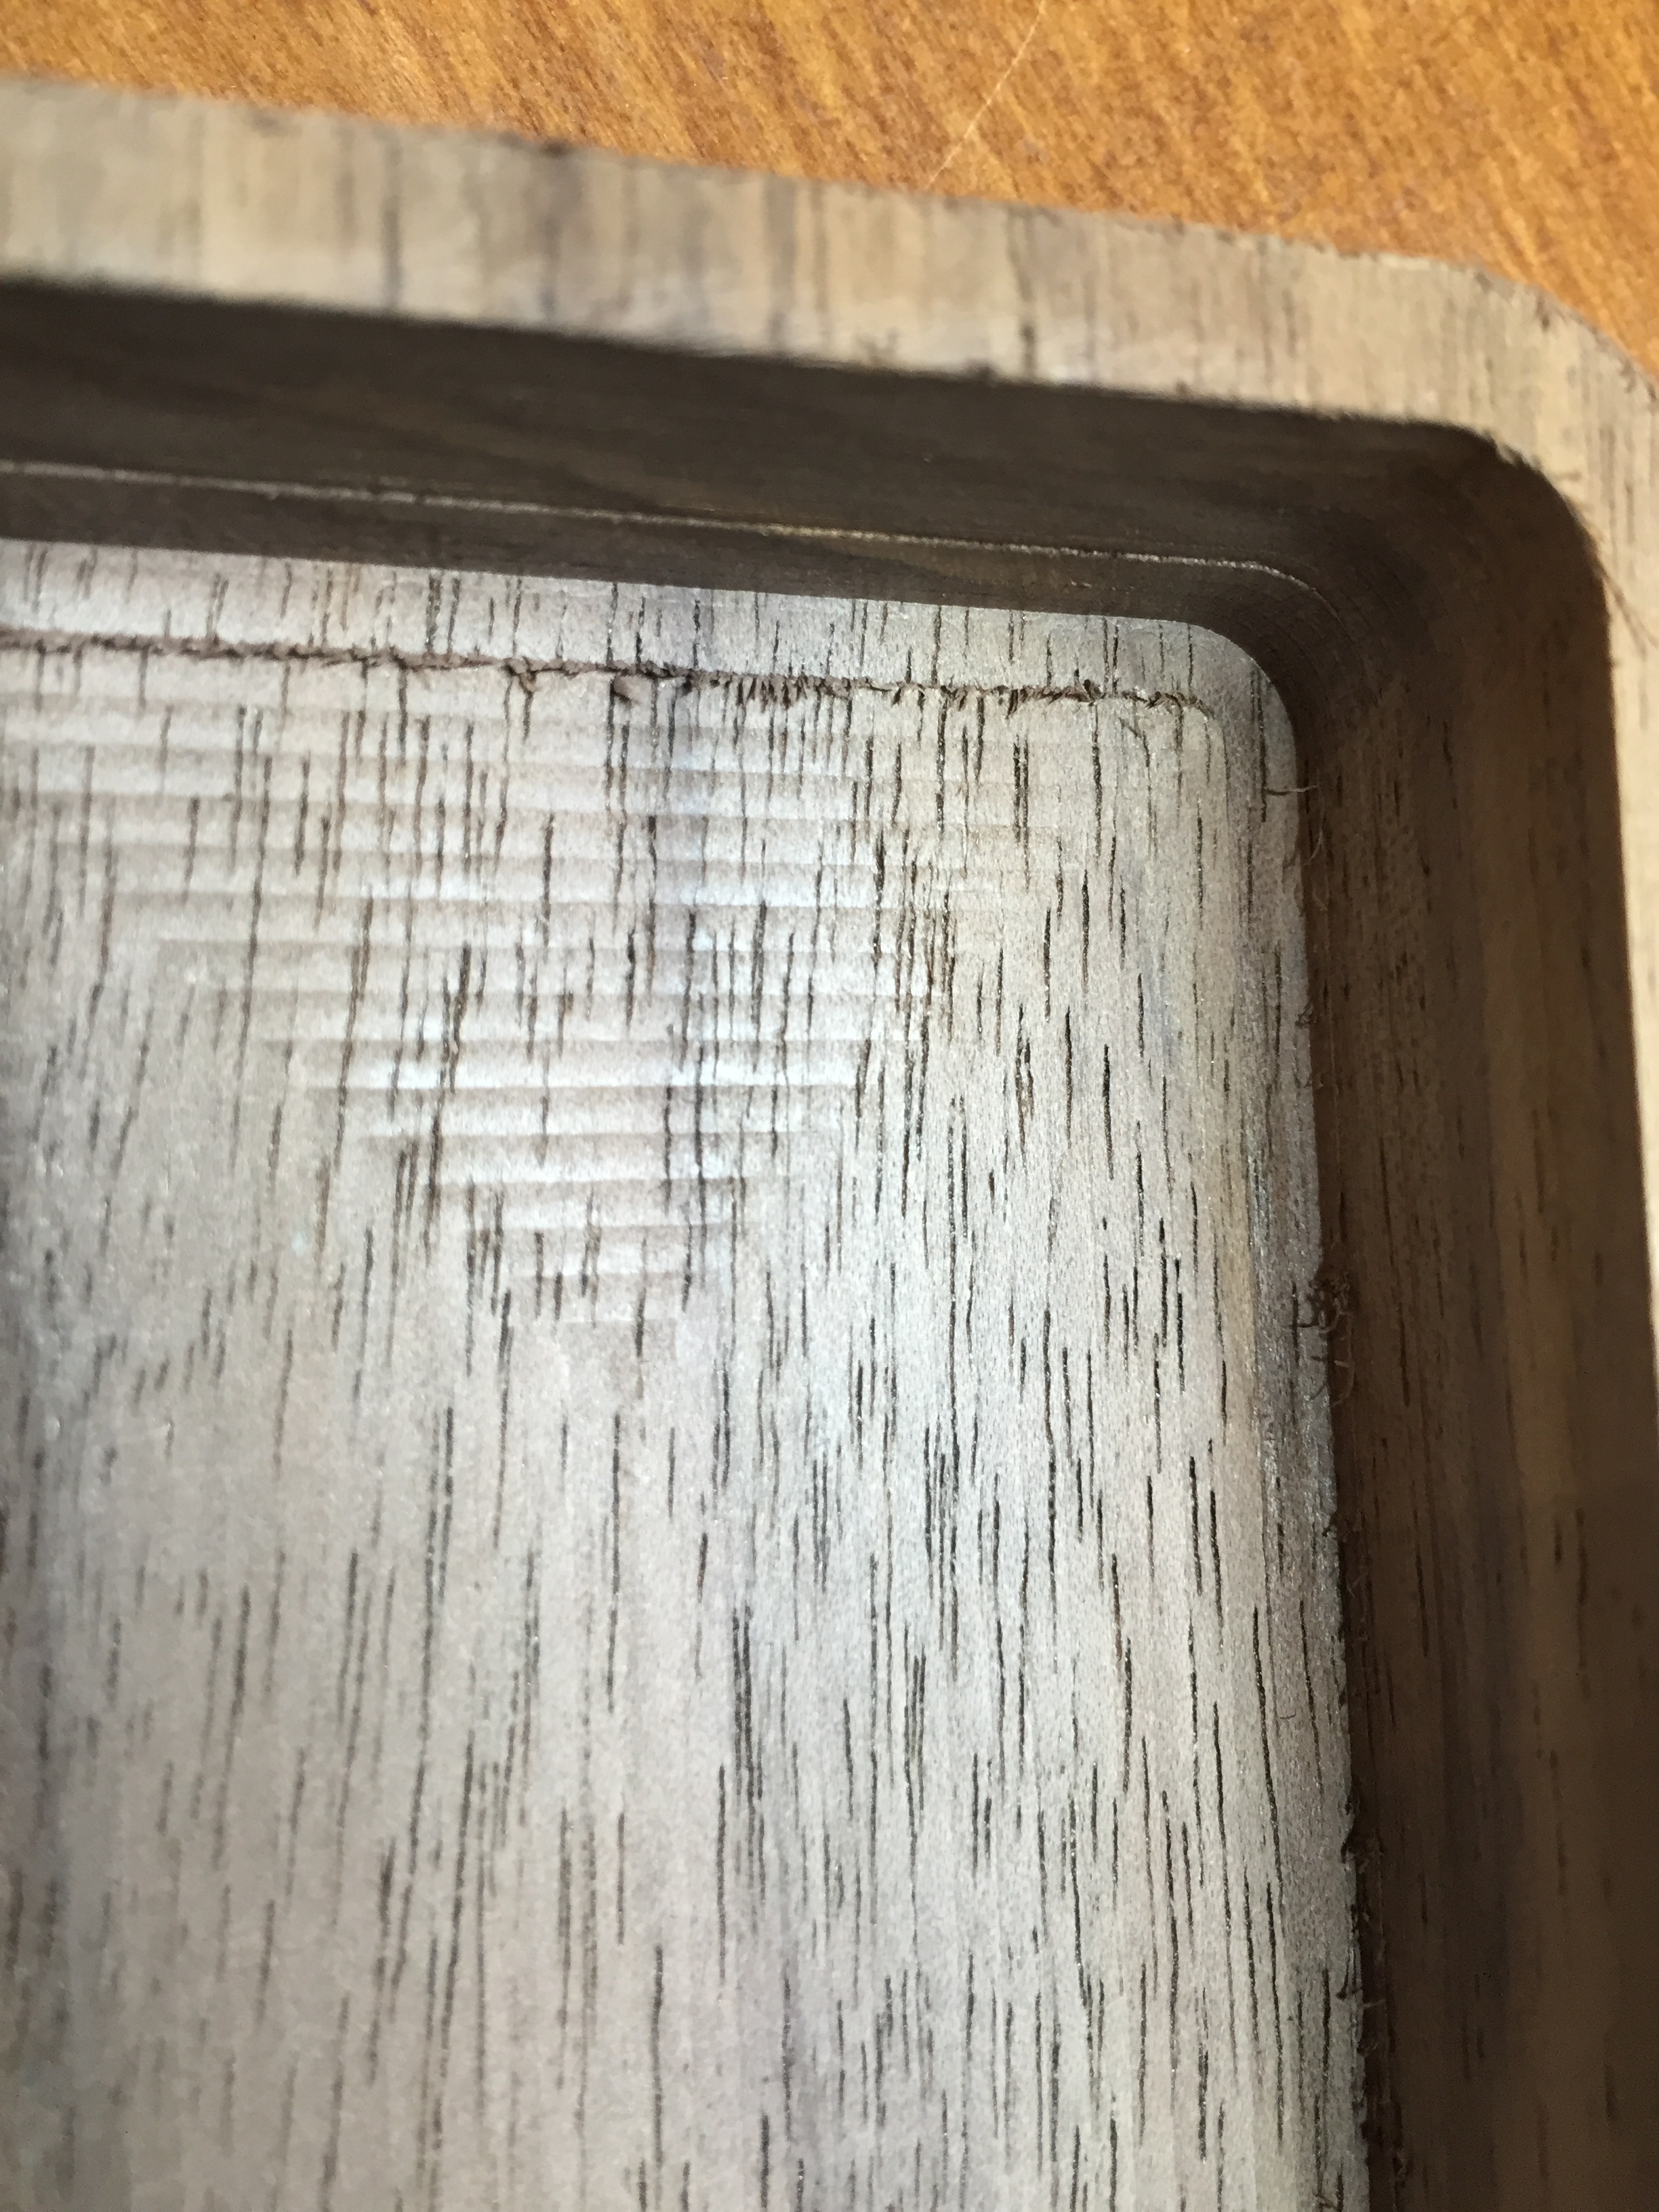
@3dsteve, you are specifying waterline + pencil finishing, which will finish the walls of your pocket down to the design depth, but you are not specifying a parallel finish, which would finish the bulk of the pocket. What you are seeing is the wall of your pocket finished to the design depth (the waterline and pencil finising hug the wall of the pocket), but only the roughing (with stock to leave) on the flat bottom of the pocket. Enable either the X or Y finishing and that will clear out the bulk of the pocket floor to the design depth.
Randy
One minor point to the excellent answer @Randy gave. When performing a parallel finish in wood, try as hard as possible to go in the direction of the wood grain.
mark
Yes agree with Randy too, I also see a slight lip on the back side face of the pocket, it’s not completely clear but it doesn’t look to be on the other side. This could be the x-axis shift bug if you machine is unluckily from that batch that had resistors with more than 0ohms on R1-R6. However Randy is on the money with the answer re the big groove in the bottom because I had the exact same thing happen to me and I fixed in this way.
Someone please correct me if I’m wrong or if this would have some detrimental side effects, but I would amend the step down value in the waterline settings to a factor of the depth of the pocket.
Eg if the depth was 0.52 in, then a step down of 0.04 in would work with 13 passes.
This would make the final pass of the waterline the same depth as the pencil clean up pass. The benefit would be that any tooling marks that remain look a little nicer than a series of parallel lines. Just my opinion.
You’ve got the correct understanding. The purpose of a pencil finish to erase any waterline (or other) tool marks. Waterline down, then pencil finish.
With fancy CAM programs I rough - it’s something like waterfall - an outside edge with a 0.001" remainder (0.001") is left covering the ideal surface), then pencil finish at the ideal surface - no tool marks left!
A similar thing can be done with MeshCAM.
mark
@Owen wrote
Eg if the depth was 0.52 in, then a step down of 0.04 in would work with 13 passes.
That is logical and a good concept, but with MeshCAM you can’t count on it happening. MeshCAM will almost always not take the last waterline depth pass. That is why you need to also specify the pencil finishing, which by definition follows the bottom of the pocket or outline. But when you do as you proposed, the pencil is in effect the last waterline stepdown so all is good in any case.
Randy
What is the X-axis shift bug?
This mega thread explains it quite well.