After much success with wood I started cutting aluminum with my SO3XXL. I have been using speeds and feeds recommended by Wiston Moy on his recent youtube video along with 1/4" and 1/8" ZrN coated endmills, a 1/4" ball end mill (also coated), and chamfer endmill.
I cut the part from a piece of 1/2" alu bar to minimize waste (see pics). All toolpath desing was done in F360. The initial adaptive clearing path started doing a helix ramp to dig a hole in the stock but then, don’t know why, it went out of the hole and started to attack full frontal the stock from the side at about 3mm DOC, which the SO3 didn’t like. It sounded horrible and (cursing) I quickly stopped the machine. Fortunately the endmill wasn’t damaged but one the Z-axis v-wheels came a bit loose so had to tighten up things. Afterwards I modified the toolpath and it did a good job, I reduced the feedrate a bit in CM4 just to be safe. I then proceeded to finish the sloped walls with a 1/4 ball endmill, pocket cleared the holes with a 1/8" endmill, contour cut the part with a 1/4" flat endmill and finally chamfered.
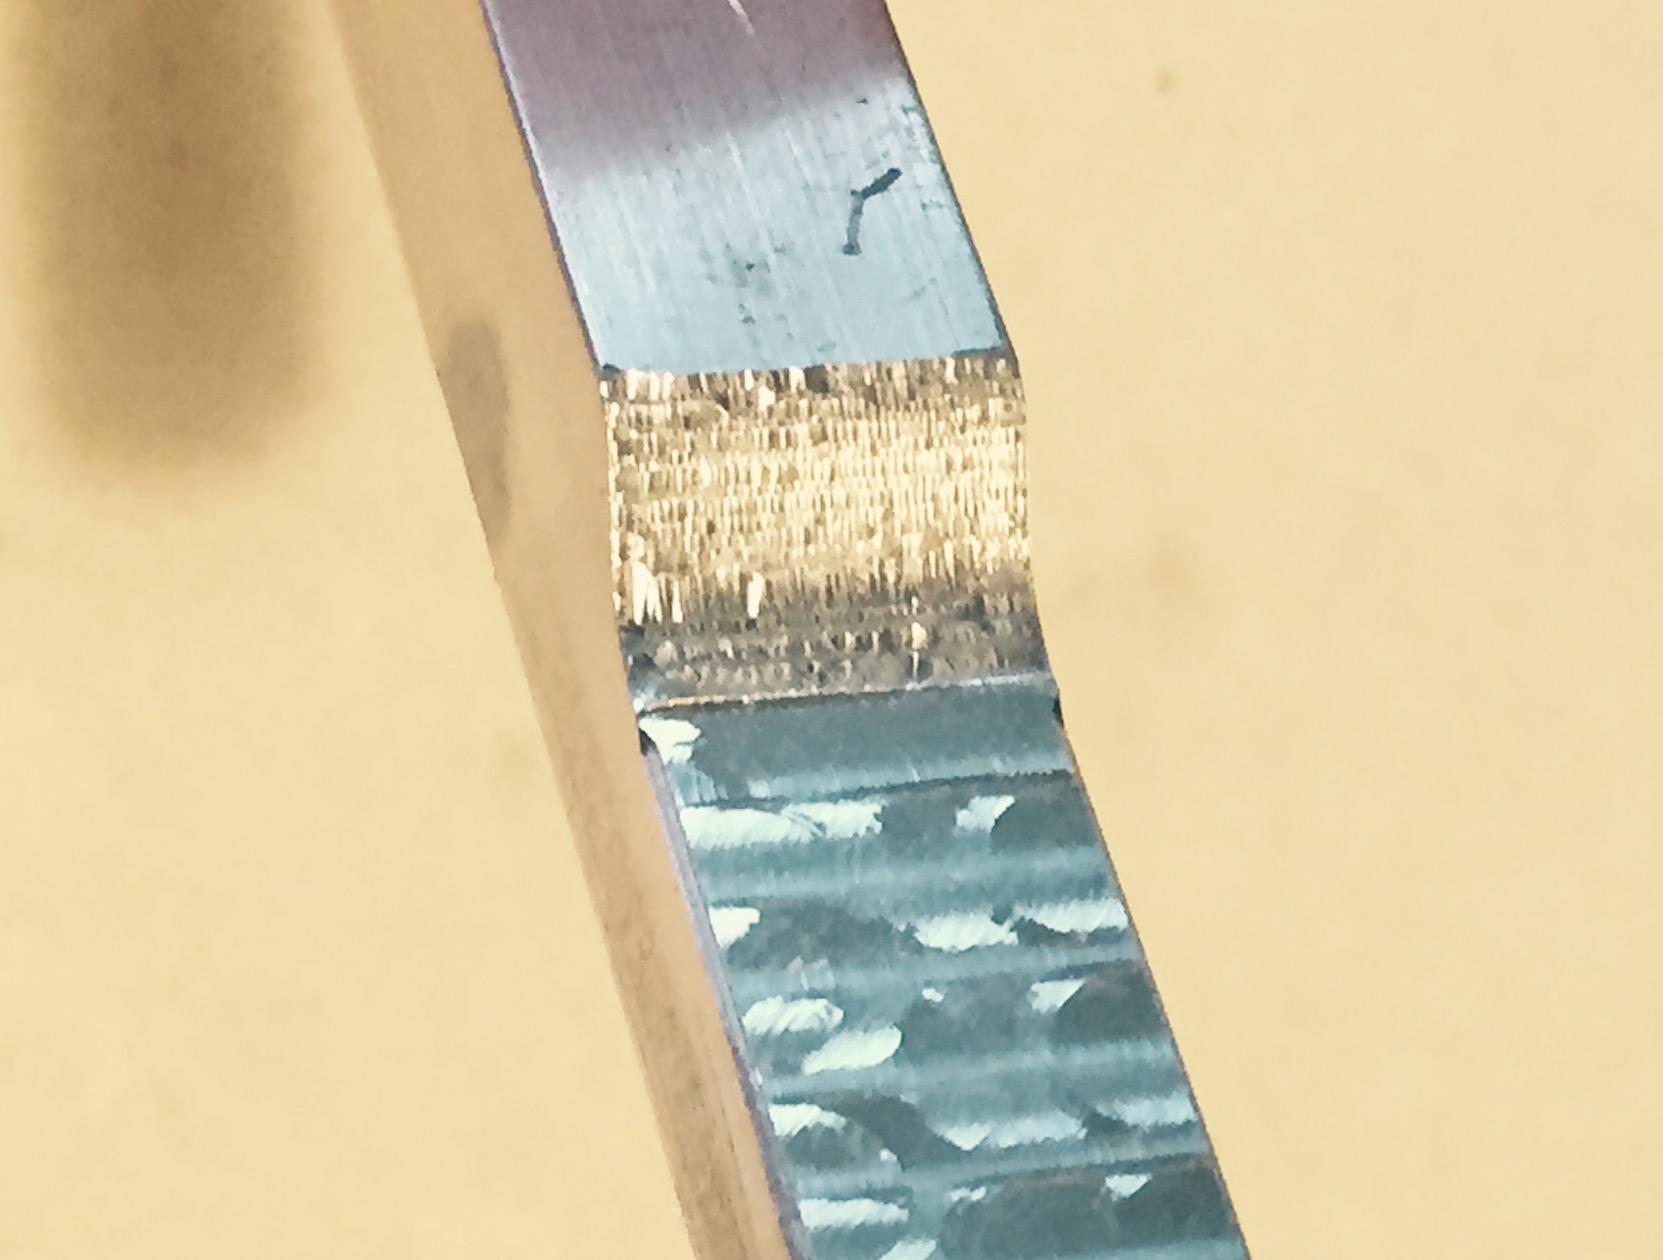
Now, I am really happy with the side and top finish but the sloped edge finish came out horrible and the cut sounded noisy. I don’t know what went wrong, I used 30 IPM feed rate (which I slowed down maybe 20% when the machine didnt sound right). Maybe the maximum stepdown of 0.3 mm was too large or I forgot to use a ramp?
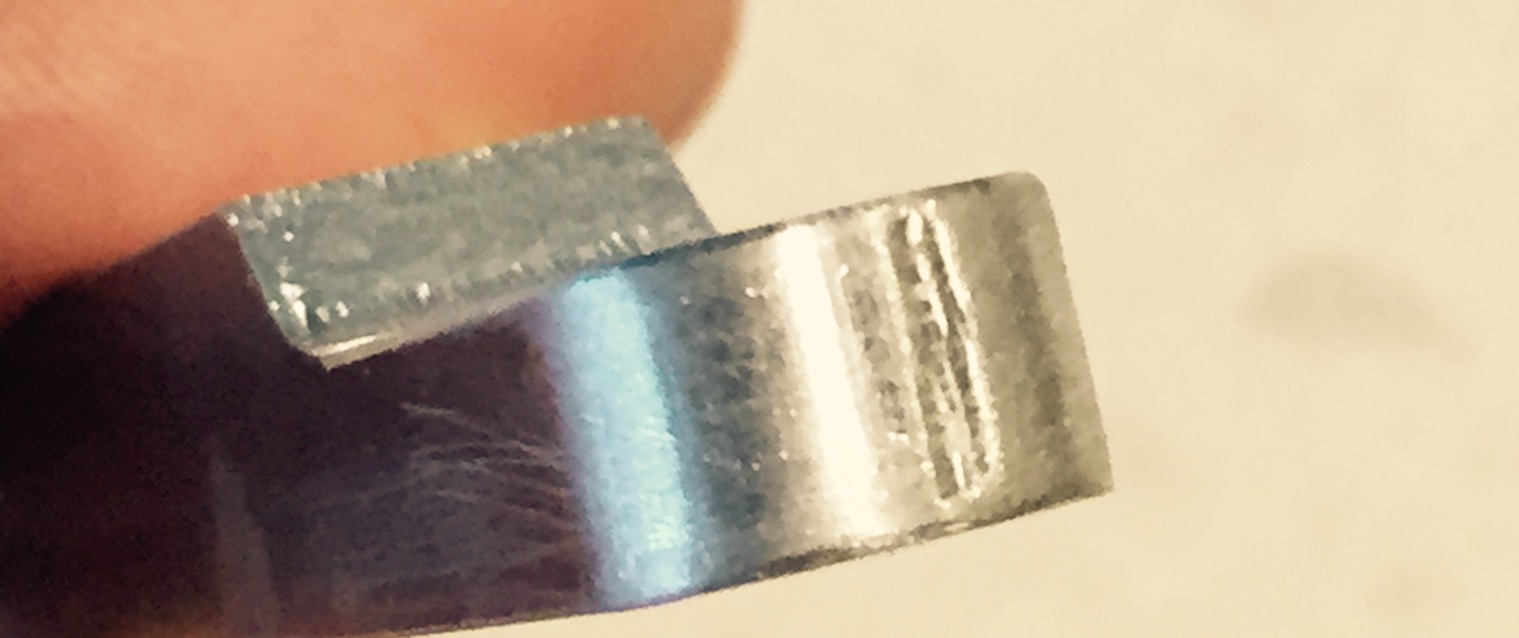
Anyhow the second thing I didn’t like was that I had to use tabs to hold the part down during (which I wont next time because I hate to file them off) but the issue is that when the endmill is raised to make the tab it moves slighly in the Y axis thereby carving a tiny slot of the edge of the part (see pics). Can you comment on my is that? It also did the same on the other side of the part.
I’m also happy that the cut was fairly accurate, for instance the distance between the center holes is within design specs to 0.05mm.
So I feel I have learned a lot for being my first cut but your feedback regarding the questions above would be appreciated.
Thanks in advance!
Tony
I’d advise simulating the toolpath in F360 before going into cutting, this may spare you a few broken bits.
I don’t have a SO, but from I see and what you said ie. noisy like hell, you must be experiencing chatter, hence the ugly finish on the curved side.
I’m not sure if you meant stepdown or stepover, but a 0,3mm stepdown is very shallow, you must feed high to avoid the heat stacking up in the bit with such settings.
But if you are having chatter the problem is somewhere else, usually the tool is sticking out more than necessary or the bit is already gummed a bit and having trouble evacuating the chips, generating deflection.
I’d recommend a bigger stepdown, 30% of the endmill diameter at least and adjust your feedrate based on that.
Also since aluminum is prone to gum up the bit easily, you might want to try applying some lubricant while cutting, dry cutting works but is less forgiving, some are using wd-40 with success, it will dampen a bit but I’d recommend a real lubricant for better results.
Ok thanks for the feedback RaXor. I do simulates paths in F360 but it’s hard recognize a move that is bad on SO3 until you try it on an unforgiving material such as aluminum. Now I can tell!
What puzzles me about the finishing move on the sloped wall is that the parameters used were the same as the finishing with the flad end mill on the flat section, which looks just fine. I set 0.3 mm stock to leave and used a 3D contour operation with maximum stepdown of 0.3 mm since this was a finishing pass. This being my first finishing operation I need to really learn how to do this right.
Actually looks really good for a first try. What you’re seeing is the result of chatter and feed rates that are too high. For the plunge at the tabs: what’s basically happening is that the end mill is bending as it cuts, then it gets unloaded as it retracts over the tab, then loads back up - this causes these marks. Slow the feed rate AND plunge rate and this will get better.
The thing with a ball mill is that only a very small part of the tool is in contact with the material, and will keep loading and unloading, causing all sorts of chatter (with a longer engagement, there is always a tooth incontact, which a short engagement, you set up an oscillation) It’s simply the wrong tool for the job anyway - you want a v-mill/chamfer mill for that sort of angle, or choose a different geometry (I just plain avoid that sort of geometry if I can - I would have cut that part in two setups - one from the top to get the round ends, then flip it 90 degrees and cut the angles on the “sides”)
@The_real_janderson Thanks what files shall I upload, the .nc ? Meanwhile I got some feedback from Winson Moy and have been changing that ball endmill path but I remember what the original looks like
And I wanted to add that this first result looks ok overall simply because of the knowledge shared by the community. If I was starting from scratch I would have broken a couple of endmills already!
@neilferreri here you go, it’s the 3rd operation (3D contour with the ball endmill) that gave poor finishing results but you are welcome to comment on all of them. I think the stepover was too large in the op with the ball endmill.
I don’t have much experiences making finishing passes aswell yet, but usually you’d want to go slow enough to generate the least amount of vibrations, but fast enough so that your chipload is at least 0.01mm per tooth, below that it is considered as rubbing the material rather than milling it.
When dry milling the noise will be awful even with the right parameters, if noise is a concern then you can lower the feed and speeds, and about a lubricant well I can’t really recommend any at the moment, I’m experimenting too, especially since they usually cost a bit and comes in big amount aswell, wd-40 will dampen the noise at the very least so you can at least try that if you wish, it’ll makes a mess of sticky chips everywhere thought so get ready.
@TNY77 Is your stock 1/2" square bar?
I’d run your parallel as you said with a .2 or .25mm stepover, but I’d also run it the other direction. Let it follow the contour of your part. For your flat faces, I’d use a horizontal operation with a very small stepover and fast feed. It’ll give you a nice finish. The final contour is tough with your stock being the same dimension as your finished part.
Are you milling the holes as well?
@neilferreri Yep stock is a 1/2" square bar. As you say the final contour is tricky but I was able to align the bar almost perfectly with the Y axis to the contour slightly finished the sides of the piece also. I could design the part .1mm smaller that the stock and run a finishing contour.
I will cut another bar (I need 3 for my project) following your recommendations and let you know how it goes. I’m not after the perfect finish either because I will eventually powder-coat these parts and the coating does a great job at covering slight surface imperfections.
Yes I have milled the holes also (see initial pic of the initial milling result at the top of the post) with a 1/8" flat endimill and they came out perfect.
Anyhow, many tahnks for your feedback, much appreciated!
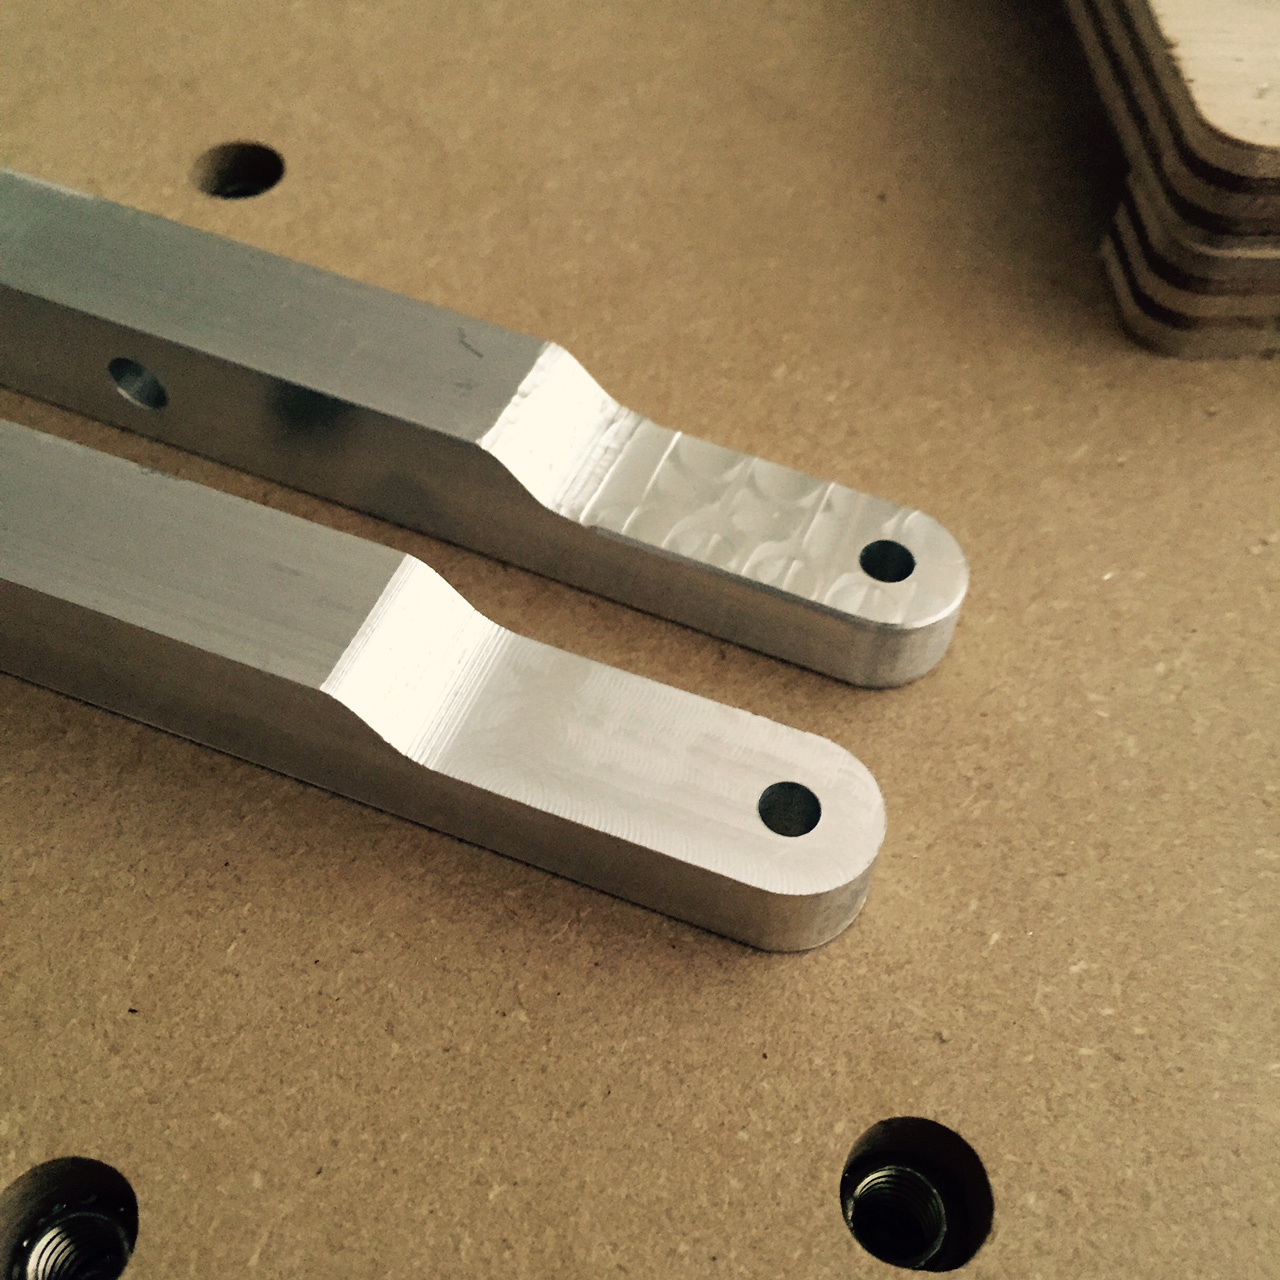
I cut a second part, this time without tabs and using finishing passes with pretty small step over. It came out really nice and I was able to finish the sloped sections with the same 1/4" square endmill using a very small stepover of 0.1mm. Really happy with the result, I love my SO3XXL!!
Thanks for the feedback guys!
(old part on top, new on the bottom)