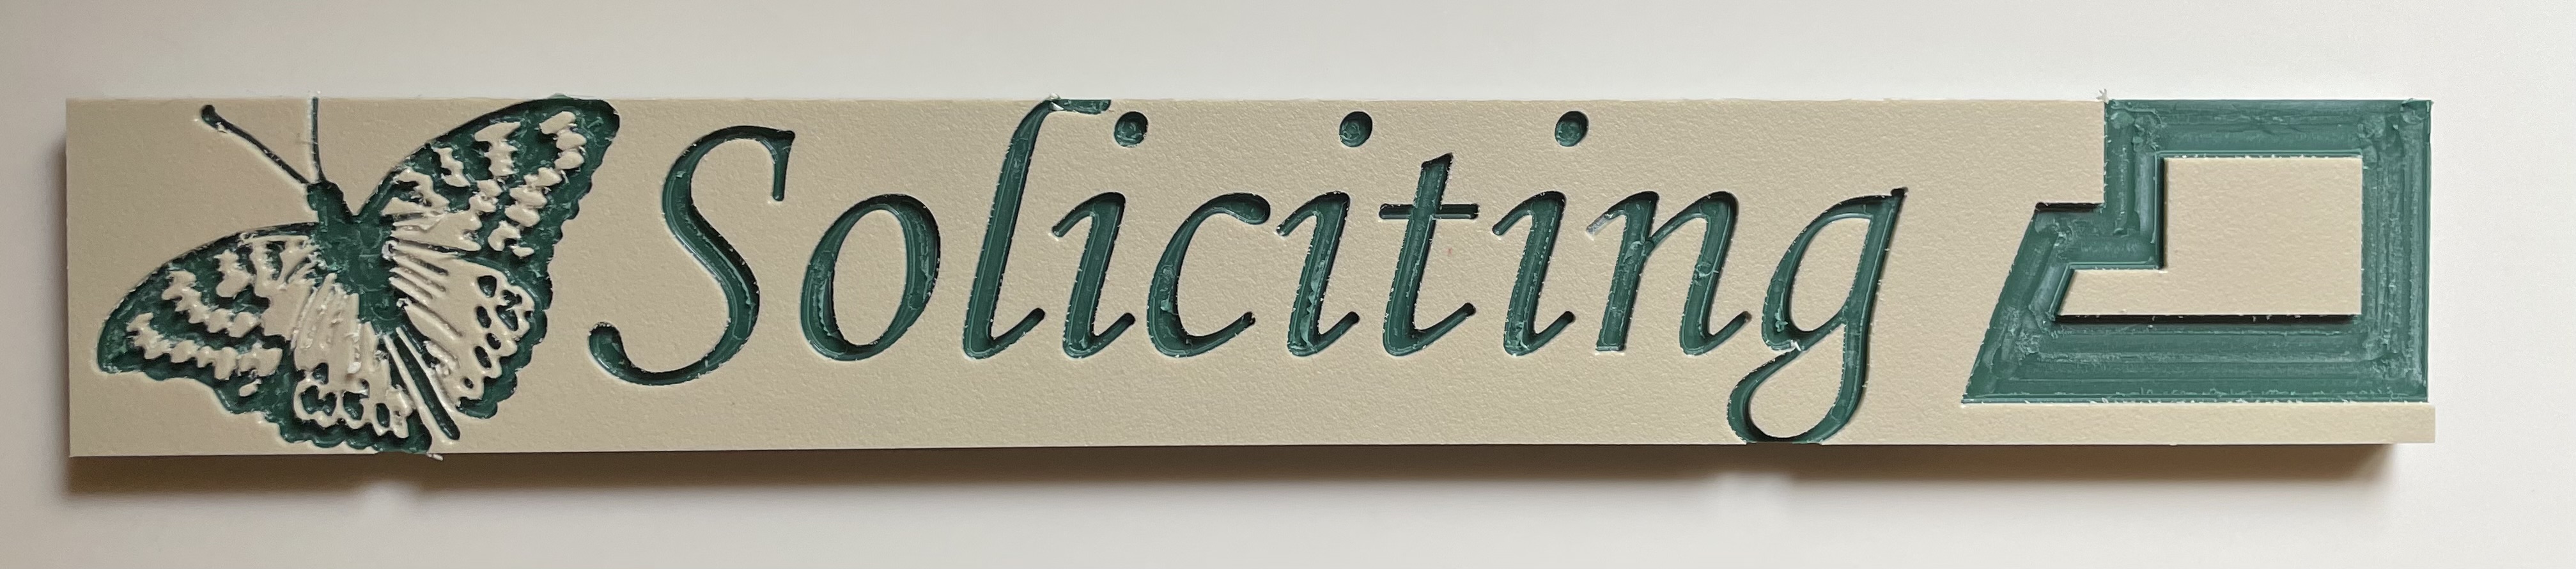
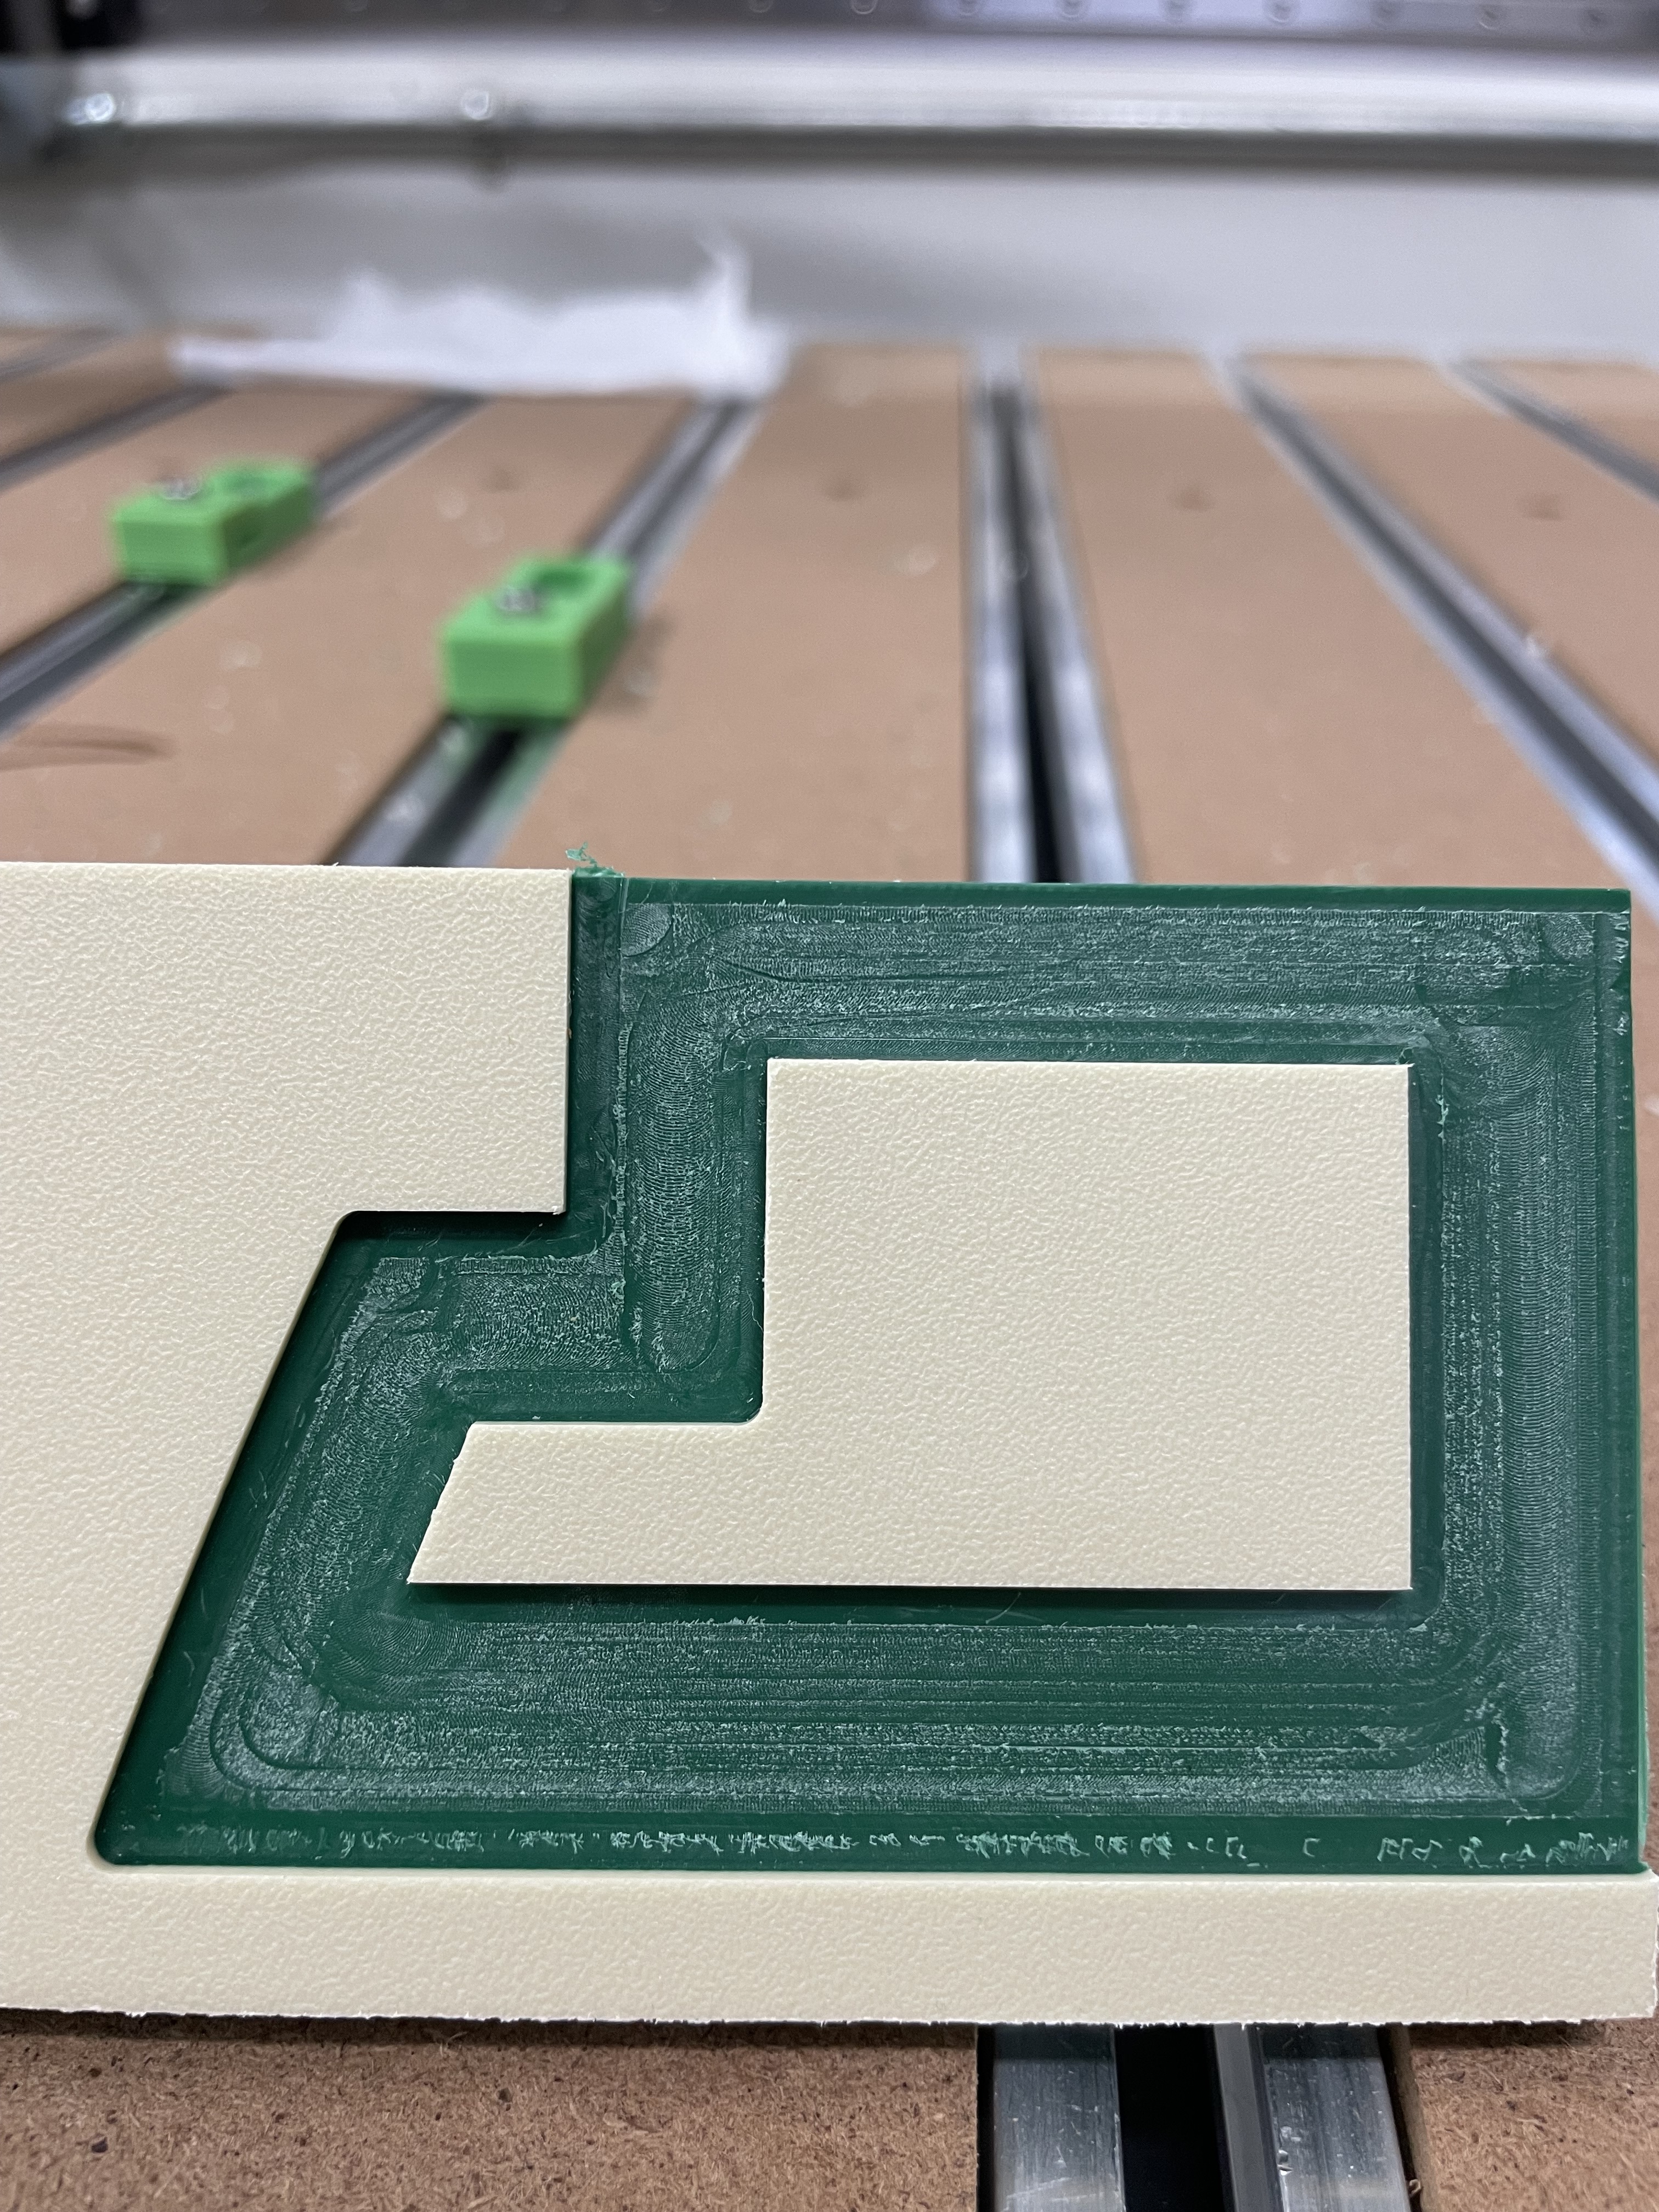
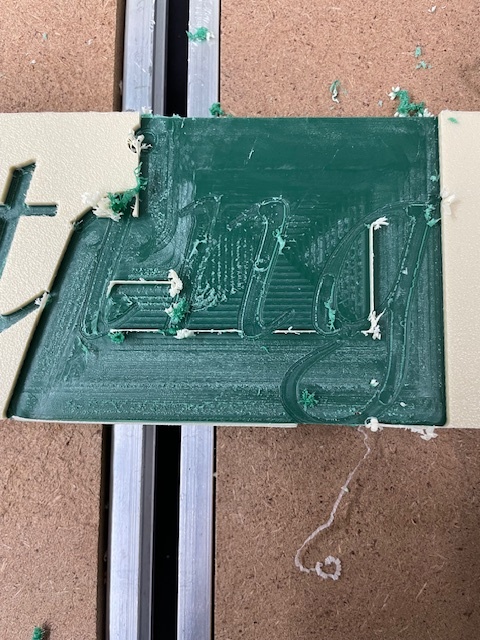
I am trying colorcore for the first time for a neighborhood sign. After cutting the piece I need for the real sign I experimented with the scraps.
I used O flute 1/4, 1/8, 1/16 and a 3 degree V bit. Vcarve allows you to specify multiple clearing bits so I had 3.
Max depth is .1, speed is 12,000 and 120 ipm except for the 1/16.
Even at that I broke the 1/16 bit after a minute and re did the tool path to use a 1/16 tapered ball nose in its place. That worked out ok.
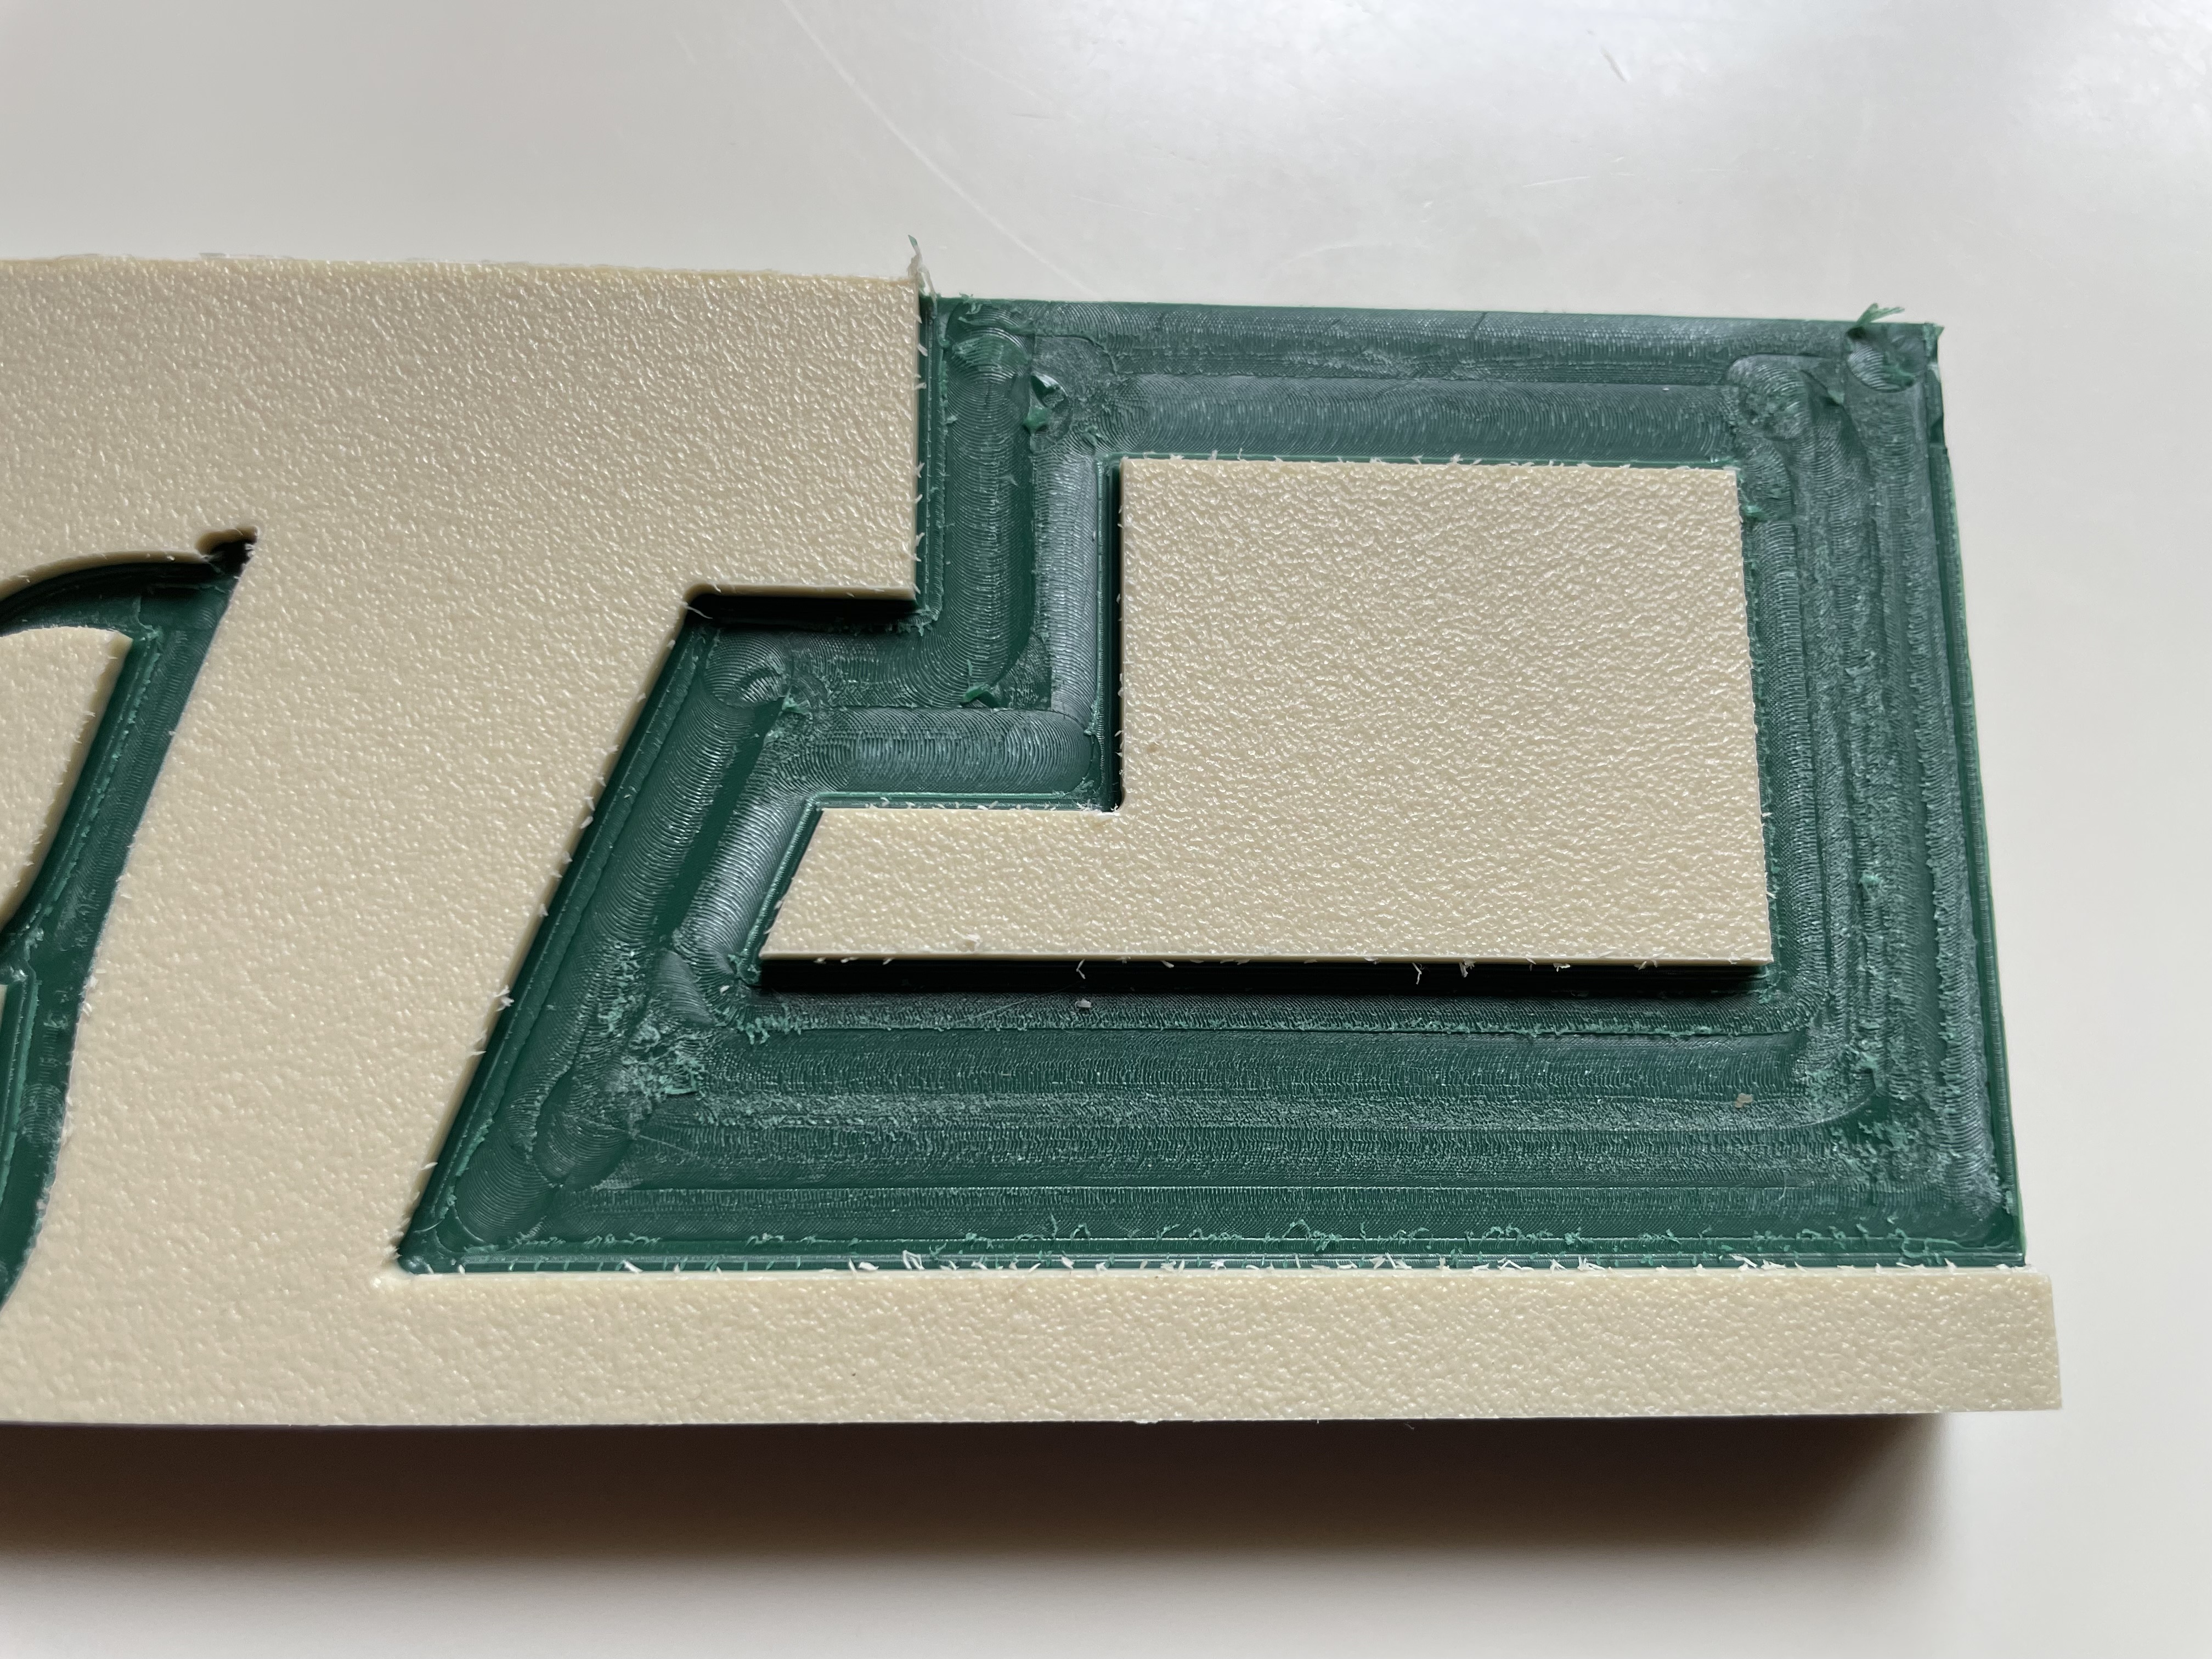
It doesn’t look bad and will be fine from the normal distance but based on my experience with PVC and the O Flute bits I had expected the large pocket area to be smoother.
I am planning another test leaving .03 or something for a final pass and probably decreasing the stepover for that large area.
I will also open up the vectors a bit on the butterfly wings so that the green is exposed more in the diagonals along the thorax (hmm, is that right).
Make sure you are using “Conventional” milling if possible.
I say crank that RPM up. Anything smaller than 1/8" can be run at 18-24k RPM.
You may want to check the tram of your spindle. When the spindle is crooked, you get nasty artifacts on the floors where toolpaths slightly overlap during pocketing.
If time permits, you can run an endmill along the perimeter of your shapes to slice off (most of) the stringy bits on the wall.
If you have the capability, do a roughing then finishing strategy. On plastics I generally do a 0.005"-0.010" finishing pass on the walls and floor.
I would also echo Winston in that the RPM on the smaller diameter bits can be increased. I generally run 200 IPM, 0.125" depth of cut, and 20,000 RPM for single flute, 1/4" endmills. For the 1/8" I would be running 24,000 RPM, 0.063" depth of cut, and more like 120 IPM for feed rate.
I generally run 1/2 of the endmill diameter for the depth of cut in plastic. That way I can feed fast, but not produce a lot of big chips so they can evacuate. for the 1/16" diameter endmill, I would also use a 2 flute to get some extra tool strength as the chip load is well within acceptable limits with that small of a diameter endmill.
But you have a great start. So flip it over and run another test.
I have switched to conventional and updated the F&S as suggested.
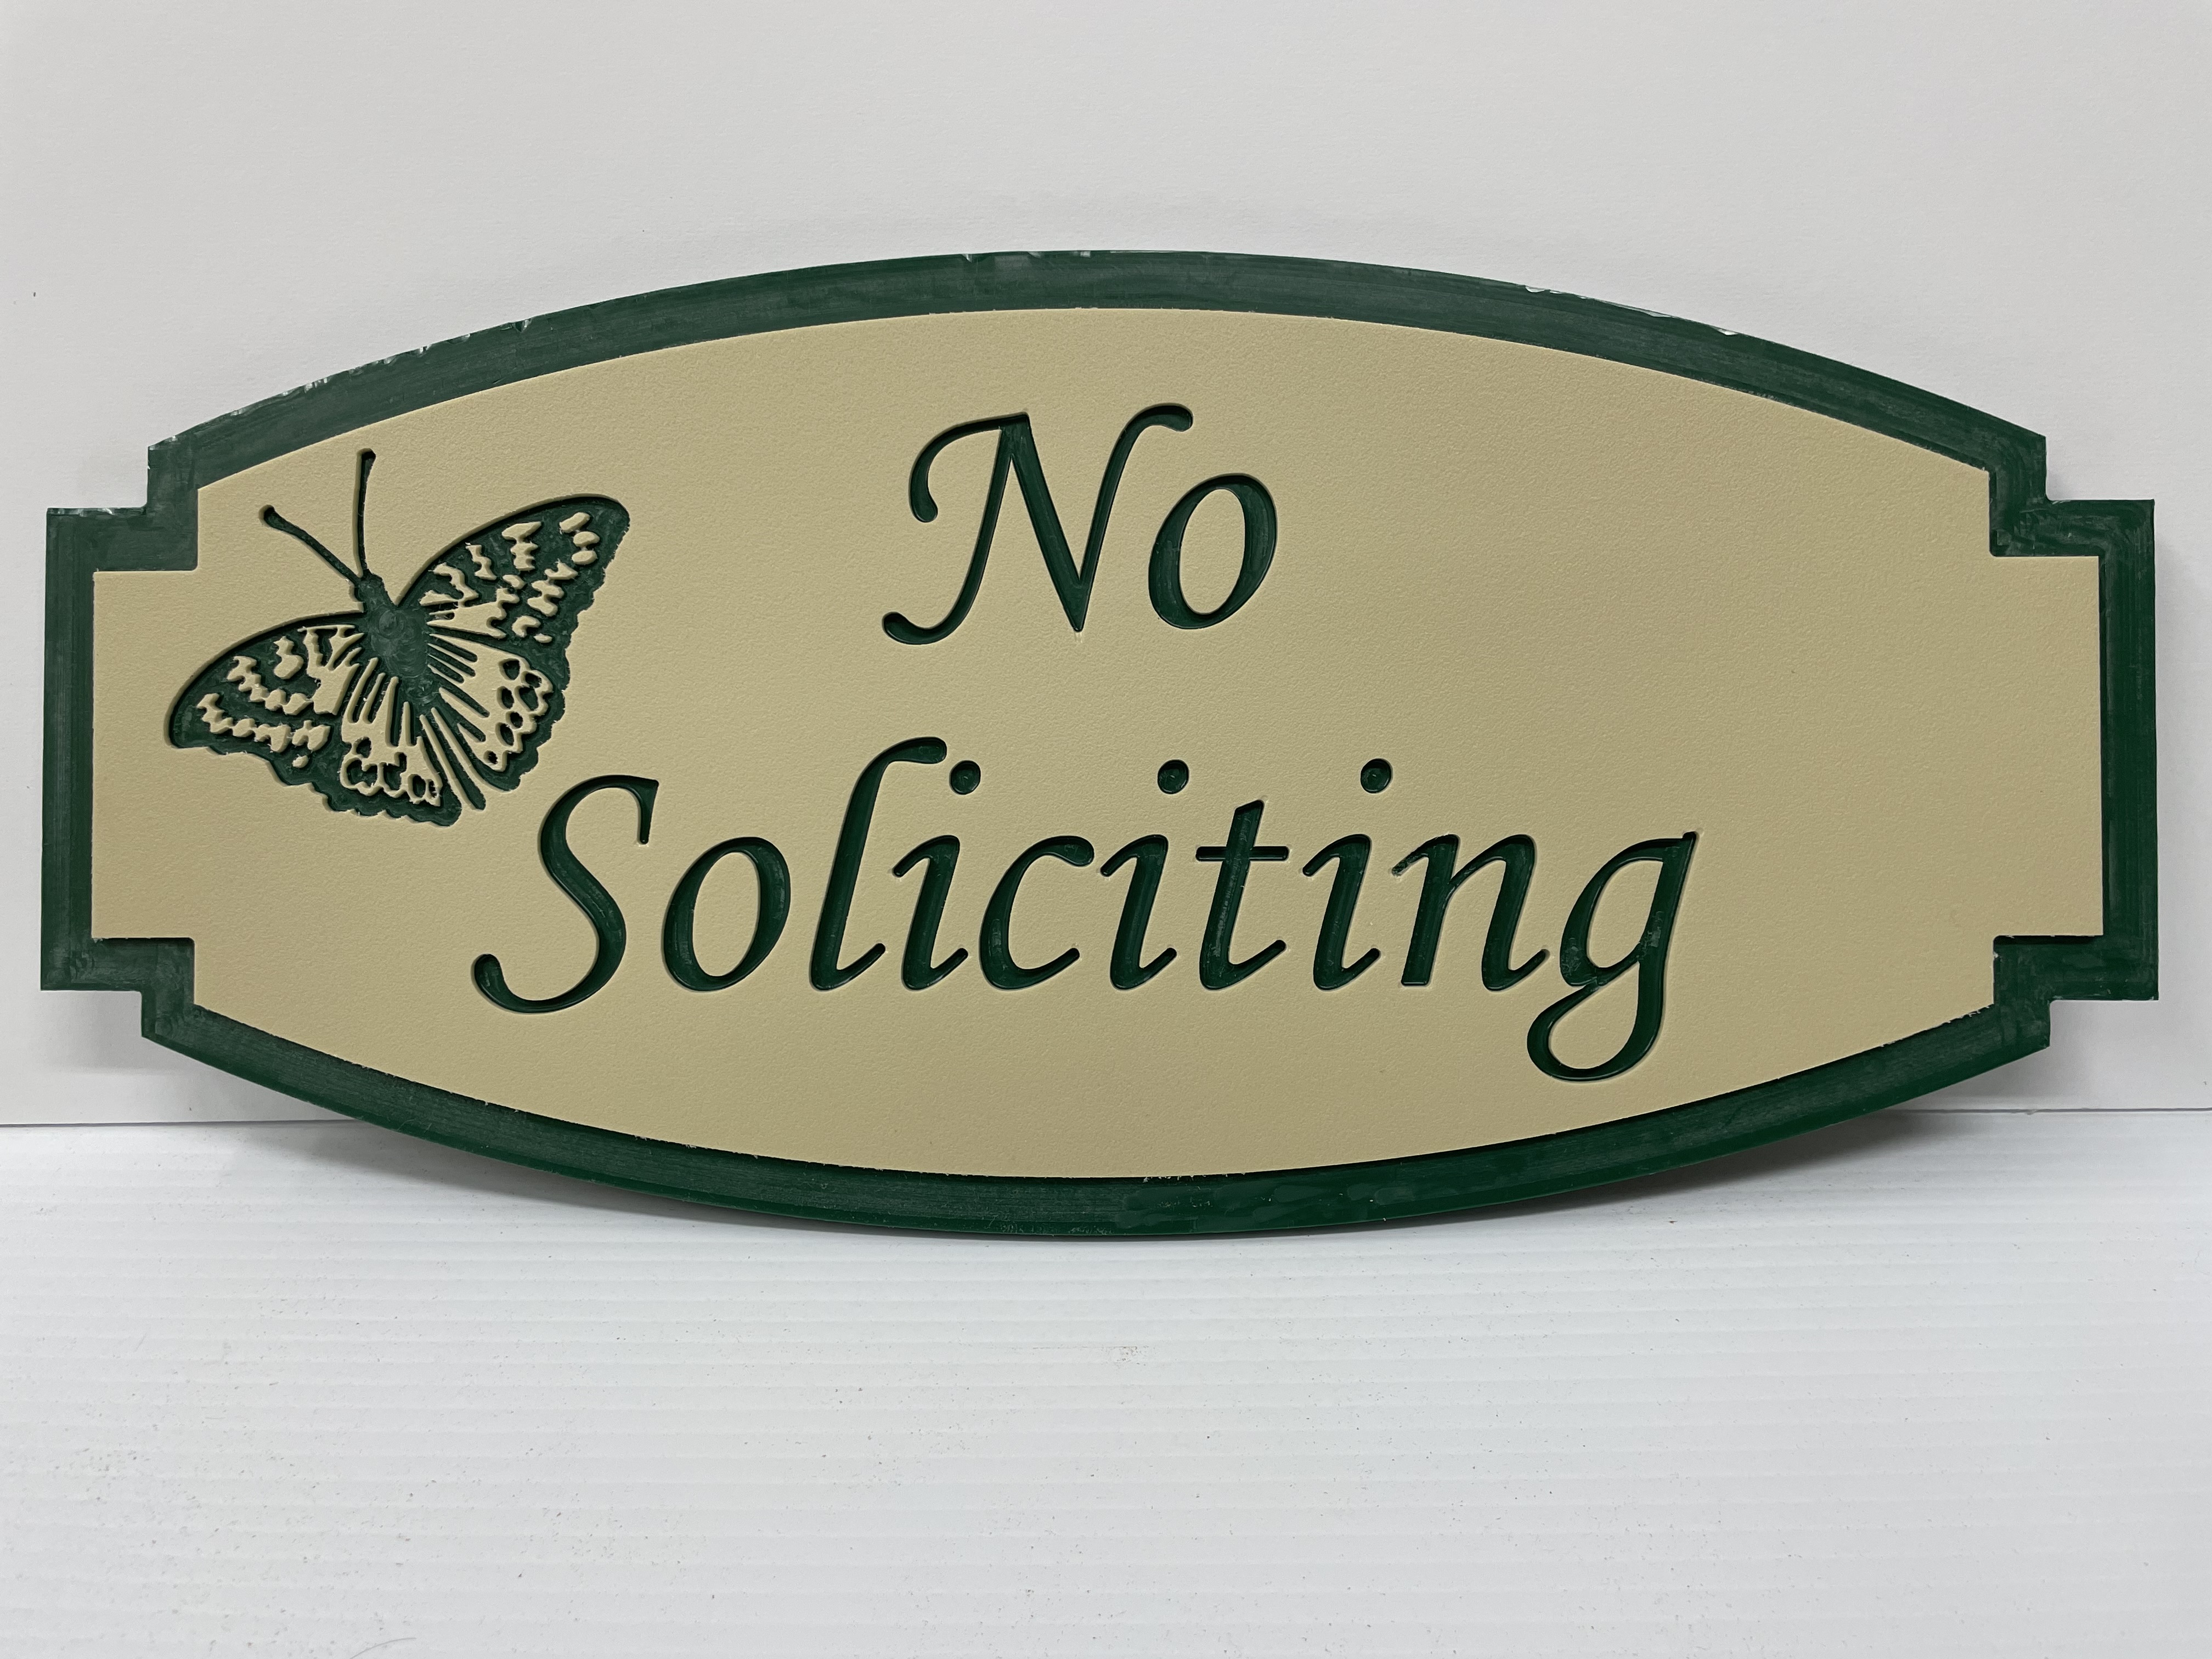
The butterfly and lettering I am doing with a vcarve path which doesn’t really allow you to set a last pass depth but I set DOC to .045 so that should leave .01.
For the pocket I did specifically set .01 as the last pass depth.
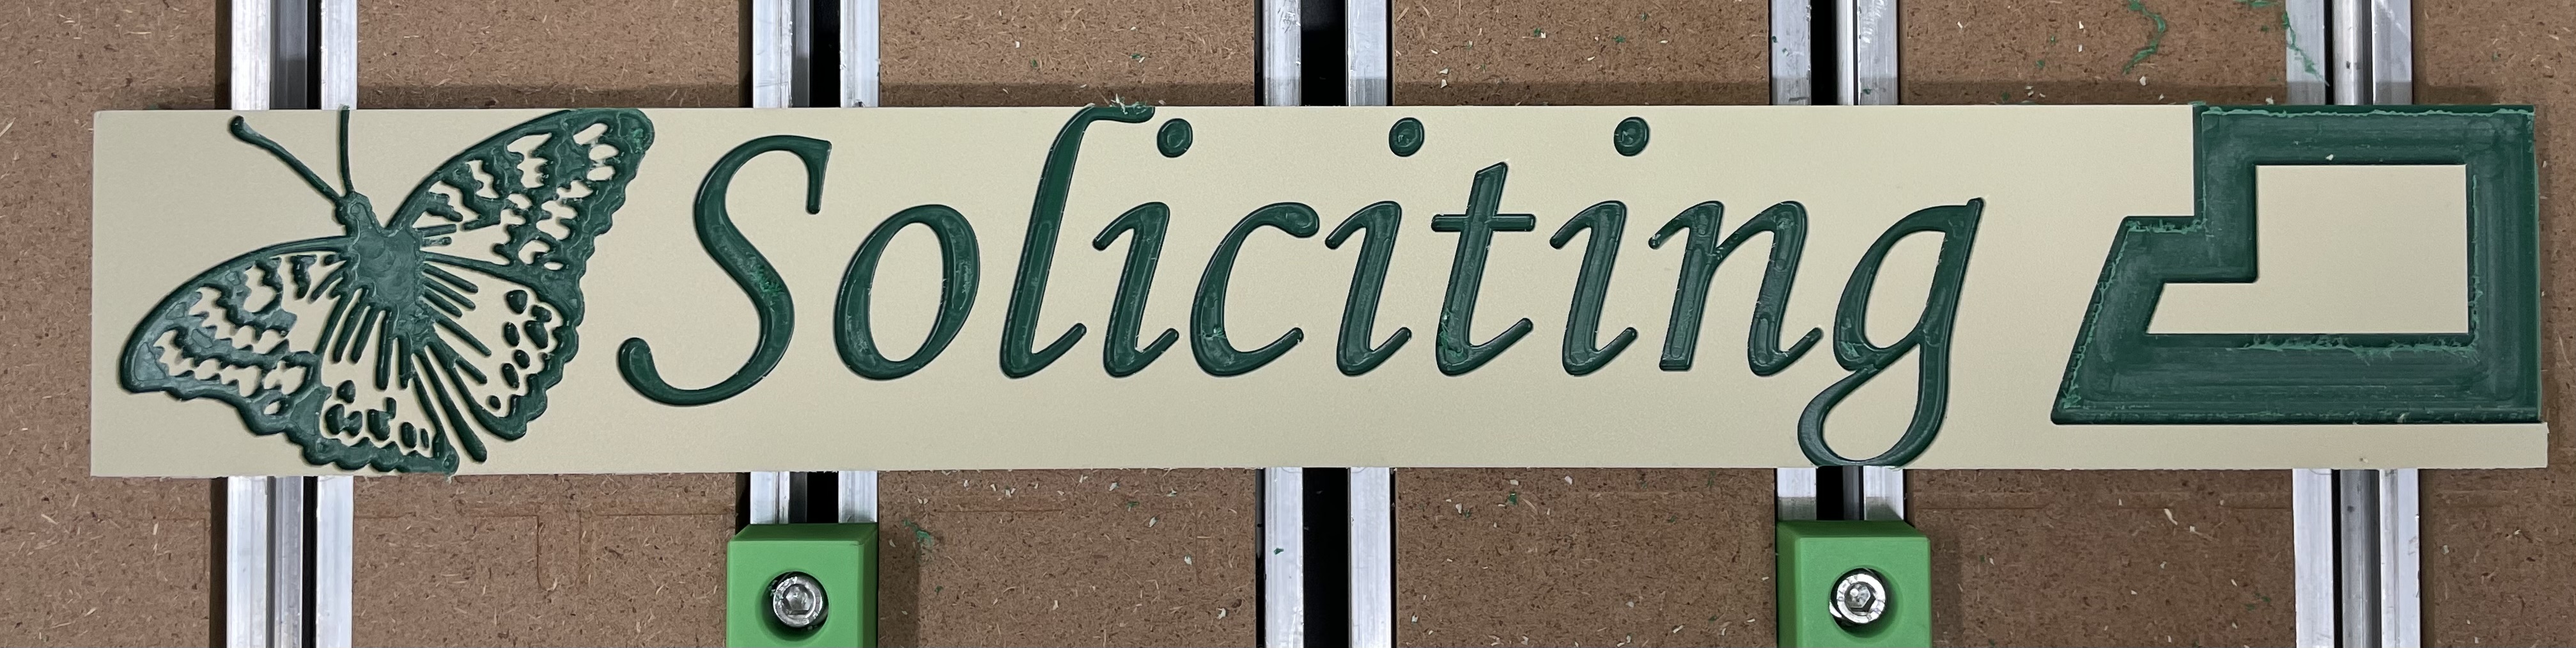
Side B is much better after making the changes suggested above and widening selected vectors on the butterfly. I also lowered stepover to 20%.
The multiple passes on the pocket was entertaining, it really looked like grass growing there until the final pass of the 1/4”.
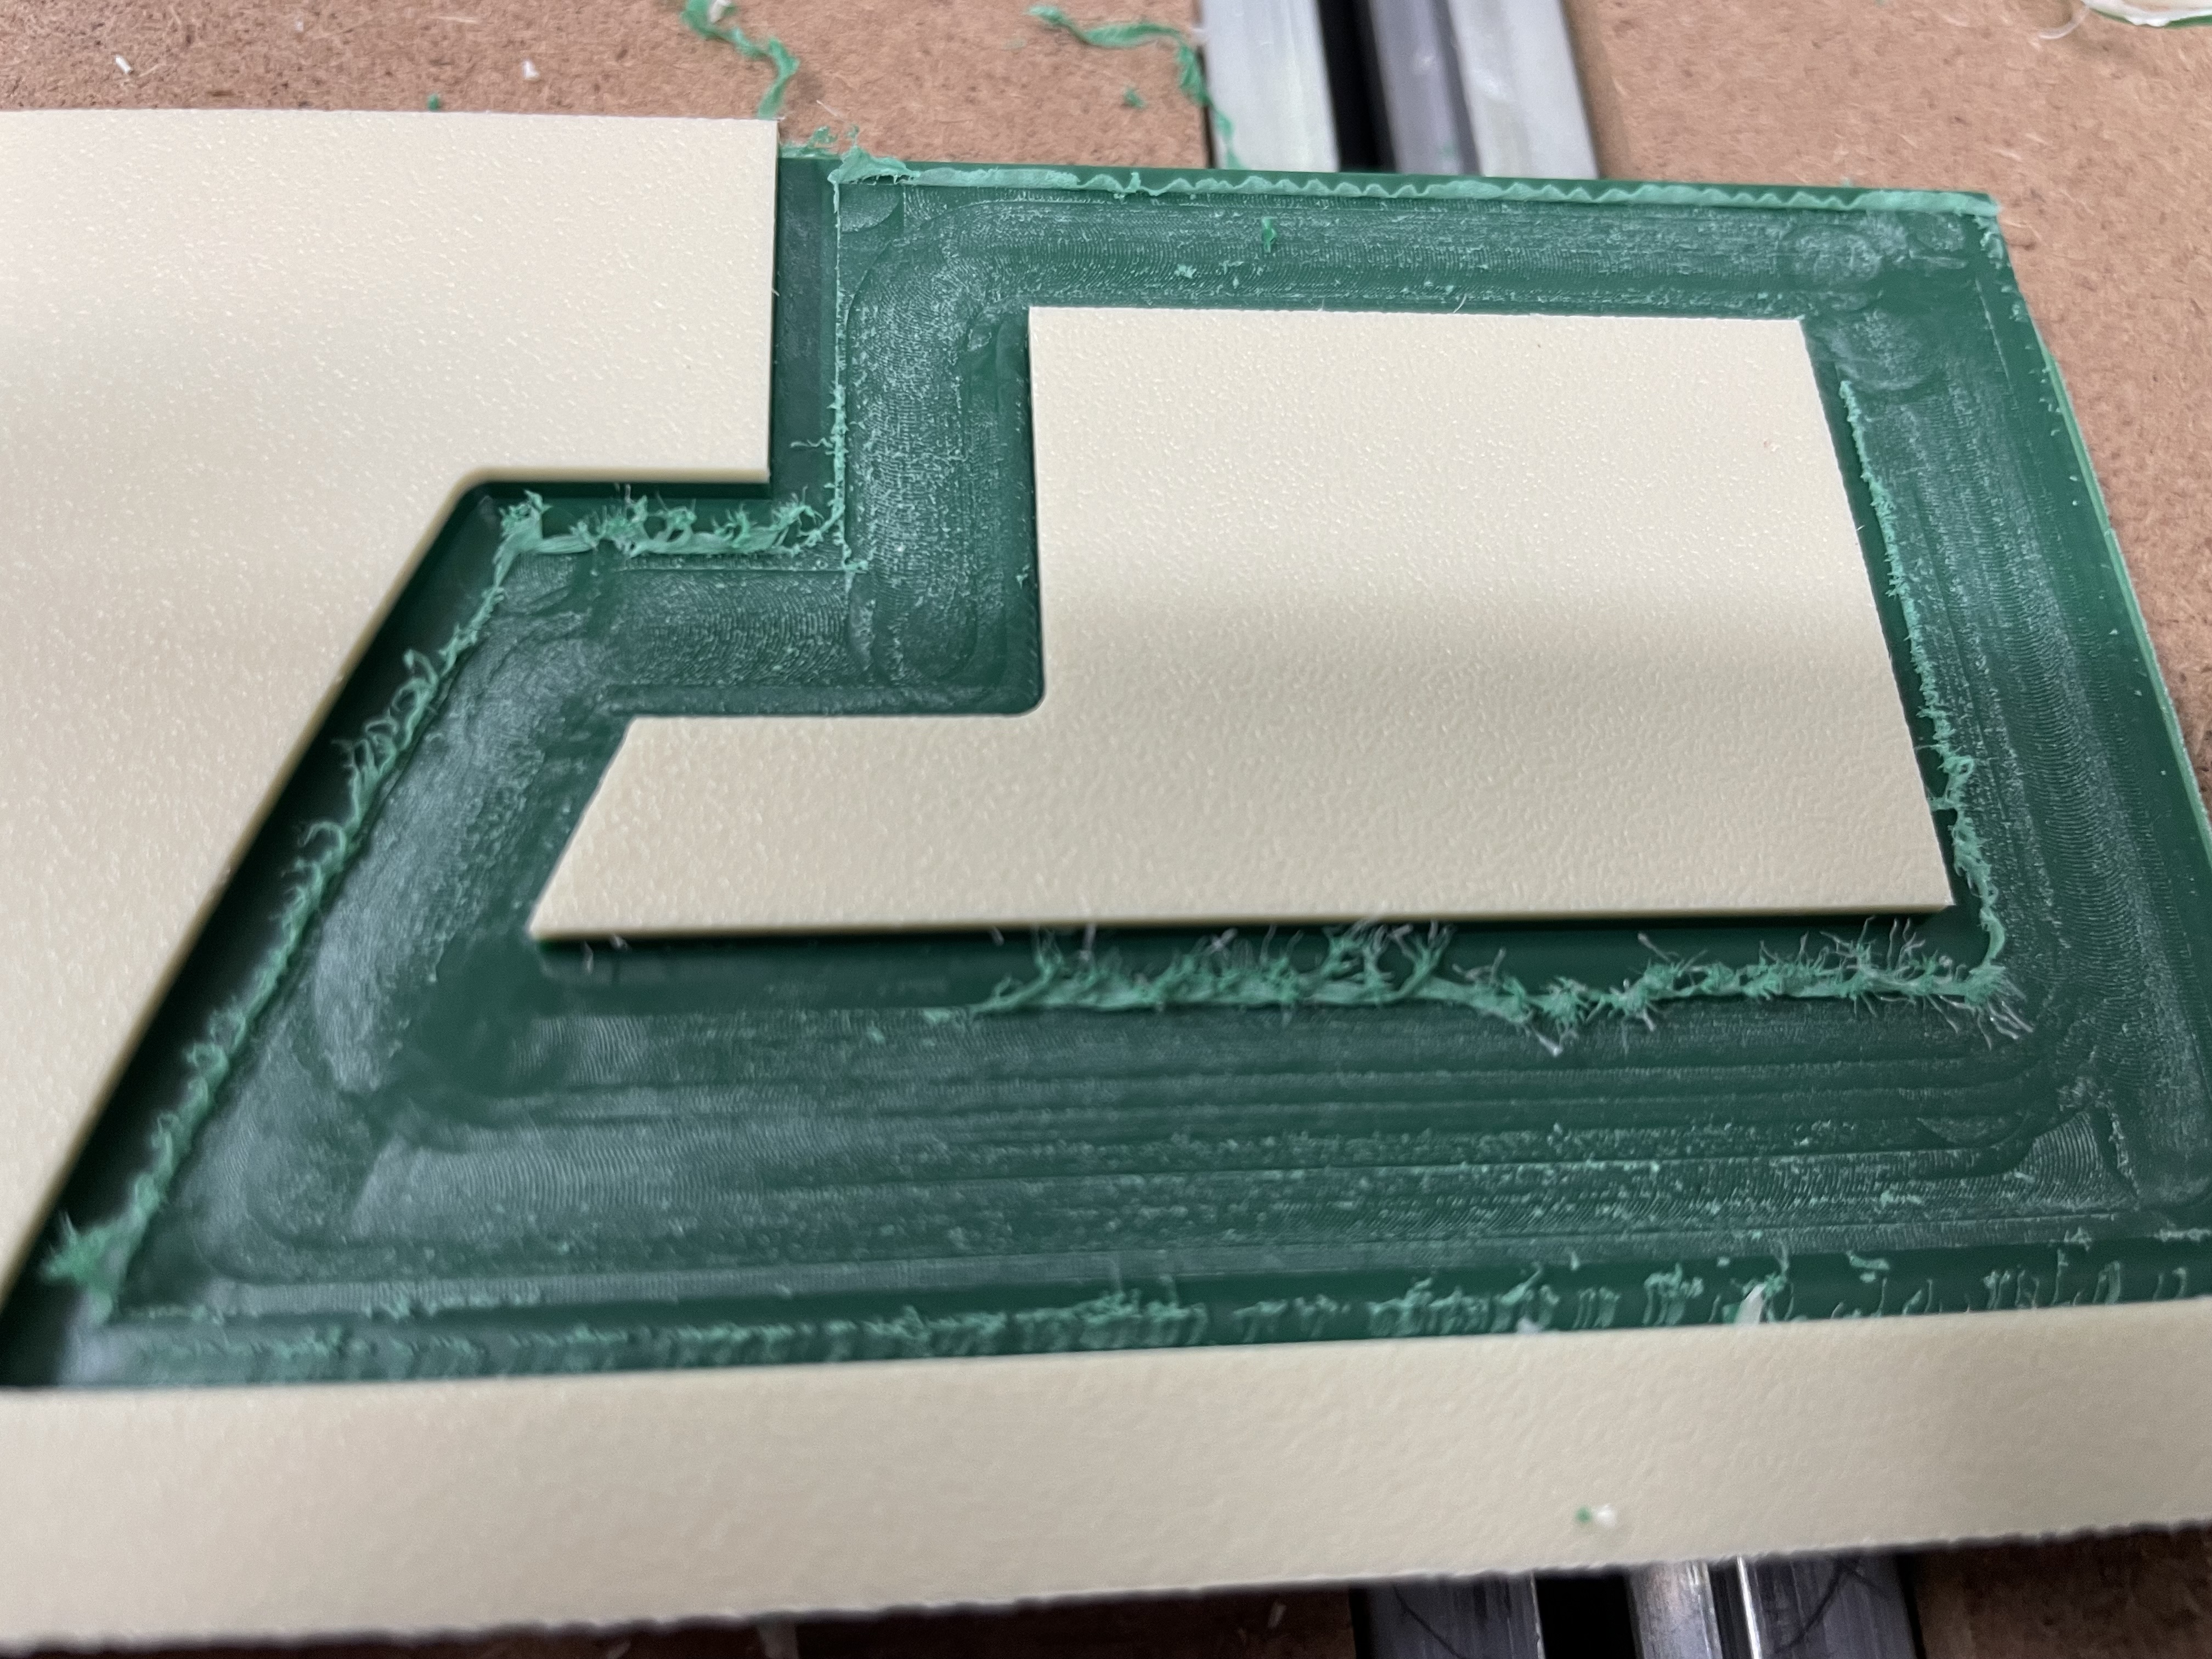
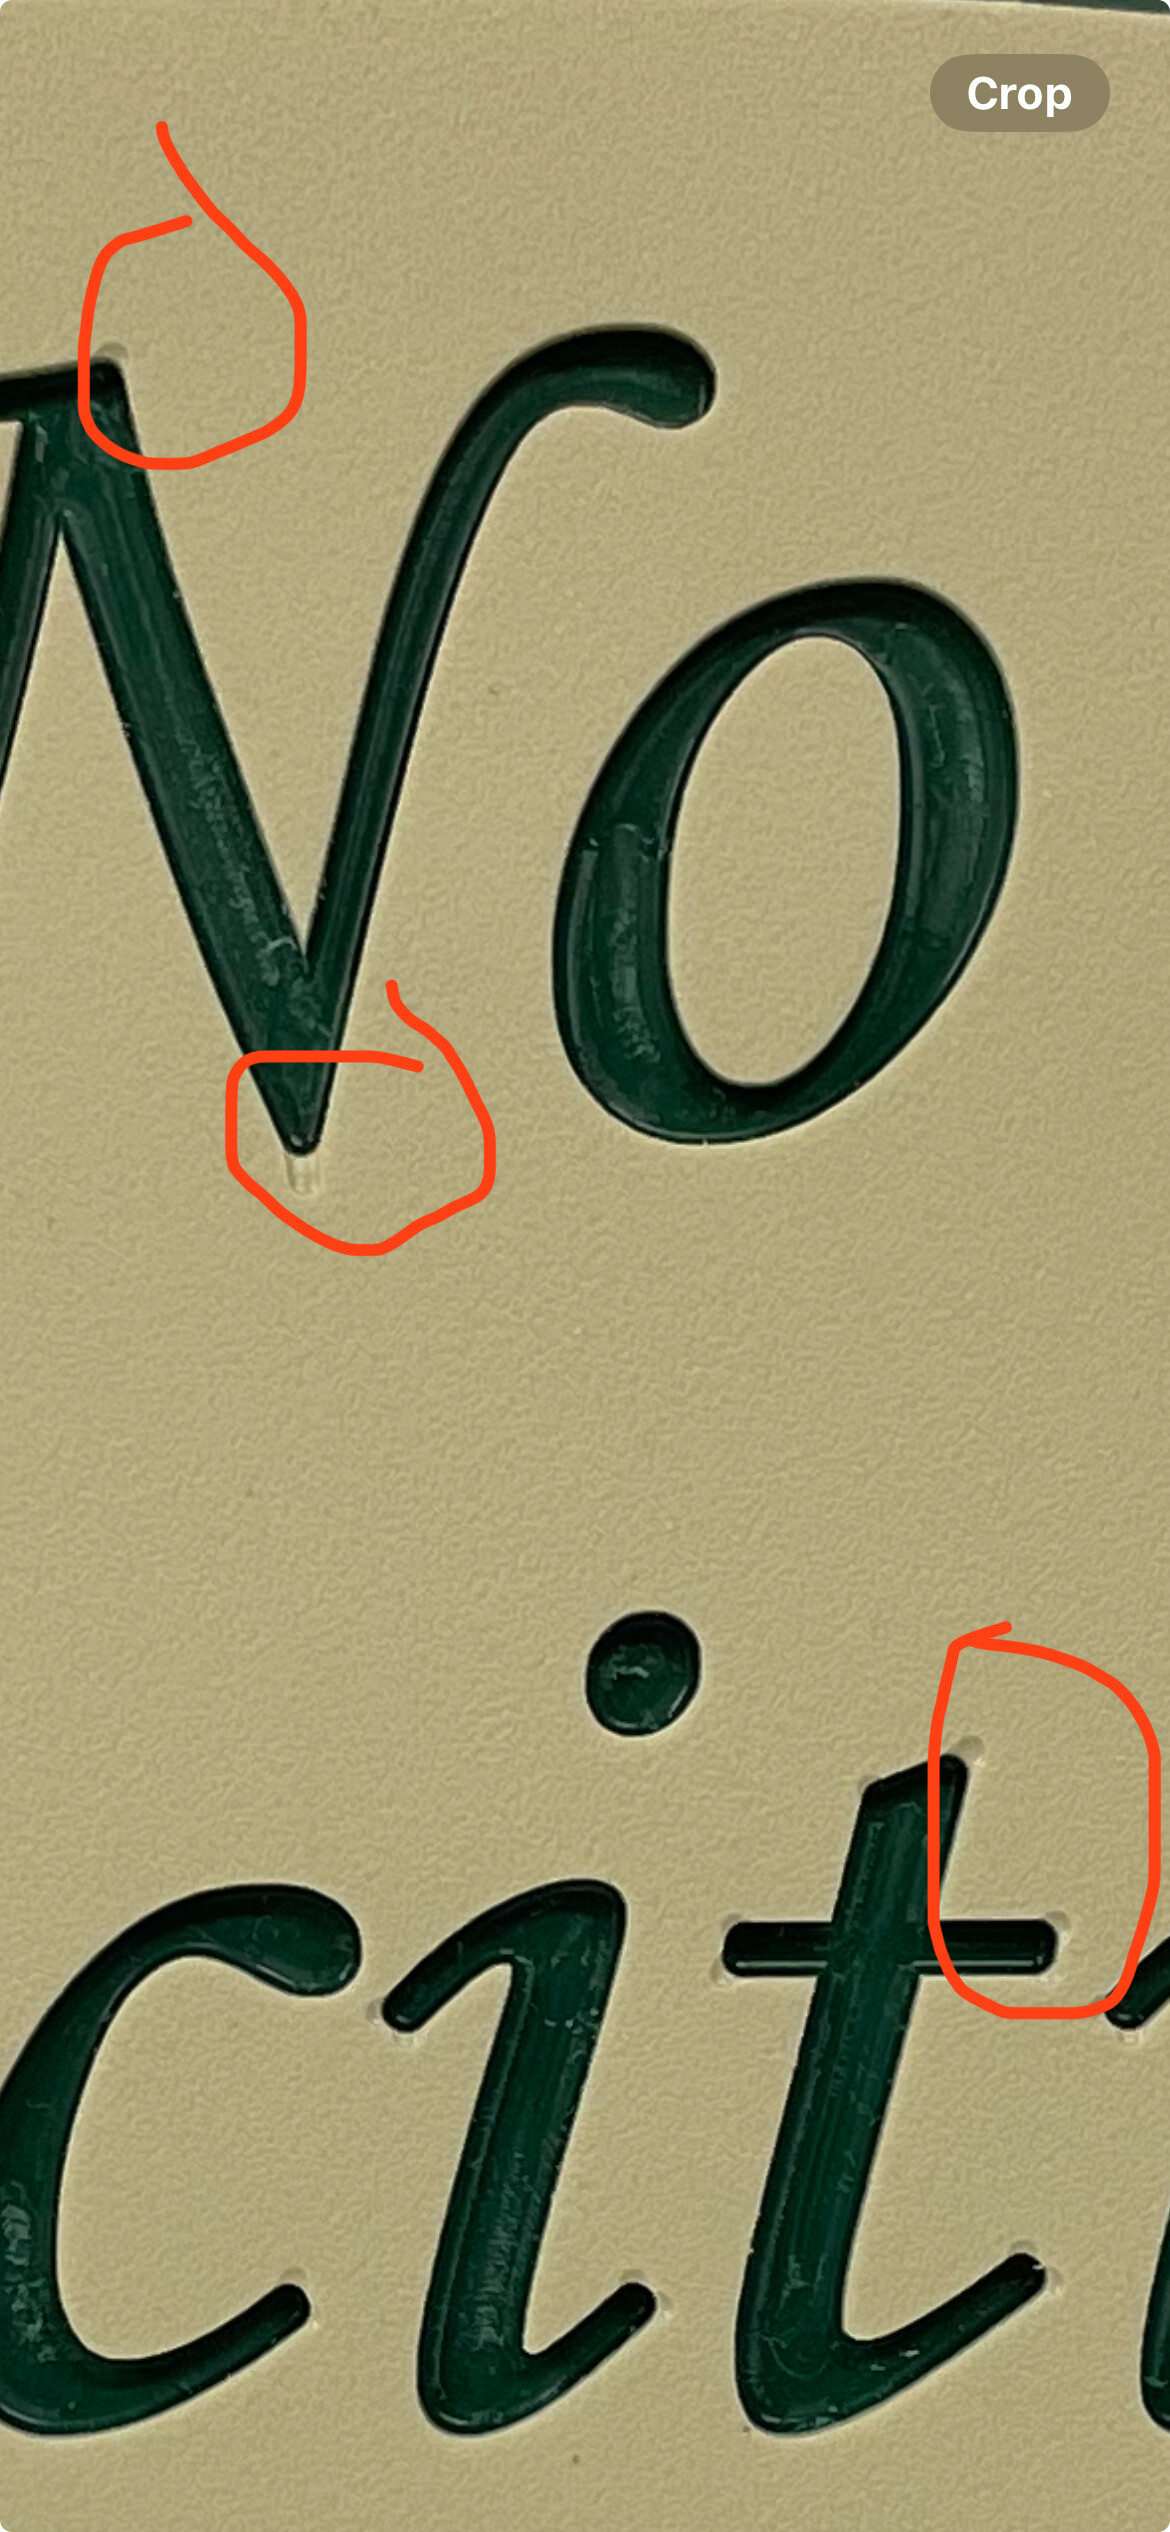
There is still some fuzz that was left be the final pass of the 1/8” bit there. I’m not sure why in just that one spot. Maybe I need to mess with stepover on that one again. It’s not a big deal to clean up but this will be a 9x18 sign with a pocket like that all the way around and I will cut both sides so if it leaves that trail everywhere it will be more effort.
The fuzz cleaned up easily. The only thing that bugs me now is the surface of the pocket has a dusty sort of appearance and not the deep green of the middle layer.
I tried cleaning with both alcohol and soap/water. In either case it looks good while wet and then dries with that “hazy” kind of look. That layer will be a very prominent feature of the sign so I would like to find a way to solve that which doesn’t mean ongoing maintenance for years.
Unless you’re liberally using double sided tape under the plastic, the ends could get pulled up as you cut. Not sure if you’re using the side clamps visible in the picture, but that 1/8" endmill probably kissed the walls of the pocket and yanked the material up, gouging deeper into the floor.
I used Xfasten double sided tape that was as wide as the piece minus about 1/8” so it was stuck pretty good. I will double check on the real piece tomorrow.
Funny thing is that when I did the first side I didn’t peel off the protective covering from the colorcore. So when the job was done is lifted the piece and the tape pulled that protective film off real quick. I am surprised it held.
And no, I was using those clamp stops with some spacers to just position the piece since I was cutting off the edge in some spots. I will pair the tape with clamps on the real one.
I got the job done. There were some fuzzies to clean up and my outer profile left a super thin wall that had to be sliced off but that was easy.
I ended up scraping an xacto blade across the outer green layer to clean up that hazy look. I held it at a pretty steep angle and scraped a super thin layer. I got most but not all. I am not sure what that really indicates.
The piece is 9 x 18 x .5. I plan to drill a couple of holes in the bottom and epoxy a metal stand in it. Then we will put it in the flowerbed in front of the neighborhood sign.
I did side 1, flipped and did side 2 and then the contour cut.
They are barely noticeable and certainly won’t be from the intended viewing distance. I did the equivalent to an advanced Vcarve but used a tapered ball nose. It was probably supposed to carve those areas but just wasn’t deep enough to clear through the upper layer leading to that visual effect. I will have to look closer at the simulation to see what it shows.
Carbide Create does not support tapered ball nose as a tool geometry, and even when using a supported V geometry, the 3D preview won’t perfectly show the appearance of a 2-layer plastic — that said, if you’re inclined this sort of thing can be easily addressed with a chisel.
It comes in lots of different sizes and color combinations.
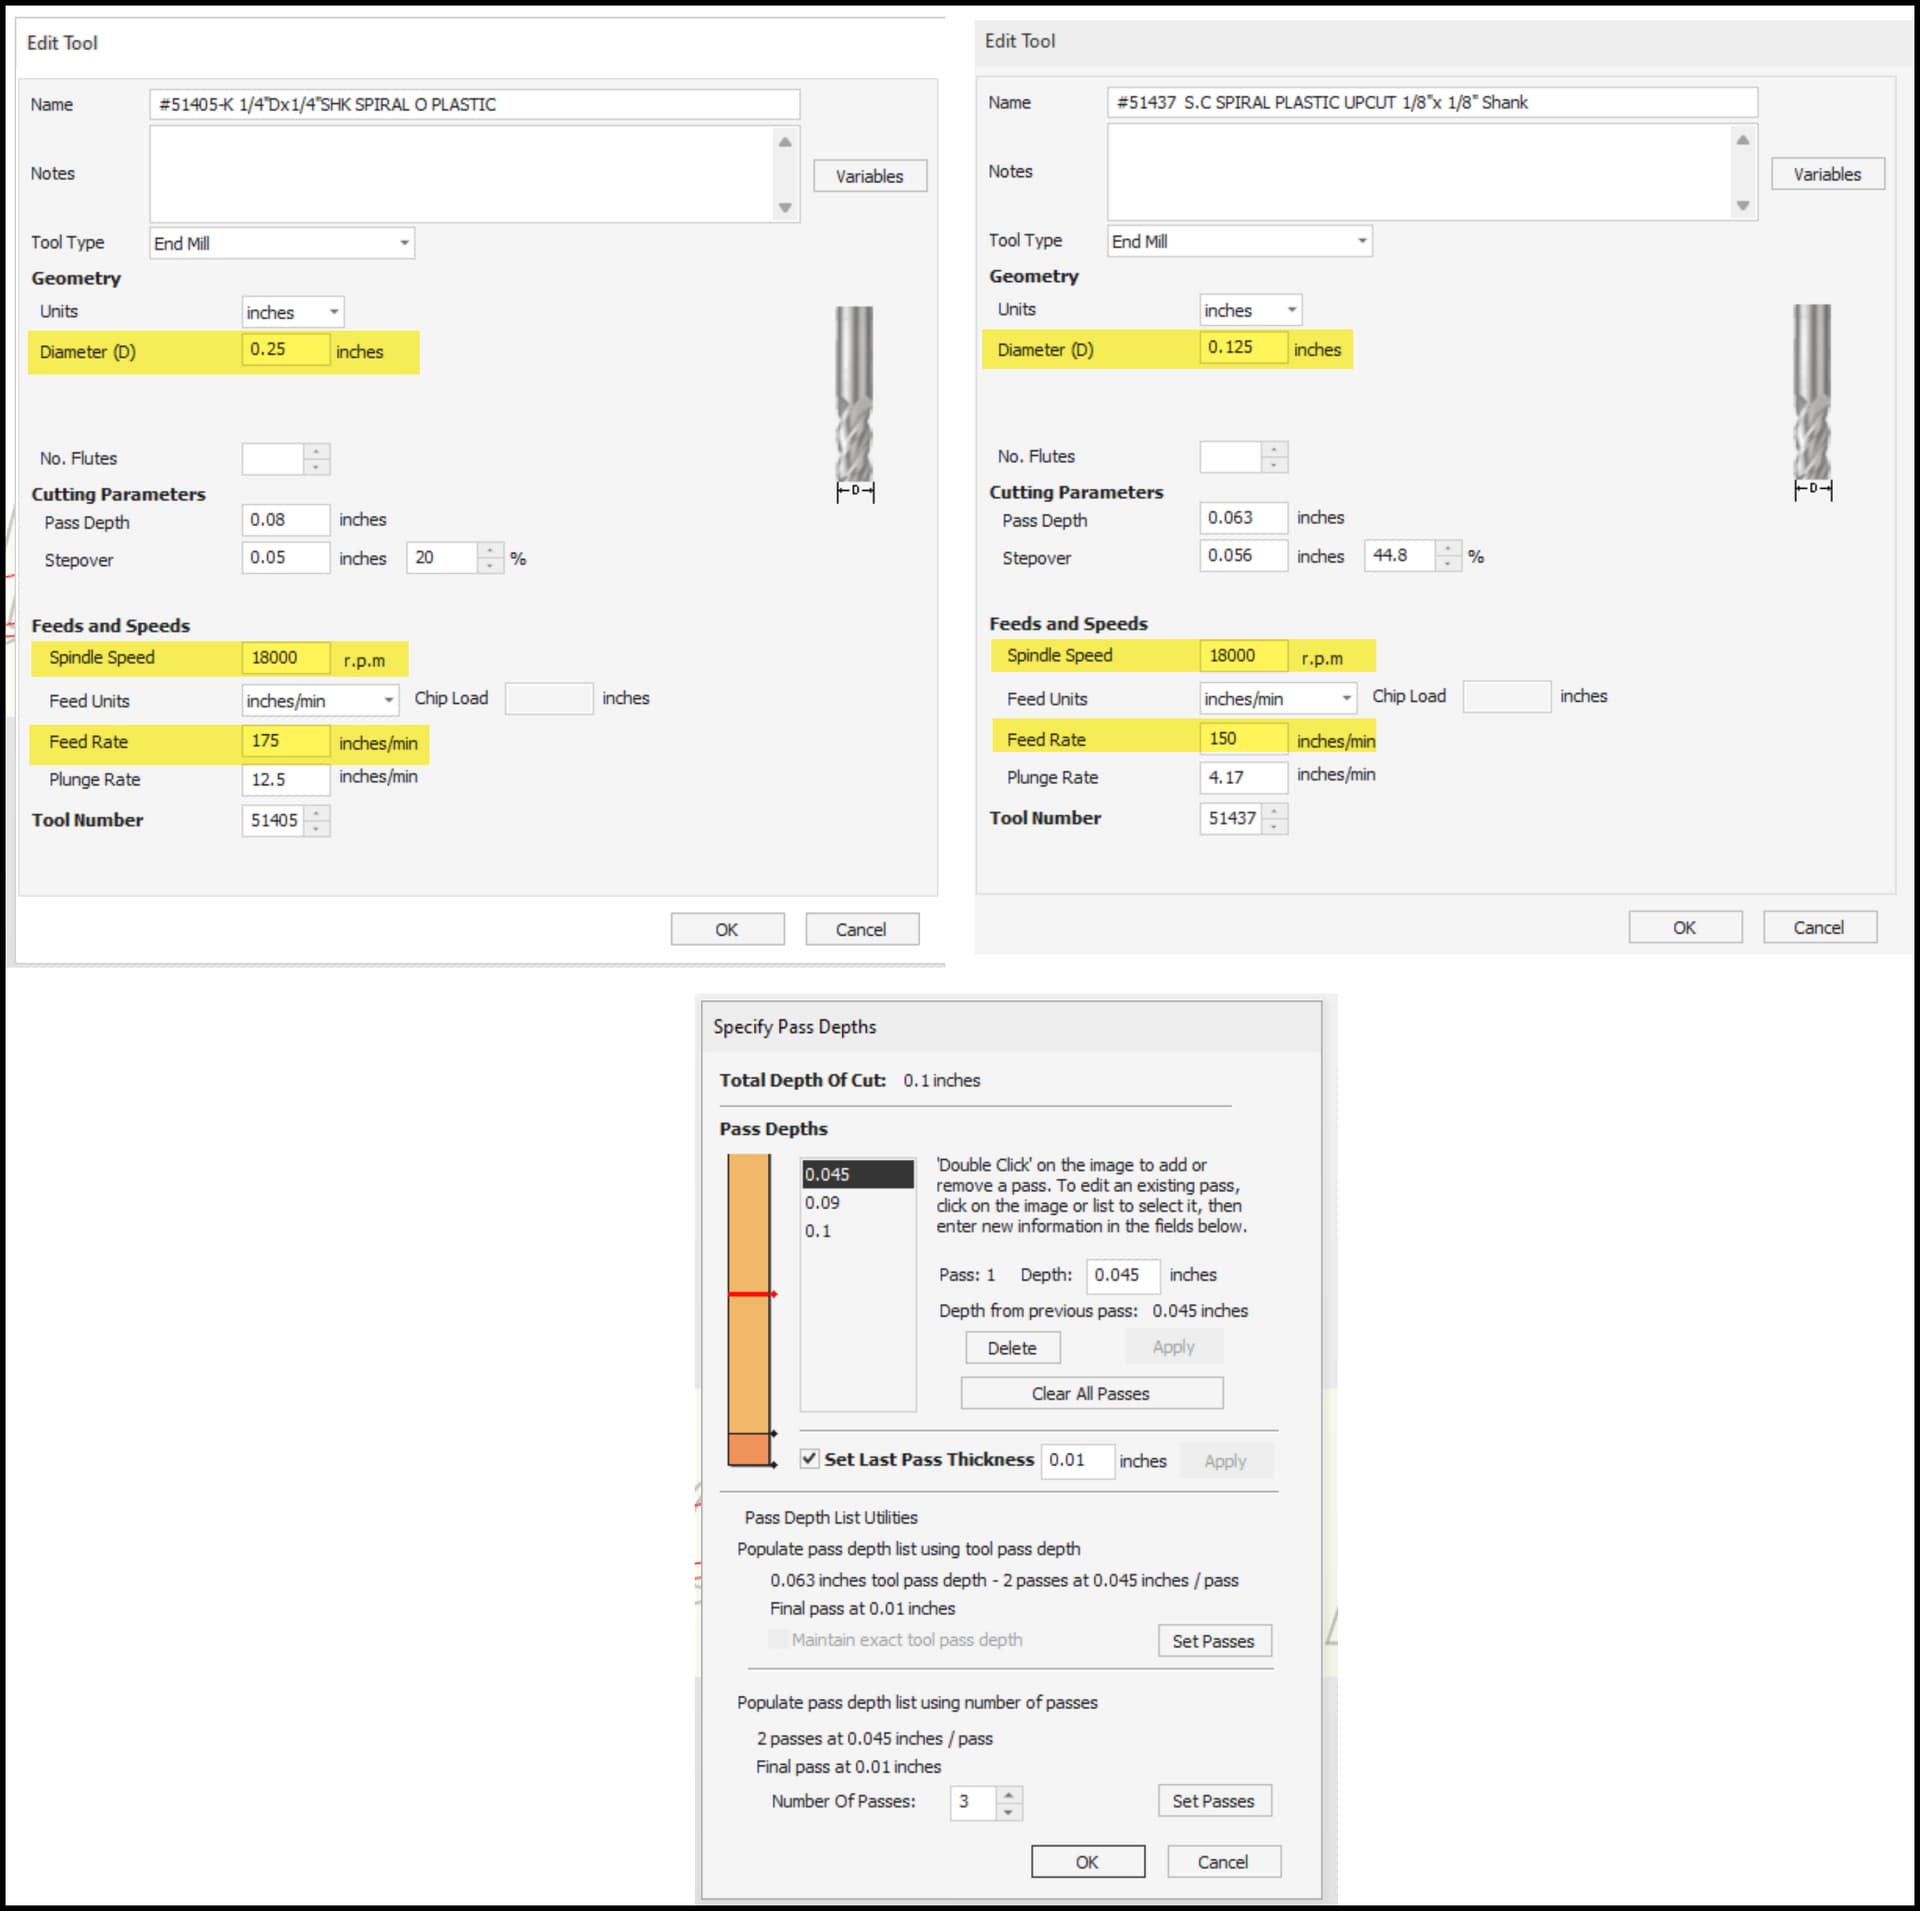
I am happy with the final product but it did require some cleanup that I didn’t like. I tried using the settings described in the thread above but still didn’t hit on the solution. I reached out to King Plastics for advice and their suggestions was 18,000 RPM for both the 1/4" and 1/8" bits and to use 175 IPM on the larger and 150 IPM on the smaller bit.
I did a test on a piece of scrap creating a similar pocket as the original using the parameters they specified and still ran into the same issue.
Here are the parameters with the 1/4" on the left and the 1/8" on the right and the pass depth shown at the bottom.
I was doing the pocket with the 1/4" clearing and then finishing up with the 1/8" for the corners and cleanup. I decided to pocket out the middle with the 1/8" only to see if there was a difference.
The part at the top of this which looks cleaner is after I scraped with an Xacto knife. The rest is straight from the CNC.
I recorded a short time lapse video showing the cut. First is the 1/4" then there is a pause in the video as I switch to the 1/8" and then another short pause and you can see me scraping with the knife.
I am sure I am doing something wrong. I really like the finished product that I ended up with but definitely would like to avoid scraping manually for future larger projects.
I have sent all this back to support at King Plastics in the hopes of finding a good solution. I would like to do more with this material.
The lettering is fine, just the larger flat areas present a problem. Perhaps my bits are not sharp enough, perhaps I should cut it all in one pass.
I trammed a month or so ago and surfaced my spoilboard afterward. There are no marks on the spoilboard from that surfacing which would indicate there were still any issues.