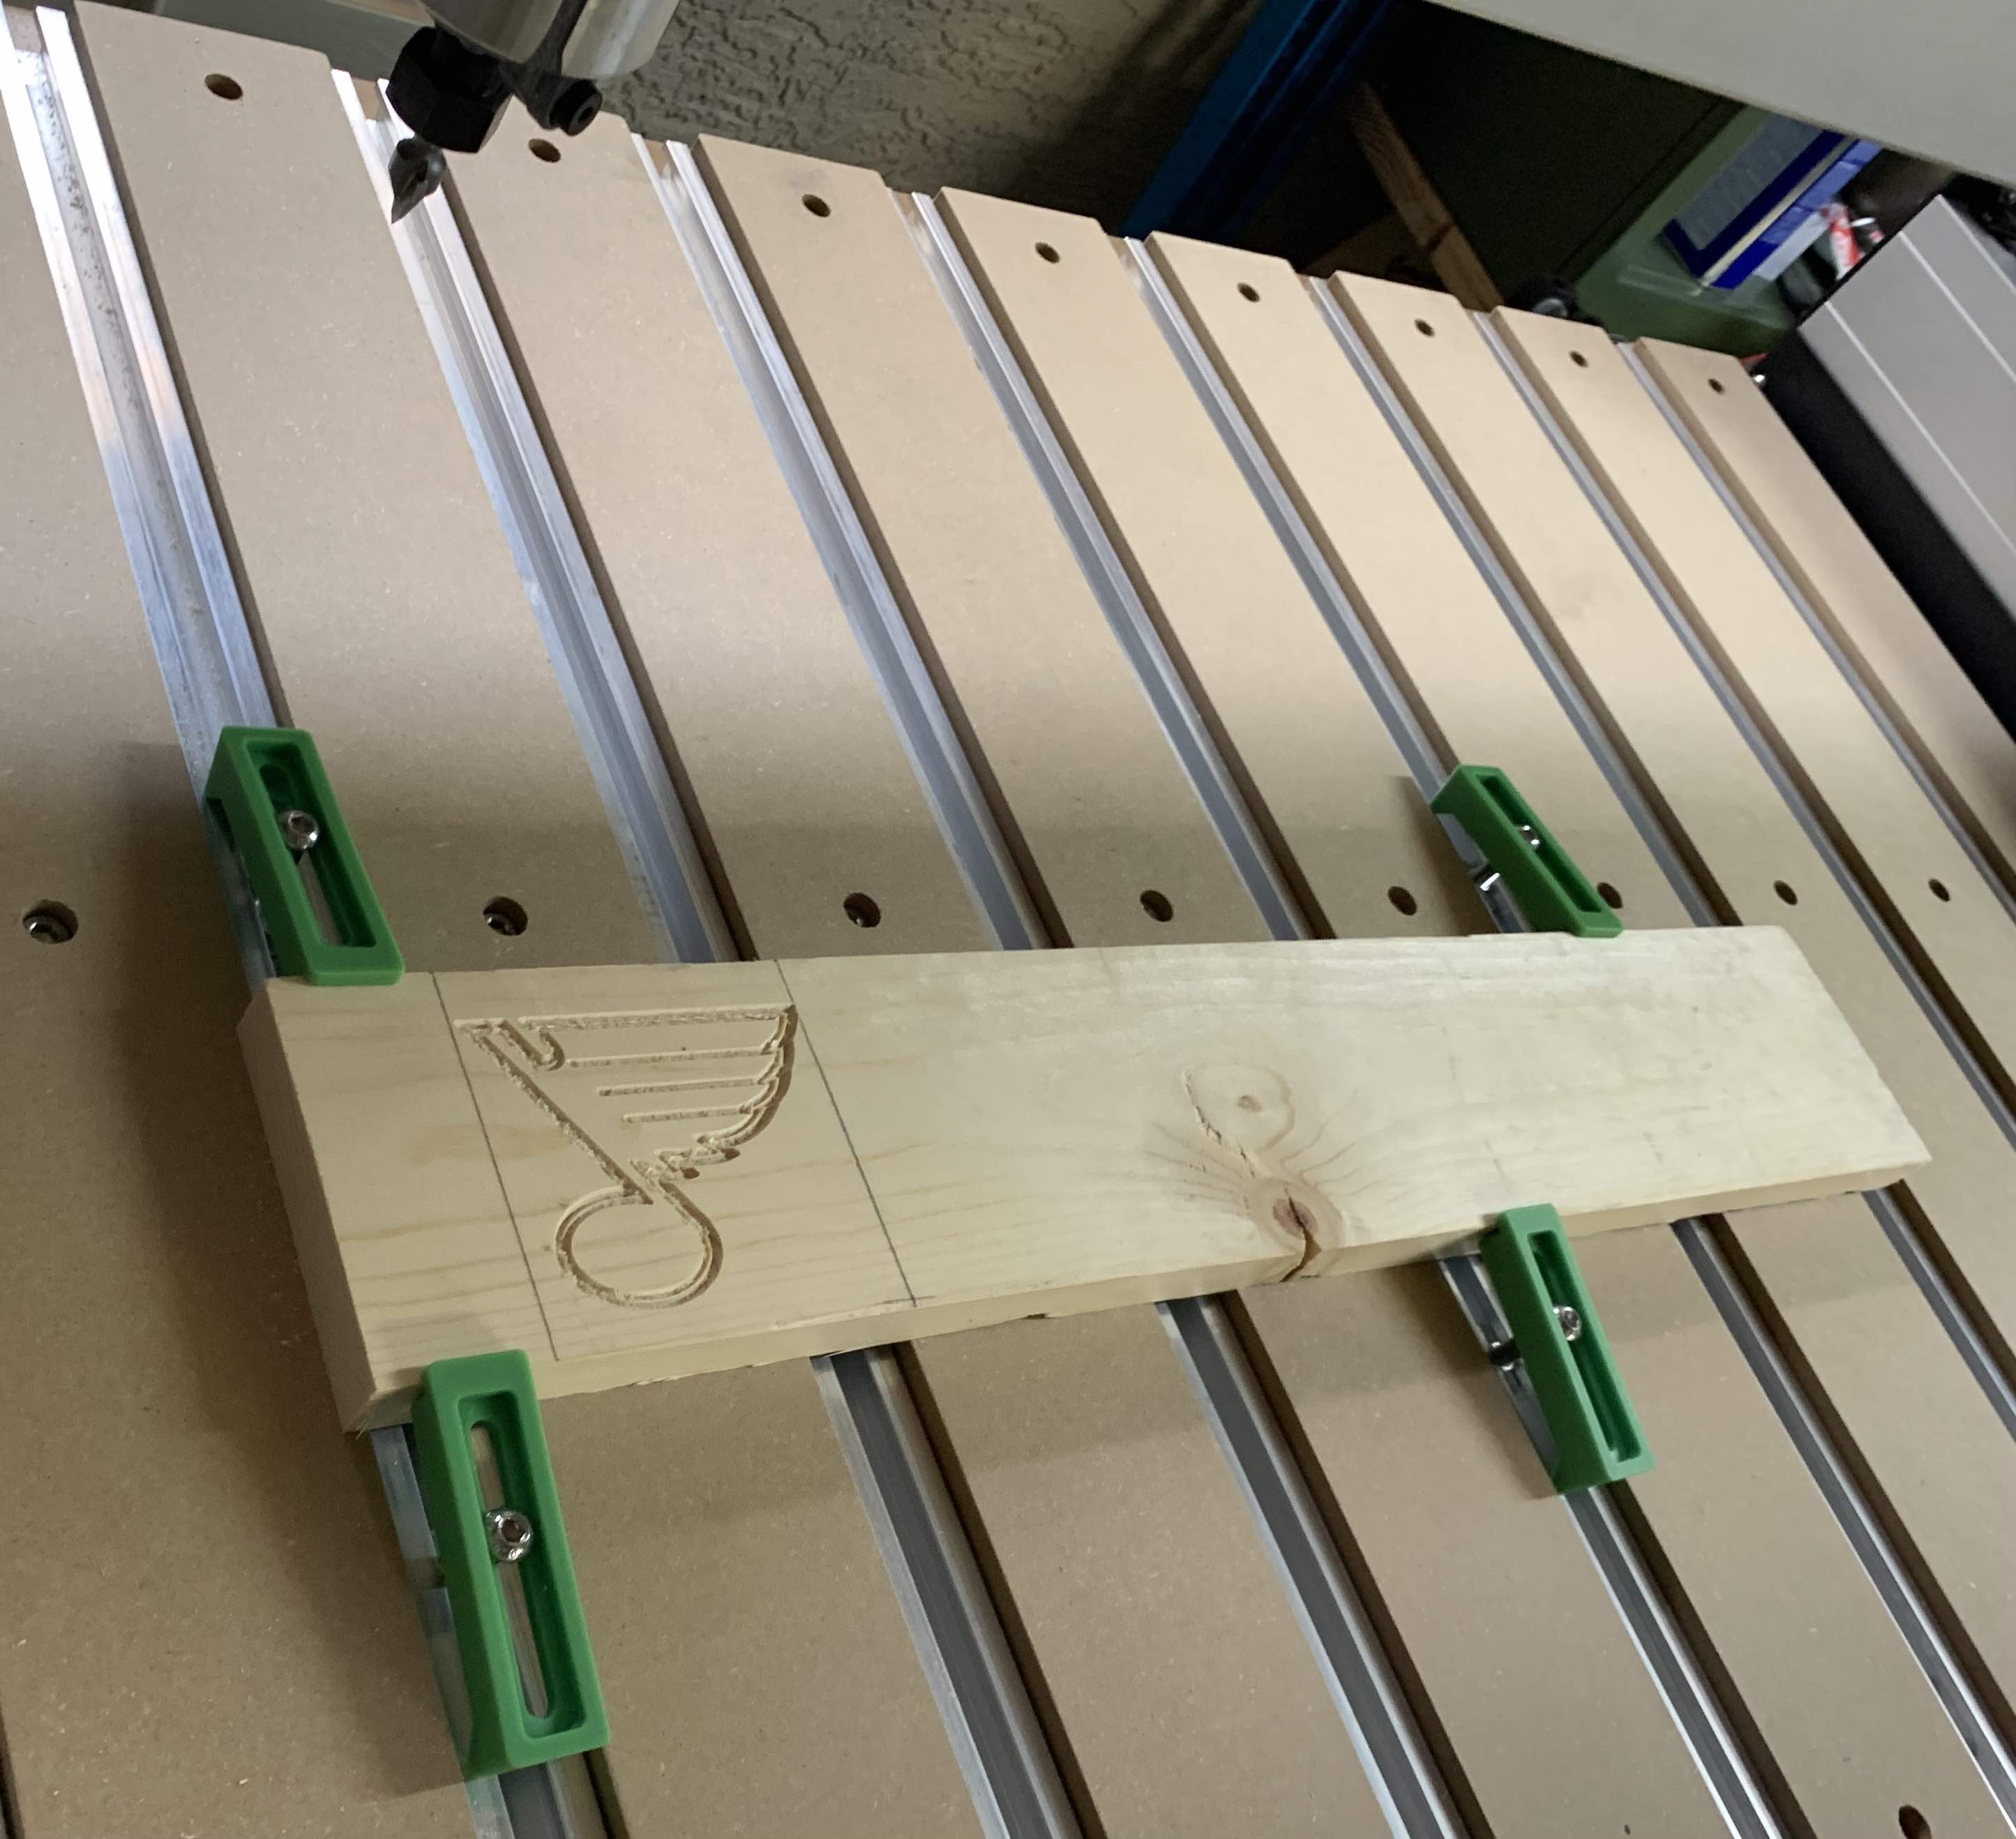
I’m a complete noob with CNC and I’ve had a few issues getting it setup, which is probably expected, considering my aforementioned experience. Thanks to Eugene in Support for sticking with me in my efforts to resolve the issues.
The Getting Started video courses have been pretty helpful so far, but decided to get in the pool.
Not great, but considering the lack of effort I put into refining the tool paths I’m happy with the results for a first cut. Anywho, thanks for the look.
Welcome to the community!
That looks like a clean cut with a mechanically sound machine, lines are straight and ovals are oval, you’re good to go
Like Guy said, pine is not a great material from a CNC perspective, at least not when there is a need to have fine details, so when you use pine don’t beat yourself up for not getting superb results…
Thank you both! I appreciate the reviews and tips.
Understand on the pine and will move on to harder woods once I get into more serious projects. I think I remember seeing in one of the early videos that running a tool path twice could clean up some of the fuzziness?
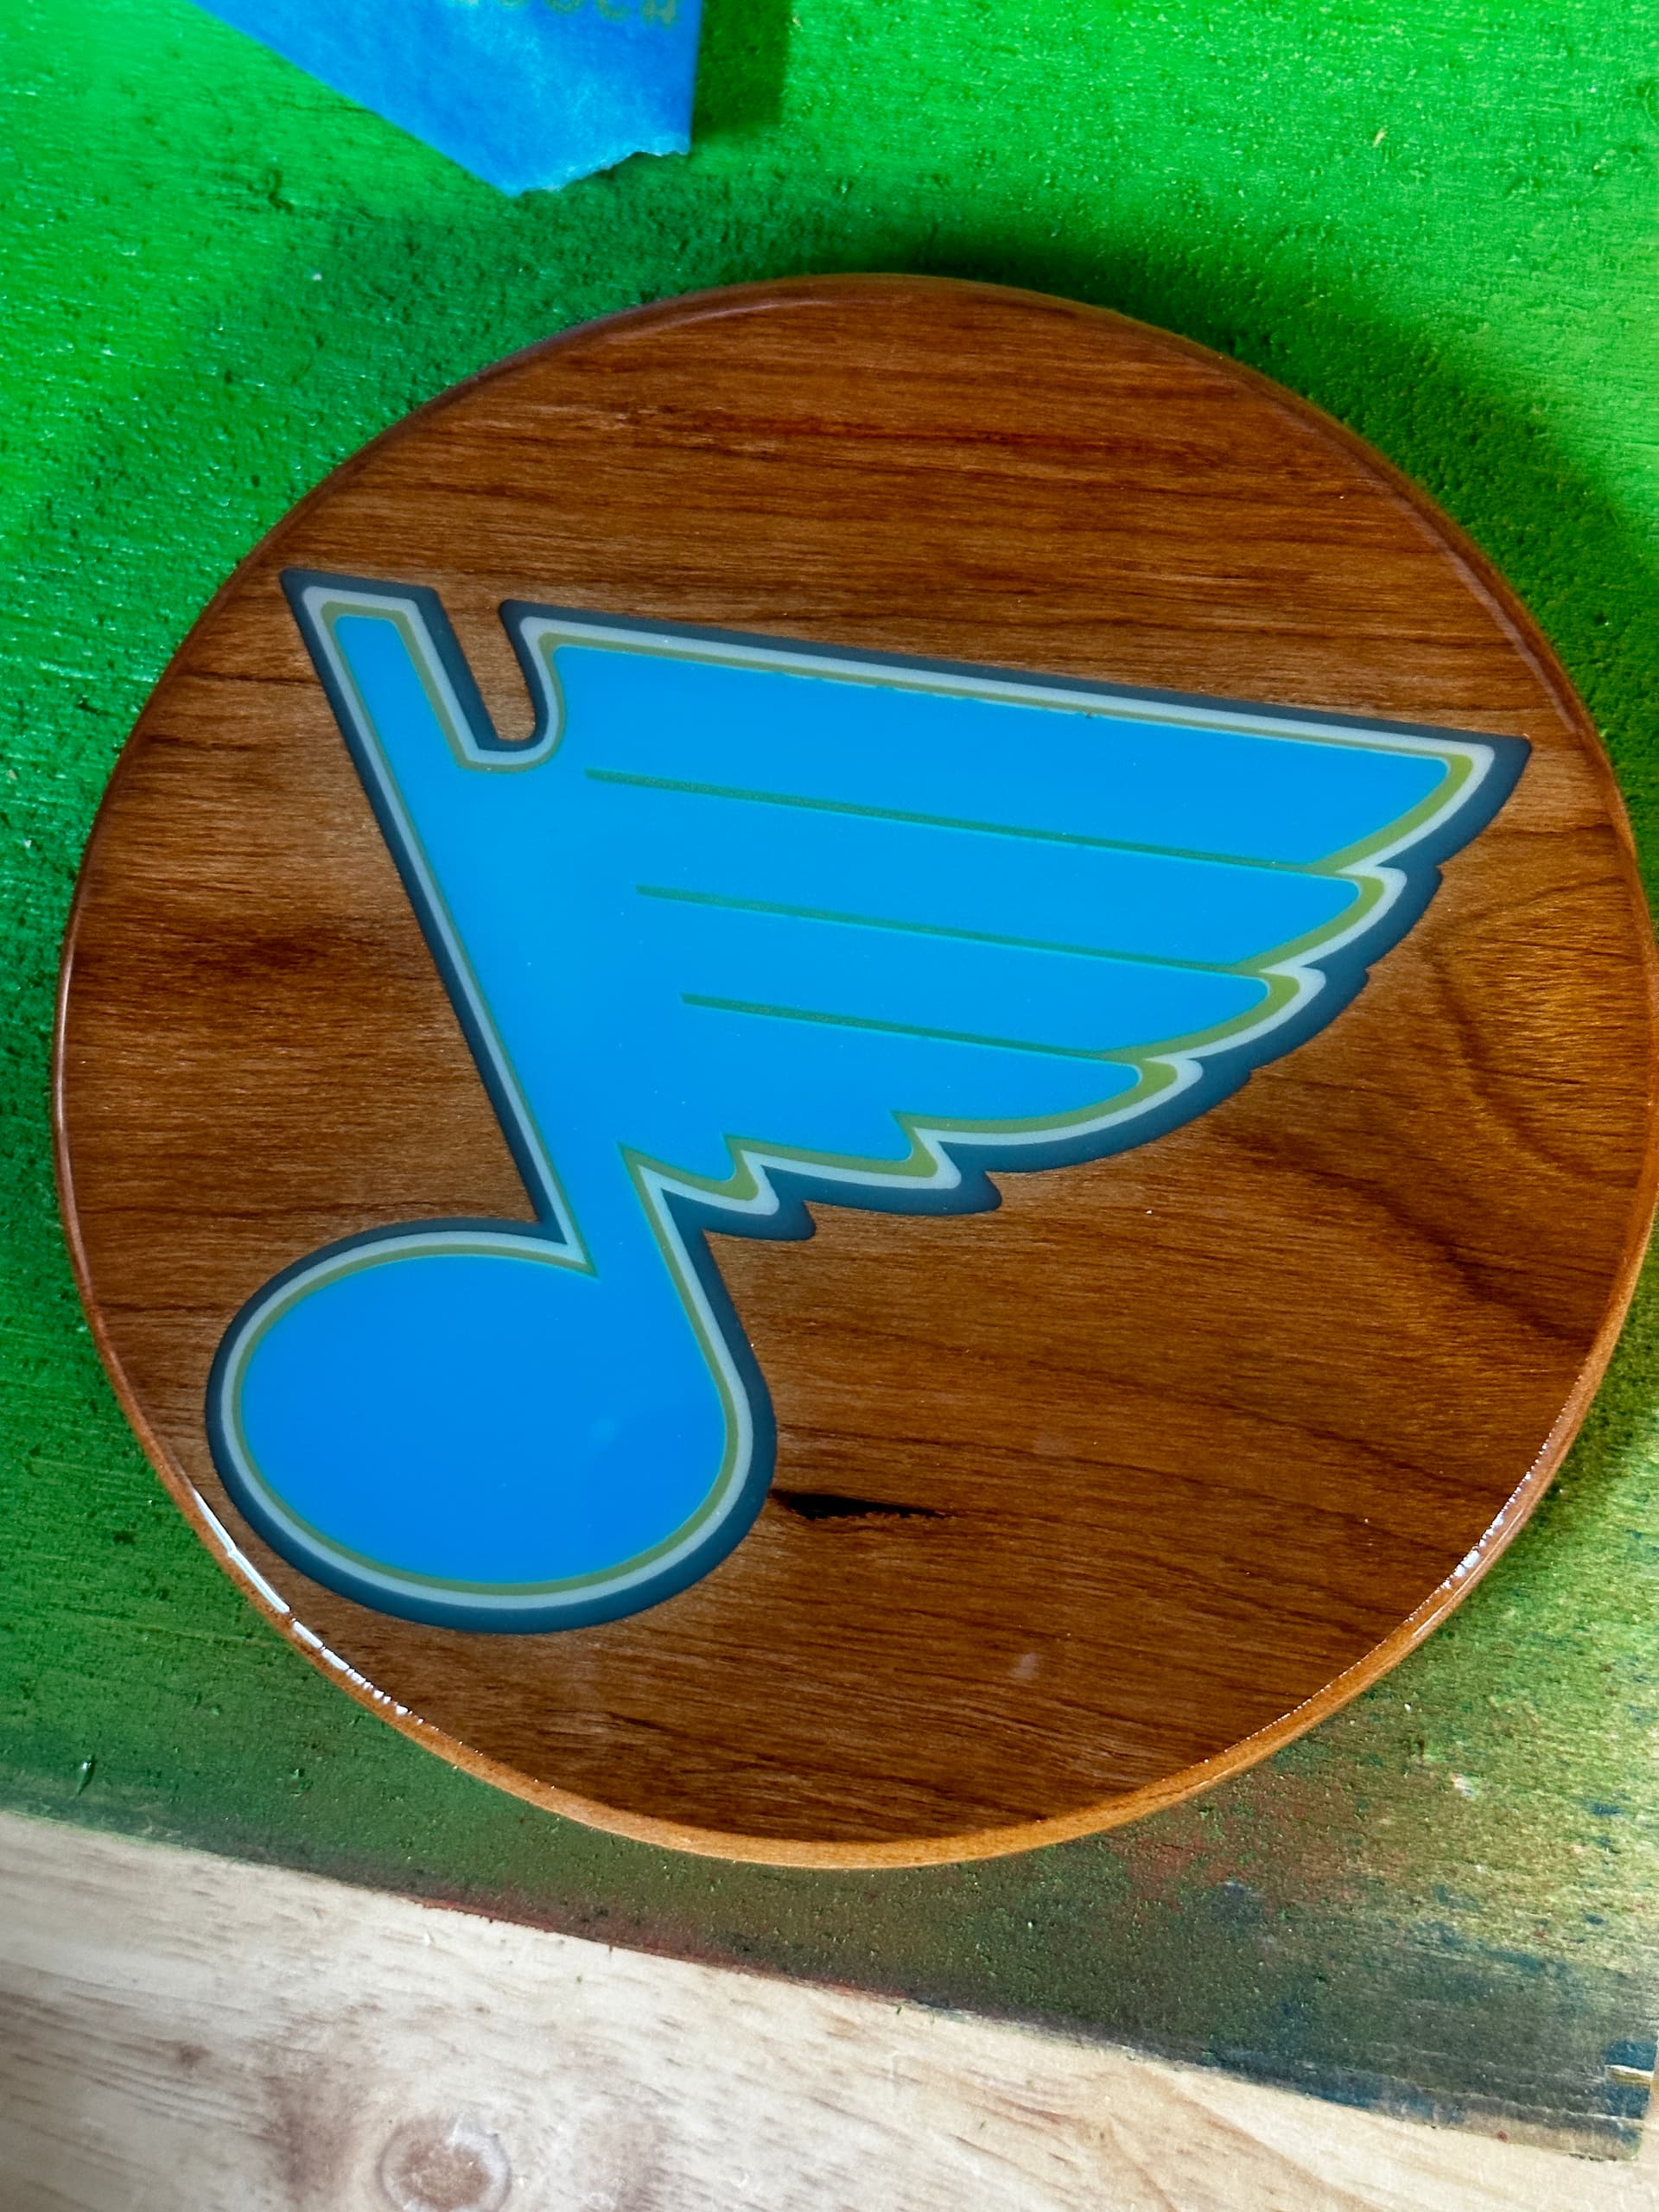
Sorry for resurrecting this post, but thought the progress was interesting along with getting familiar somewhat with epoxy resin.
I obviously didn’t get the consistency in the colors I would have liked, the yellow wasn’t bright enough and is somewhat greenish by being a little translucent and next to the blue.
This was a lot of fun with multiple pocket cuts within the same area to create the outlines and figuring out how deep to cut. When cutting out the pocket in the white layer, I didn’t want to go all the way through it, so the yellow would appear brighter from sitting on a white foundation, rather than the darker blue or even the wood (cherry). I made the opposite mistake when I cut the yellow I didn’t go deep enough to expose the white to the blue layer, so had to cut the yellow a second time.
I still can’t believe the yellow dividers within the blue note survived both cuts, because they are “wa-fer-thin”. Thank you BitZero.
I spent a fair amount of time belt sanding, bemoaning why I committed so much time to this, sanding and attempting to polish it, before learning that I could have cleared it all with McFly. Also later, I figured out that once smooth I could just brush a thin coat of clear resin to bring up the shine. Then later a heavy pour over the whole thing.
Anywho - just wanted to share a follow-up to my initial post and the journey so far.
Also - big thanks to those who have shared their own works, processes and responded to my many questions, because they have all helped me figure out what I have so far.