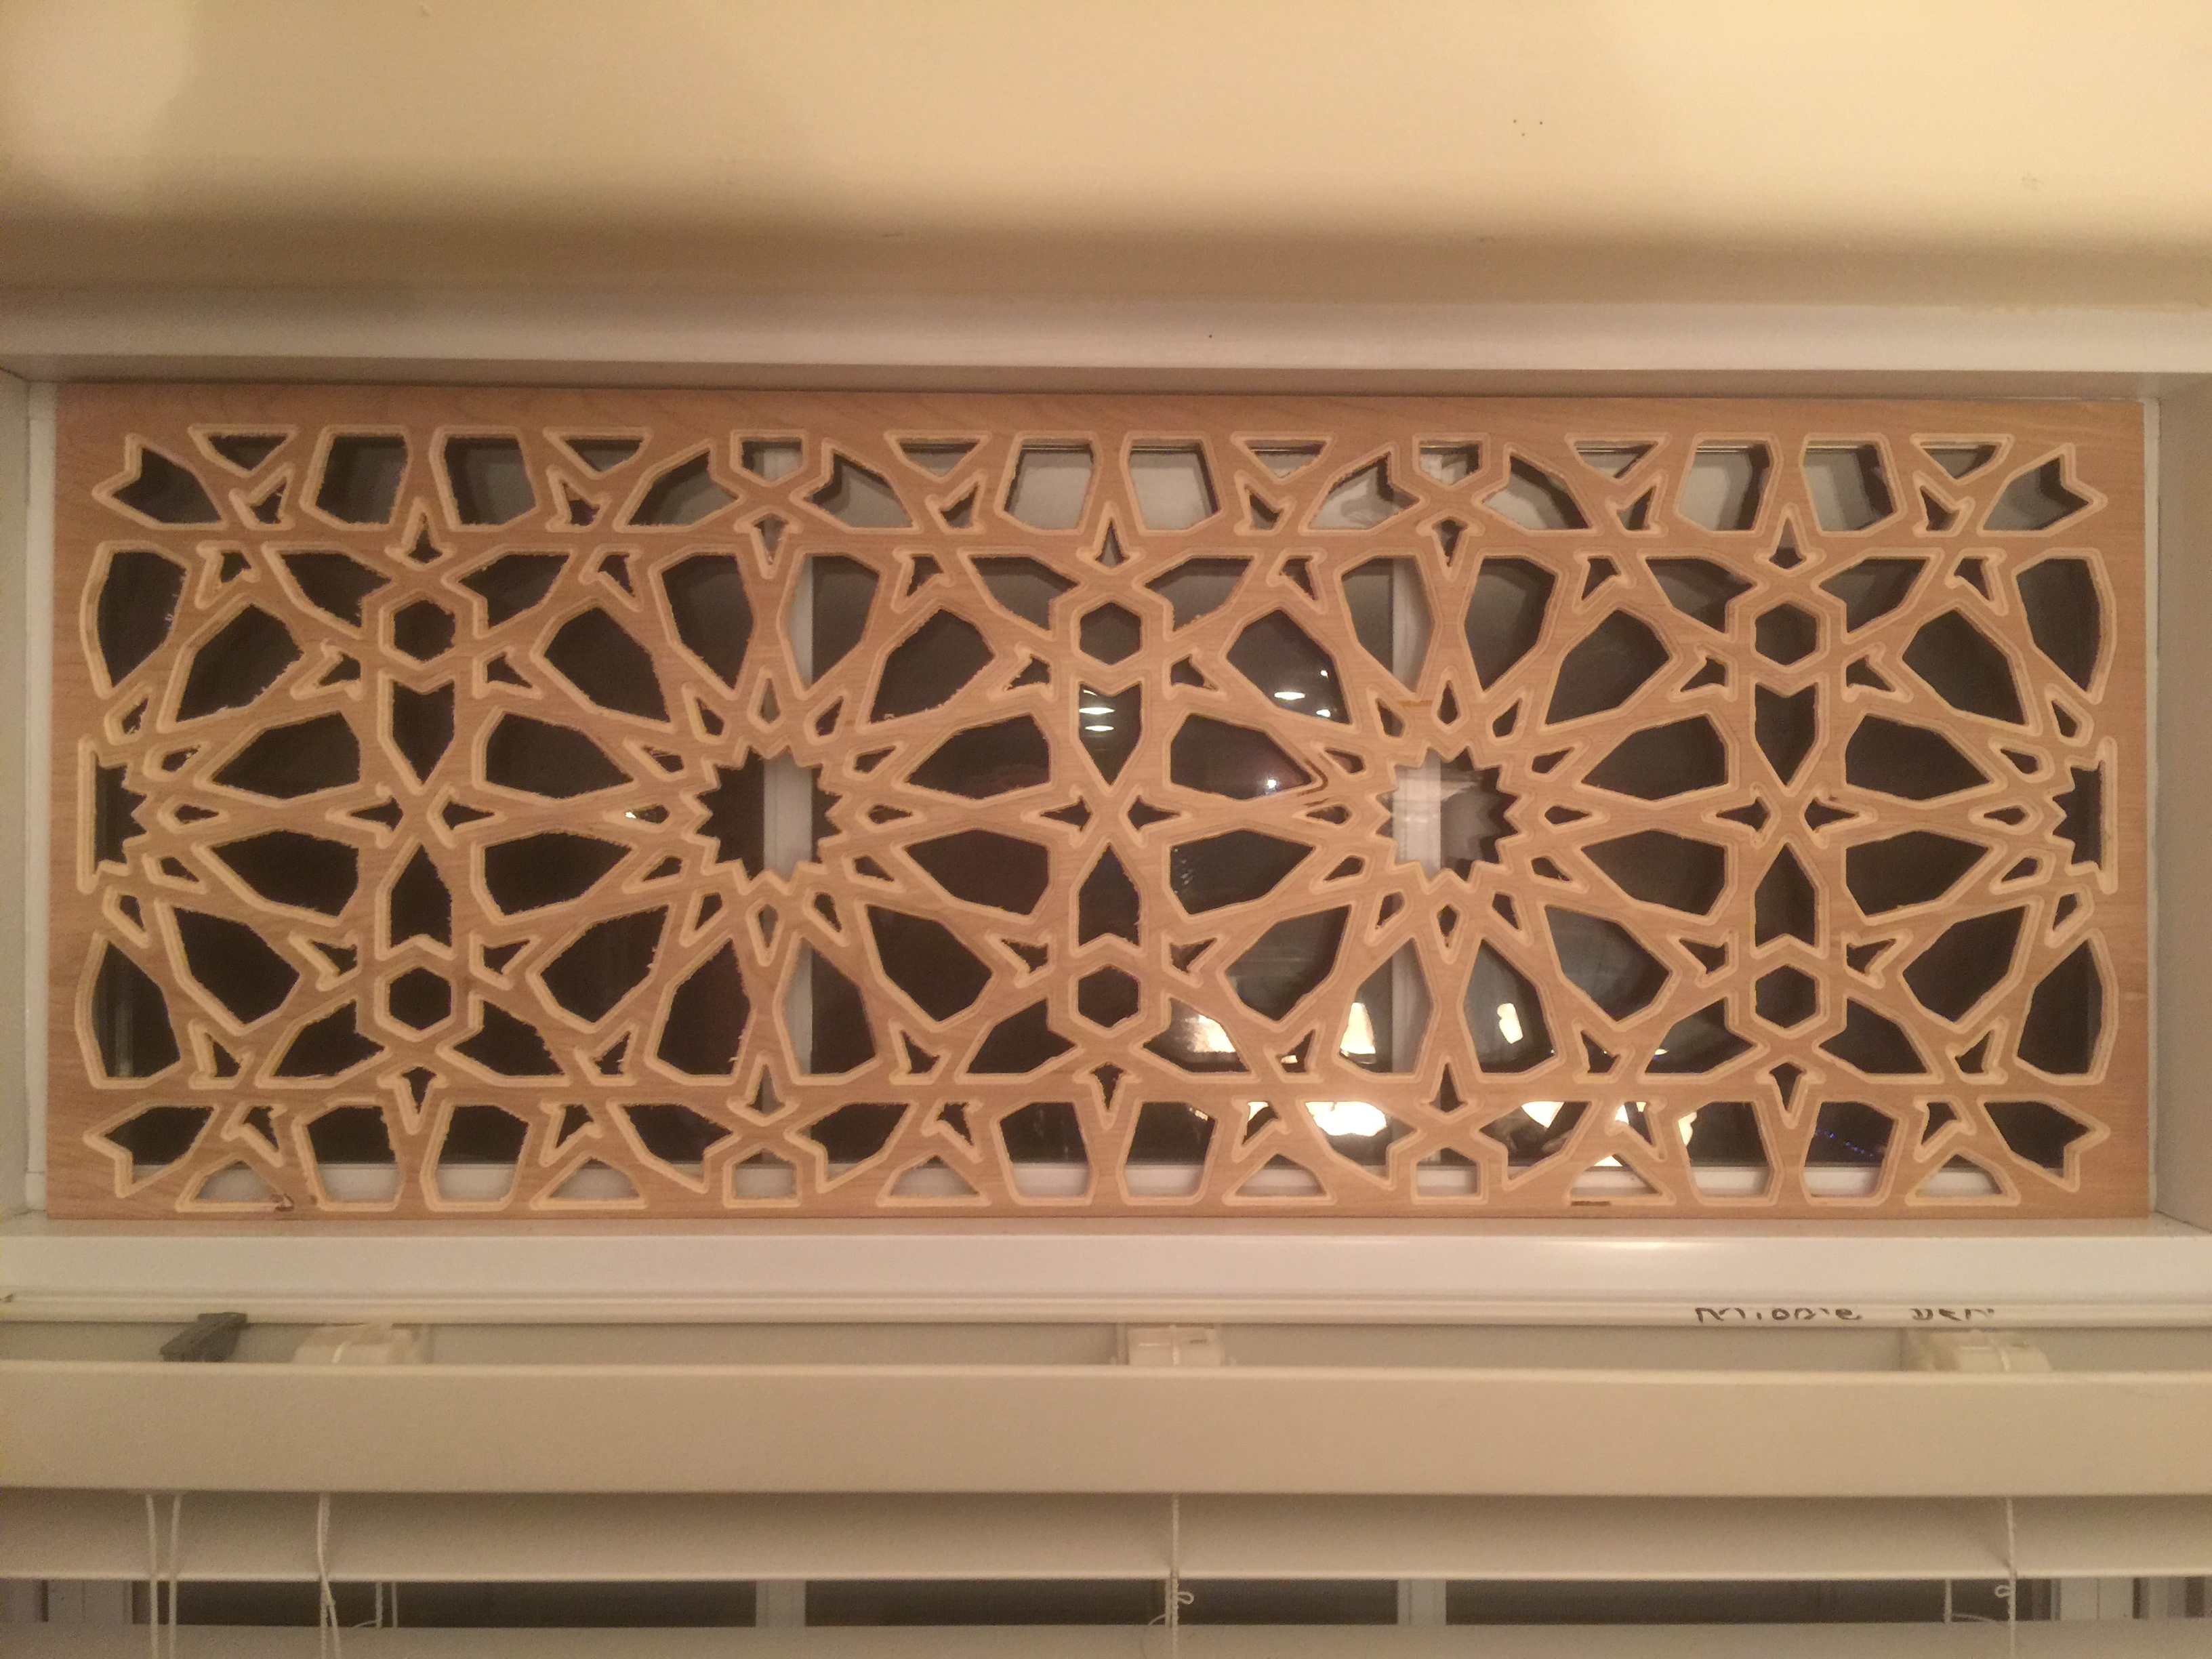
After getting things set up, making a DIY rail/wasteboard, my first project is to create window panels for the house. I’ve got some great big windows in a high ceiling living room. The sun is great but can be sharp and hot in the summer. So, I saw something similar on another site from a few years ago and made my own after finding a pattern I liked and creating an svg in Adobe Illustrator. I started on a smaller window, 12x30
For the most part the project went without a hitch. The first cut was to depth using a 45 degree V bit with inside/left offset. Then an edge surfacing cut with a 90 degree V to about half depth with no offset, which lets the layers of the 5mm panel board pop out.I still have some clean up to do of the edges. Some are a little fuzzy.
I have only one complaint with Carbide. The first toolpath proceeded along rows and was very economical in movement. But the surfacing edge cuts/toolpath was very scattered. Instead of proceeding down a row as the initial tool cuts and moving from top to bottom, the machine went here and there for each, sometimes traveling the whole board from one item to the next. This no doubt added a fair amount of time to the job.
Why did one toolpath proceed economically but then the next toolpath (made from the same selection) proceed with such wasted movement?
Sure. I am reconfiguring them. Perhaps splitting up the tool paths into two separate Gcode will get the second one economical. And my end mills are custom but I’ve just started so the numbers may not be correct. I am adjusting to get less tear out by the edging run.
*Edit : I can’t seem to get the .c2d files to attach???
Any change in tool will often result in a different toolpath order from carbide create (or meshcam). I don’t know exactly why they sometimes come out with such strange order (ideally, it would sort to keep rapid distance minimal) but they do.
I adjusted the orientation as it’ll probably work better for me to cut with the long end vertical on my machine for hold downs not getting in the way of the dust boot.
And I adjusted the size for a slightly thicker border to try next Carbide day.
One file is cut thru. I used a two flute 45 degree v. The edge file is edge surfacing for the bevelled edge with a two flute 90 degree v. Ot that’s what I used anyway.