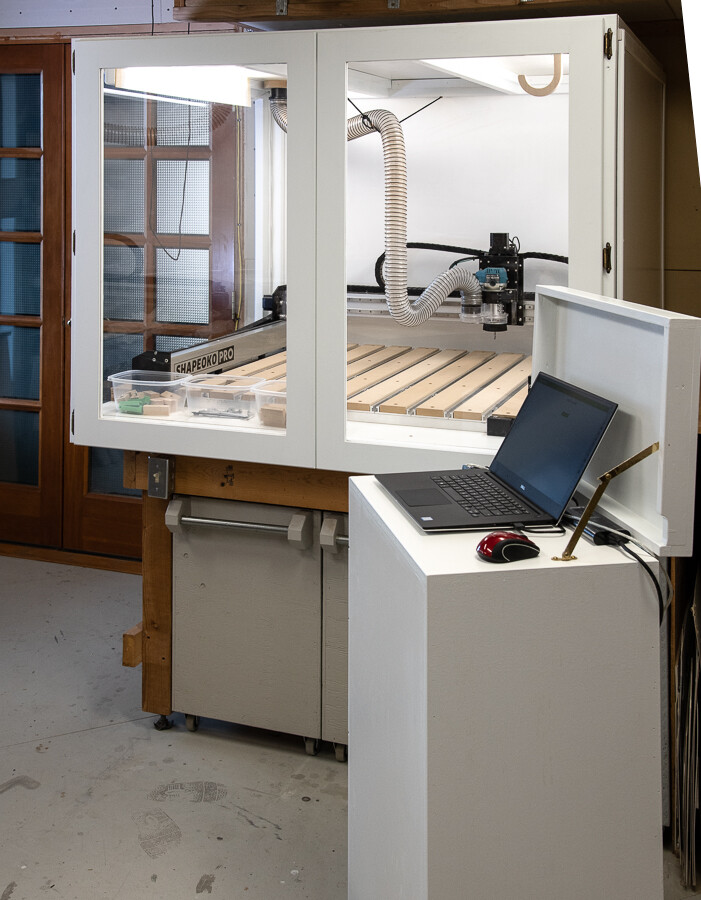
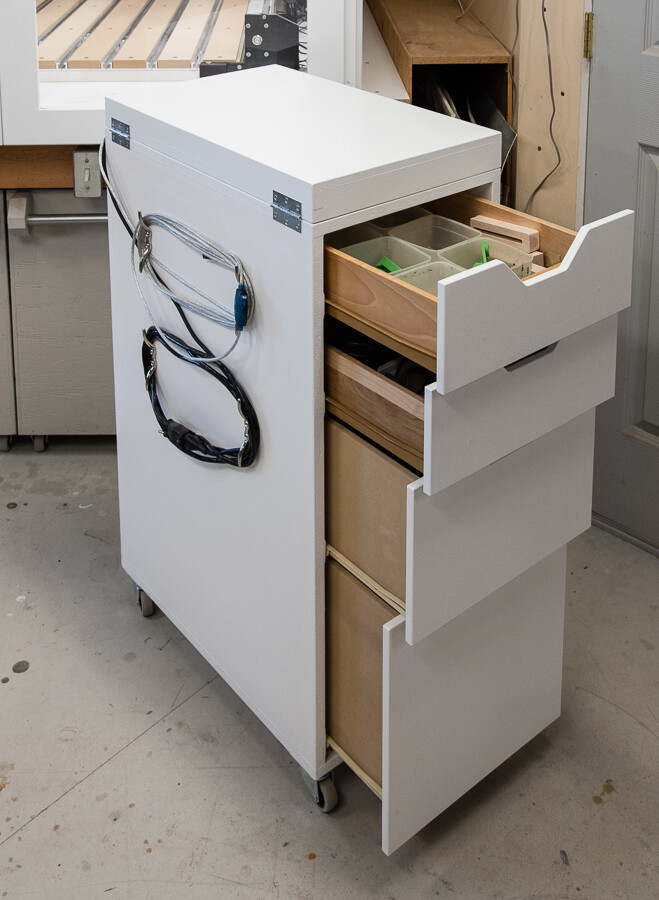
After ordering my Shapeoko Pro, I started to design an enclosure and plan other things that would be needed to integrate it into my woodworking shop. I already had a solid workbench that was the only place left in my shop that could accommodate the Pro XXL footprint. I wanted an enclosure that was roomy inside and had good access to the machine from all sides. I decided on a design that had a frame built from milled 2x4s and panels on the sides, back and top that can easily be removed. I also built a cart to give me a convenient surface for my laptop computer and contained storage for all the hardware needed to use with the Shapeoko. The top of the cart also closes to protect the computer when not in use.

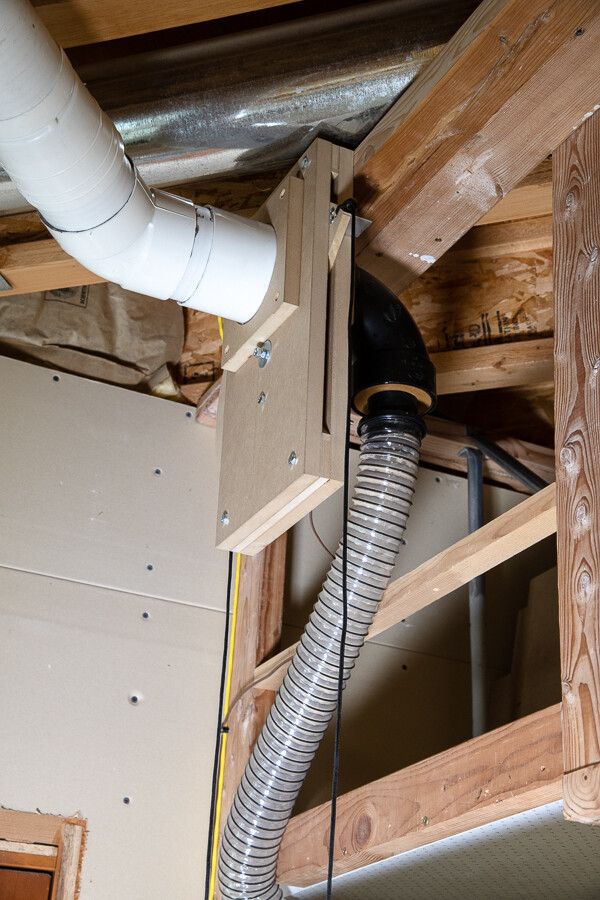
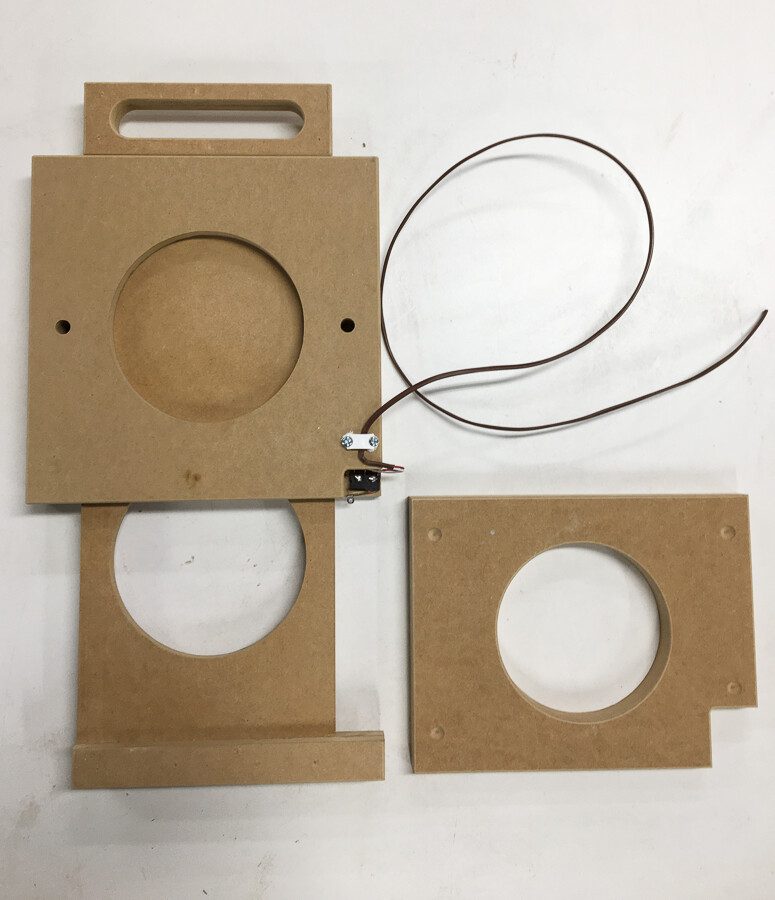
I already had a dust collection system for the other stationary machines in my shop, and I wanted to connect it to the Shapeoko as well. I realized that the best way was to connect the dust collection was from above the enclosure. This required a blast gate that would be way above my head. I came up with a design for a rotary gate valve that could be controlled by a rope from below. I also incorporated a micro switch in the design that automatically turns the dust collector on when the gate is open. I used the Shapeoko to cut the blast gate parts out of 3/8” & 3/4” MDF, as well as the transition fittings to connect to the PVC pipes.
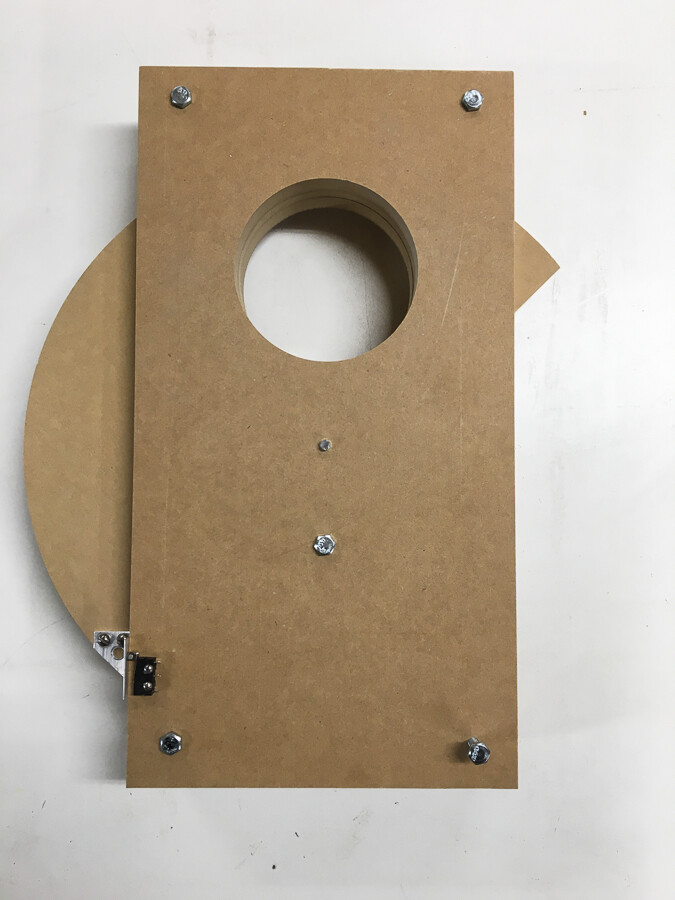
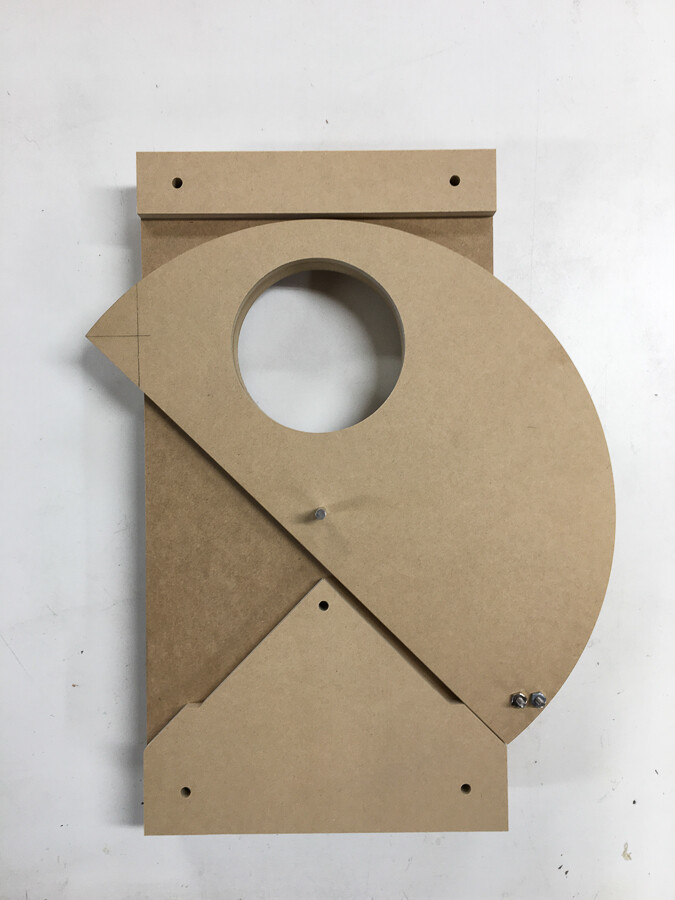
. I liked the way this blast gate turned out so much that I decided to replace the 9 other blast gates in my shop. This allowed me to upgrade all the gates with micro switch control and provide much smother operation than the old gates which were made out of Masonite and particle board and were over 30 years old. These gates were a linear in/out design, and were cut out of 3/8” & 1/2” MDF using the Shapeoko.
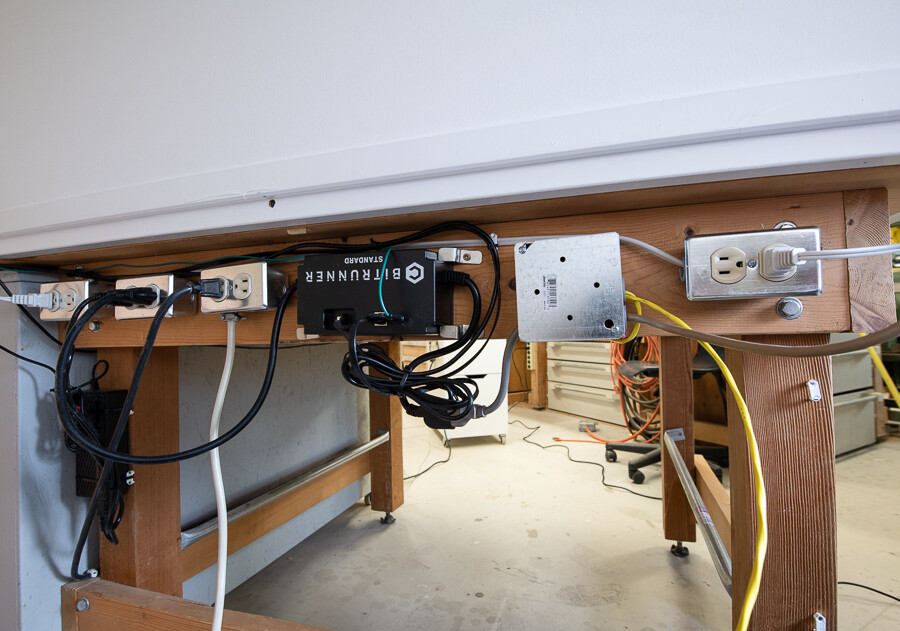
During this project, I accidentally neglected to shut off my router during an unexpected (and unneeded) tool change request which chewed up the surface of my BitSetter (Thank you to Carbide 3D for replacing my BitSetter no charge for my newbie mistake). Beside being a newbie to CNC, one of the reasons I neglected to turn off the spindle is that I can’t hear the router running while the dust collector is on. This prompted me to immediately order the BitRunner. I also decided to connect the BitRunner to a 120 vac relay and wire the relay’s NO contacts in series with the blast gate micro switch. This means that the BitRunner not only shuts off the router when appropriate, but it also shuts off my dust collector. Now I have total silence when the router is off. This is not only a much needed safety feature, but also gives me an immediate indication when the Shapeoko needs a tool change or is finished with a job. I consider the BitRunner to be the best upgrade I have made to the Shapeoko so far. Maybe BitRunner V3 should include a contact closure output to facilitate control of external devices such as this.
I also used the Shapeoko to cut other parts for this project, including: vent holes in the top panels, dust collection hose hook inside the enclosure, drawer fronts, door hinge mortises and extra large hold downs.
