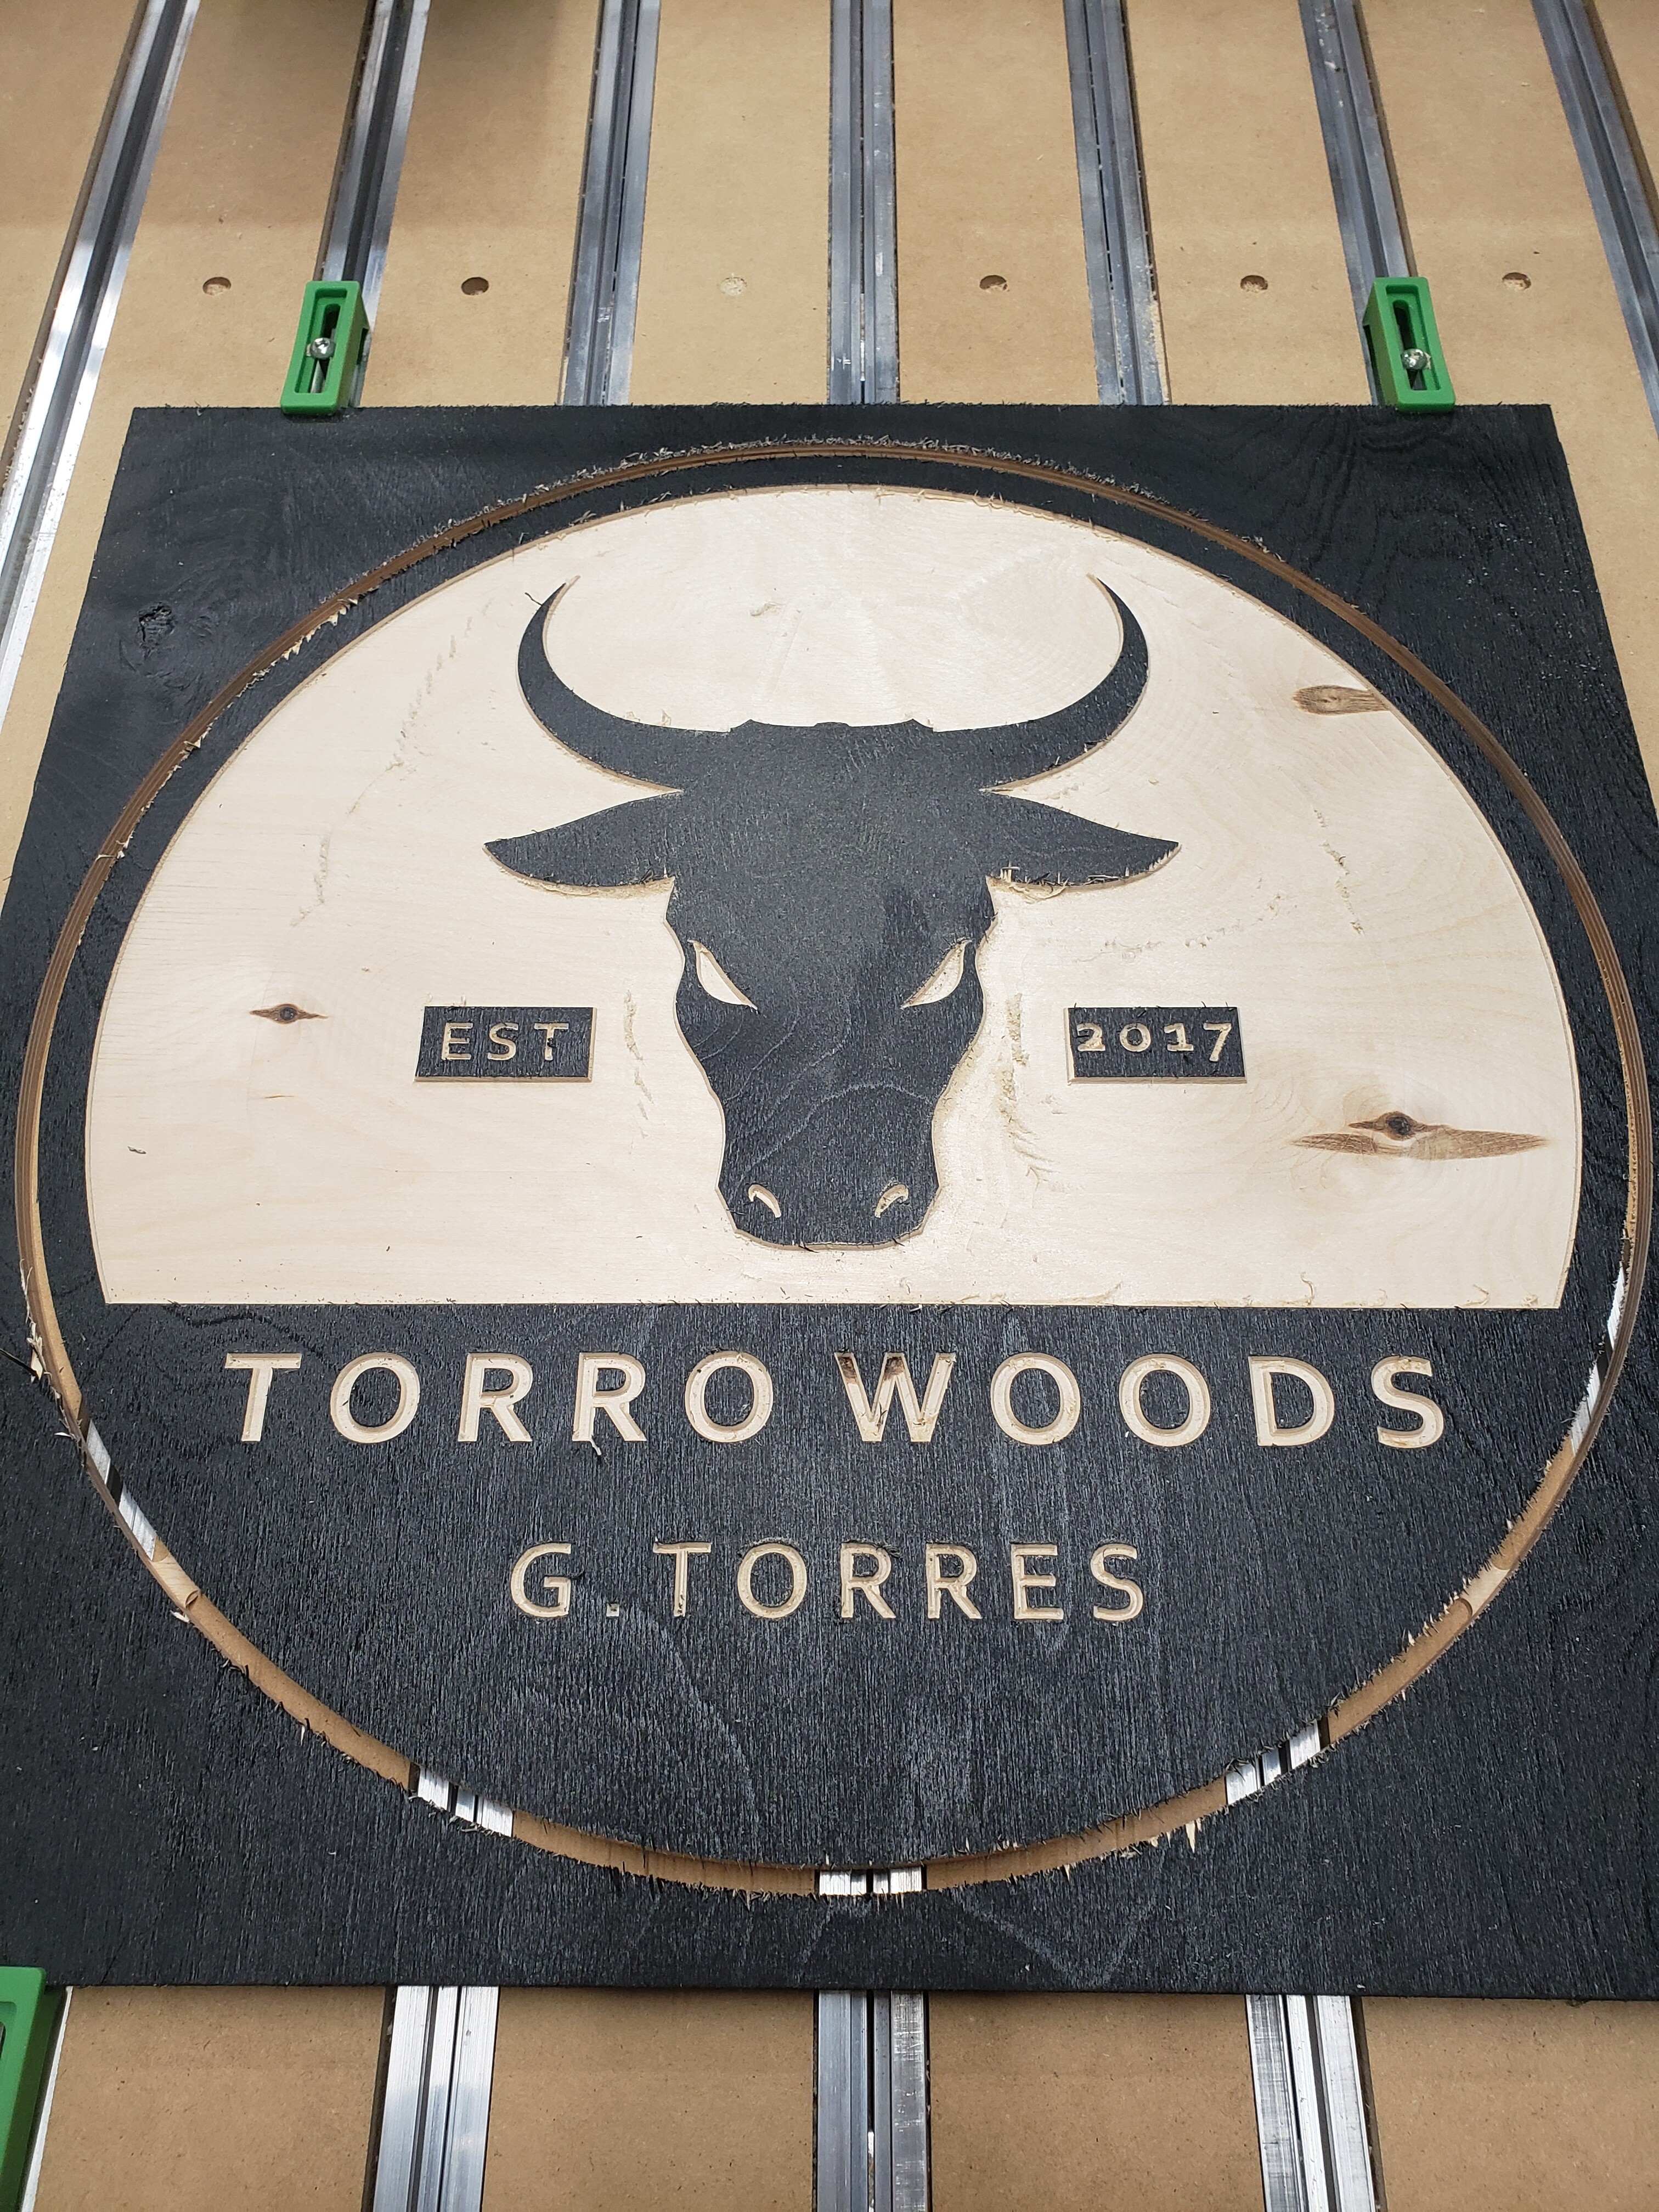
Well to start off I just finished assembling my new SO4. This is my first venture into CNCing and its pretty awesome. I need to learn a few things like speeds and feeds. The chips lifted by the upcut bit is something I guess I have to get used to. The pocket though wasn’t completely clean. Had to do quiet a bit of sanding because you can see where the bit walked thru. But overall I’m happy for my first “keep” project. Any advice and/or suggestions?
9 Likes
Hey @kaizen33,
It looks like you are off to a great start !
Upcuts produce tearout, more so in ply. There are a few remedies:
- using a downcut endmill. It will leave top edges clean and sharp, since it’s essentially pushing down on the material while it cuts (i.e. the opposite of upcuts). But then you may get tearout on the bottom side of the piece. In practice, if you place a sacrifical layer of [anything] under the piece and overcut slightly, the bottom edges will be clean too.
- using a compression endmill (those have both an upcut section at the tip, and a downcut section higher up the flutes) and then using a cutting depth that is such that the tip of the endmill is slightly past the bottom of the stock, and the downcut section is at the top of the stock. This usually means deep cuts, and sometimes deeper than the machine can cope with. More below for a workaround to that.
- finally, you can also leverage the “roughing then finishing” approach. For example, for that outer circle cutout in your picture, you could first use your upcut endmill to mill a slightly larger circle profile (by creating it in the CAD file, using the offset tool). Of course this pass will still produce some level of tearout like you had. But then, you create a second toolpath, which this times follows the original circle you want for the final piece, and you program it to do a single pass at full stock depth. The high depth of cut will not be a problem since you already cleared out the way during the first toolpath, so the endmill will only be shaving off very little material. And this alone can reduce tearout. What is much better is using a downcut or a compression endmill for that finishing pass, and then you are pretty much guaranteed to get clean edges.
Regarding getting clean pocket bottom surface:
- a similar strategy of roughing + finishing can apply too. Use a regular pocket toolpath to mill down to the target depth you want MINUS say 0.02", at whatever depth per pass you were going to use. And then create a second toolpath, that will do a single pass at 100% depth in the same pocket. Also use a smaller stepover for that second pass. The combined effect of the small stepover, and cutting a thin 0.02" layer, should make for a better surface finish.
- the above only works if there are no other effects at play in the surface finish. And if you see periodic vertical/horizontal ridges on the surface, one of the usual suspects is the imperfect tramming of the router/spindle.
- but then again, some woods produce clean bottom surfaces when milled while others refuse to cooperate, and ply tends to be one of the latter.
Happy machining
7 Likes
Thank you for the tips @Julien. They are greatly appreciated. I’ll look into traming and playing with carbide create options you mentioned. Also bought some cut-down bits to try out. Back to playing lol
Pro tip: call them “downcut endmills” rather than “cut-down bits”, at least to not risk a snarky comment from @RichCournoyer ![]()
Let us know what you think of your brand new SO4!
8 Likes
SNARKY? Why I autta…(grin)
6 Likes