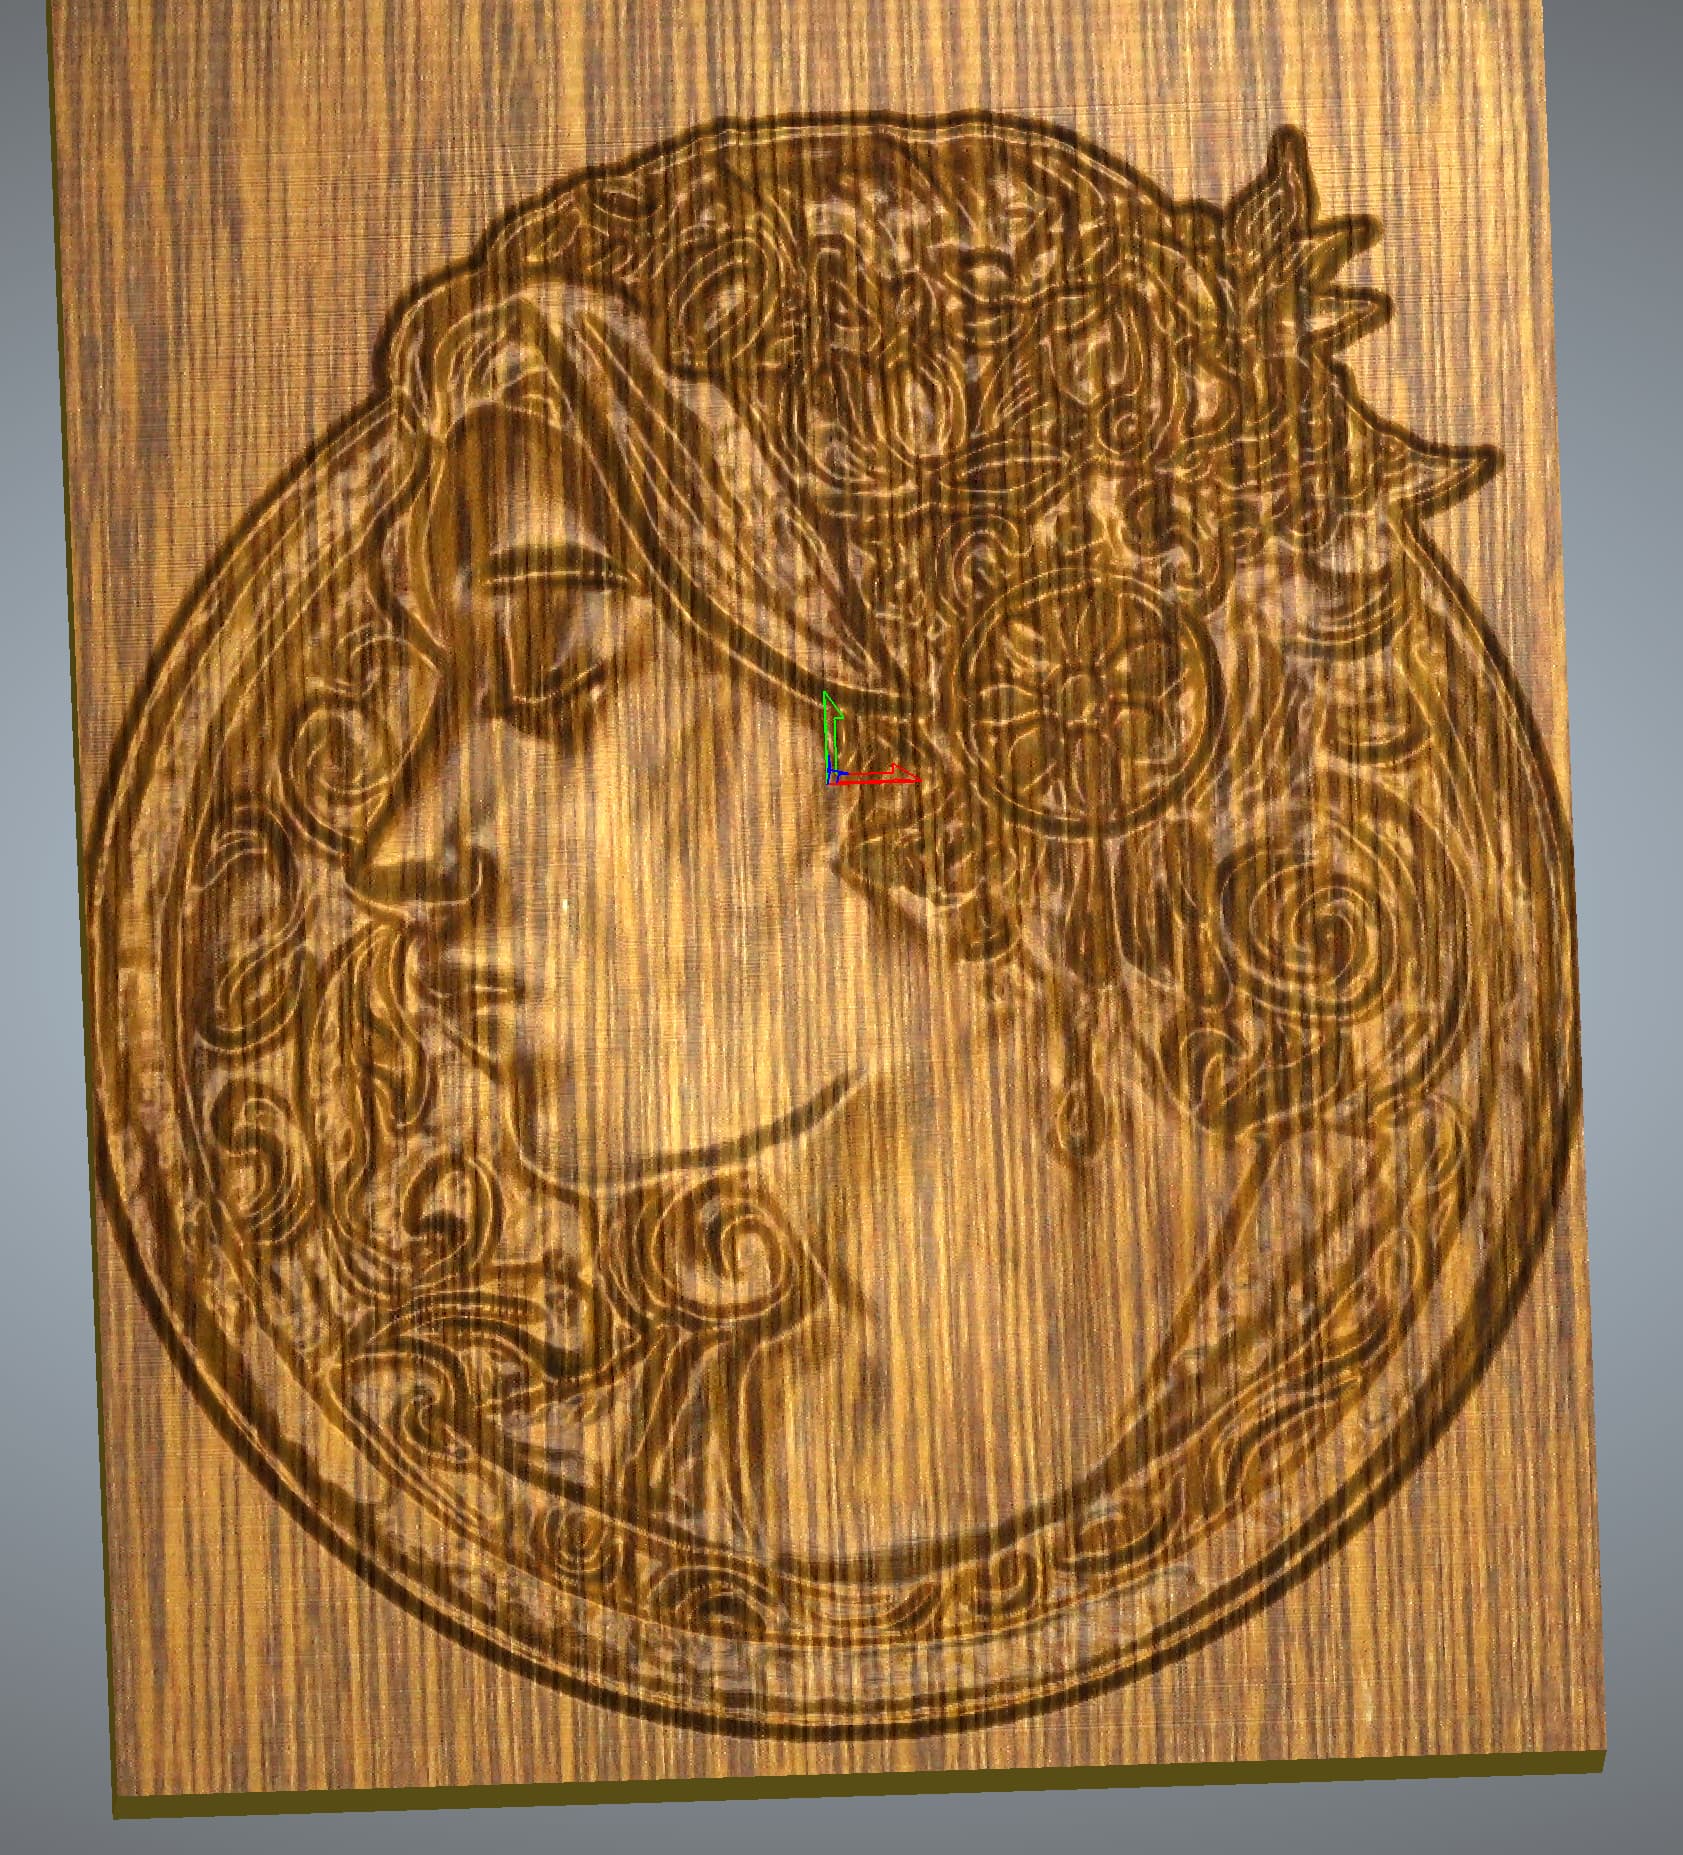
I’ve been wanting to learn some more “artsy” skills lately. Making relief carvings falls firmly within this category.
No real measures, no primitive shapes, no hard angles. It’s certainly a departure from my comfy and cozy world of fusion 360.
My reference image was basically a relief already so I’m definitely not breaking any new ground here.
The process of converting an image to a relief has been covered many times so I’ll do the Cliff notes:
Took the reference image and converted to a height map.
The generated map was pretty rough, especially around the dominant facial features. So I did a fair bit of digital sculpting and smoothing until i felt it looked “right”.
Cut the entire relief with one pass in a raster style. I’m used to working with metals, seeing my little nomad pull off a 5mm doc was kind of hilarious compared to my usual cuts.
All in all, it’s been an interesting journey requiring a very different workflow than what I’m used to. The results are satisfying and tickle be brain in a different way as well. Neat.
This is really beautiful to me. I’ve got a few questions if you don’t mind.
Can you go more in to depth about what you mean by cleanup? I’ve tried importing height maps of artwork and usually have some issues with fuzzy height maps in Carbide Create. Can you give me some tips on smoothing and sculpting the features?
What set up do you use for the 1/16" tapered ball bit? Is it set up as a ball nose or a V bit? If you have a screenshot of the library entry that would be awesome.
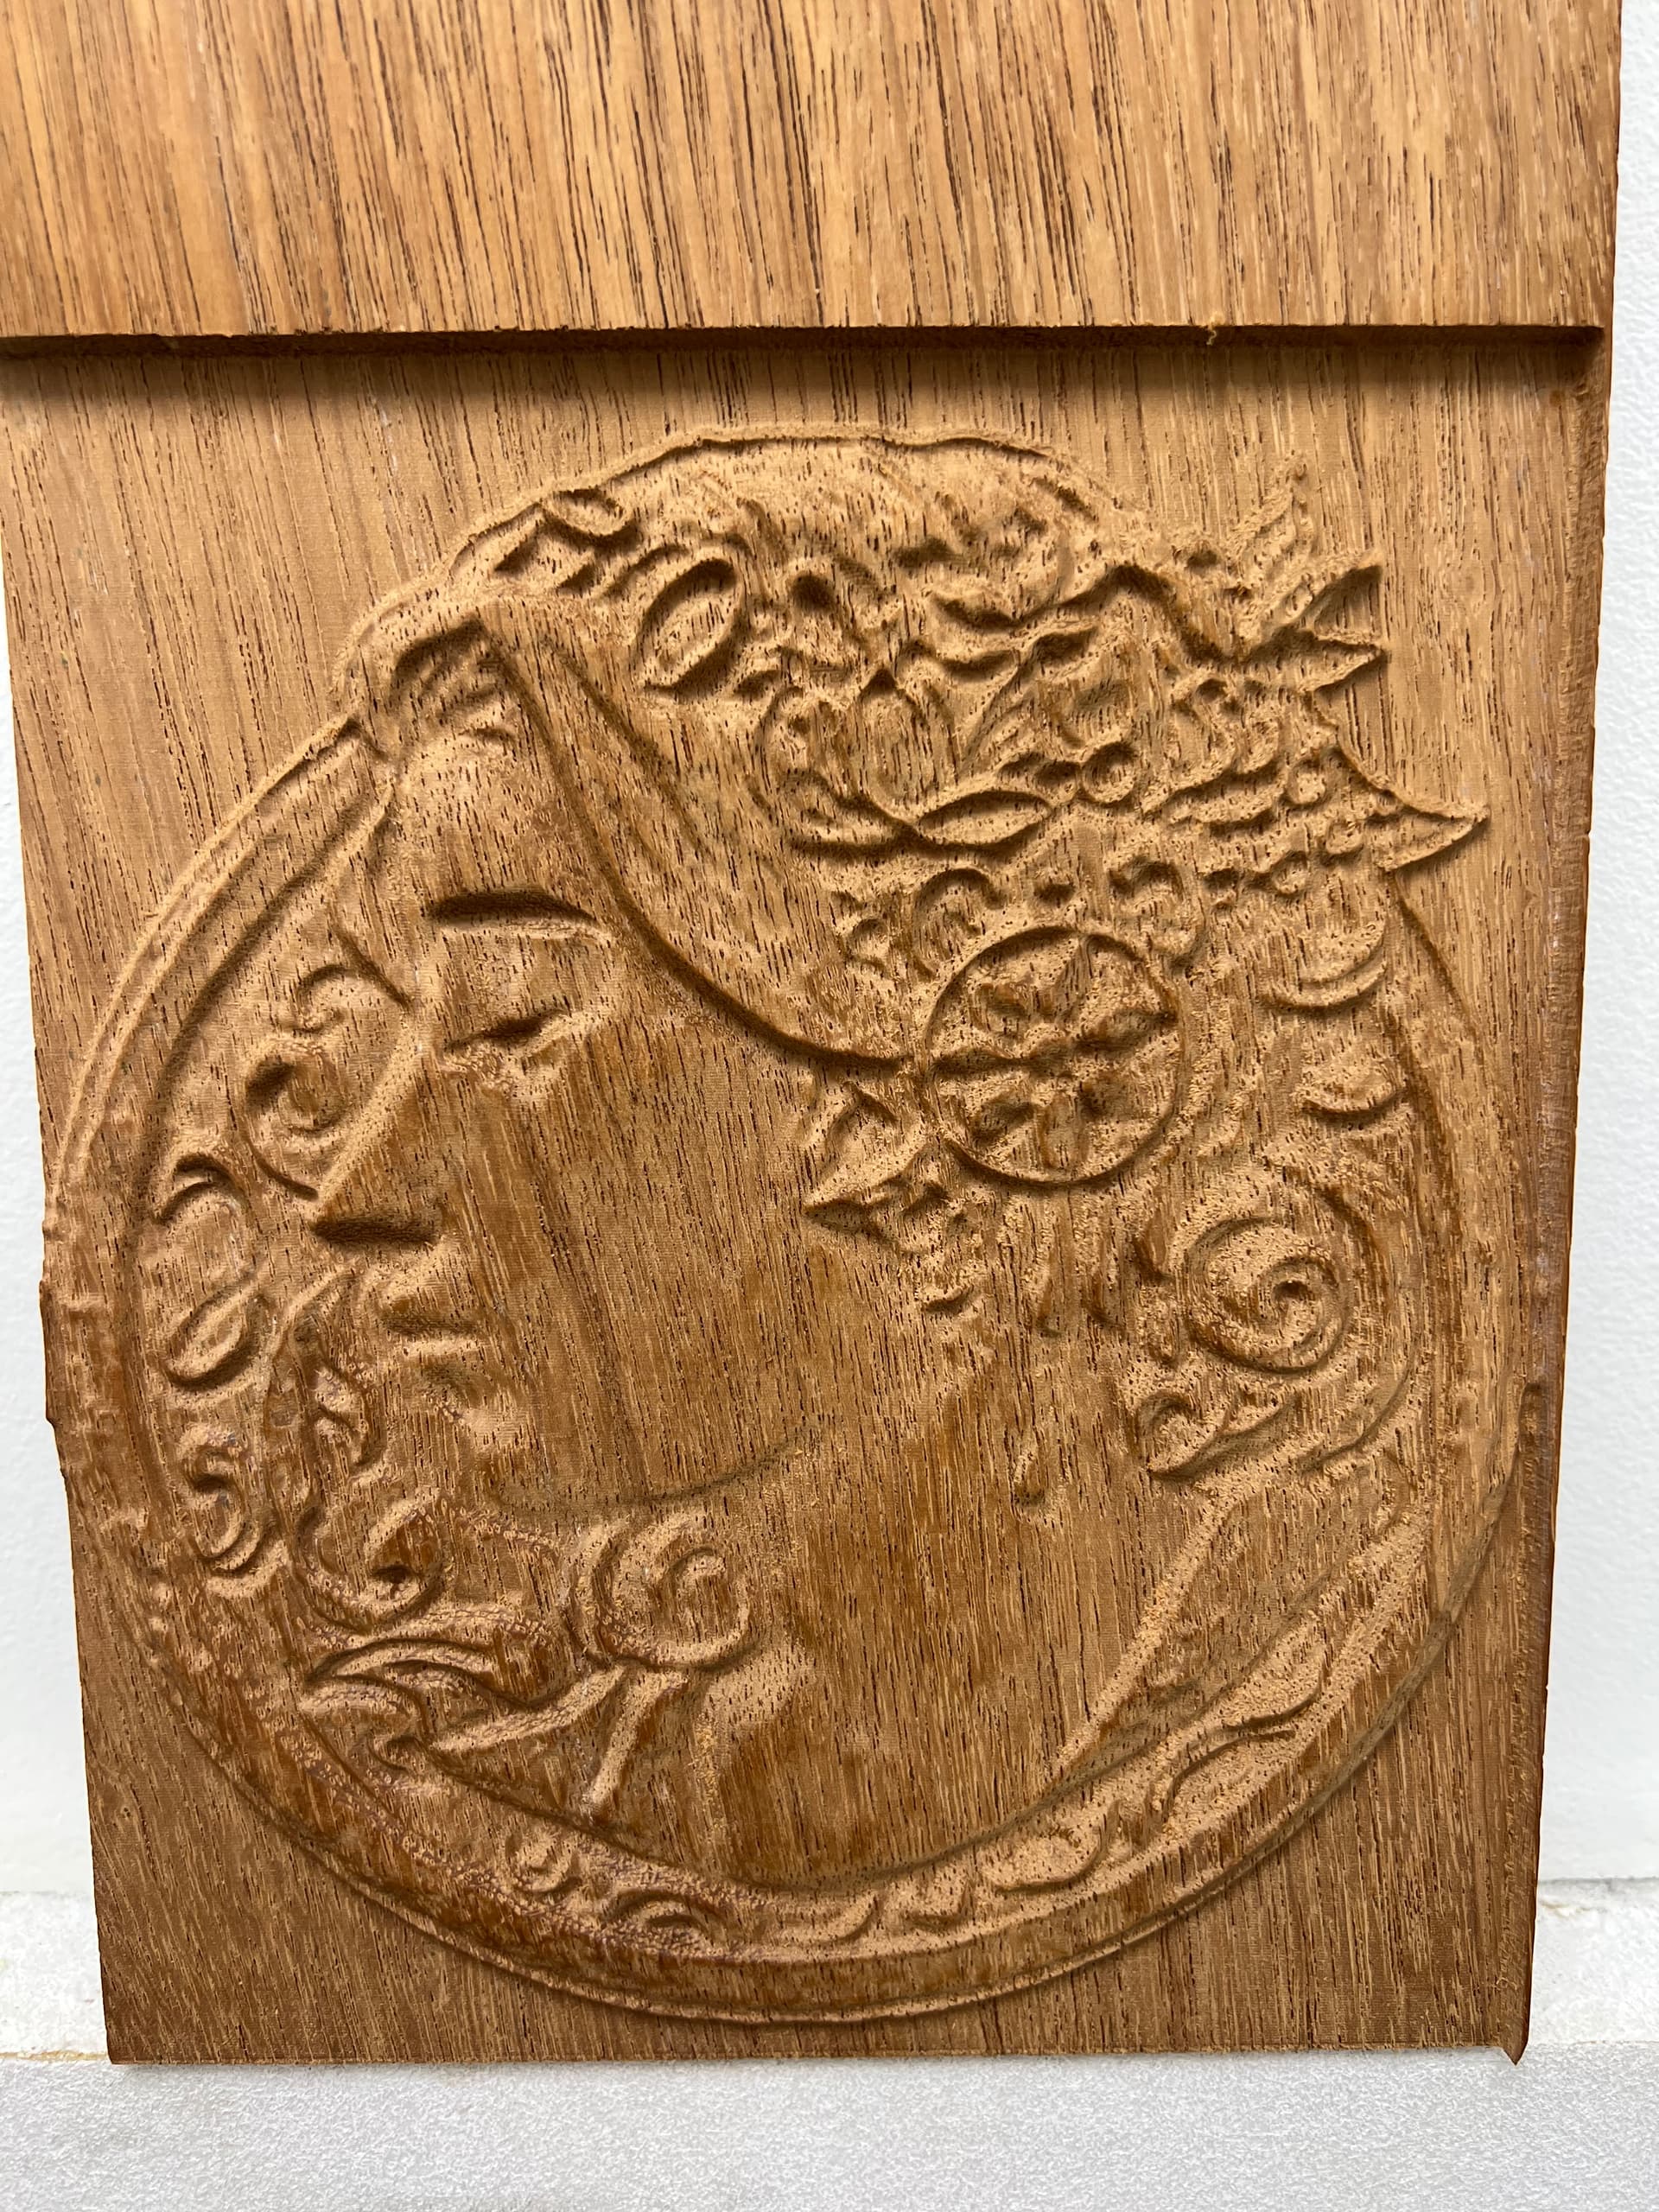
Wow, that is striking. It looks like red oak to me and that’s a difficult wood to mill on a good day. The grain and texture really adds to the beauty of your piece.
I’m still on 2D standard CCreate, but when I make the jump to Pro, I hope I can create things half as beautiful as your project.
This piece was done in carveco maker +
In my limited experience, carveco is:
Painfully expensive
Difficult/Obtuse to use
Hard to beat in terms of results
This makes for a love/hate relationship with the product.
I did purchase a carbide create pro license over the weekend so i hope to see what i can do with a more reasonably priced/approachable program.
Cleanup was mostly smoothing the fuzzy heightmap like you’ve experienced. Then it was a matter of manually knocking down the spots that are too high and raising the spots that are too low.
In my case that meant a good deal of work with the cheek bones, nose, and eyes.
Carveco gives you tools to work with the object like a digital clay model. Like actual sculpting, so i didn’t have to do the “cleanup” in grayscale or anything like that.
I’m hoping i can accomplish similar results in carbide create pro but I’m guessing another piece of software will still be required in the workflow.
My approach for cc pro is going to be:
Generate stl from heightmap in something like blender.
Cleanup the sculpt in blender.
Export the stl.
Import into carbide create pro.
I’ll certainly provide updates on how this approach goes in the coming weeks.
For this particular carve, i wanted an aesthetic that looked roughly hewn. Something that could have been done with primitive tools in stone. That really gave me a lot of leeway in terms of aggressive smoothing and loss of detail. It was a fairly forgiving project all things considered
Oh and the dark grain running down her face looks like a tear. That was complete coincidence. Wood is weird
I’m pretty sure this is Zebrawood. I just got a hardwood sampler with a bunch of 6"x12" boards to play with. I’m really surprised at how little tearout there was consider the long grains on this stuff.
That said, I know more about stars than I do hardwoods…and I don’t know squat about stars
It seems like you are on your way to a much higher proficiency in this kind of thing than I’ll ever see. Even attempting a guess at which wood this is tells me your knowledge of the medium is heads and tales above my own. I expect in 6 months I’ll be asking you how I can get my carvings as clean as whatever you’re doing
How did you put the tapered ball nose into Carbide Create? I have entered new tools in before, but I don’t see a way to combine the properties of a V bit and a ball nose in the tool library. I have to enter it as either a V bit or a ball nose.