I’m a new Shapeoko 5 owner and new to CNC but have done a lot of 3D printing and general trouble-shooting with 3-axis systems. I wanted to post a problem and a fix in case it helps others.
TLDR Problem: My machine cut sloppy circles and then started failing to initialize. It wouldn’t clear the X limit switch and threw GRBL errors.
TLDR Solution: the ball screw shaft was loose for the X axis introducing some play in the X movement, especially when switching directions. Tightening the shaft nut fixed all problems.
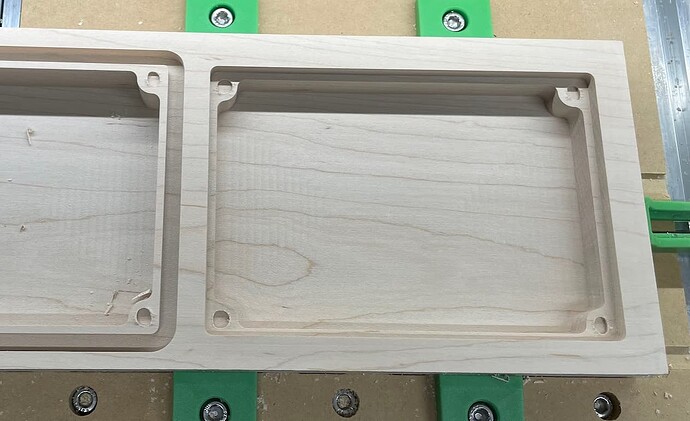
The first problem I noticed was that some small circles I cut for magnets were sloppy and inconsistent:
Later, when I started up my machine, it wouldn’t initialize. I don’t remember the exact error but basically it wasn’t clearing a limit switch. I turned off the machine, manually moved the gantry to clear all limit switches, then turned it on and checked all switches with a piece of metal. They all lit up fine. In the diagnostics menu, they also showed the correct status when testing. I figured out it was the X limit switch that needed clearing and noticed a jerk when the X axis was changing directions. Turning the machine off again, I manually moved the gantry on the X axis and noticed it had sloppy play when changing directions. The shaft was loose and the motor would turn for a bit before the shaft engaged, causing it to not fully clear the limit switch when initializing.
I figured out it was the ball screw shaft but it took me awhile to figure out exactly which thing needed tightening. Here’s how you do it:
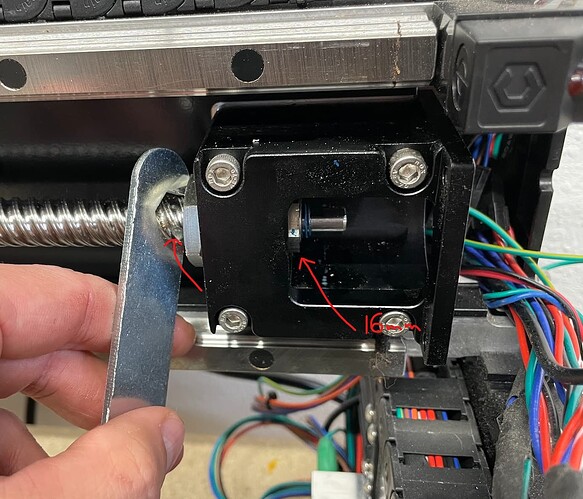
Remove the X axis stepper motor and coupler, which requires loosening both the collar screw and a set screw. Once the motor and coupler are removed you can access the shaft bolt:
Once those are off, you can tighten the shaft bolt using a 16mm (I think) socket with an extender. You should have a tool that came with your machine that prevents the shaft from turning when you tighten it:
Reinstall the the coupler (tightening both the collar and set screws), the motor, and make sure all screws are nice and tight and you should be good to go!
Note that this can happen on any axis. I have had issues with the couplers and shafts coming loose on all three axis! Make sure these screws stay tight over time and use the temporary lock tight between the couplers and the shaft to save yourself some headaches.


