I have been toying around with some ideas for the holidays for family, trying to get ahead of it. My dad is an avid golfer and he had asked me awhile ago to design him something to use while he was golfing so I decided on a putter. I want to design the putter and mill it out of aluminum for now so I can perfect the design and maybe add weight or change materials later. I have sourced some wood pieces for testing and aluminum bar right now to just mess around but the problem is my design capability.
Currently I have Carbide Create Pro and Fusion 360 for hobby. Which program would be better for me since I have limited design experience except for 2D stuff? Any other programs I should look into that are Free, I dont have much of a budget right now for new programs?
My idea is to put the face of the putter down and just mill out the entire back, shape, and sole of the putter in one program to avoid moving the pieces multiple times. In the end I would adjust the face loft through angle of the neck as it attaches to the shaft.
In 3D design if I wanted the face pointing down which face should I start the design on? If I mess up the start of the design by picking the wrong face am I able to change the design so it is on the correct face later?
I will try and get a rough sketch drawn over the next day or so and upload my idea, just trying to get a feel for what the task would involve. Thanks
while Carbide Create Pro is great for designing “simple” 3D shapes in no time, it’s nowhere near as flexible as Fusion360 for creating “arbitrarily curvy” shapes, so for a golf putter that will probably end up having a complex surface, and assuming you are comfortable using Fusion, I would use that. That said, if the putter shape is really simple with lots of symmetries, it could turn out to be simple to do in CC, we would need to see your sketch to tell.
In Fusion360 the 3D model part and the CAM/toolpaths part are pretty much independent, so you can choose and change the orientation of the toolpaths coordinate system at will without impacting the 3D model. That should address your uncertainty about which face will be the best reference for toolpaths.
I guess you may want to mill some kind of texture on the flat face of the putter, in that case you will probably end up with a two-sided job anyway, so you may want to plan for that upfront.
Thanks for the reply. I plan on doing something similar to this design. I would not say i am comfortable using fusion 360, just did some practice off youtube videos part of a 16 part series.
It looks like there are a few 3D models of golf putters on Thingiverse, this may save you all the CAD time to focus on the CAM/toolpaths instead and get cutting. Importing an STL in Fusion360 and generating 3D roughing and finishing toolpaths should be quick.
I’d suggest going for fusion360. Having a cool project like this is a great way to learn the software and up your design game. I totally get that it’s a steep learning curve, but as you get stuck you can ask here and people will help you along
Search these forums and YouTube for 2 sided machining and fusion360 tutorials, there is loads of good stuff on there.
I’d design a simplified version of what you want to achieve, try and make that out of wood, then put a few more curves and features in, then adjust your toolpaths, then do another test, then progress that way
Thanks again. I did now know of the thingiverse website i will check it out. Im gonna try to design one myself at first and if it fails i will look into purchasing a designed one.
Just so you know, models shared on Thingiverse are actually free, they are usually shared under a license that will let one use them freely for non-commercial use, as long as credit goes to the original author.
That said, designing your own is way more interesting indeed, as a learning experience. As @Stu pointed out, don’t hesitate to ask for help here if you struggle with Fusion. Many of us dabble in Fusion at least occasionnally.
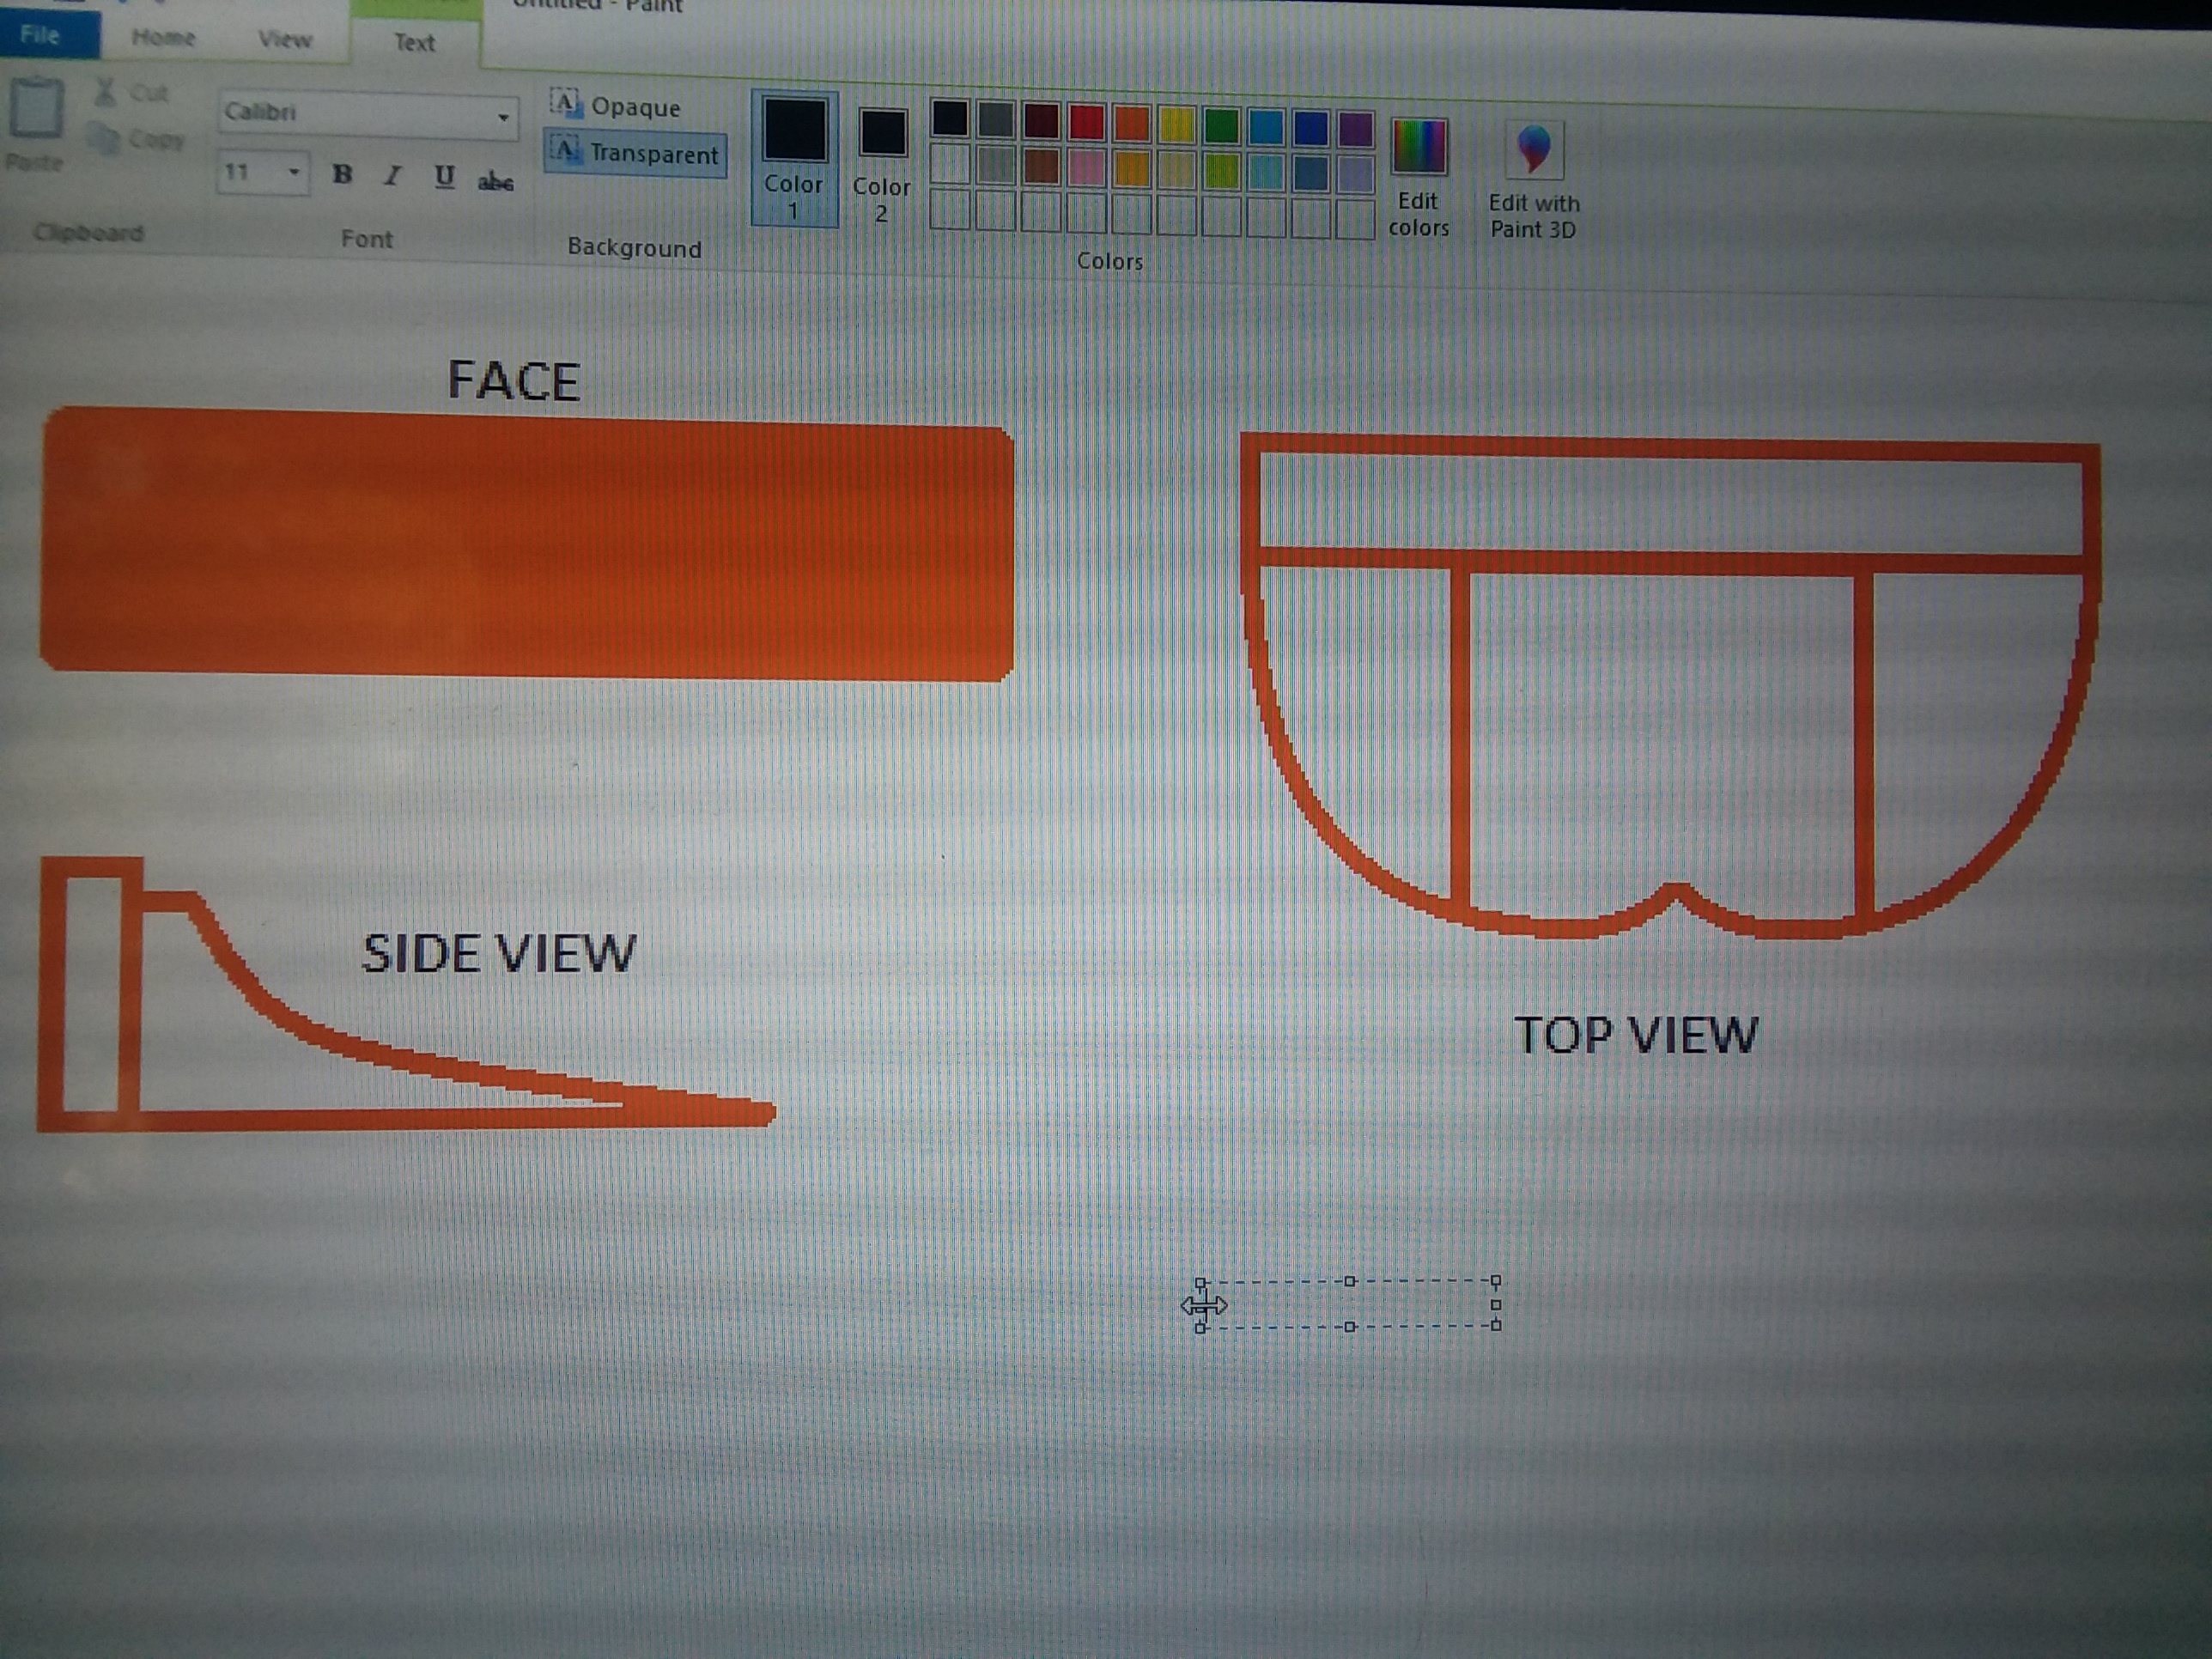
So I dove in deep with Fusion 360 over the past few days and have came up with a design for my golf putter. I originally was planning on putting the face down and then milling the entire putter from my aluminum bar. After designing it I see I may have messed that up by the arc bottom since the cutter wont be able to bend around it…sigh. I also messed up in putting my fillets in there before I was done designing so I had some troubles with that but think I got it mostly solved.
So my questions:
1 - How do I go about creating cutting code? I created some cutting paths in Fusion 360 but how do I save them to where my shapeoko xxl will run them.
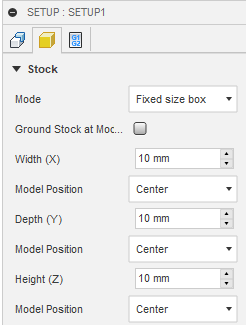
2 - My aluminum bar measures 110mm long x 64.6mm wide x 38.5mm tall, how do I put these measurements in the design so that it knows how to cut the putter out? I would like the project centered in the bar so that I can utilize the extra on the ends for hold down and also tabs.
3 - Looking at my design I almost feel I will need 4 different cutting files. One for the top, One for the bottom, One for the face, and One for the back cutout where the name is located. Much more difficult than I envisioned when starting this.
4 - I plan on using a 1/4in end mill for the roughing and maybe a 1/8in ball end mill for the final pass? Does this sound okay based upon the design?
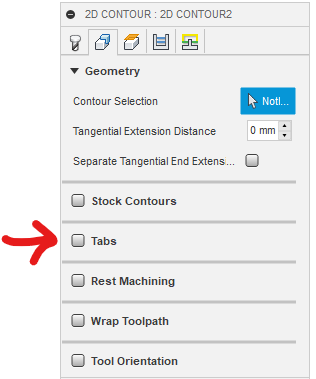
5 - How do I add tabs in Fusion 360? I figured I would put a few on each side so when I flip it over it will still be attached. I can file these or sand them off later during final hand finishing.
Im sure I will have some more questions as I debate this further but I have attached my file so you can view and assist me in any ways. Thanks!