Seasons greetings and hope that you all had a good Christmas and are all in good health.
Until now I have been faffing around doing small tests designs and toolpaths to gain experience with Carbide Create as I have yet to finish setting up my SO3 and I really struggle to believe that I am selecting the right tool. A case in point is the attached Tree of Life file. I downloaded a JPEG and used Inkscape Trace BitMap to make the SVG.
All went well (IMHO) until it came to setting up toolpaths
I used the pocketing option (320 1/4" end mill) to hog out most of the material.
I then used the same operation (102 1/8" end mill) to clean out the majority of the remainder around the tree but in better detail.
I then moved on to finally using Vcarve (30degree V bit) to clean up the final edges of the tree
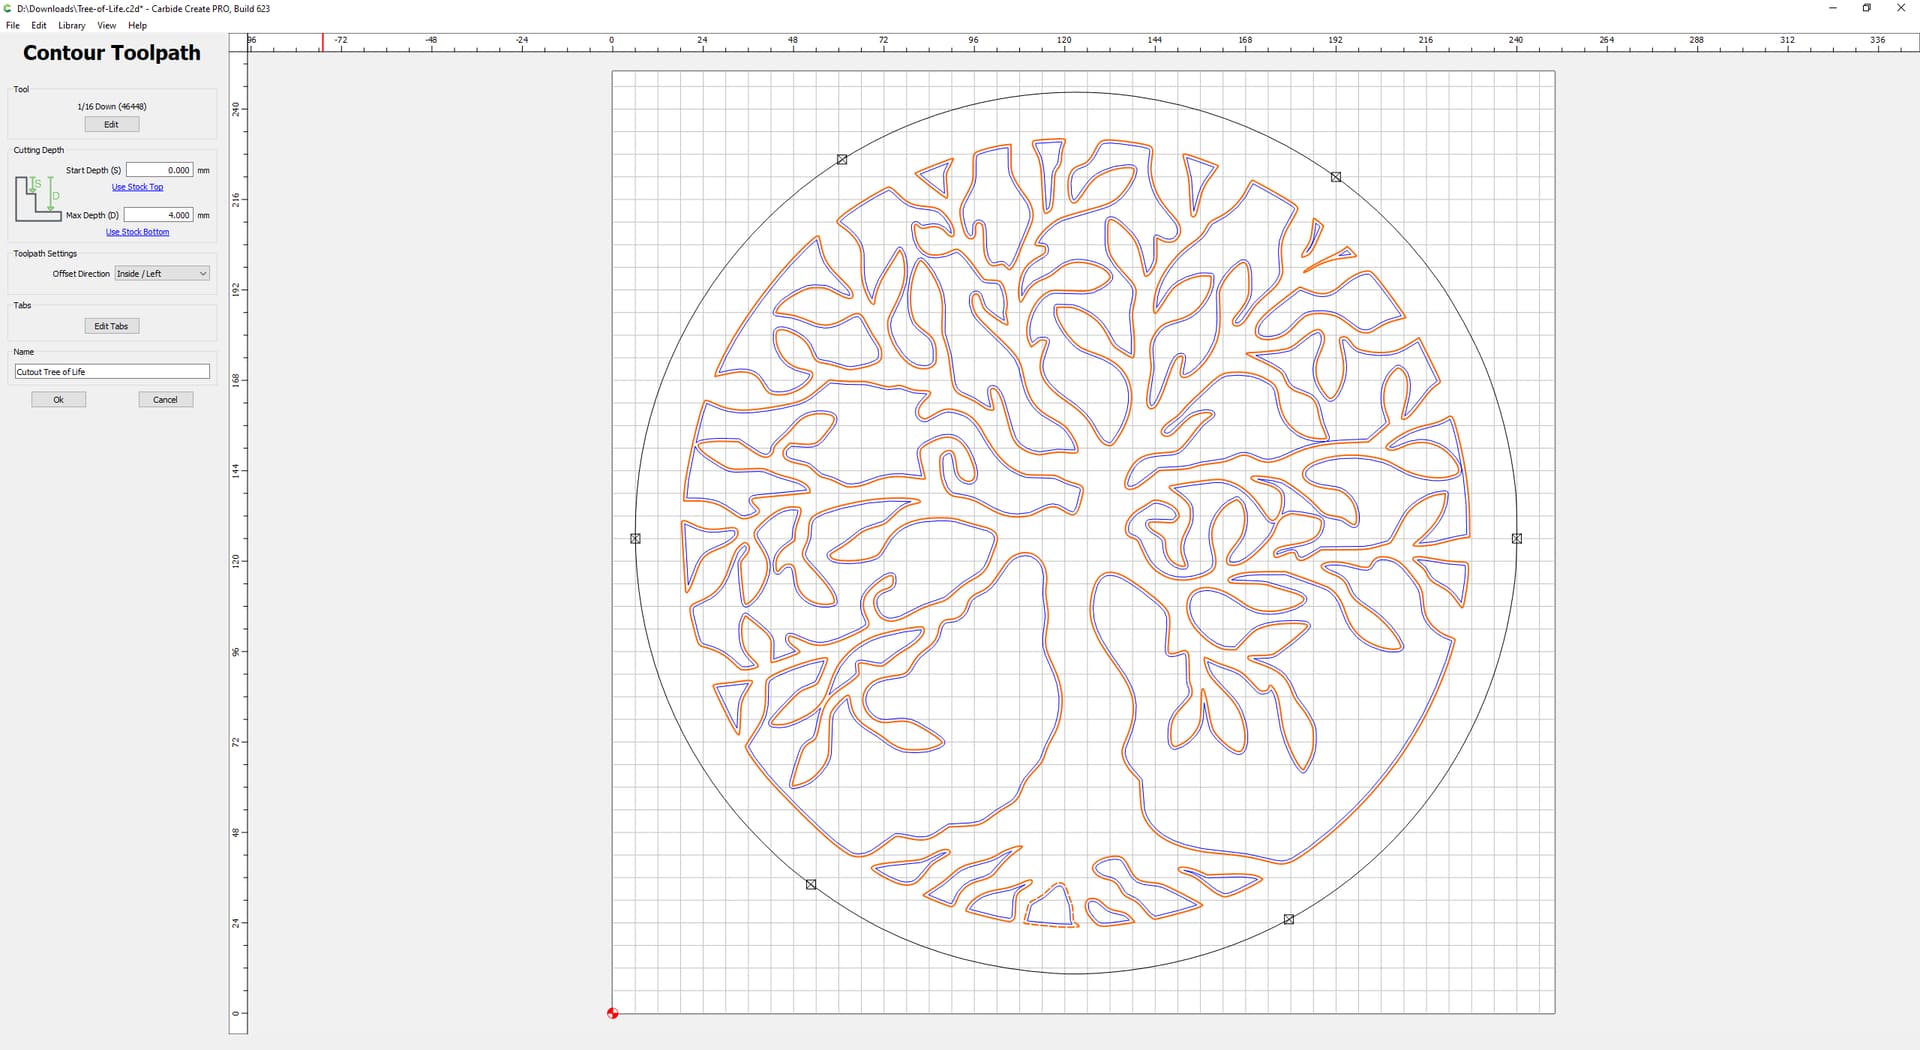
For the finish I cut out the outline using tabs as an outside contour using the 320 end mill and tabs. Simulation was good here as it showed that I needed another tab!!
So when I look at the simulation I see there are still parts of the Vcarve where the tool has not cut and assume this is because the space is too small for the v bit to fit. Should I have added another Vcarve toolpath with a 10 or 15 degree vbit to get better detail where it has missed.
Also the V carve looks like it will take ages to cut. Is there a way to speed this step or is it unavoidable because a V bit is being used over a relatively large area. I guess I could speed up the cut or try a bigger DOC but until I have more experience I’d like to keep the odds of a broken cutter low
If anyone is prepared to guide me and correct my errors I would appreciate it. I am not looking for anyone to do the toolpaths but rather explain my mistakes and corrections so that I can learn Tree-of-Life.c2d (396.1 KB)
Still learning myself, so would love to follow this thread to hear from others.
From your file, it looks like you do a pocket with the same parts first with a 1/4" end mill, then an 1/8" mill. Unless you confine a smaller “pocket” for the 1/8" mill pocketing toolpath, my understanding is that the 1/8" mill would essentially be cutting over where your 1/4" mill would’ve cut already, so that 10 min estimated time would be a wasted effort. For larger images, I imagine you could select the original pocket to rough out with the 1/4" mill first, and then use the offset tool (inside) and pocket this new reference line with the original outside vector with a smaller end mill to reduce any wasted motions.
Have you tried you the Advanced V Carve toolpath? I believe the regular V Carve toolpath just cuts from the midpoint of two walls, whereas the Advanced V Carve (even without enabling pocket tool) will probably get you much closer to your intended results.
I would try perhaps creating an Advanced V Carve toolpath with the vector you have selected, then enabling the Pocket Tool (Tool #1) using your 1/8" end mill, and then using your 30 degree V bit for Tool #2.
Edit: after posting, I realized you may not want that look the V Carve may leave on your product if you’re cutting right through the material as the edges would have the angle of the V bit. If that is the case, I would imagine you would need to go with a smaller end mill, or perhaps use a V bit with a smaller angle or cut deeper than your stock thickness with an inside offset.
Observation 1
In the Job Setup, you have the stock thickness set to 4mm. Looking at the first toolpath “Pocket Toolpath Tree” your start depth is 1mm with a max depth of 7mm. Something in these numbers looks wrong to me. Given these settings I think the bit would start by plunging 2.524mm deep (because the start depth is 1mm and the depth per pass is 1.524mm). Assuming the CNC could handle the additional 1mm, the next problem I think you are going to have is due to the confusion of saying the stock is only 4mm thick, but the first toolpath says to go down 7mm.
Suggestion 1a: If the material (aka stock) is actually 7mm thick you need to change that 4mm to 7mm in the Job Setup
Suggestion 1b: If the material is actually 4mm deep, the bit would go right through the stock and 3mm into your wasteboard.
Observation 2
If the intention is to remove the wood from inside the circle that is not the tree of life. Just use a “Contour” toolpath set to cut inside.
It sounds like to me that the reason your cut time is so long is because you have set your toolpaths up in a way where they are going over the same area cut by the previous tool and therefore wasting time. Advanced V carve in Carbide Create is your best option to help eliminate this. If you do not want to go that route that I would recommend creating small offsets for the 1/8" tool path and the v bit tool path but honestly advanced v carve is the better option.
@BenH No I did not try Advanced Vcarve so I will give that a try. I realised that I was cutting air, and repeating what is a wasted cut, but did not think of Advanced carve to get over that issue. I’ll give that a try and see how it goes.
You make a good point re the V carve look. I’ll have to try a couple of options to get the vertical edges to the cut.
It will be a while before I get back to try it as I just started work (AGAIN at 77years!!) driving a shuttle for the local drinking establishment in the evenings 2 days a week. New Year is going to be a bummer as I will be working until the last party goer leaves. Its always the drunks that are last to leave in my experience
I did realise that I had the 2 different thicknesses. I originally started planning to use 7mm ply but switched to 4mm to see what the effect would be using basically the same toolpaths and cutting in to the spoilboard (but only for the simulation). I wanted to look at the toolpath for the Vcarve and see if anything changed. I should have reset it before attaching the file