I’ve designed a plate in CC and, just to be difficult, I want to etch text into the plate.
I’m assuming I will need three toolpaths: The first to make the holes (through cuts), the second for the text (not through cuts!) and the third to cut the piece out of the stock (1.8mm plastic).
I’ve attached the file.
I’m not sure yet how to set the depth of cut for each toolpath, but I’m trying
First I’ll note that there is a set of C3D video tutorials for CC that you should check out (but you probably did ! just double-checking as they give a pretty good overview of the workflow in CC)
Now, about your design file:
Indeed you’ll need a pocketing toolpaths to cut the holes (through), another toolpath to cut the text (more on this below), limiting depth to something lower than stock thickness, and then an outer contour toolpath (possibly with tabs, depending on your workholding setup) to cut the piece.
for the holes the thing is, you will need an endmill that is slightly smaller in diameter than the hole diameter (CC won’t let you use an endmill of exactly the hole diameter). I see you have 3mm and 4mm holes, what endmills were you planning to use ? 3mm diameter is a little awkward if you use imperial endmills since 1/8" is 3.175mm, so just a bit too large to fit. You would need to use a 1/16th (1.6mm) endmill, or a 2mm endmill (if you have access to metric cutters)
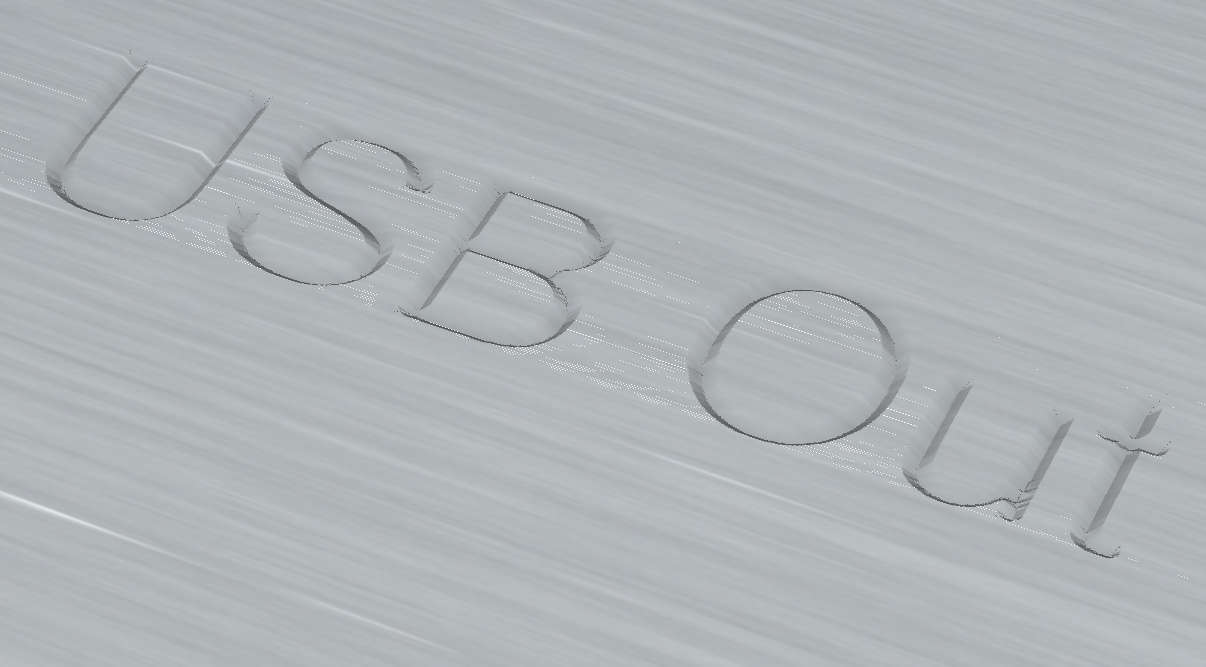
your USB plate is small, so that text is small too. If you were to use a square endmill, it would need to be super small to fit inside the letters, in this case smaller than 0.6mm in diameter:
This is really not convenient, also it would give you rounded corners so the text would not look the same as the font. That’s why very often people use V-bits to carve text: the point of the vbit can go arbitrarily shallow, and can get in those corners. How deep it goes is controlled by the spacing between the selected edges, and the angle of the VBit. For a 90° vbit you would get:
for the final contour cut: if you use side clamps, add tabs to keep the piece in place until the end (but then you need to manually cut those tabs), if you use double-sided tape or tape & glue, then you can do without tabs, cut through, but just barely such as not to cut too much tape (which is no problem except it leaves gummy residue on the tip of the endmill)
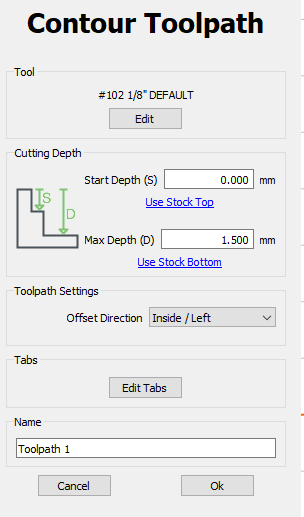
For pocket and contour toolpaths,max cut depth is set using the “Max depth” setting in the toolpath:
For Vcarve toolpaths, you have no direct control on the depth, as I said above it’s derived from the selected feature and Vbit angle.
There is however an “Advanced V-carve” toolpath, where you can tell CC to Vcarve down to a specific max depth and not further down (and then it does flat bottoms at that depth in the places where it would have cut deeper for a regular Vcarve toolpath). It’s probably not useful for your usecase with that very small text, unless you stock is extremely thin.
I have had a look at the tutorials, but I might be a bit dazzled by all the terminology and the speed at which the information is imparted, but I’ll have another look.
I do have a 1/32" fishtail upcut bit which, according to the supplier, can be used to cut plastic, so I could use that?
I’m not too bothered about the text, in truth. It was just me getting clever - not!
Sure, however that’s a teeny tiny endmill, susceptible to breakage if anything goes wrong. What kind of plastic do you want to cut and what thickness would your stock be ?
It will also take a long time to pocket those holes with such a small endmill.
All the Stanley storage dividers I’ve seen have been HDPE — should cut easily, but you have to balance feeds and speeds so that the plastic doesn’t melt onto the endmill.
My first version of this cut pretty well, just a bit too close to the edge to be of use (my fault) and it didn’t cut all the way through. There was some cleaning up, but that didn’t take long.
This version is designed to be cut out of the middle of the ‘stock’, but led to several points about including text and the number of toolpaths.