I just finished the install of my HDZ on my Shapeoko XL and I encountered some issues with the information provided.
First the written instructions are for the older HDZ (3.2) and should be updated. I relied on the excellent video prepared by @Luke.
First, I suggest that you remix your video to include shots from the other side as many of the assembly operations are done behind the Shapeoko. Second, I would suggest that you write a list of the parts we need to harvest and include it with the instructions.
I had to deal with significant issues related to the drag chain:
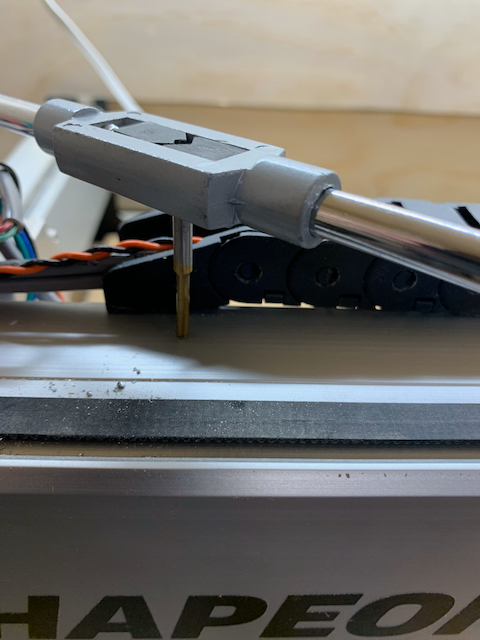
First, the bracket holding the drag chain is installed with the support at the top like an upside-down L but I could not install it that way because my drag chain was too short and so was the wire for the X limit switch. The bracket has to be installed like an L.
Second, This gave me just enough drag chain and wire to reach but even then, the little 2 sided tape holding the other end of the drag chain was being pulled off so I installed a 3mm cap screw to hold the entry point of the drag chain on the extrusion.
I had screwed my drag chain down to rail when I first built the machine. After adding the HDZ, I had to move it about an inch towards the right side. I did redrill and tap for another hole.
The limit switch was hitting on my machine from the start, I used only the outer hole in the bracket and the frontmost hole in the dragchain.
And your piece looks great
OK, this is great these instructions are much better unfortunately a bit late.
I have to point out that I followed the info that came on the card in the package with the HDZ points me here:
https://docs.carbide3d.com/assembly/hdz3_2/ There I found no information redirecting me to the 3.3 instructions, I figured you did not have released full instructions yet, just a video. I must admit that I did not tour the whole site in search of the instructions, I figured the info provided with the product was the most current.
I would like to echo Luc’s experience with both the drag chain and limit switch.
I also ran into a very minor issue with the suckit dust boot, the limit switch screws stick through the other side of the ears and interfere with the extension piece. I decided to shorten the screws rather than moving the limit switch even closer to the already problematic drag chain.
Upgrading to the HDZ did give me the excuse to change the drag chain to a longer one I had ordered months ago.
BTW: I’m not complaining, Carbide 3D you guys are awesome. Just want others to have an even better experience.