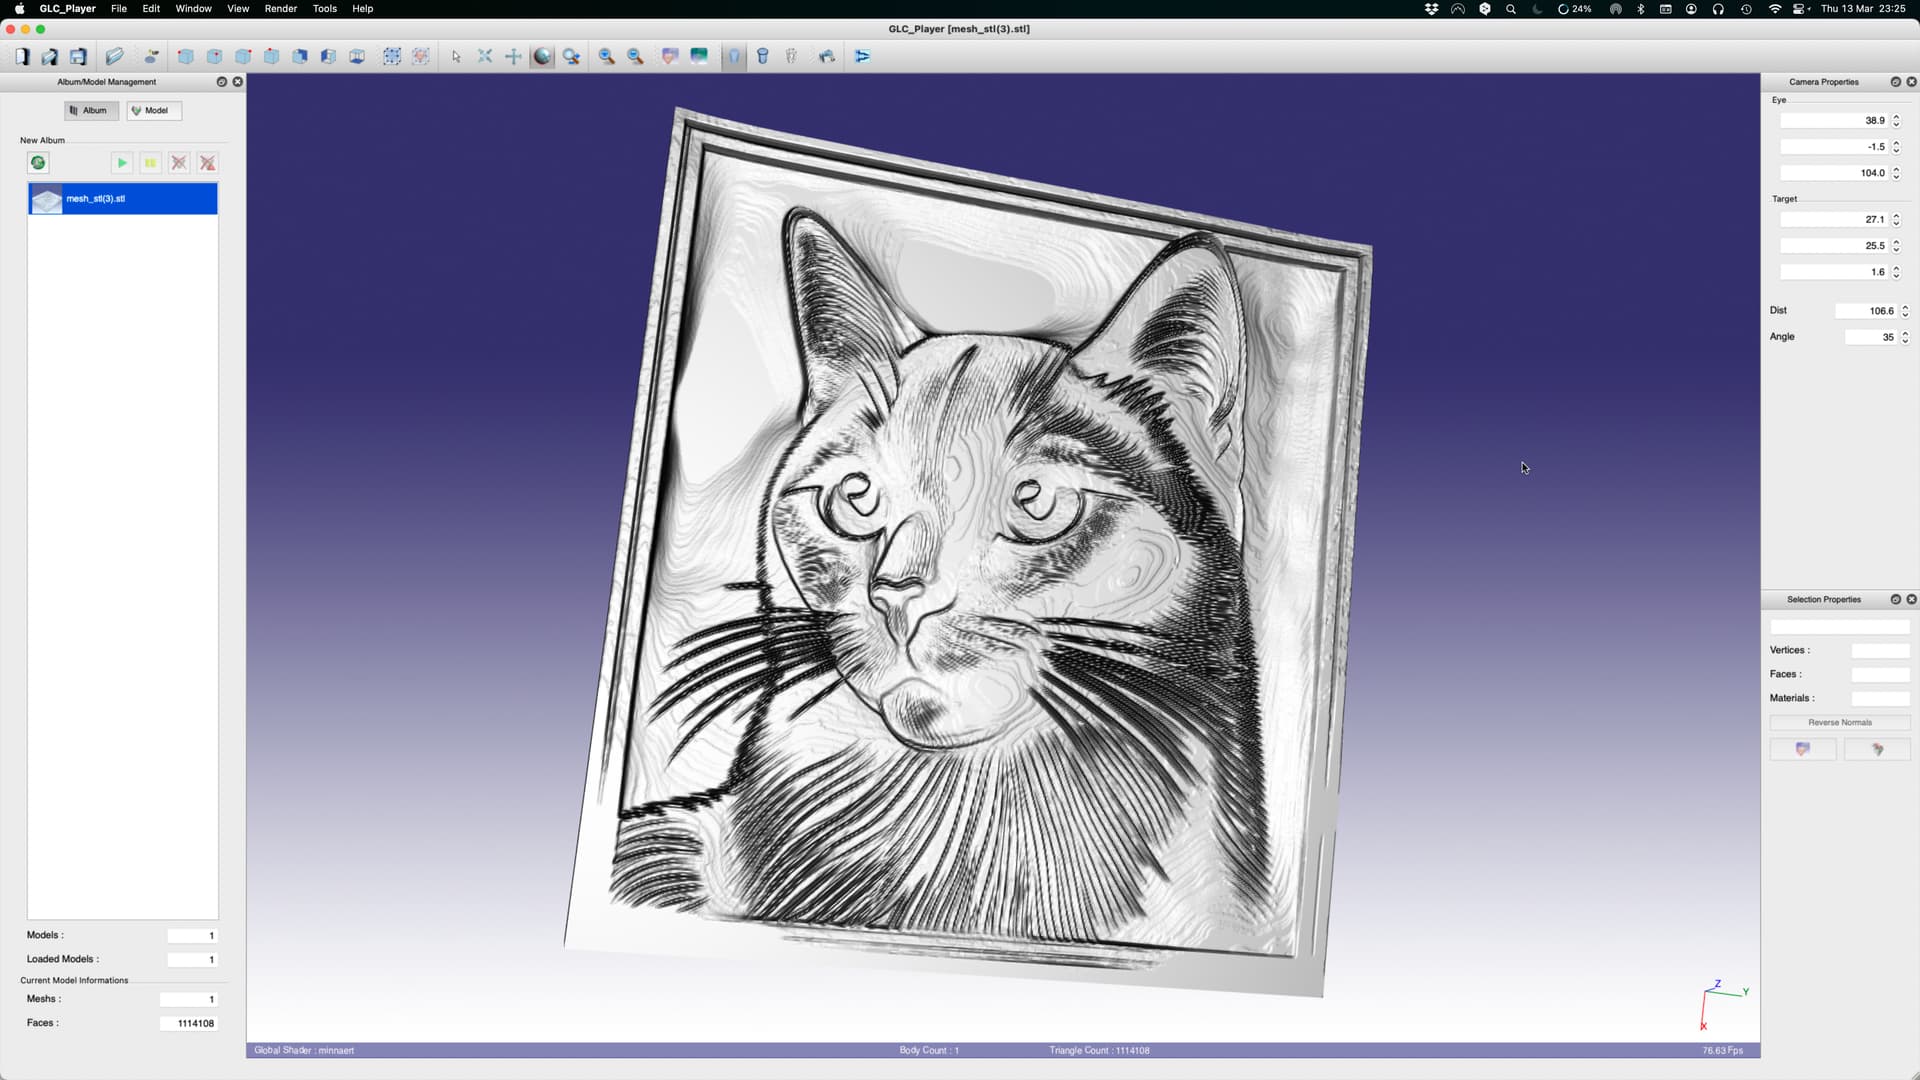
In response to a request as to creating heightmaps for carving to show details arising from differing depths of epoxy as done in:
This was done in Affinity Designer (AD) but could be done in most other vector graphic apps.
For the aneome the heightmap looks as such:
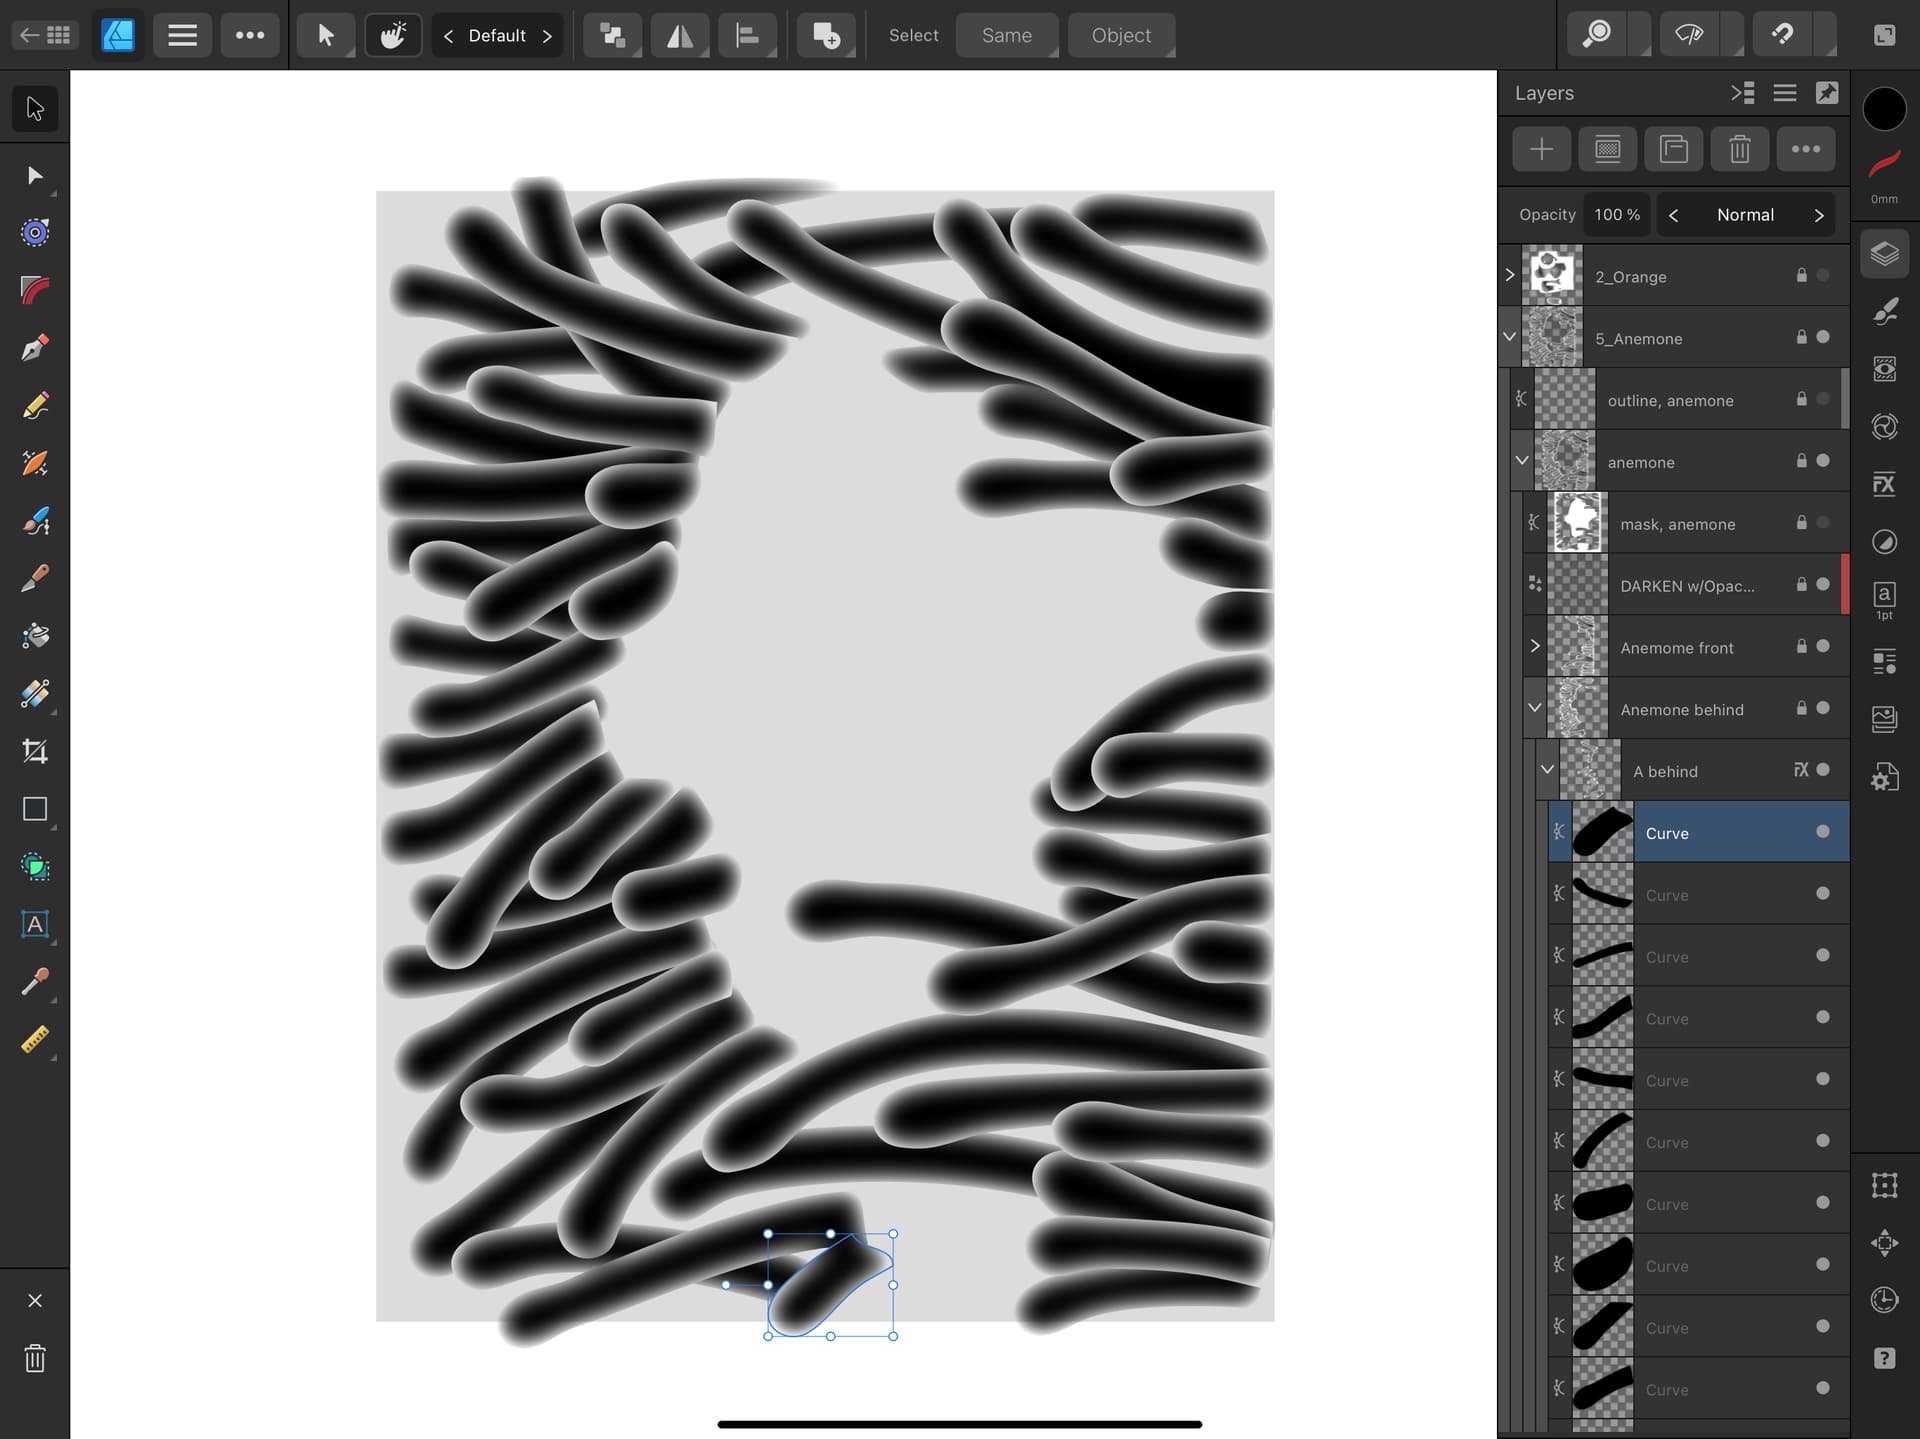
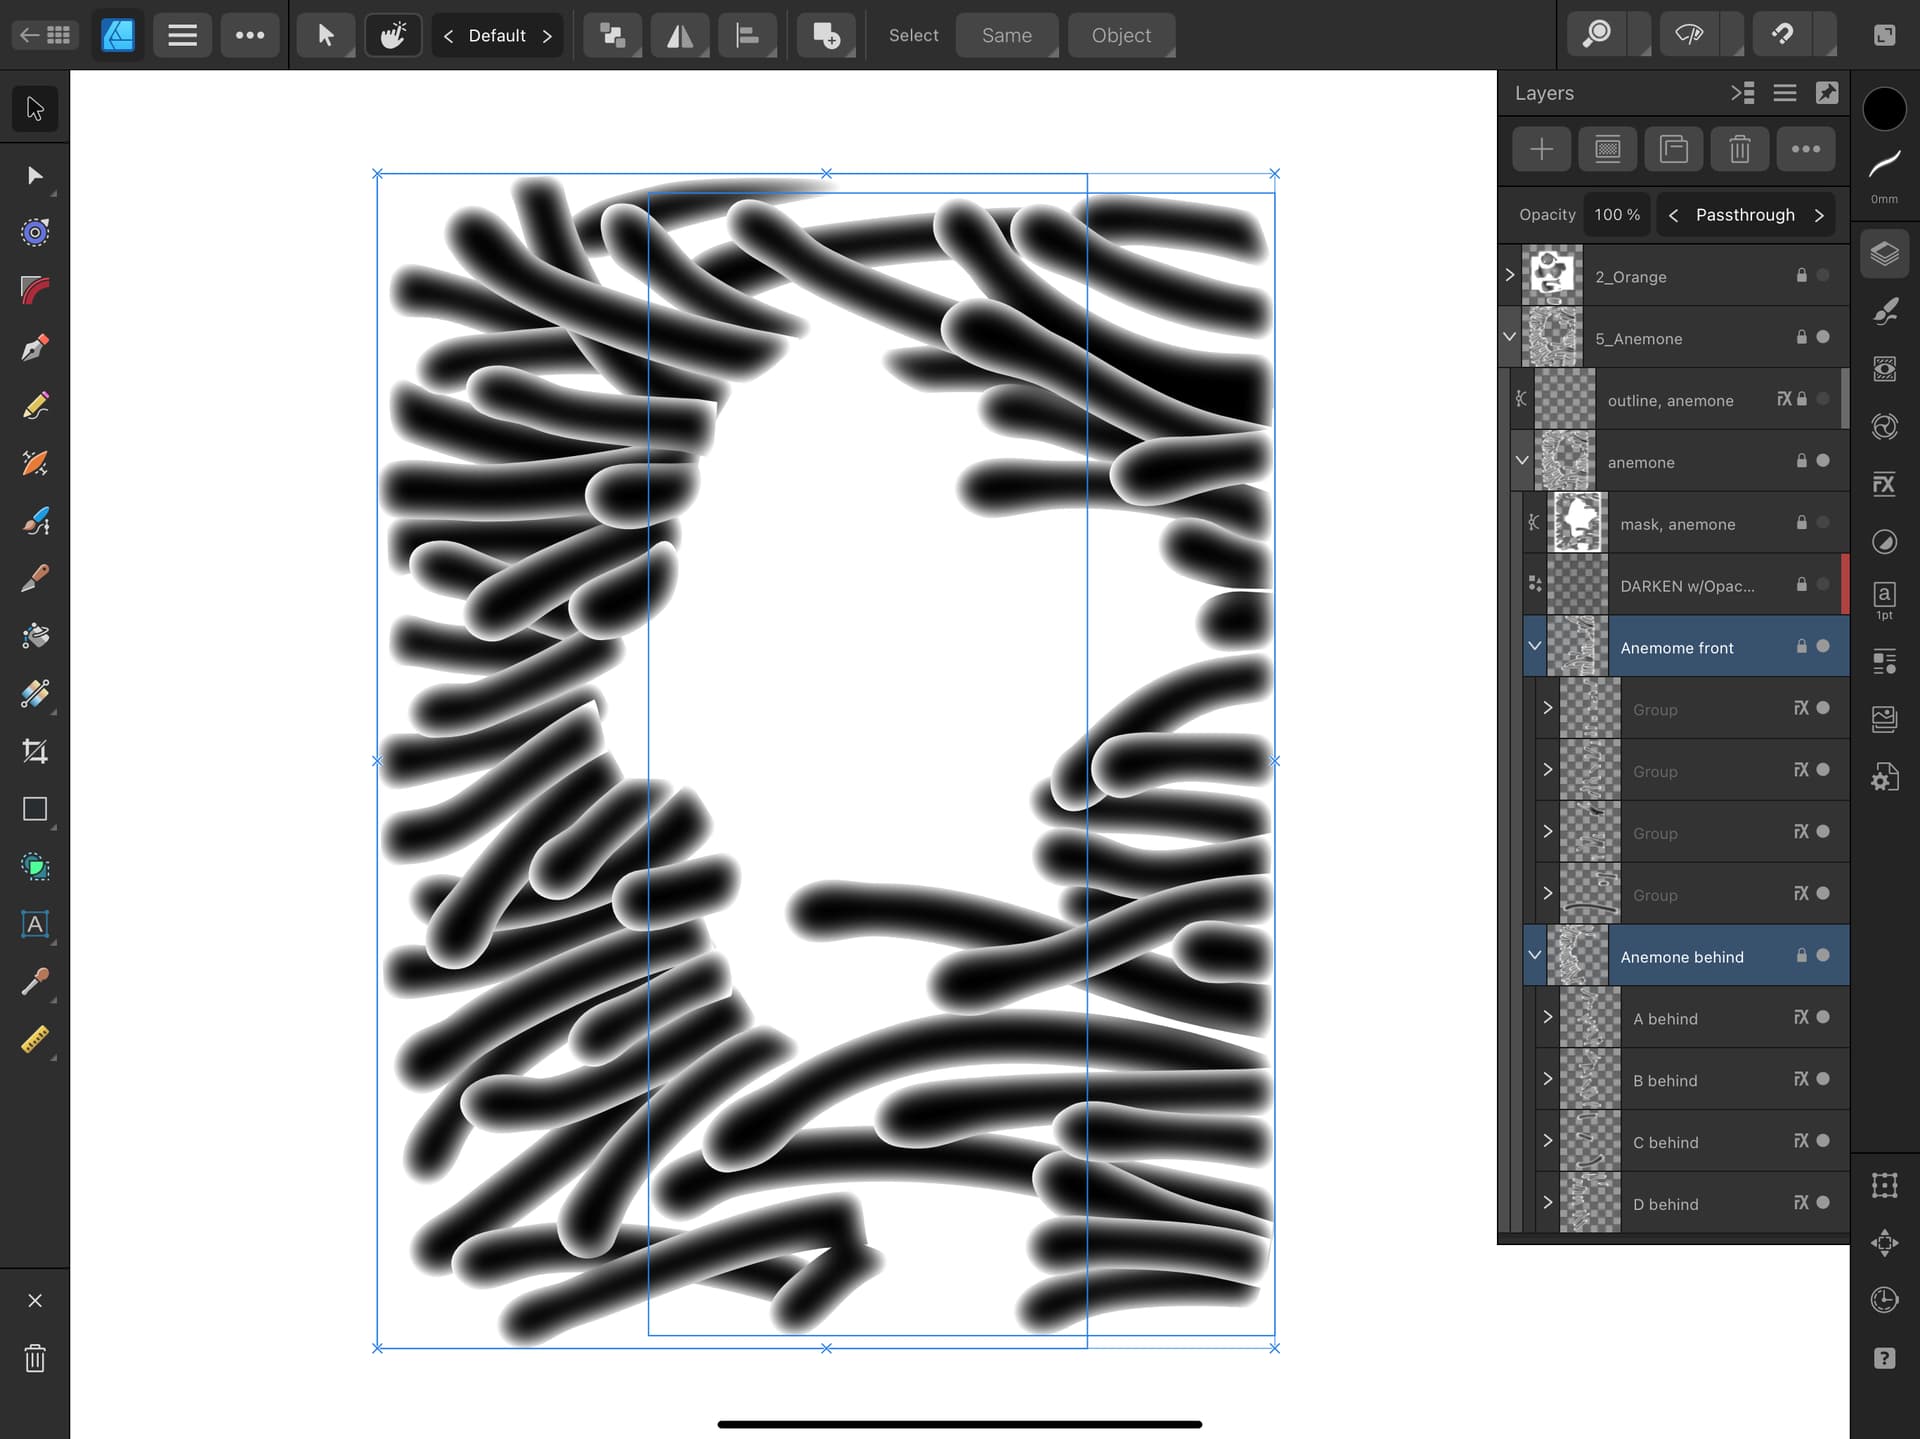
This must be done in layers for proper overlap of the multiple tentacles. Here’s one layer, simply 8 closed vectors filled with black:
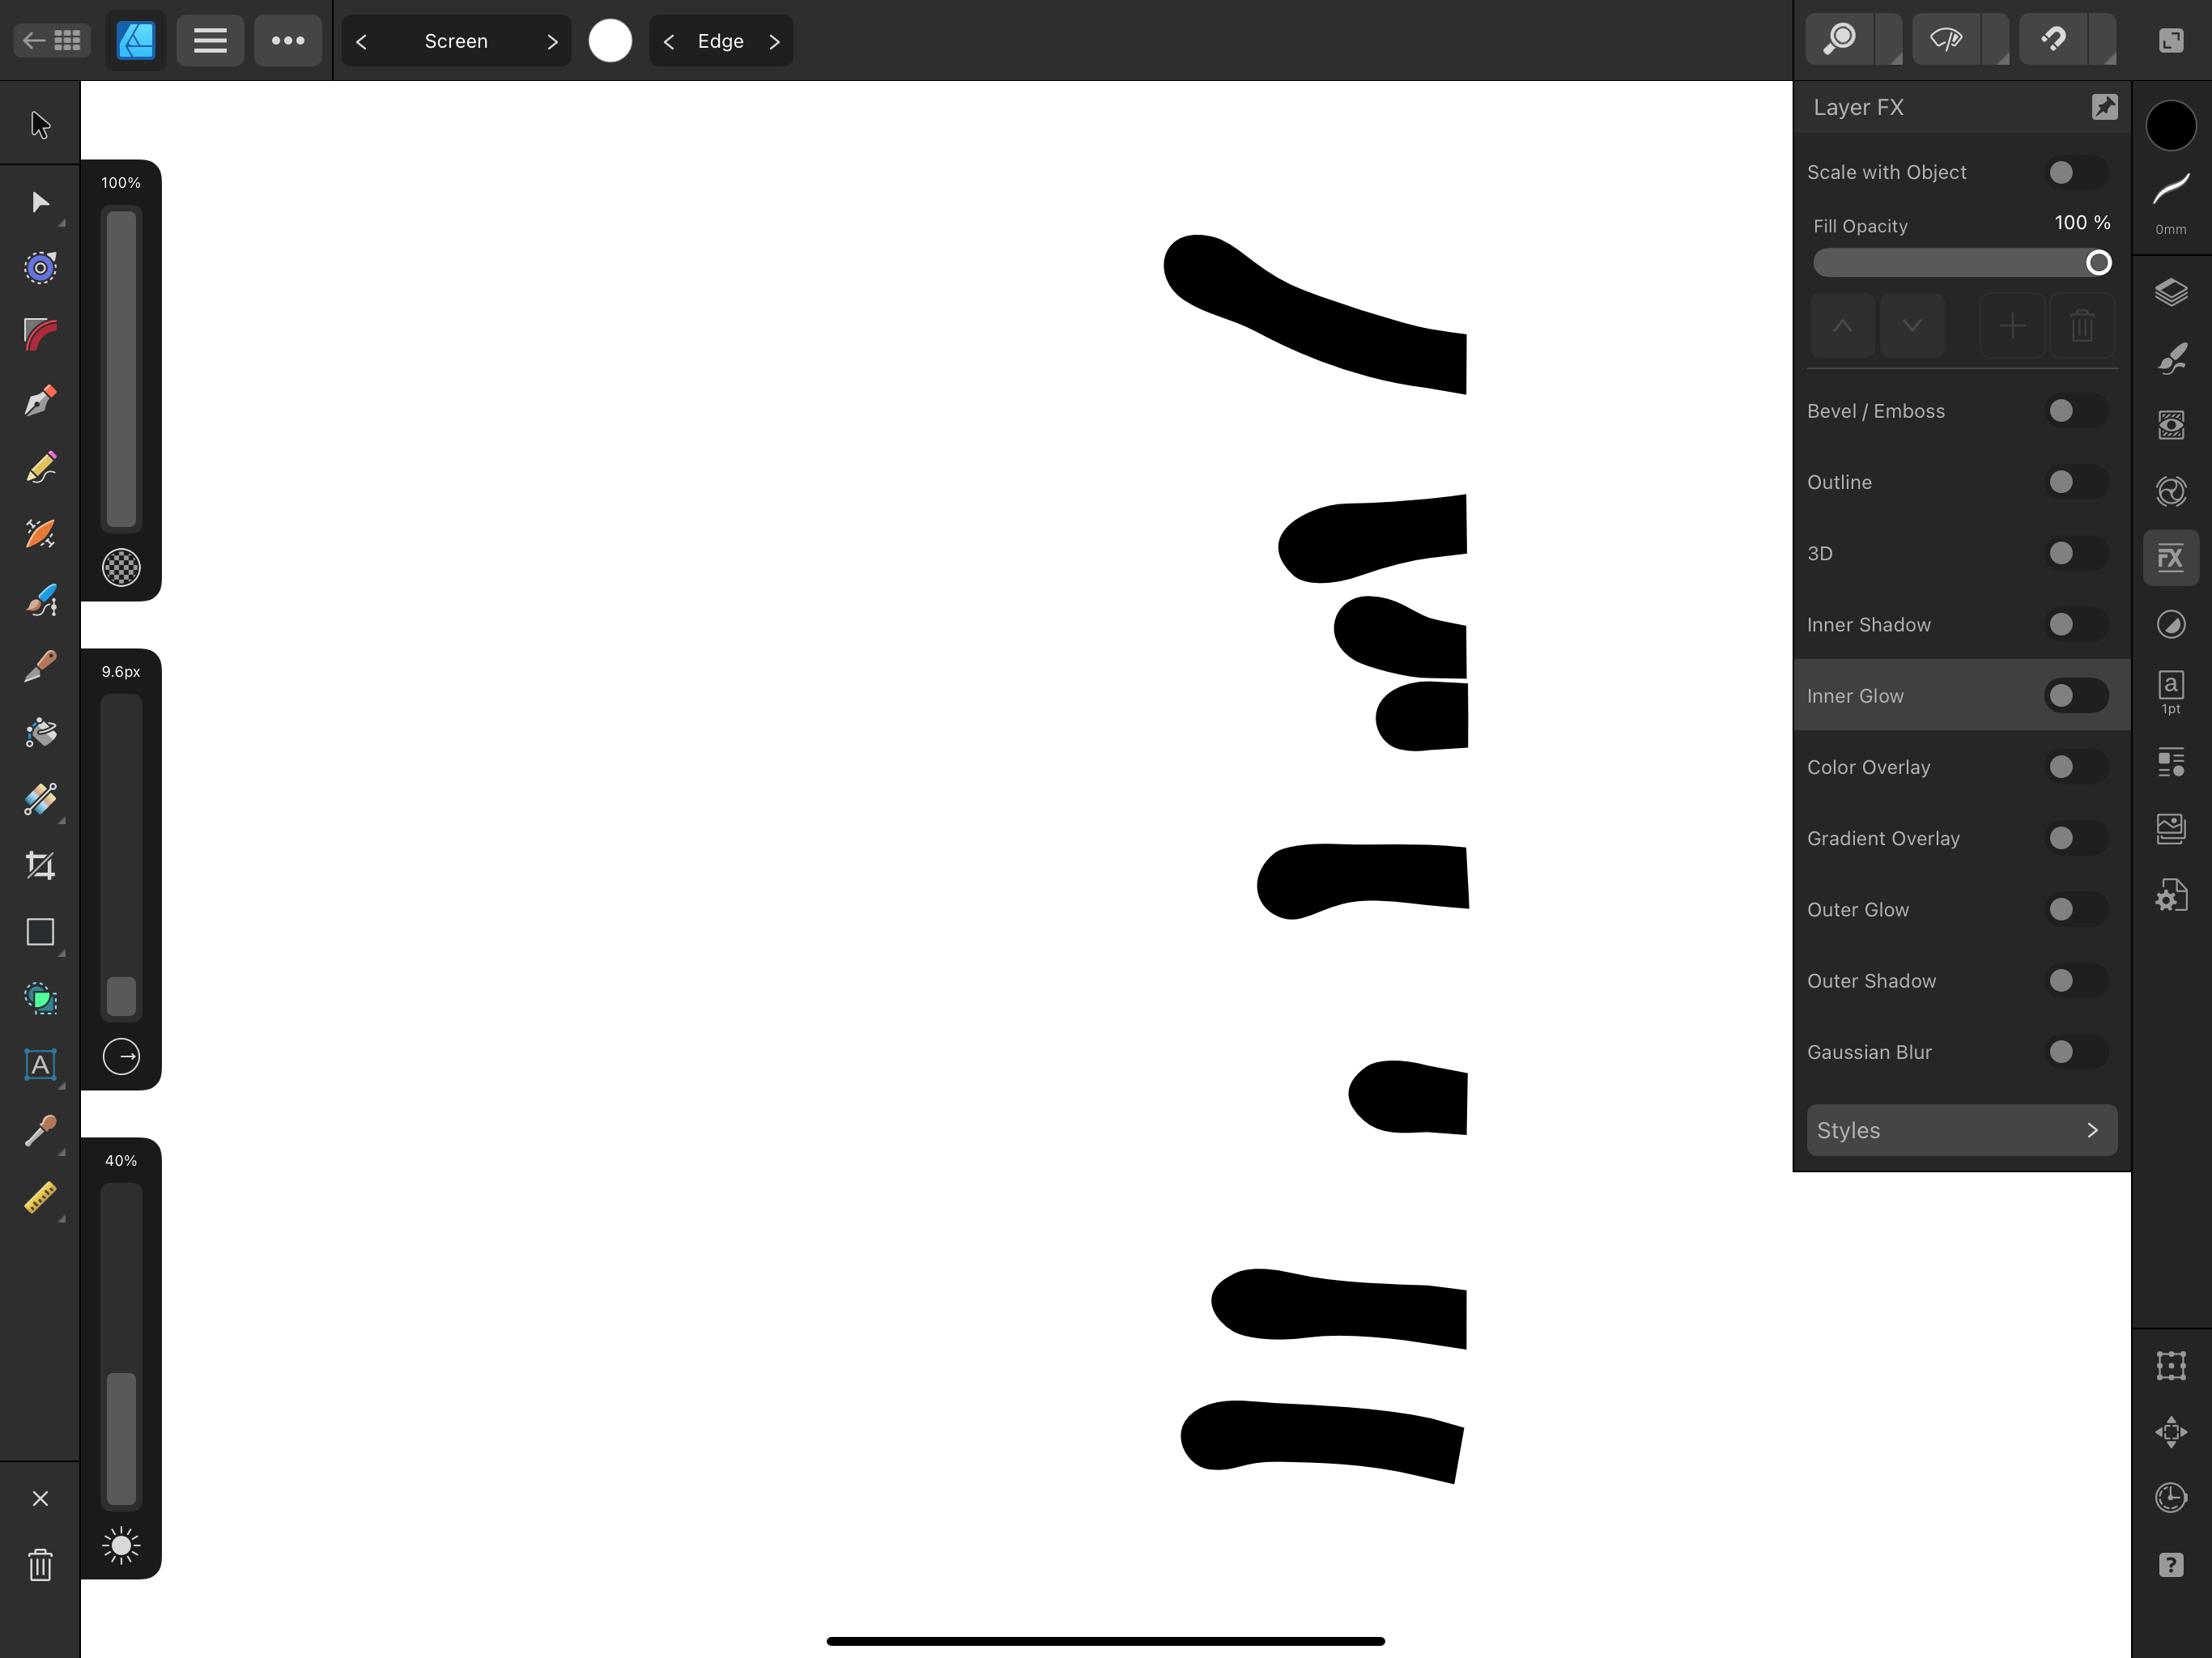
An Inner Glow is applied and the parameters set

Here’s another layer beneath the first:

All the layers, same application of Inner Glow:
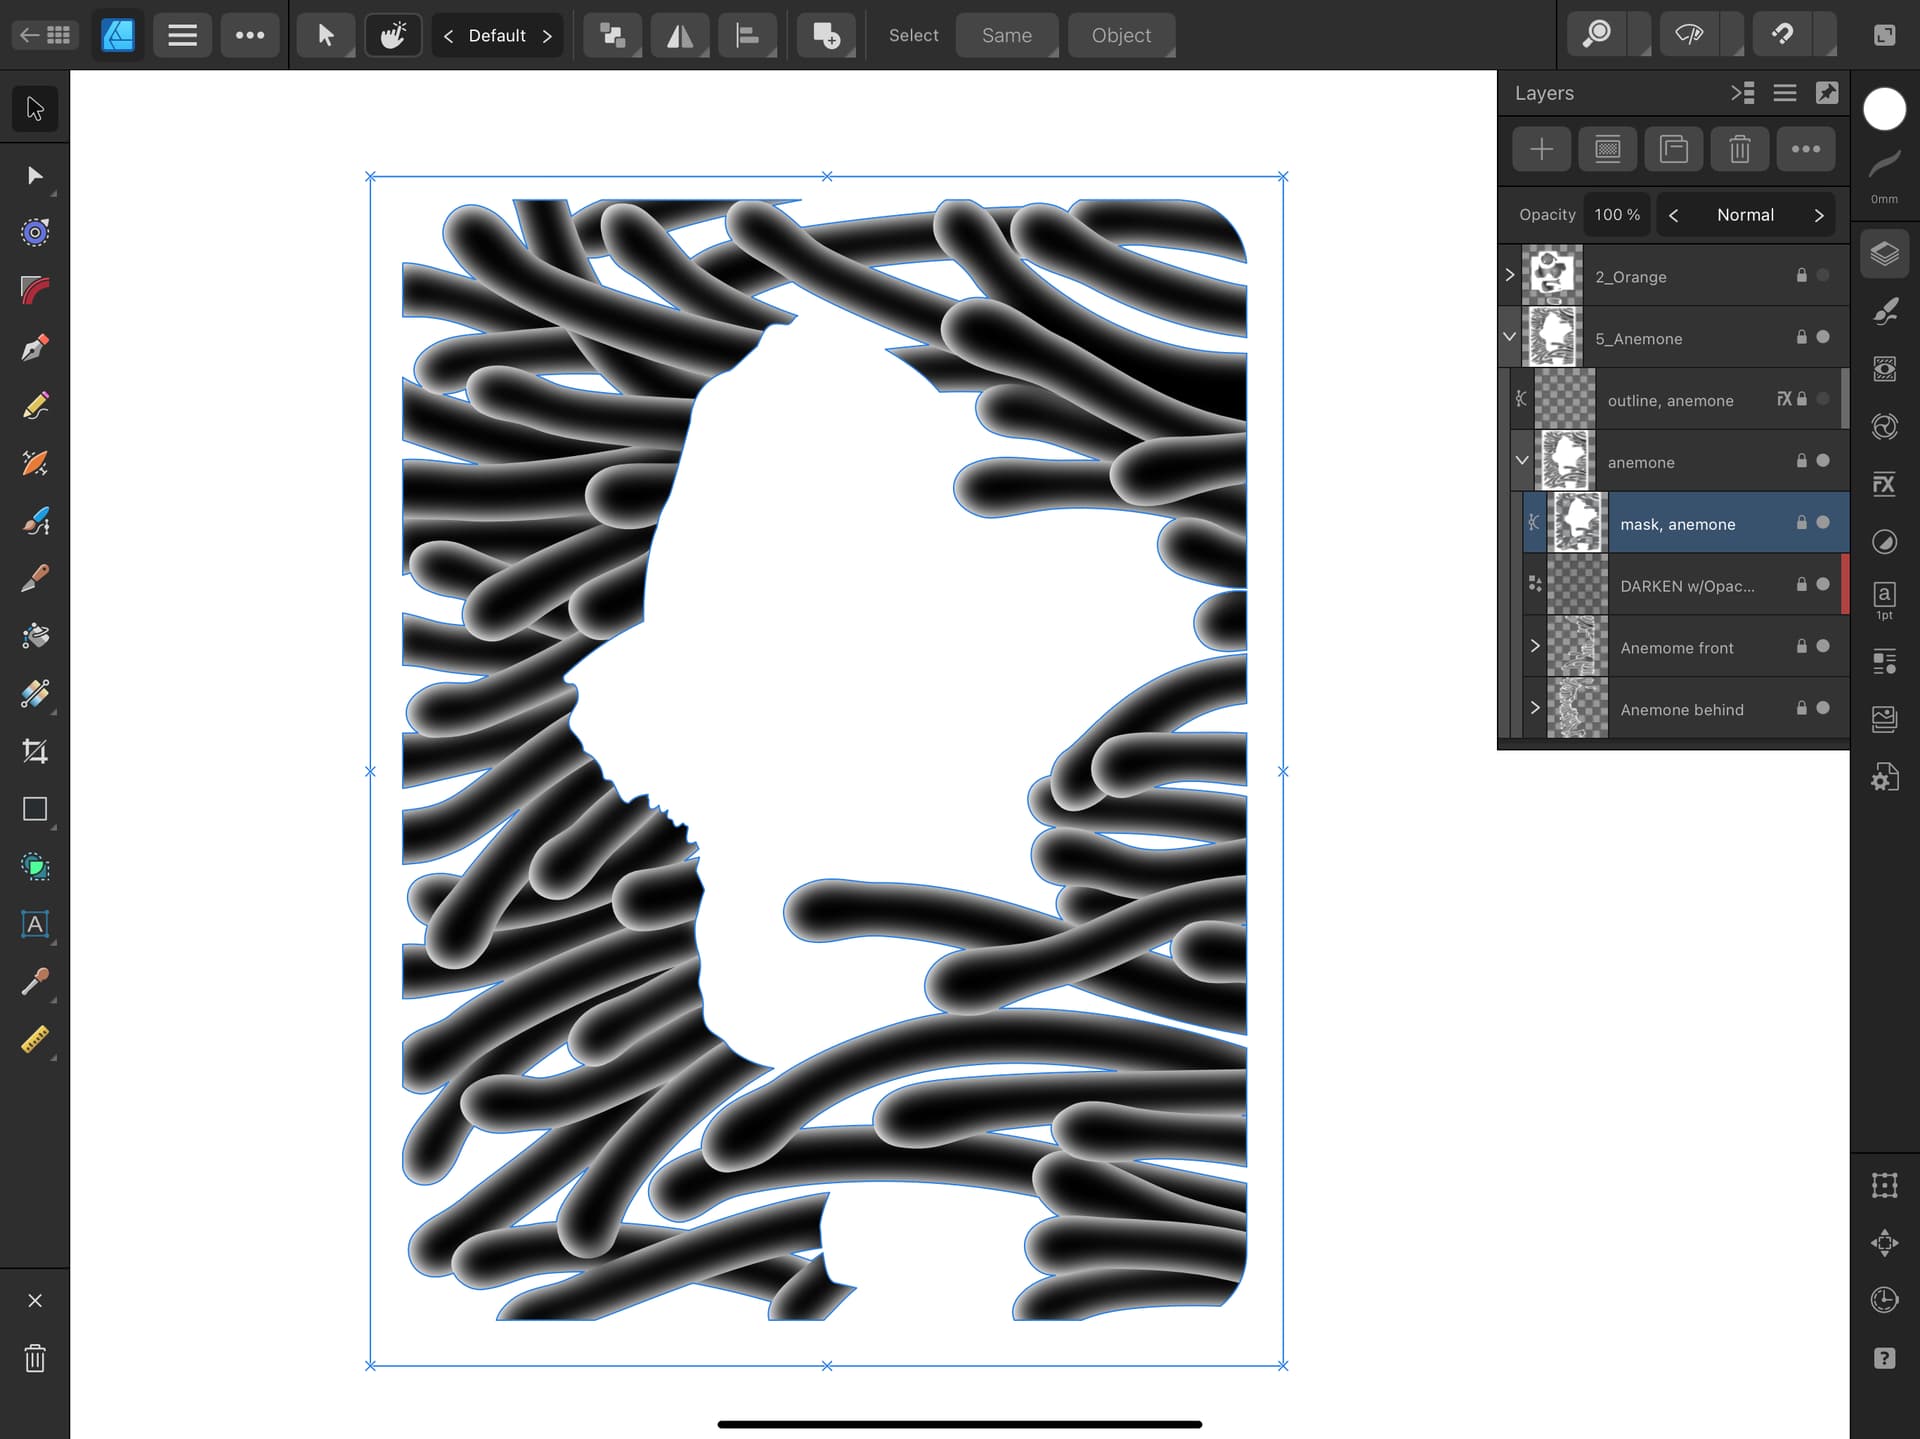
But this needed tweaking. A trial run showed too much white after the epoxy was placed so the entire map was lowered by superimposing a black rectangle with very low opacity on top:

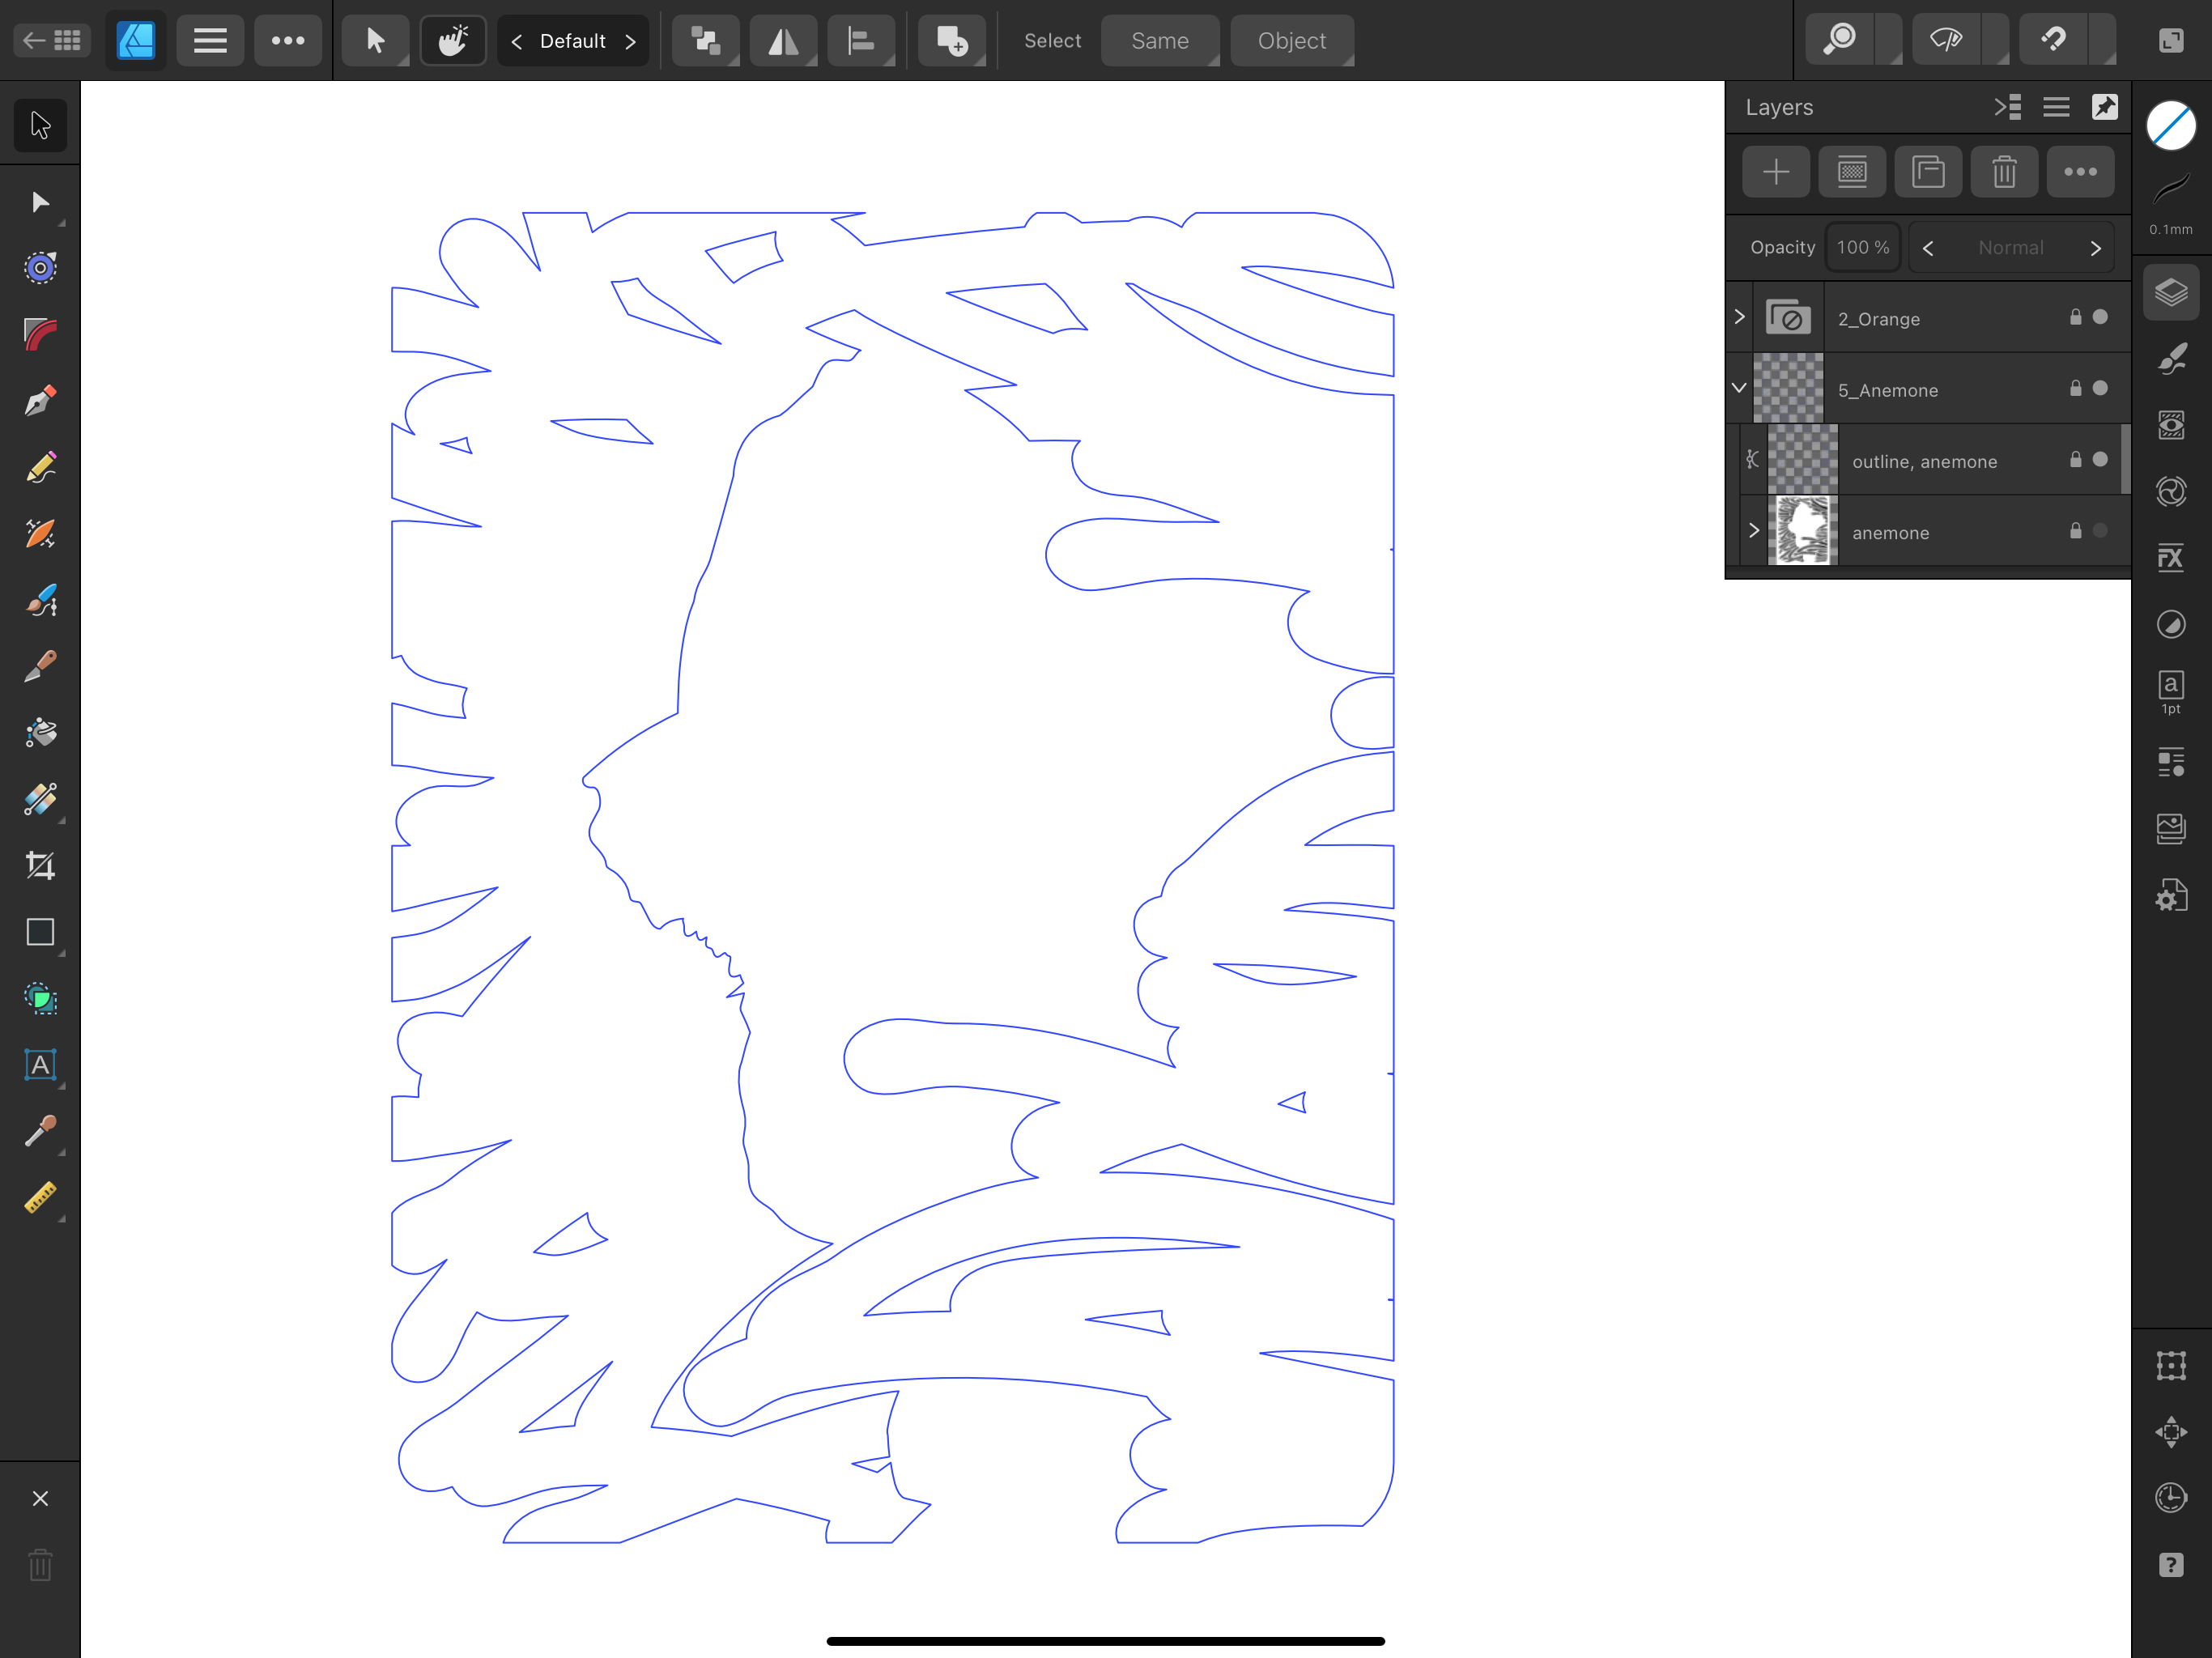
Finally, a matte was applied to hold-out for the fish:
This was saved as a 600 dpi PNG and used in CC. I also make the outlines in AD versus CC. This was saved as an SVG at 96 dpi:
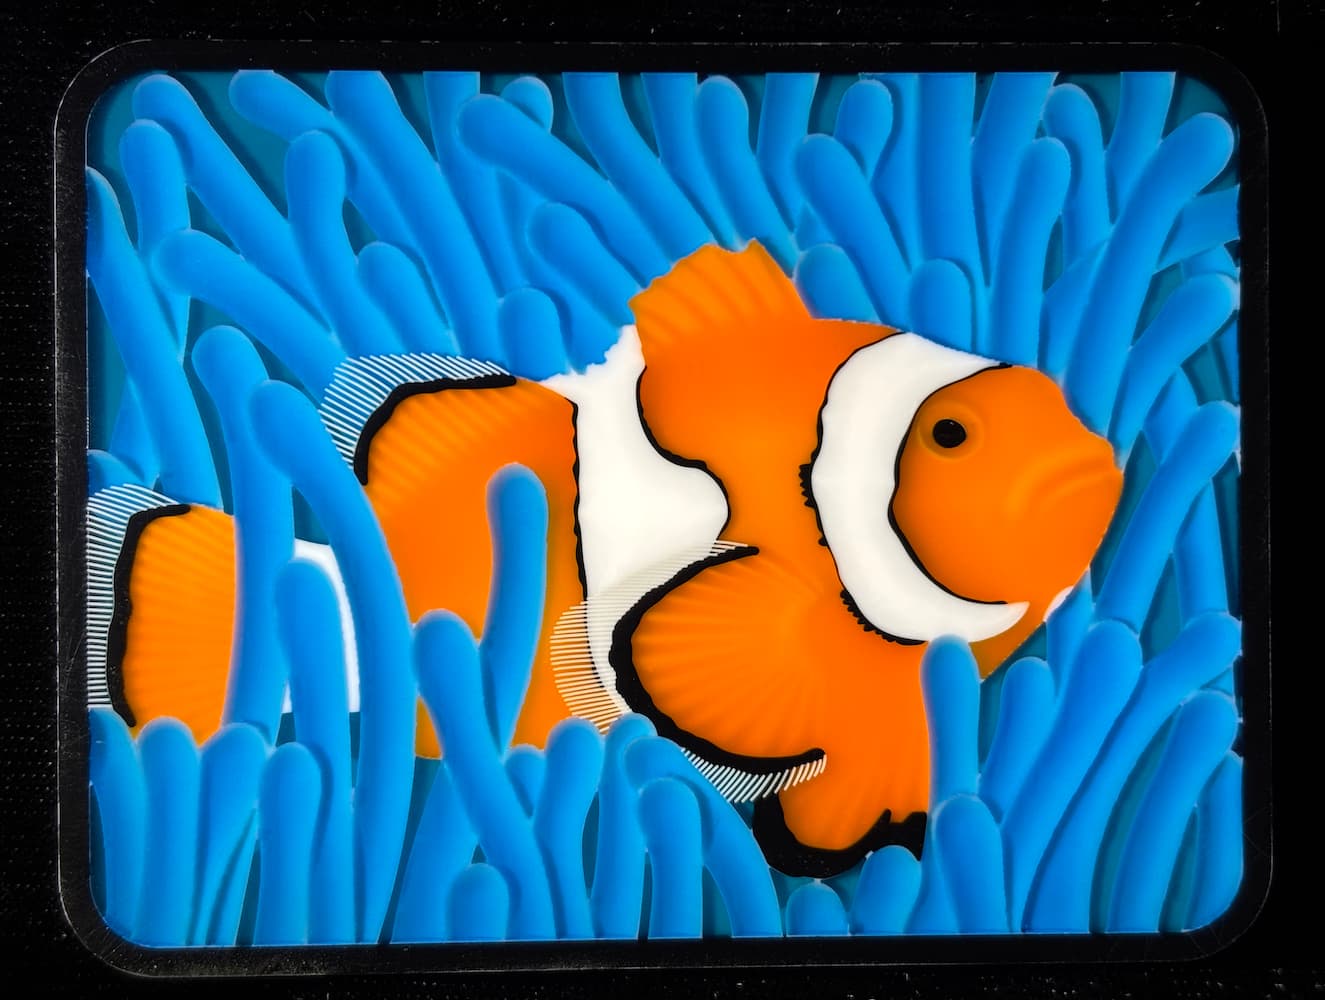
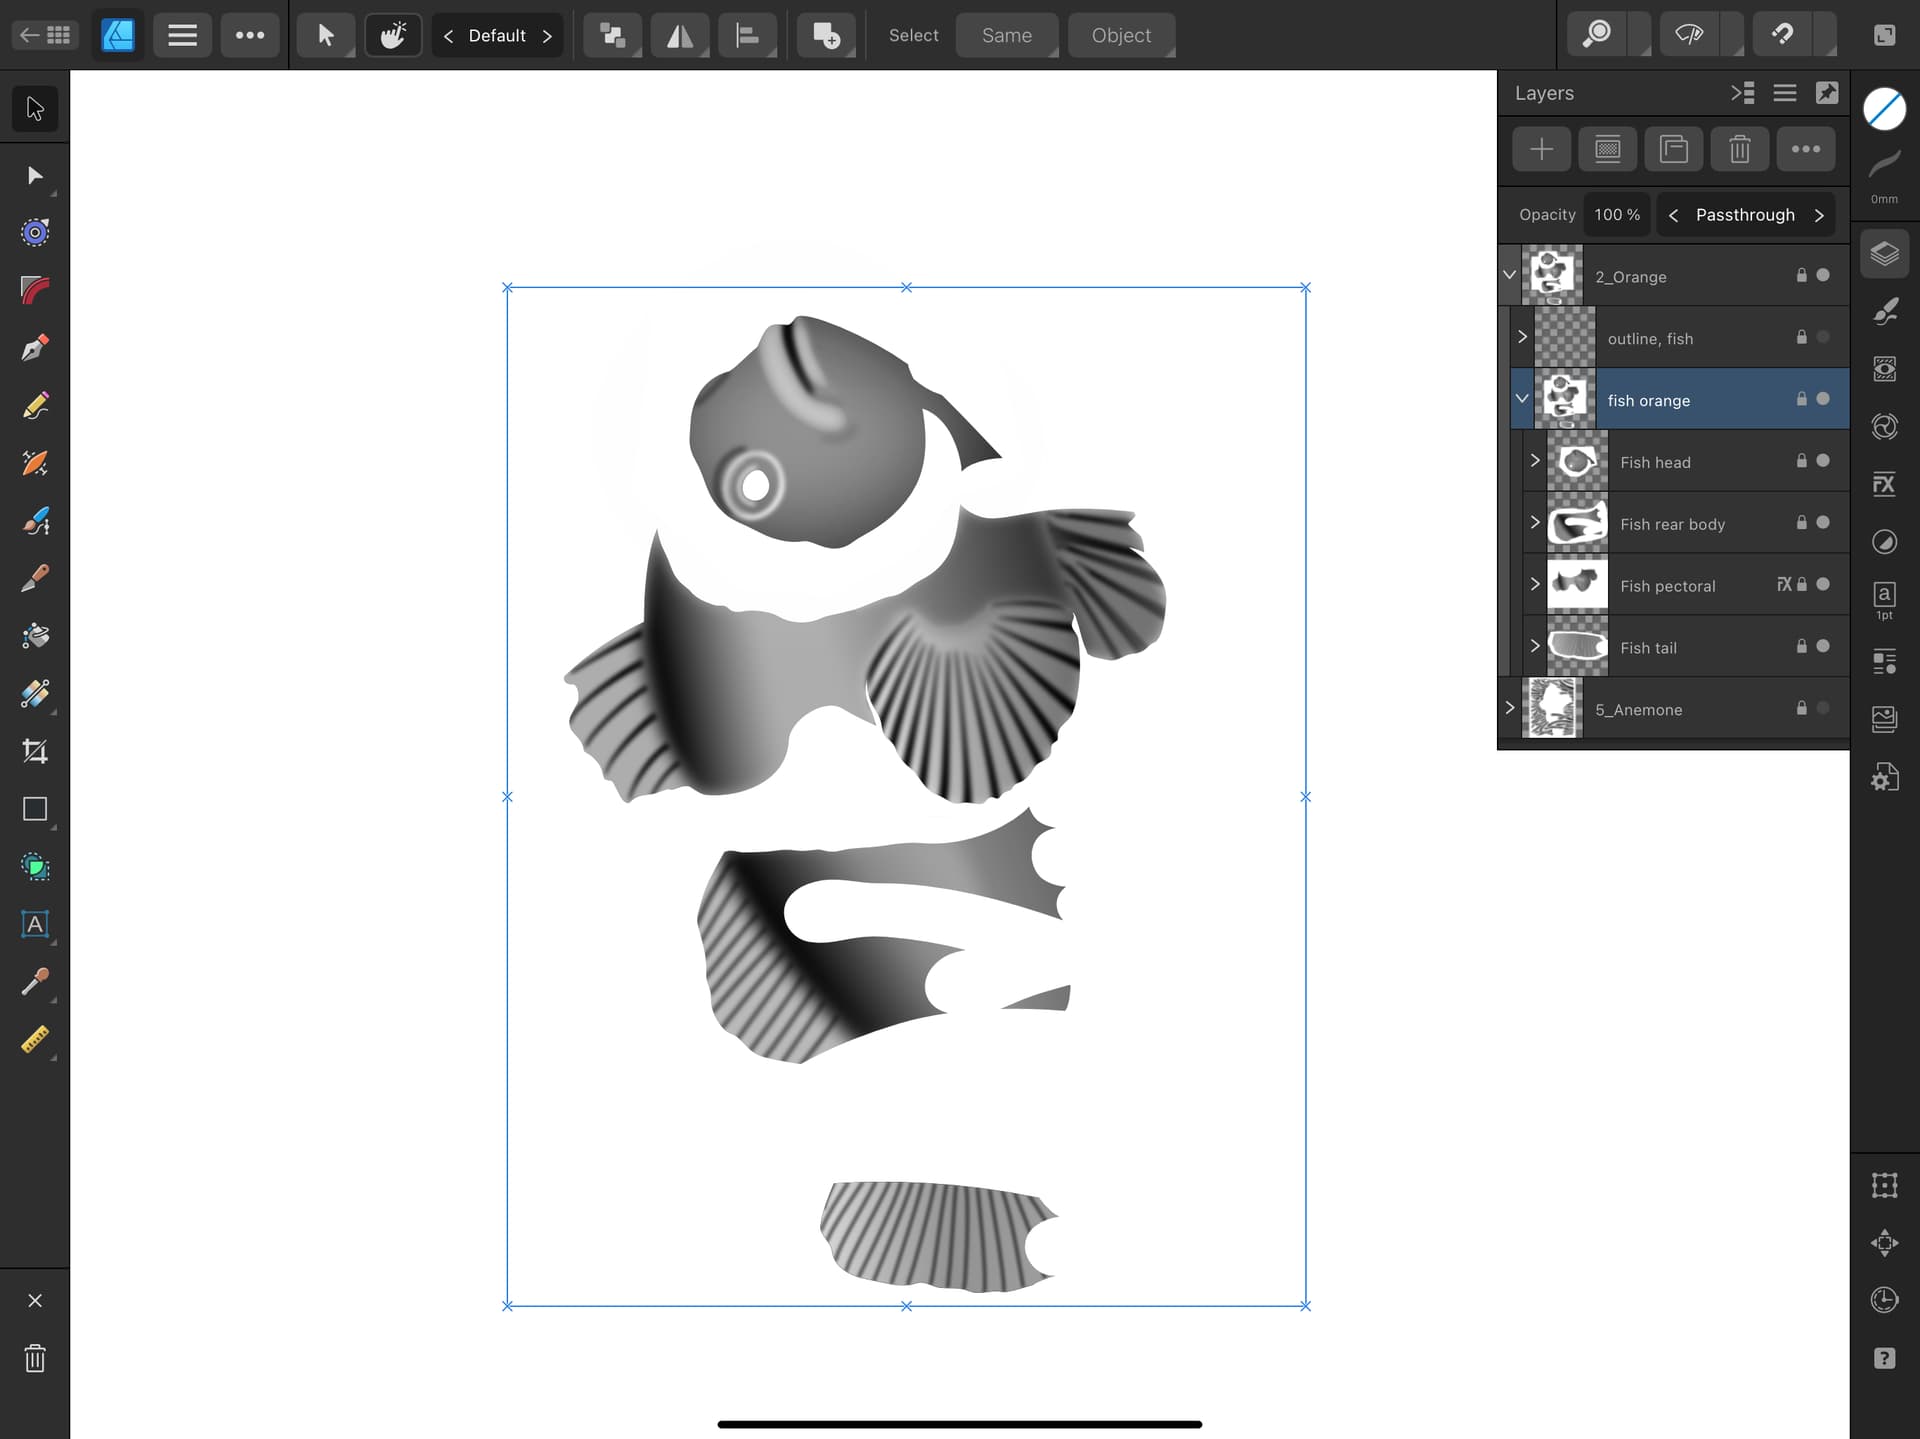
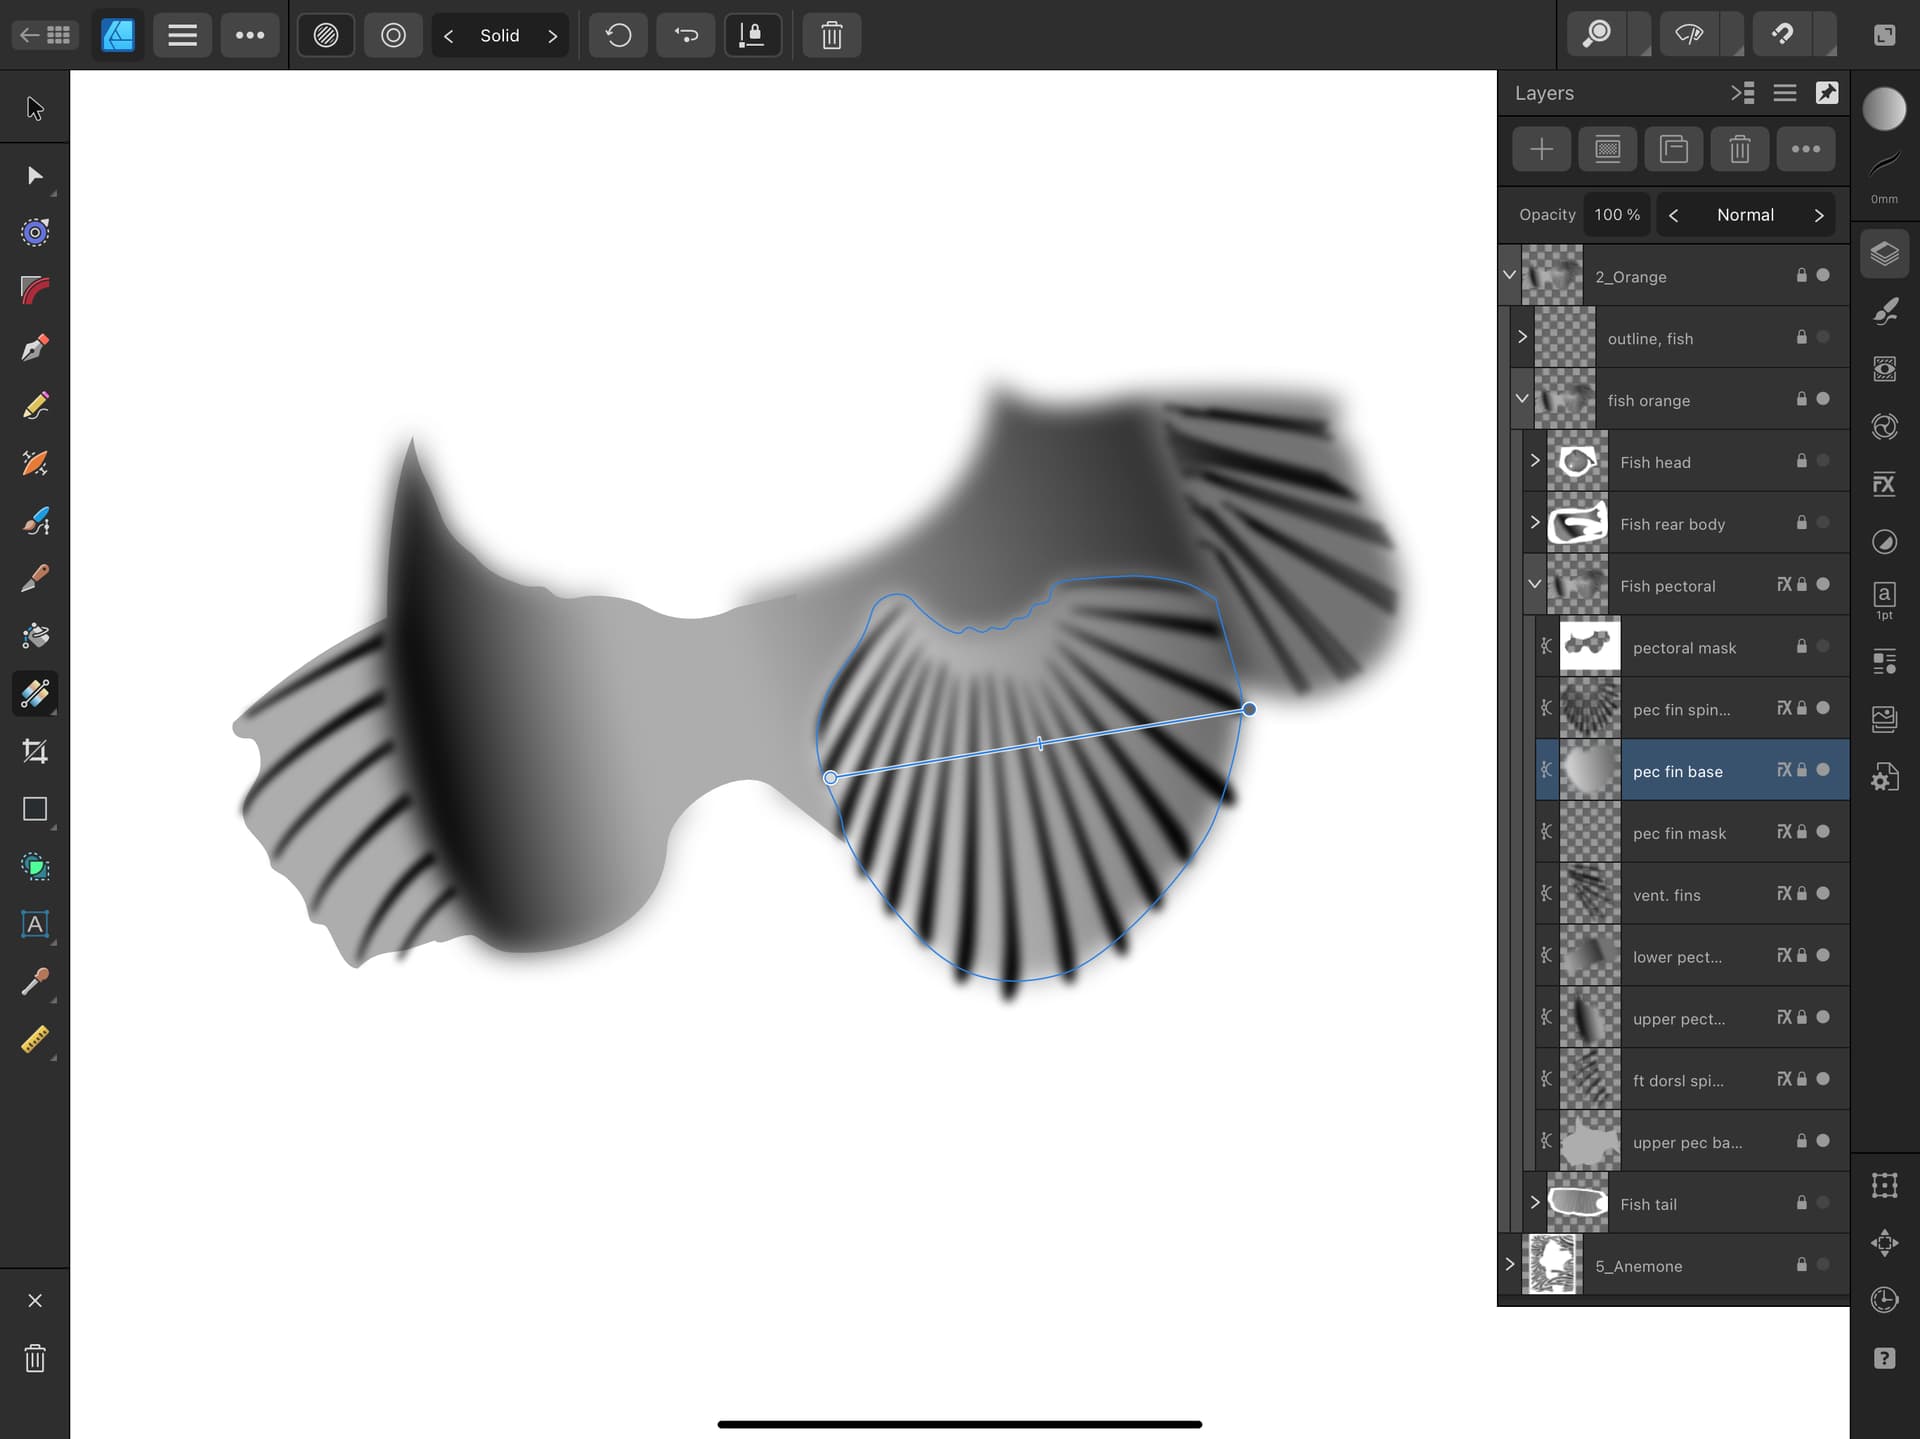
The fish orange detail is somewhat different. In its entirety:
The recesses between the spines are closed vectors with a black fill:
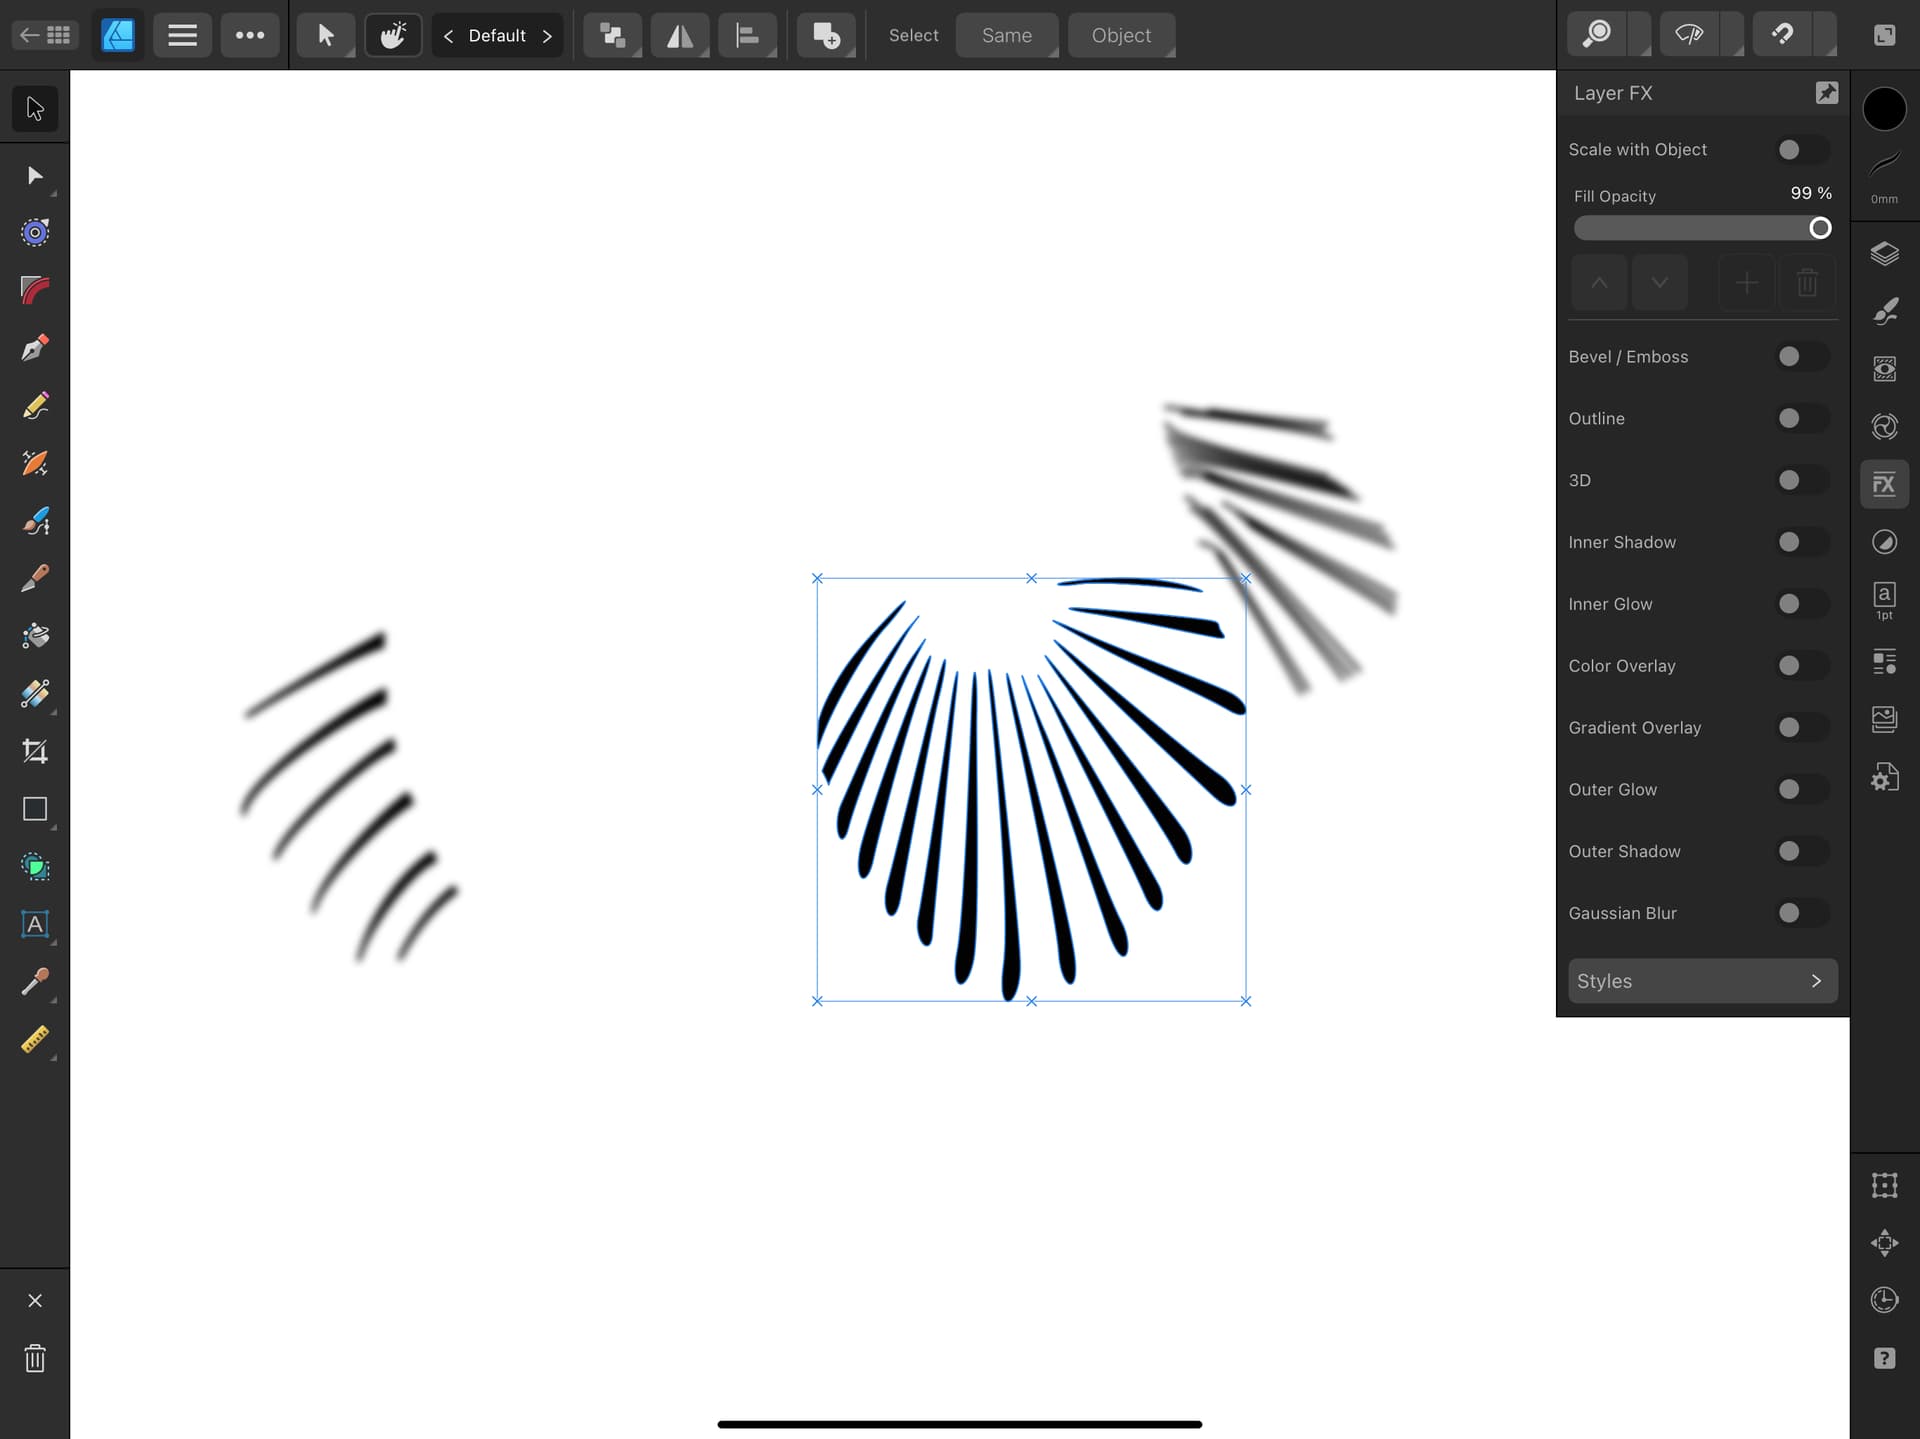
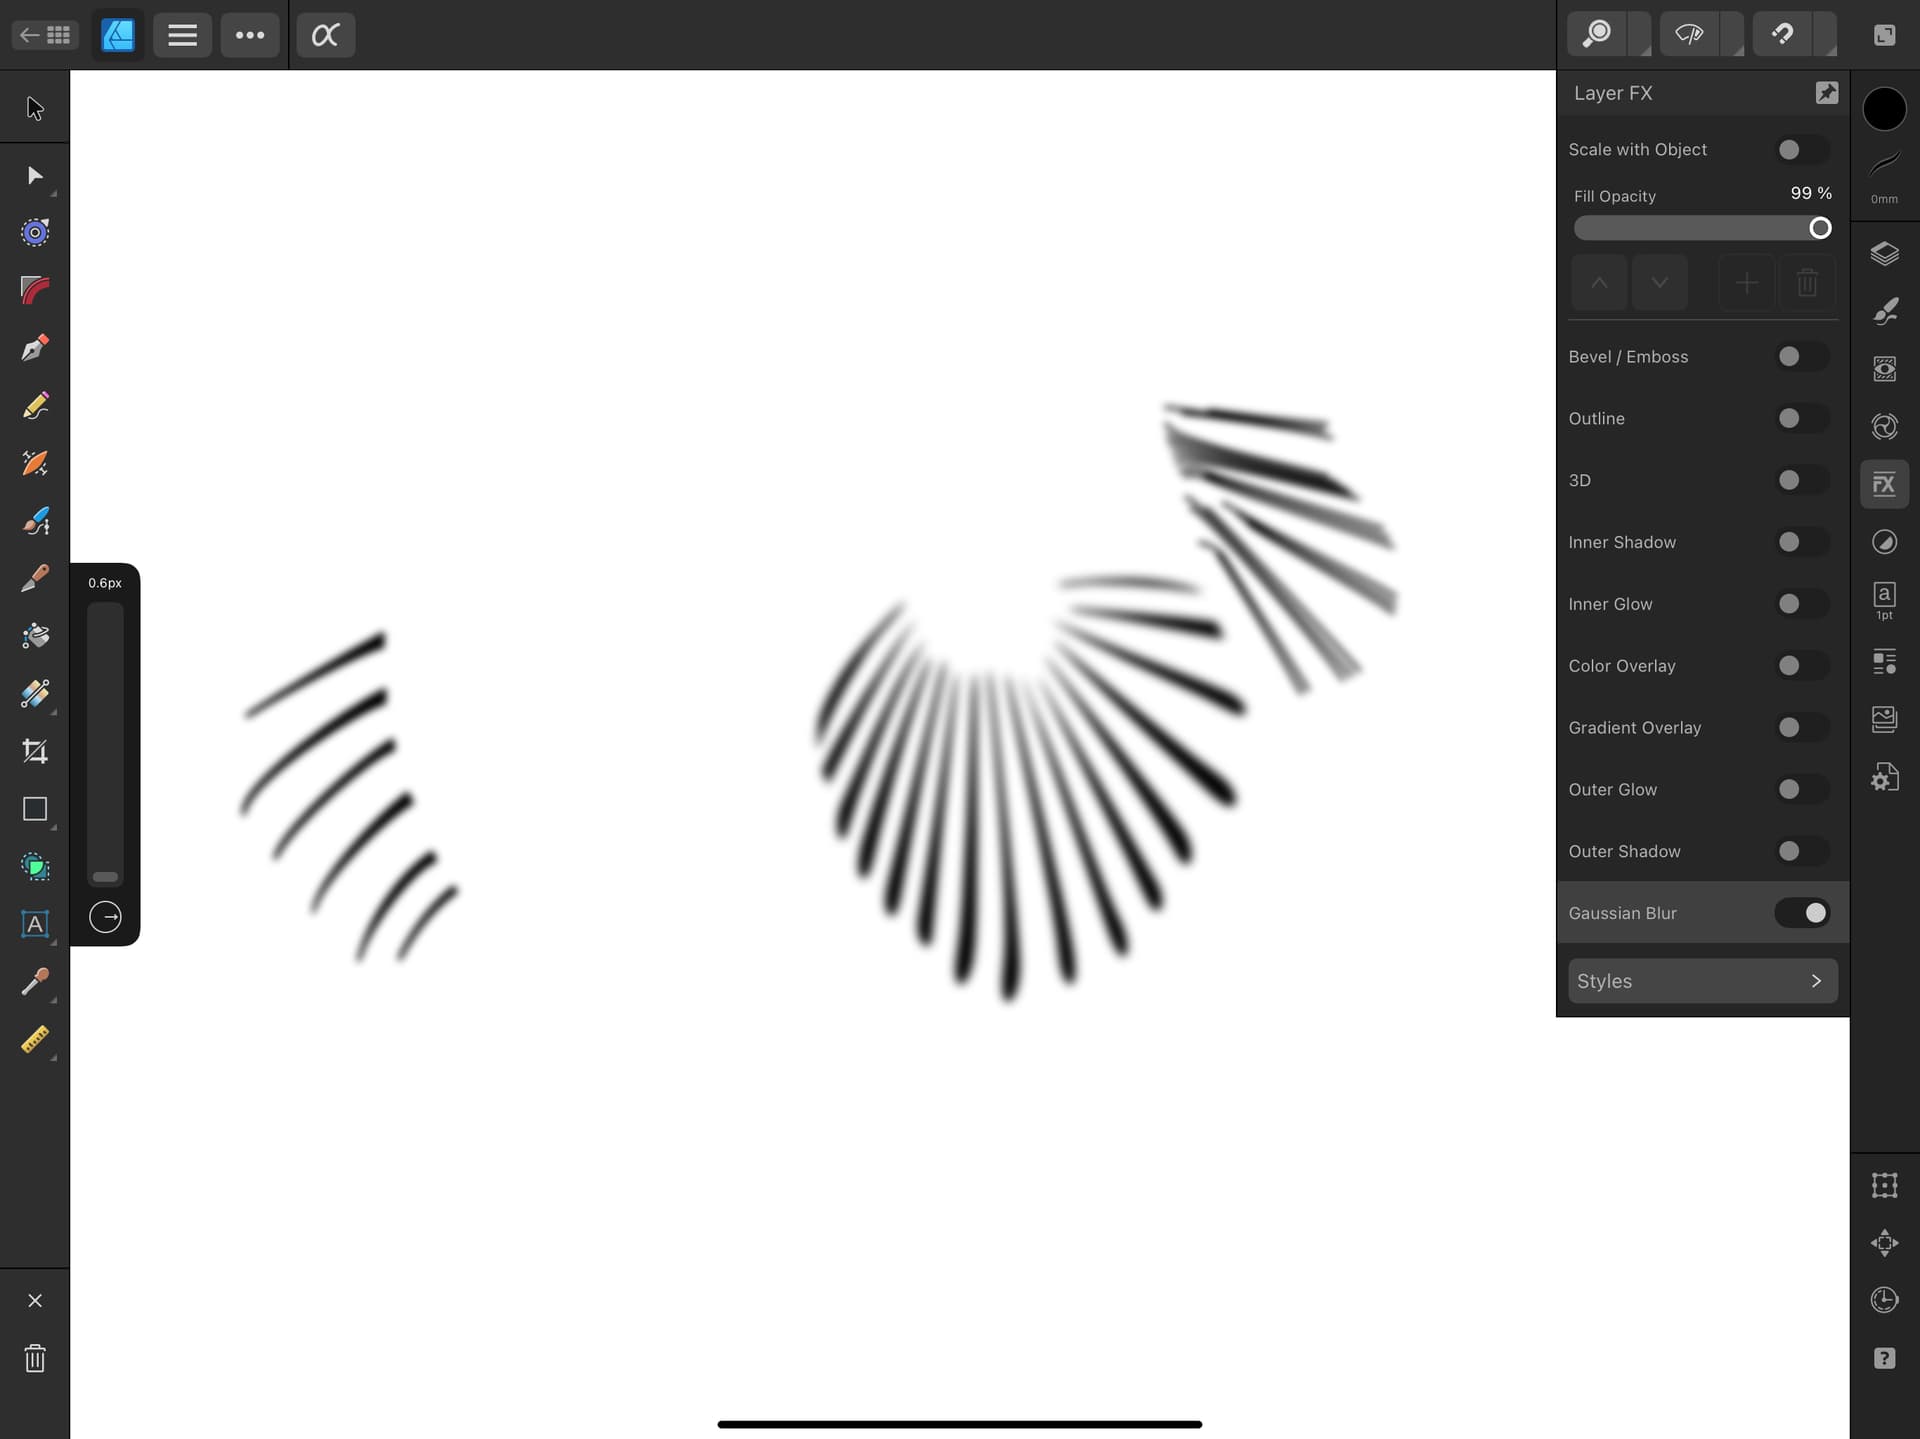
A slight blur is applied:
The body curvature depth is simulated with a gradient fill:

An overall base layer is needed:

All combined together:
And matted:

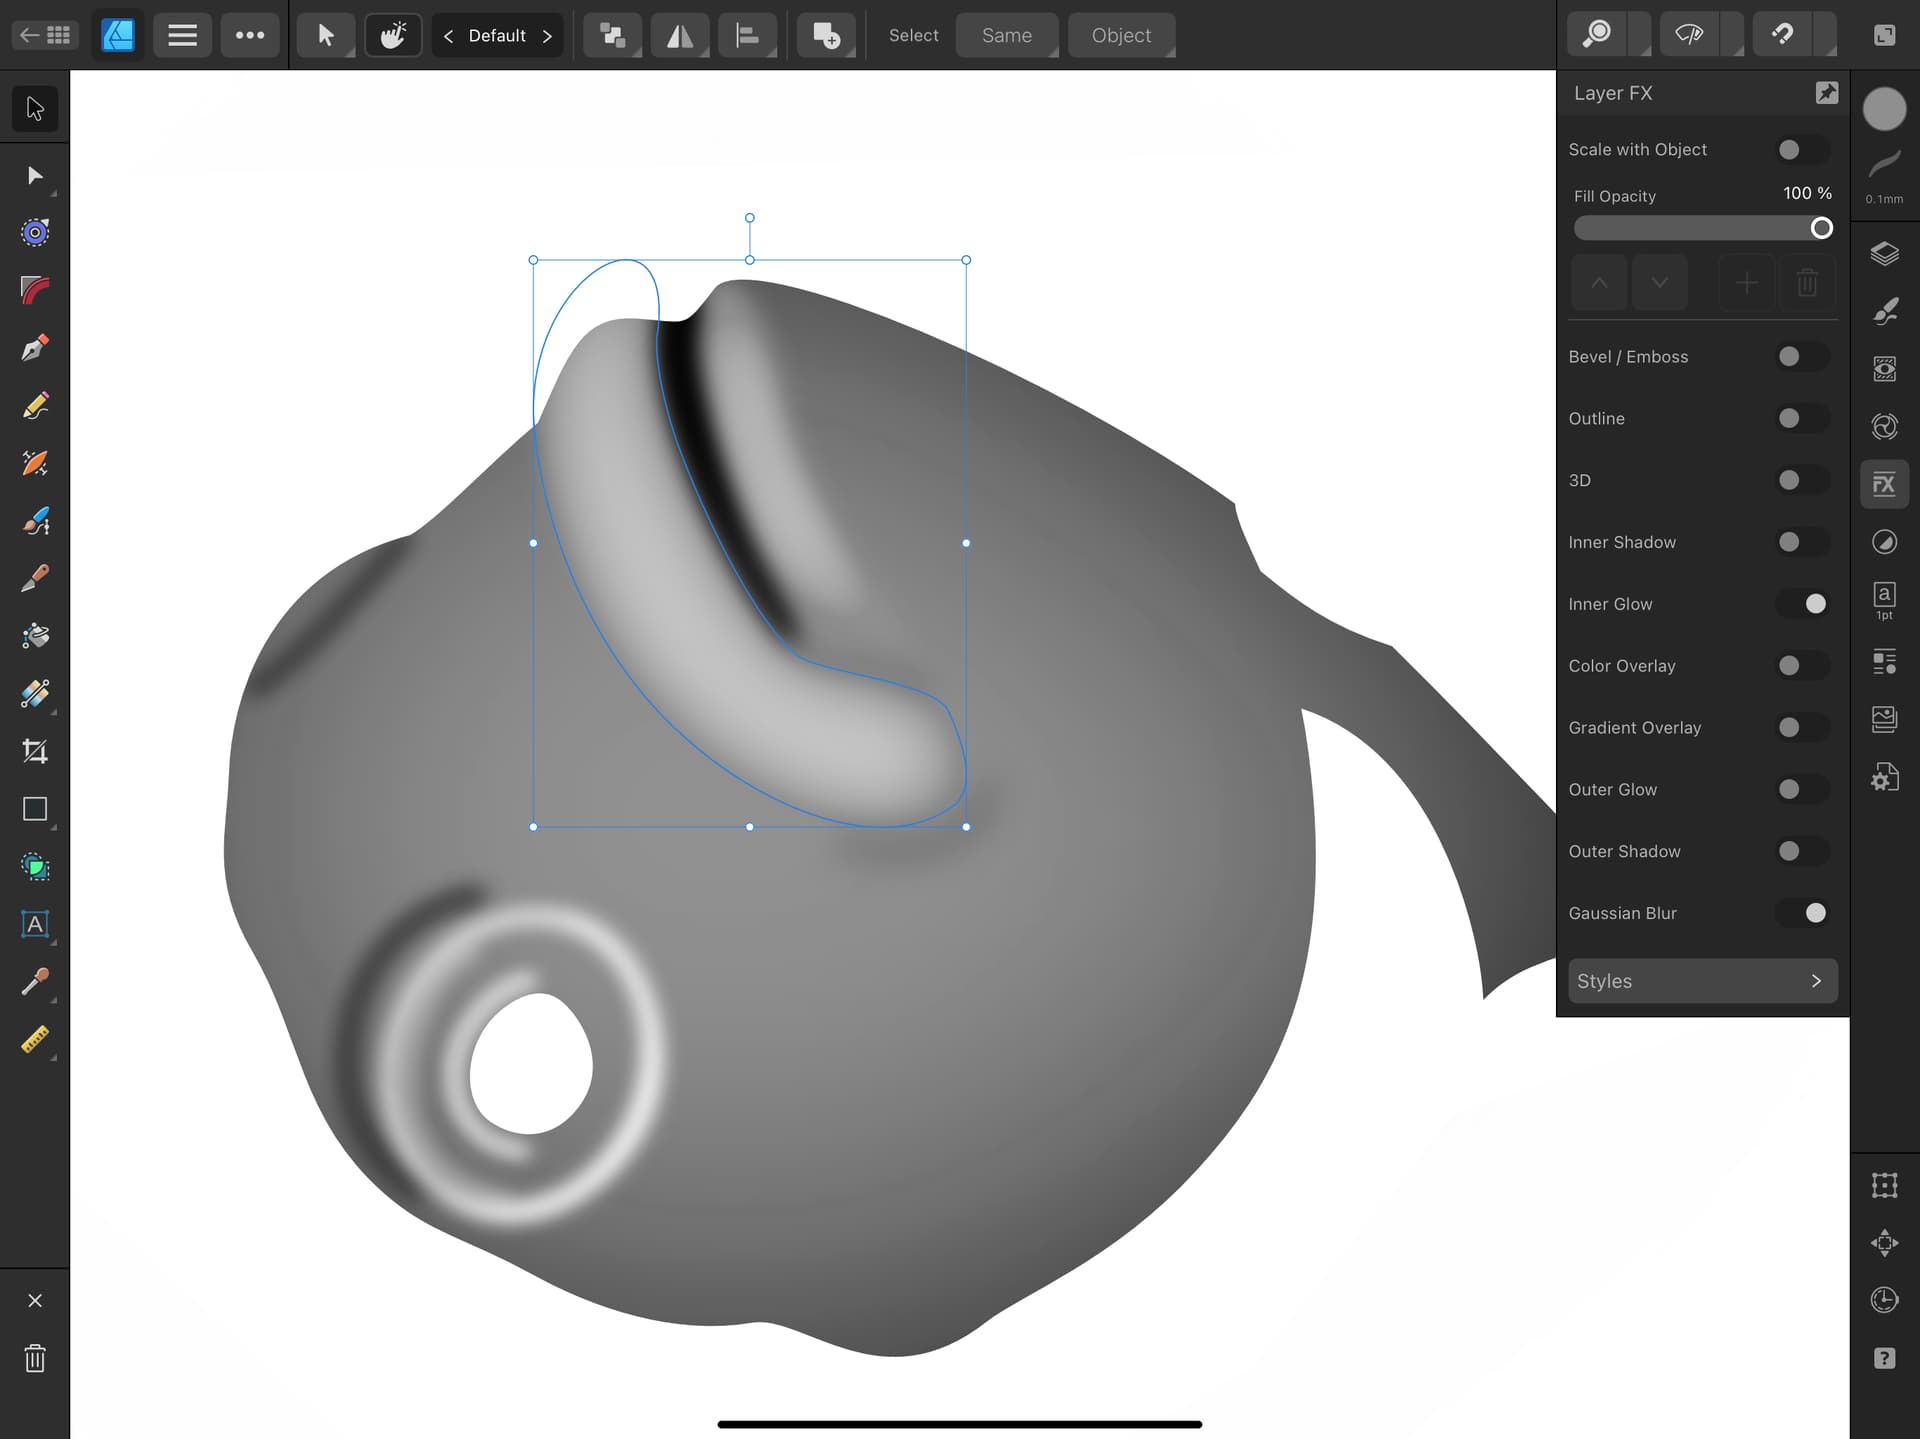
The head was done in a somewhat opposite fashion where elements like the lips were raised versus the lowering between spines. Here the lips were given an Inner Glow of a lighter color than the base and then Blur was added:
And it’s as easy as that! Lots of trial and error but it will go faster next time. Don’t attempt this unless you’re retired or lobbying for a divorce.