always place the BitZero per the instructions for a given Probe type — registered against a corner when probing XYZ, fully on a surface when probing only a single axis at a time
ensure the tool won’t bottom out before making the last cut — I try to use the shortest possible tool for the initial setting of zero
If you continue to have difficulties post a .c2d file, generated G-Code, step-by-step notes on how you are securing your stock and setting zero relative to it, and a photo showing a failed attempt at cutting and we’ll do our best to work through this with you.
Thanks Will (and everyone)! I’m going to do a new sign shortly and will go slowly and document each step, and with pictures, so if I get another failure I can provide any specifics you need.
Figured I’d add this part instead of start a new thread.
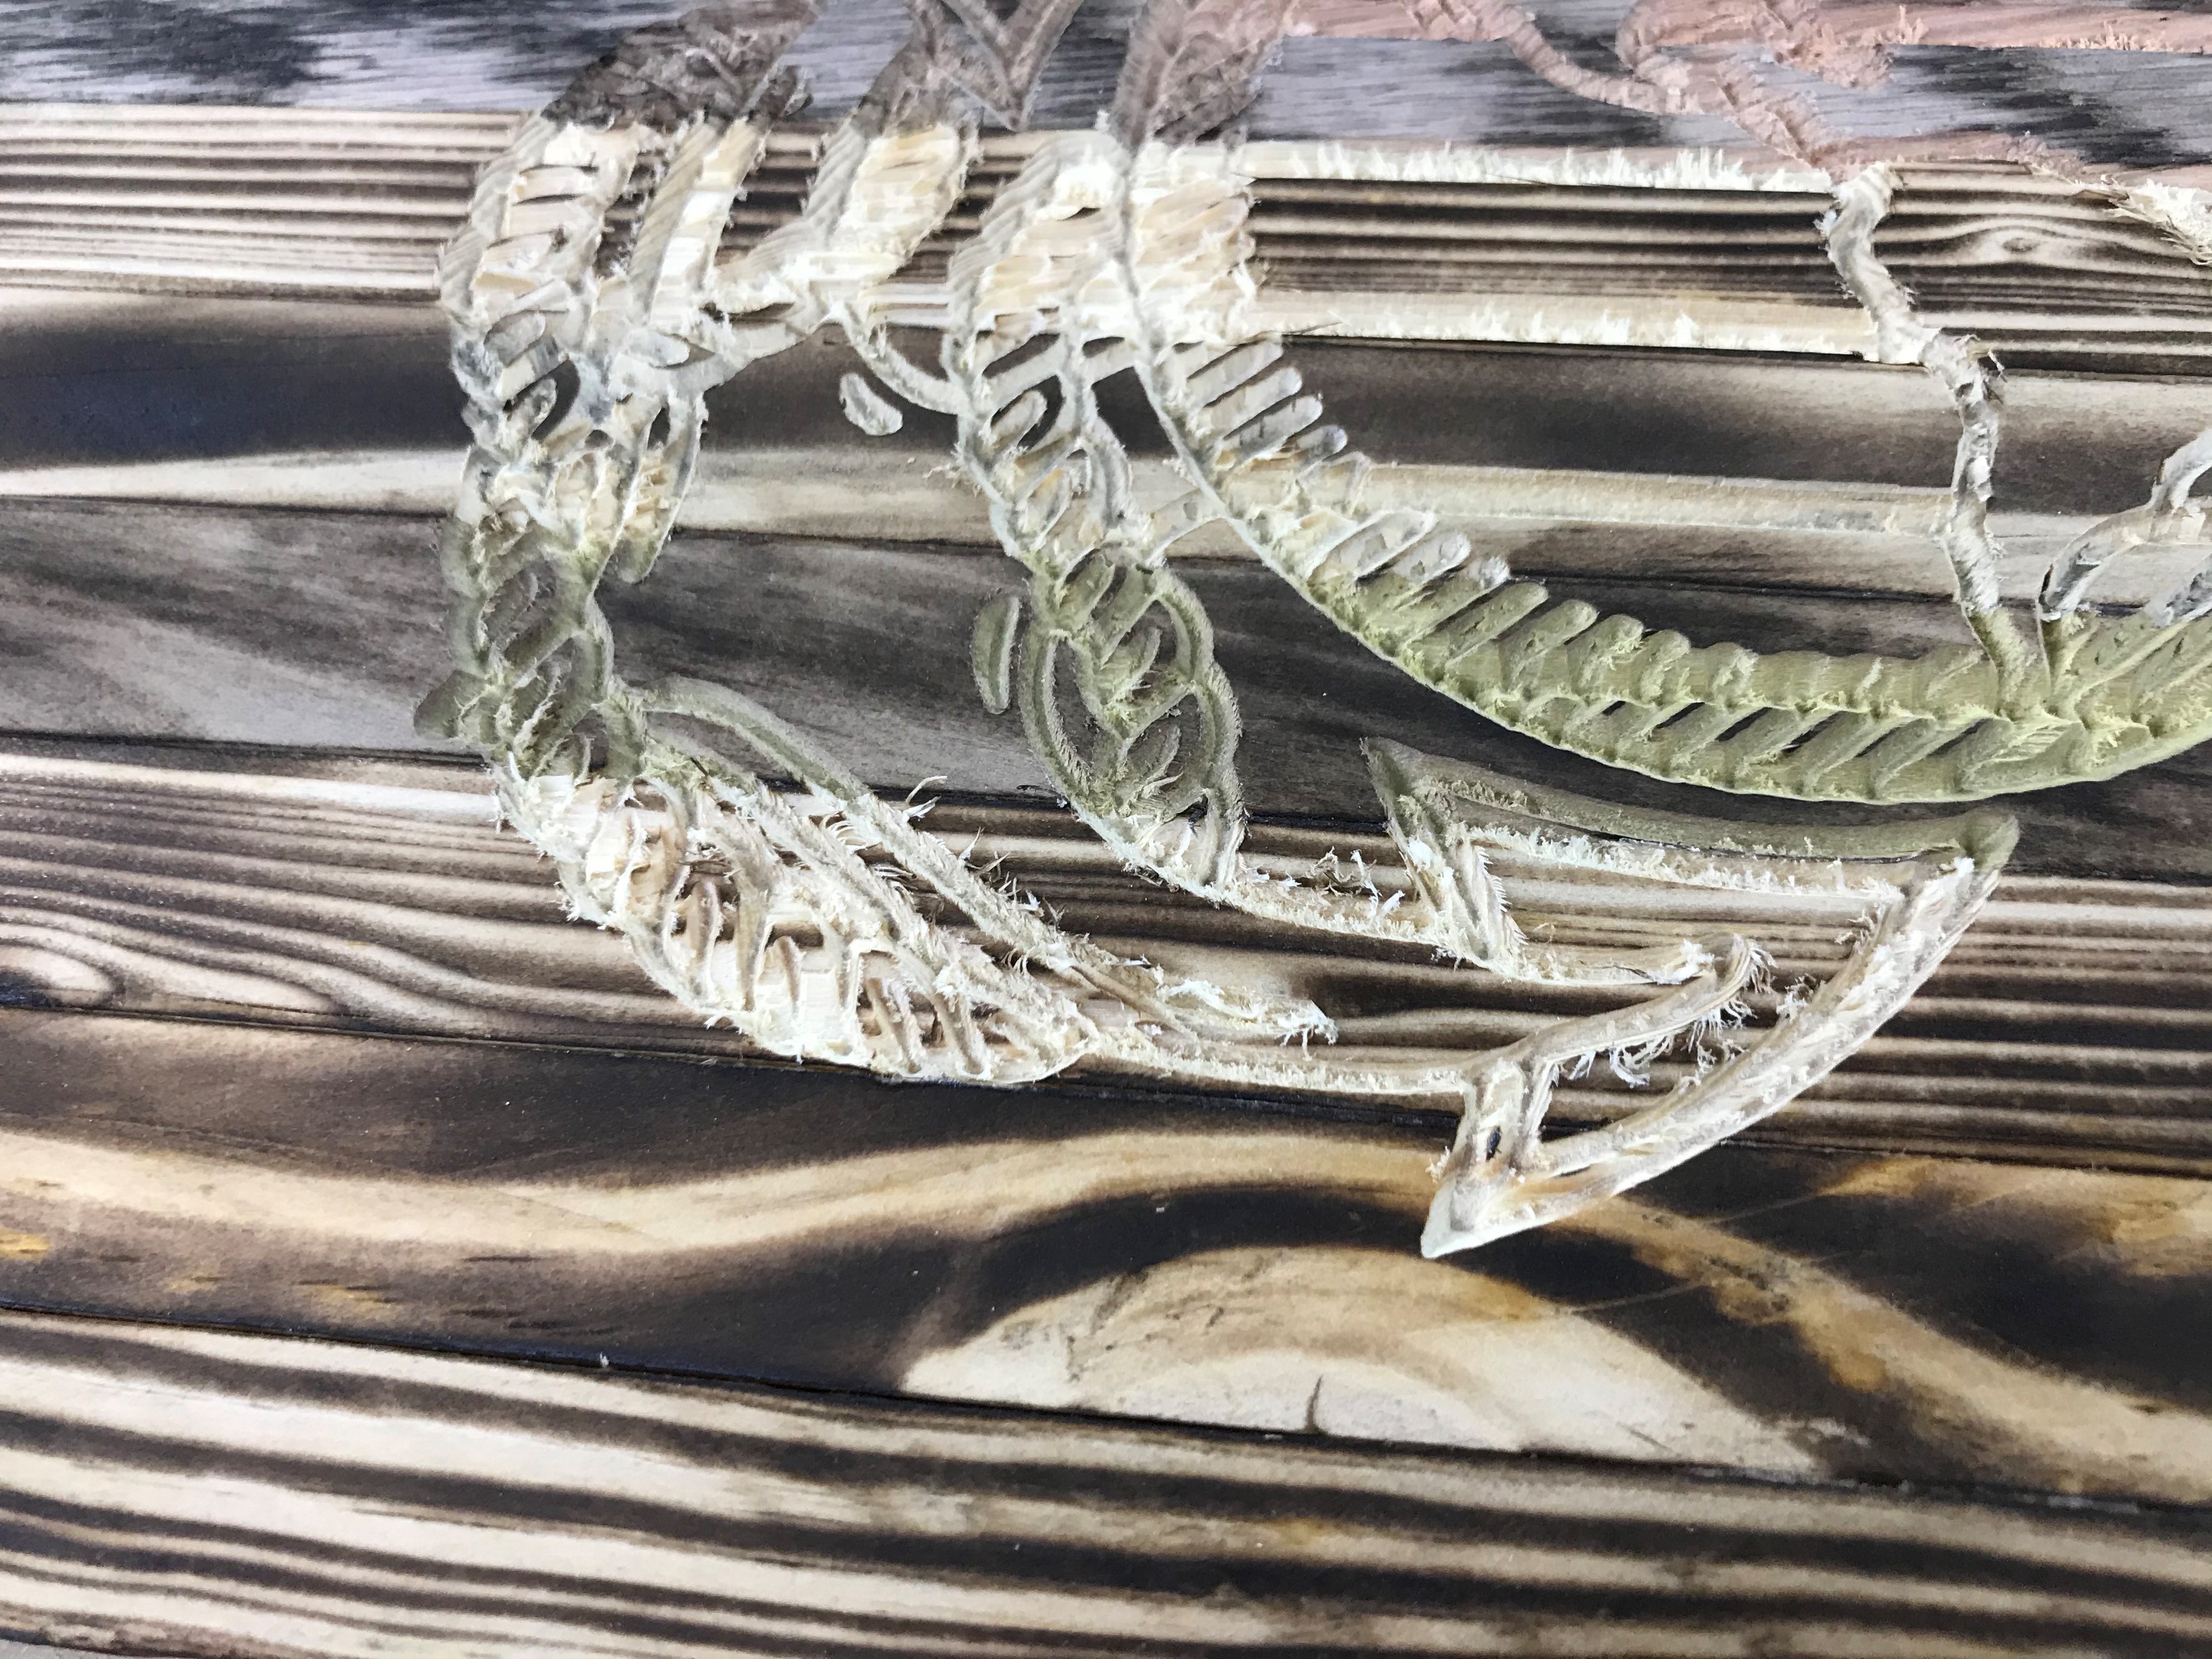
Ok, I tried another flag. Making some for some vets for Veterans Day tomorrow. Since I only have two of these distressed pieces I manually set the X/Y/Z to rule out anything I’m doing wrong with the BitZero and bit selection process and give me the best chance of being successful.
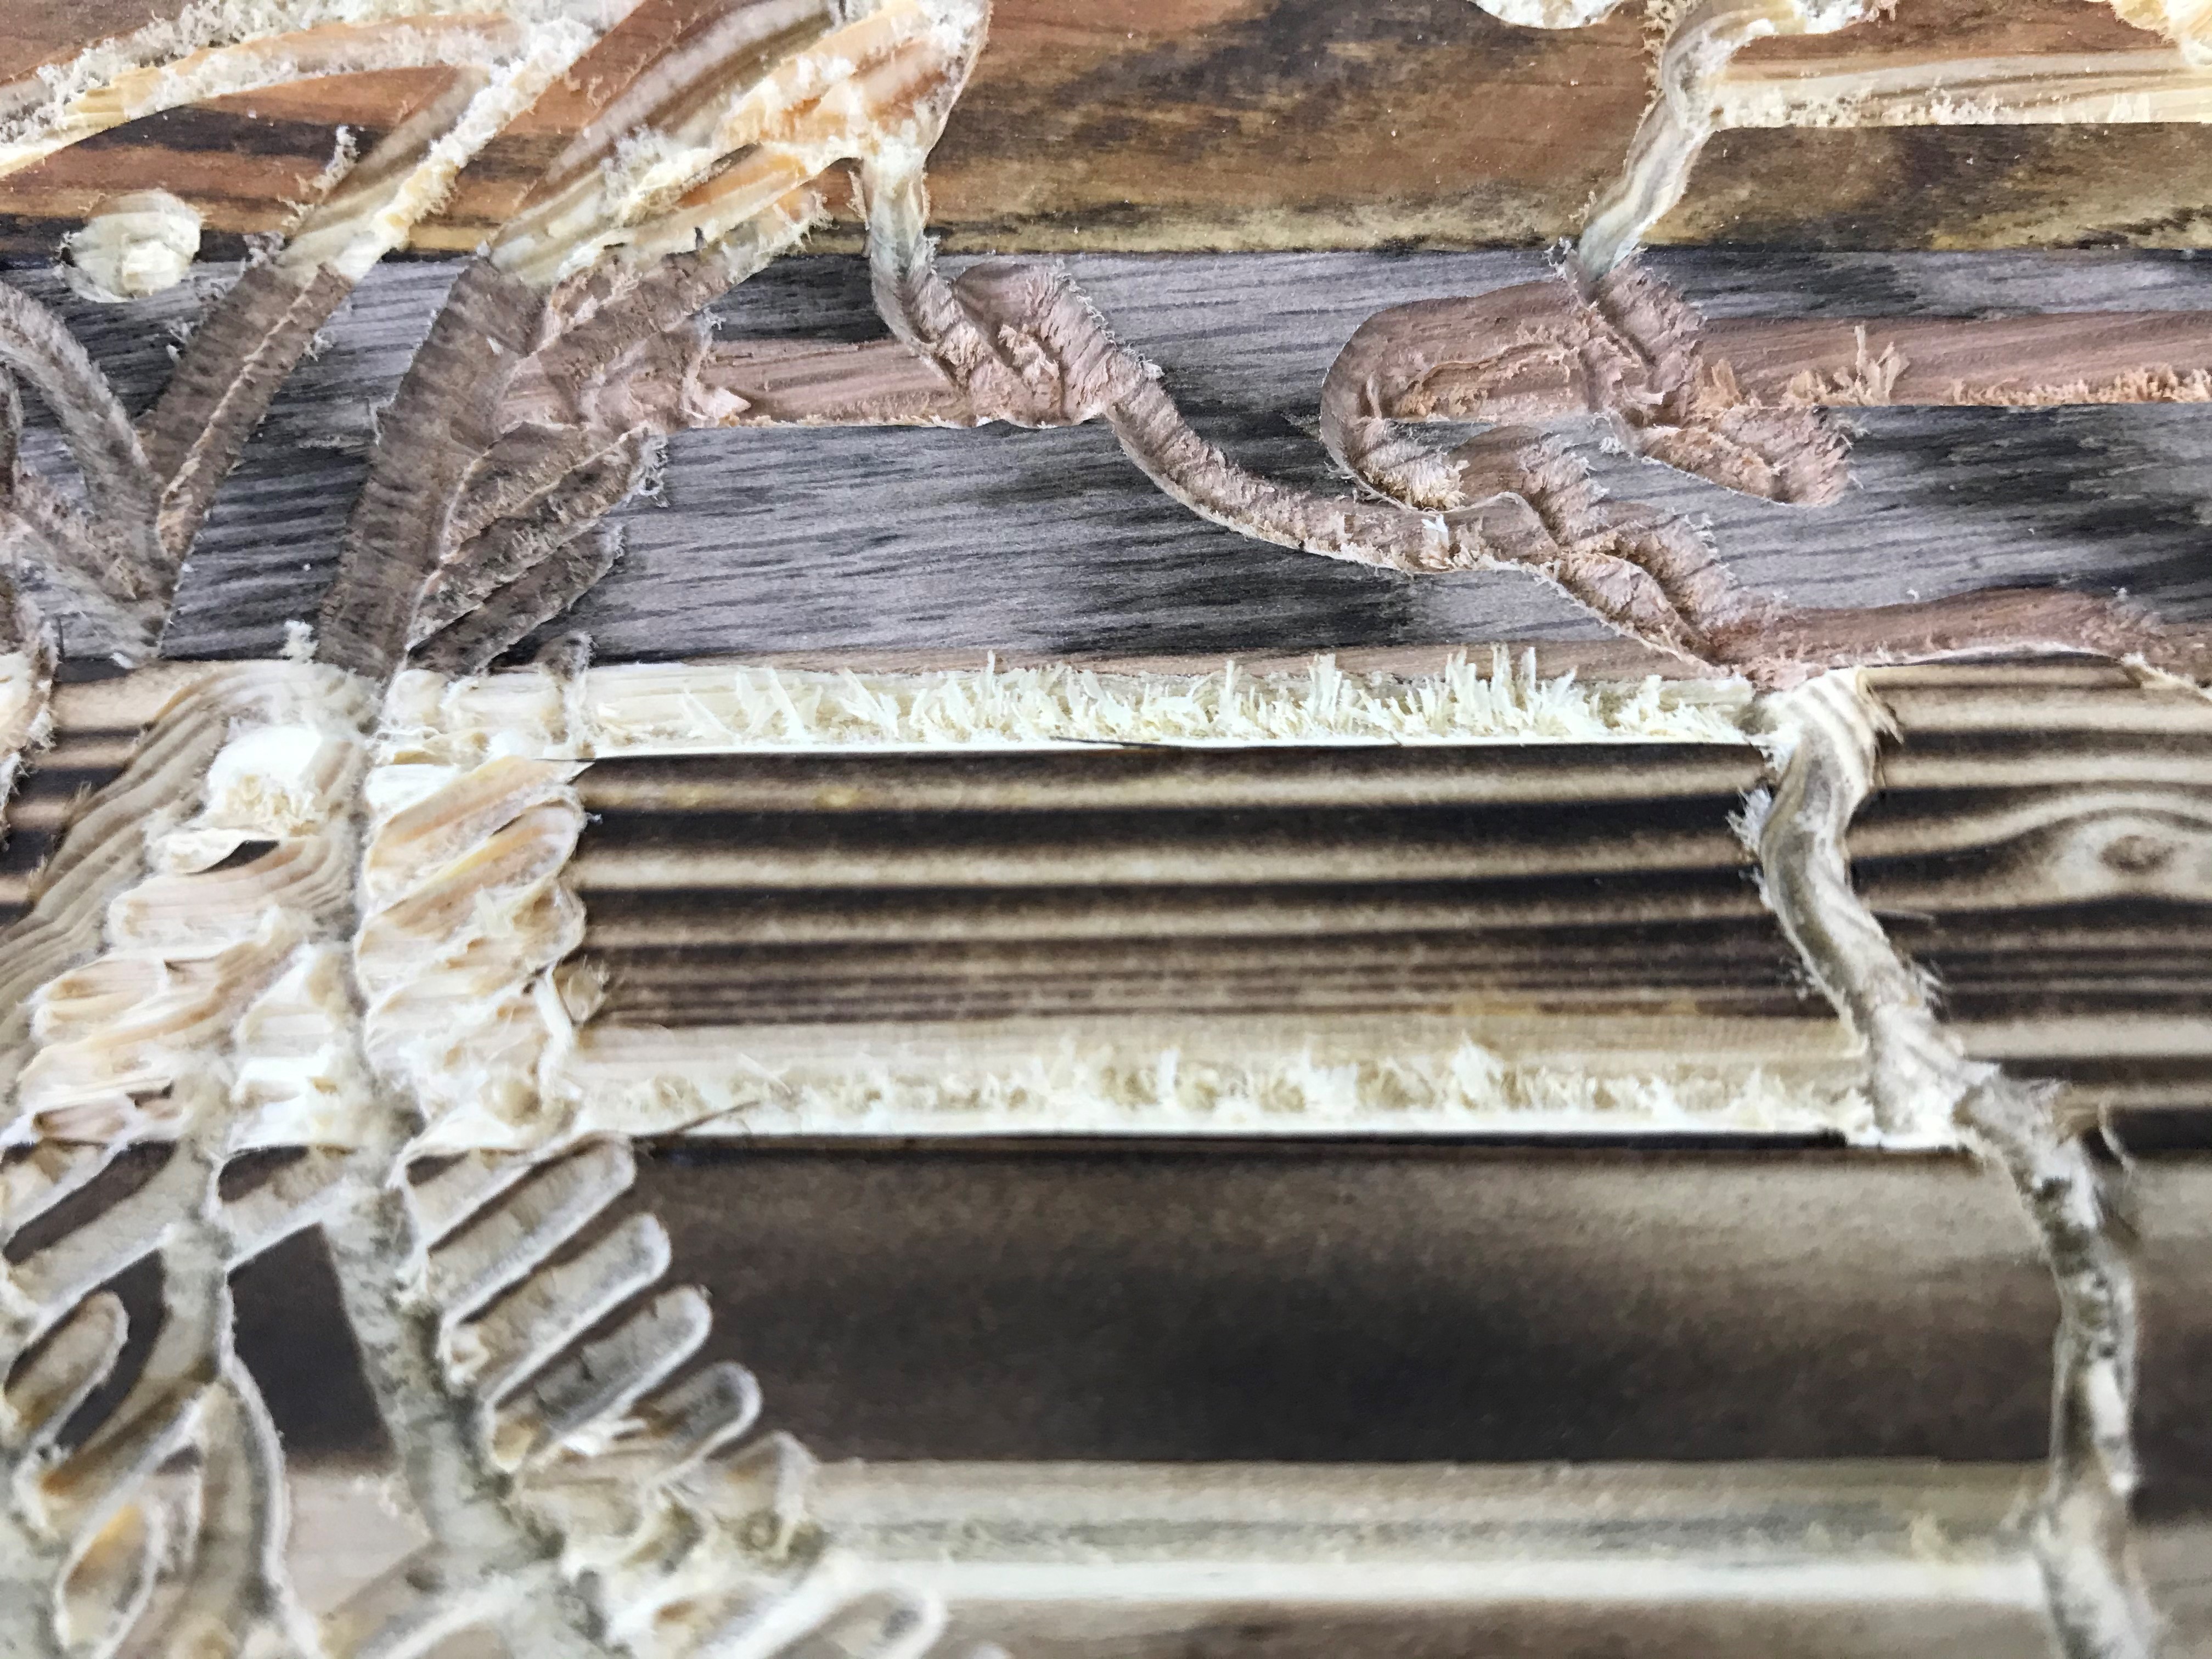
It’s the Marine Corps logo (Eagle Globe and Anchor). So what did I do wrong here? It looks like I carved it with a chainsaw. While the project “worked”, I wouldn’t say it was very successful.
How does this compare to test cuts in the material? I didn’t do any test cuts, I just ran the program.
Advanced V carving? Are you not running a pocket clearing toolpath? No earthly idea what a pocket clearing toolpath is, but I assume from the question I was supposed to do that?
Enabling the pocket clearing option would clear the bottoms of the pocket with a successive pass w/ a second tool (requires either a BitSetter or using a third-party utility to separate the monolithic G-Code file into multiple files).
Pocket clearing toolpaths sound awesome. Do I follow the same toolpaths but with a smaller bit? I hate to keep bothering you guys - where can I get the “for dummies” explanation on how to do that?
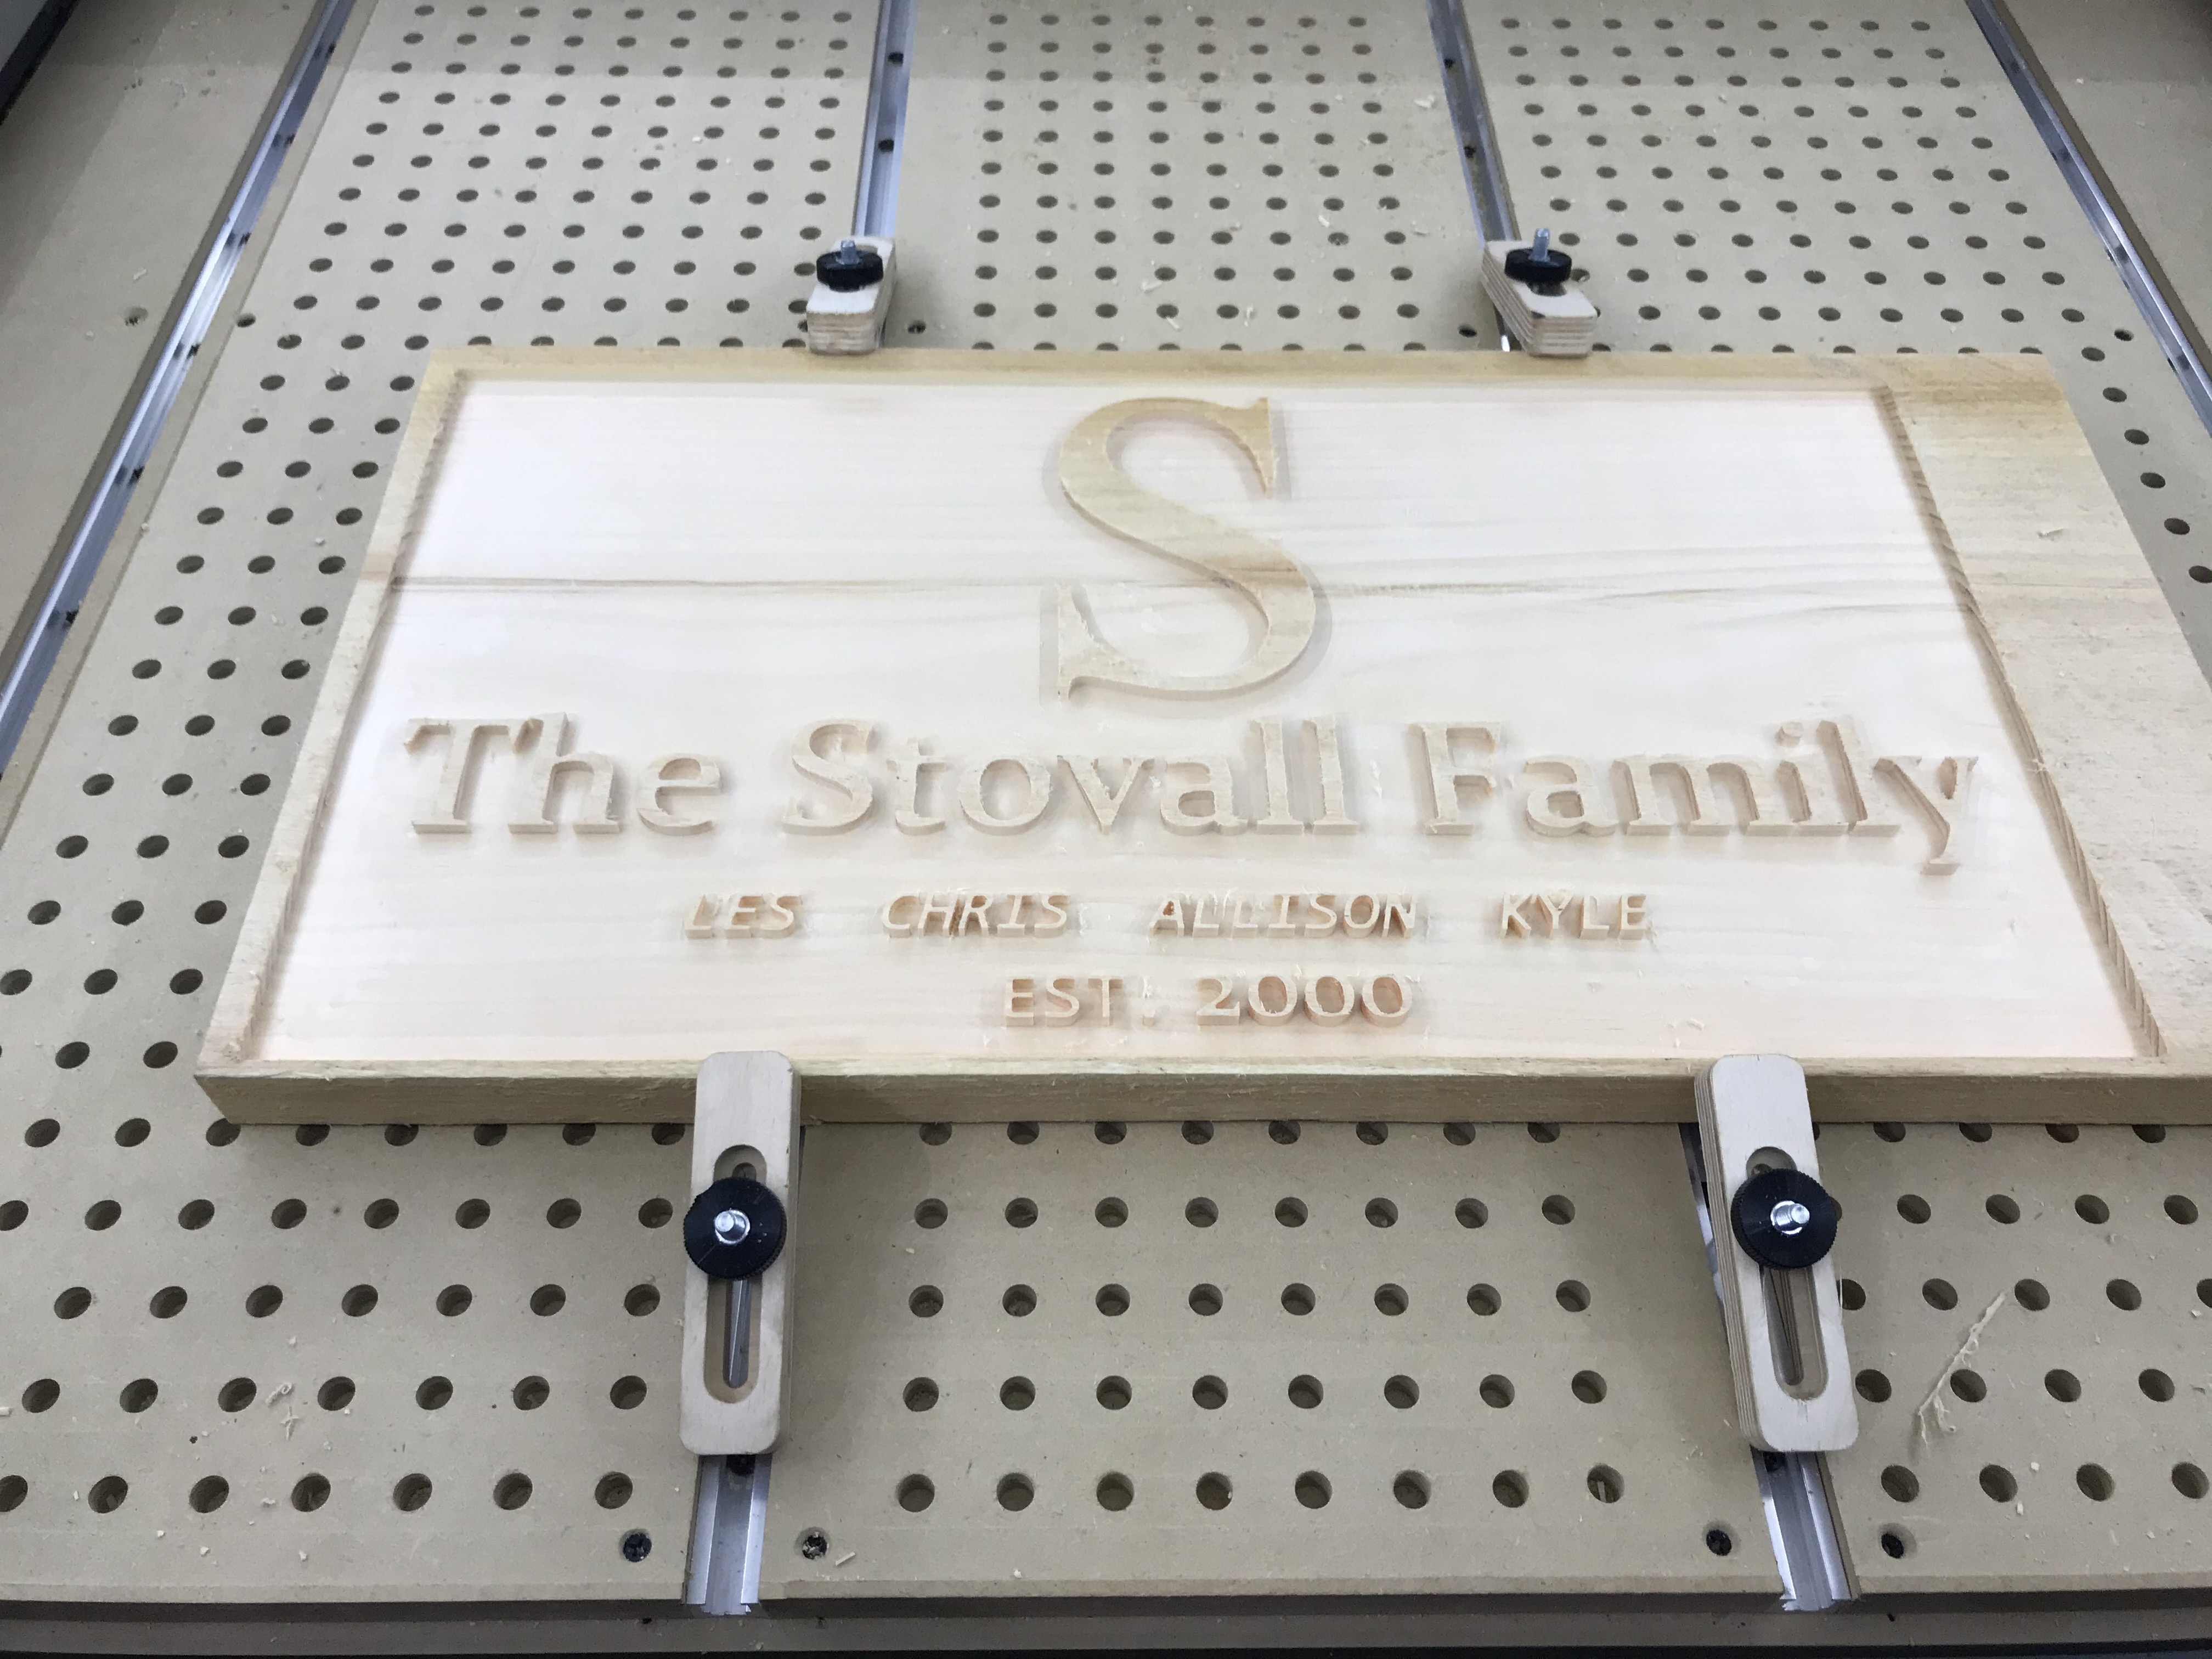
The preview looks awesome in Pine. Perfectly smooth.
BTW - thank you all so much. This has been so stressful and confusing for me and you don’t know how much this help means to me.
Pocket Clearing is a checkbox option in the Advanced V carving toolpath pane — with a bit of work you should get things so that the preview and actual cut match — just do some test cuts in scrap, okay?
This looks like some material just does - it’s wood, it has grain, and a less than perfect edge tears a little. Does it clean up easily with a sanding sponge?
Ok, I figured it out. It’s the BitZero. Not saying the BitZero is defective, but I’m clearly doing something wrong. When I zero with the BitZero, then jog to z+6mm, it’s not 6mm. Sometimes it 8 or 10 and it was as high as 16 once. X & Y are correct, but the Z never is correct. When I manually set Z it works every time. Maybe I broke it? I did once probe without the clip attached, with horrible results.
@will I did several test with the Advanced VCarve, and made sure to click the “Enable area pocket tool” but it never did anything. The default tool is a #102, and it never prompted a tool change.
Please send in a .c2d file, generated G-Code, step-by-step notes on how you are securing your stock and setting zero relative to it and we’ll do our best to work through this with you.