I have a Shapeoko 3xxl, and i am using Carbide Create v764.
last year i was Use Vectric VCarve to do some Inlays and everything worked out great, perfect values for glue gap, saw gap and there was no gap in my inlay. I no longer have Vectric VCarve and i am working with Carbide Create. i have searched through many tutorials and tried everything, but nothing seems to work out properly.
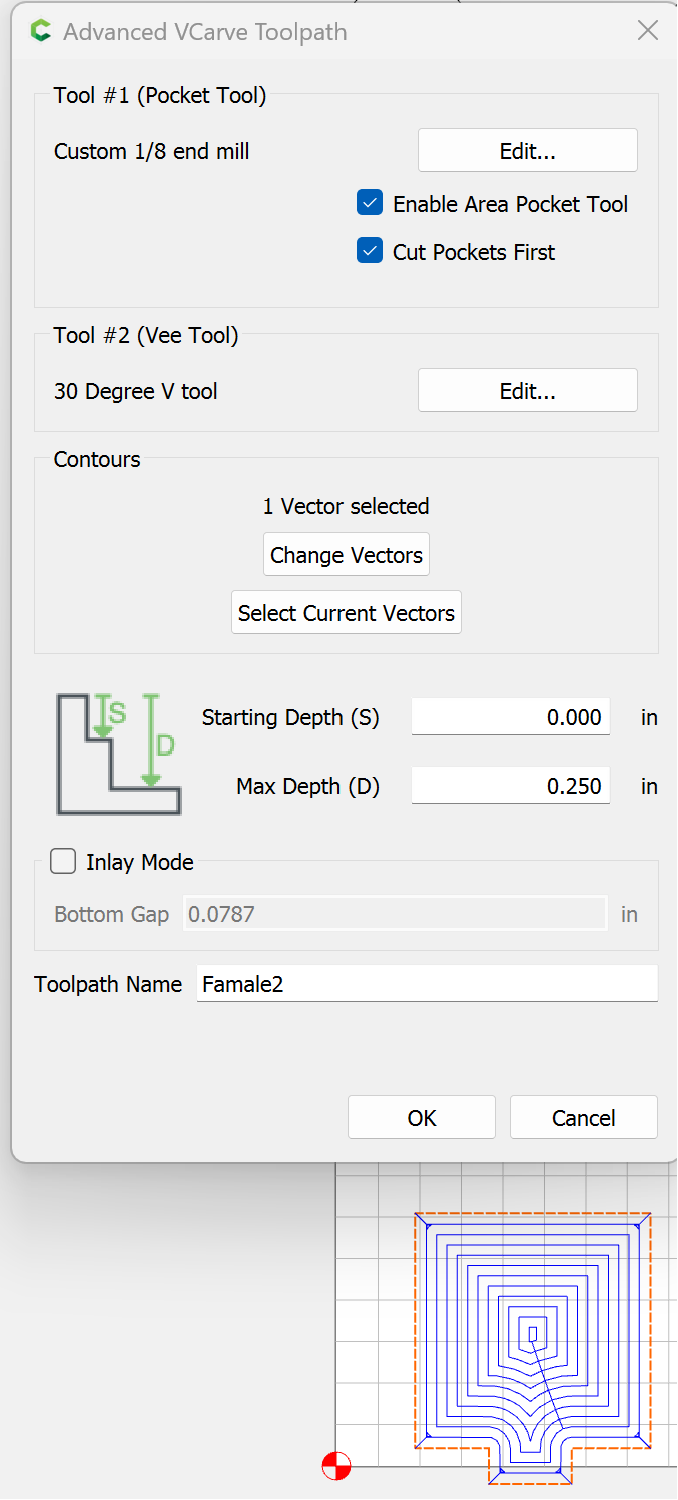
I have been using some scrap hardwood and a simple shape for my tests and I have the female part cut using Advanced VCarve, a30 degree vbit, and a Max depth of .25".

After that i cut 5 different Male parts all using Advanced VCarve, the 30 degree bit, and changing the start depth, max depth, and Inlay Mode based on tutorials un the forums i have been trying to follow.
First i tried the simple Start depth 0, Max Depth .25 and checked “inlay mode” with a .02" bottom gap.
this resulted in a loose fit, with no glue or saw gap.


Then I tried another test using the inlay mode with a bottom gap of .02", but i changed the start depth to .02" as well


Again loose fit, Small saw gap, no glue gap.
Then i tried some numbers i saw in another post, no inlay mode, Starting Depth .22" Max depth .25"
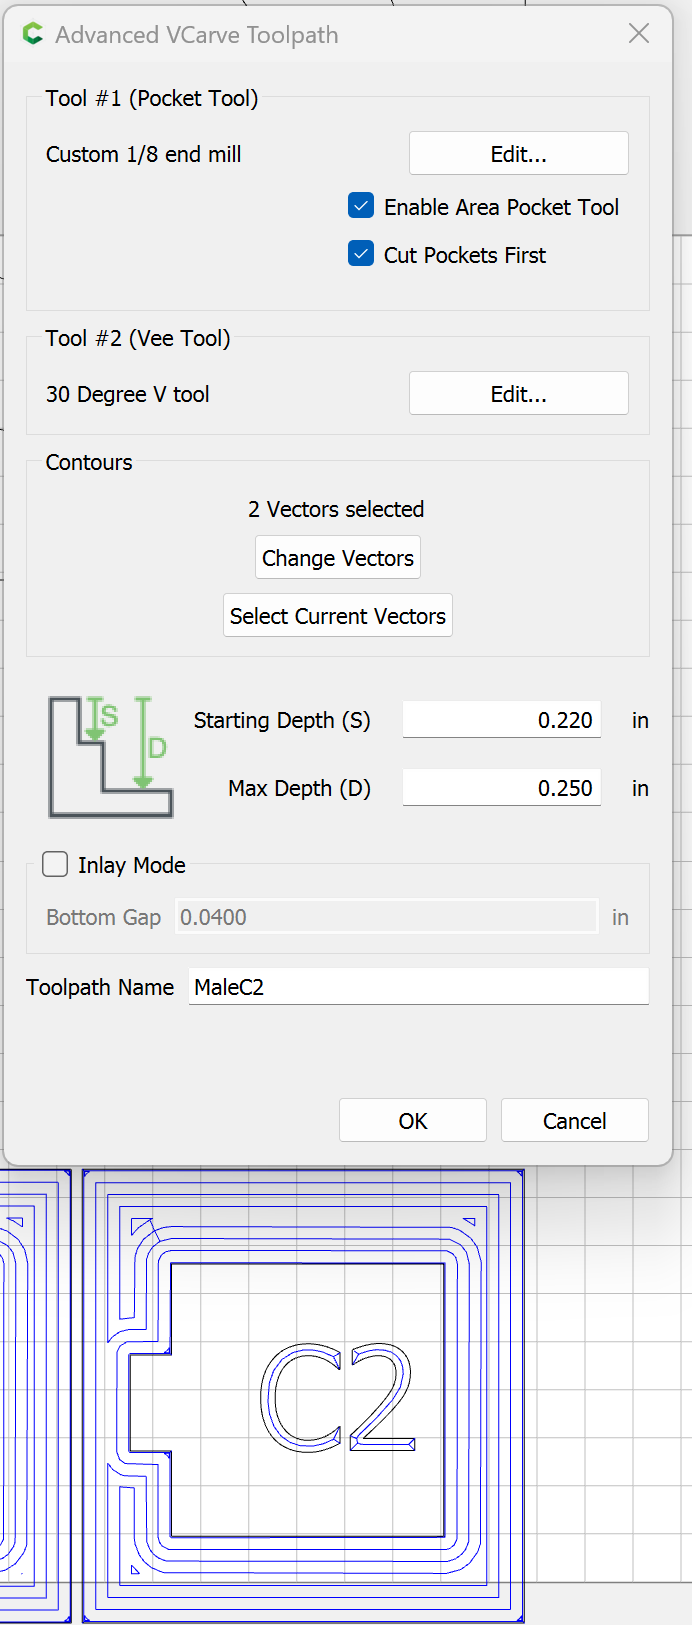
VERY Loose fit with no saw gap or gue gap.
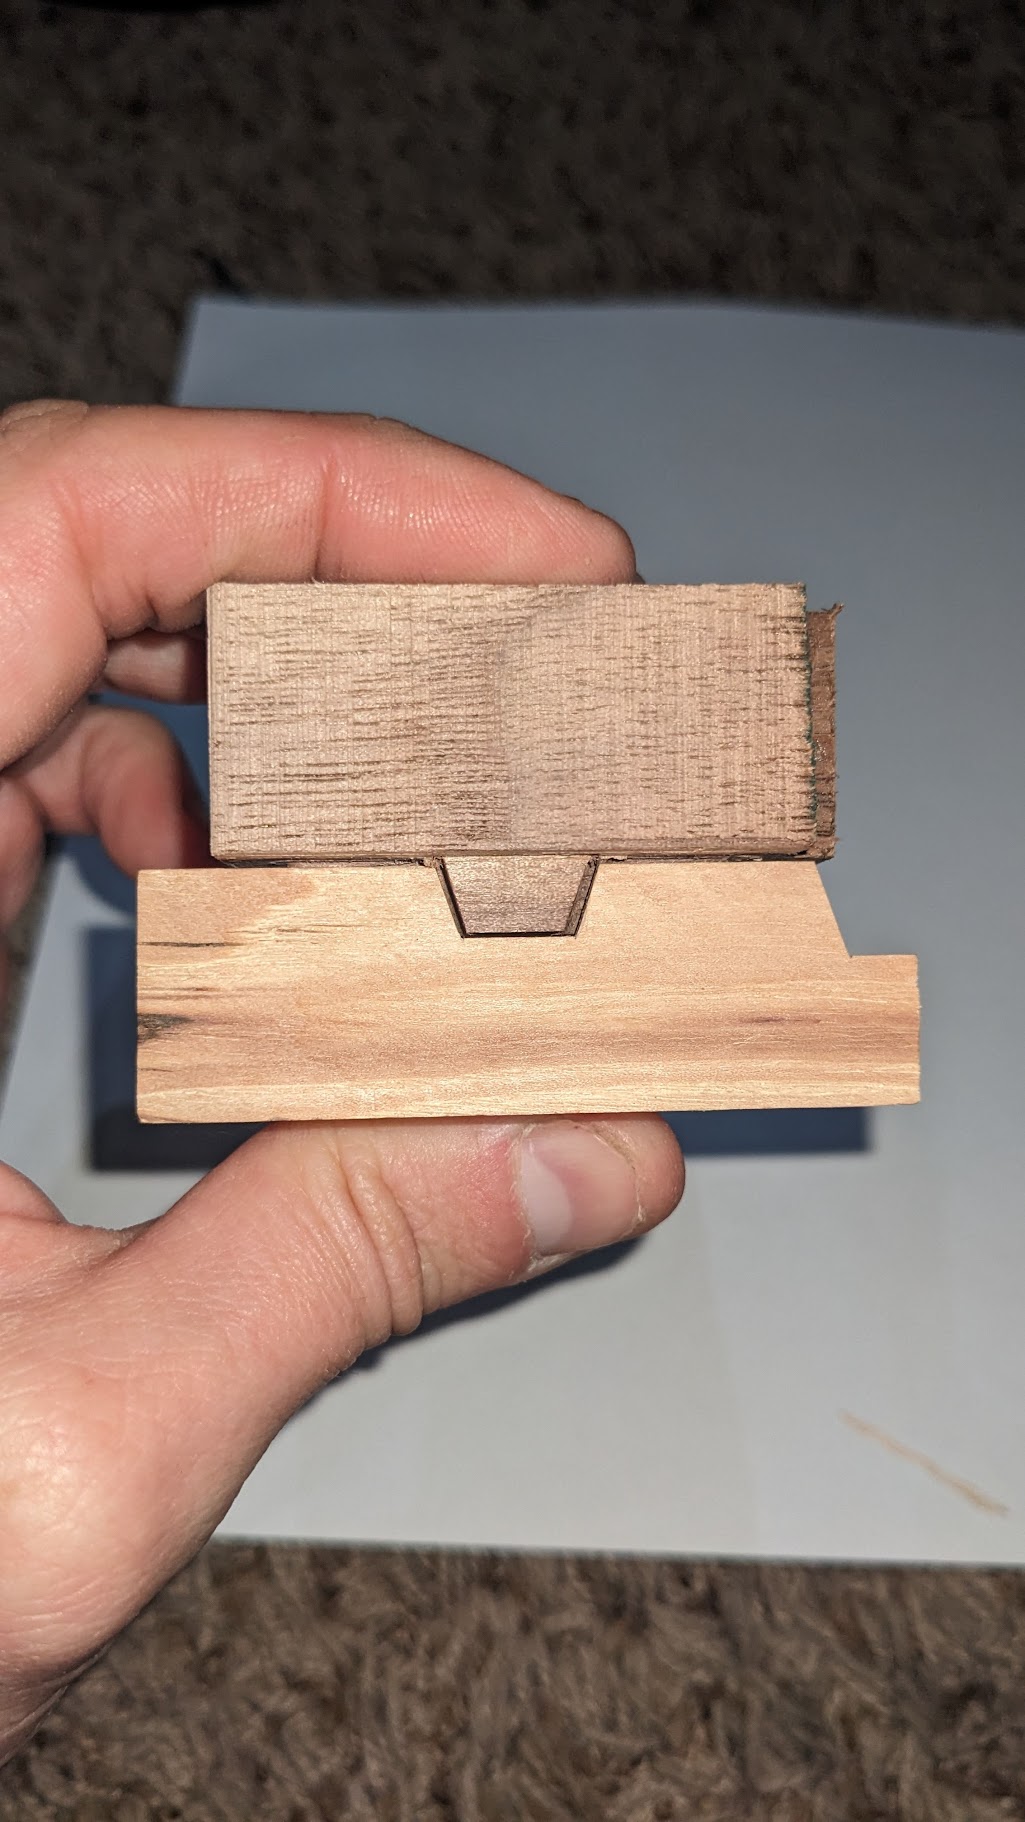
then i started playing around on my own and i got some numbers that almost work, but the glue gap is larger than i want, but i cant seem to make it smaller.
First:
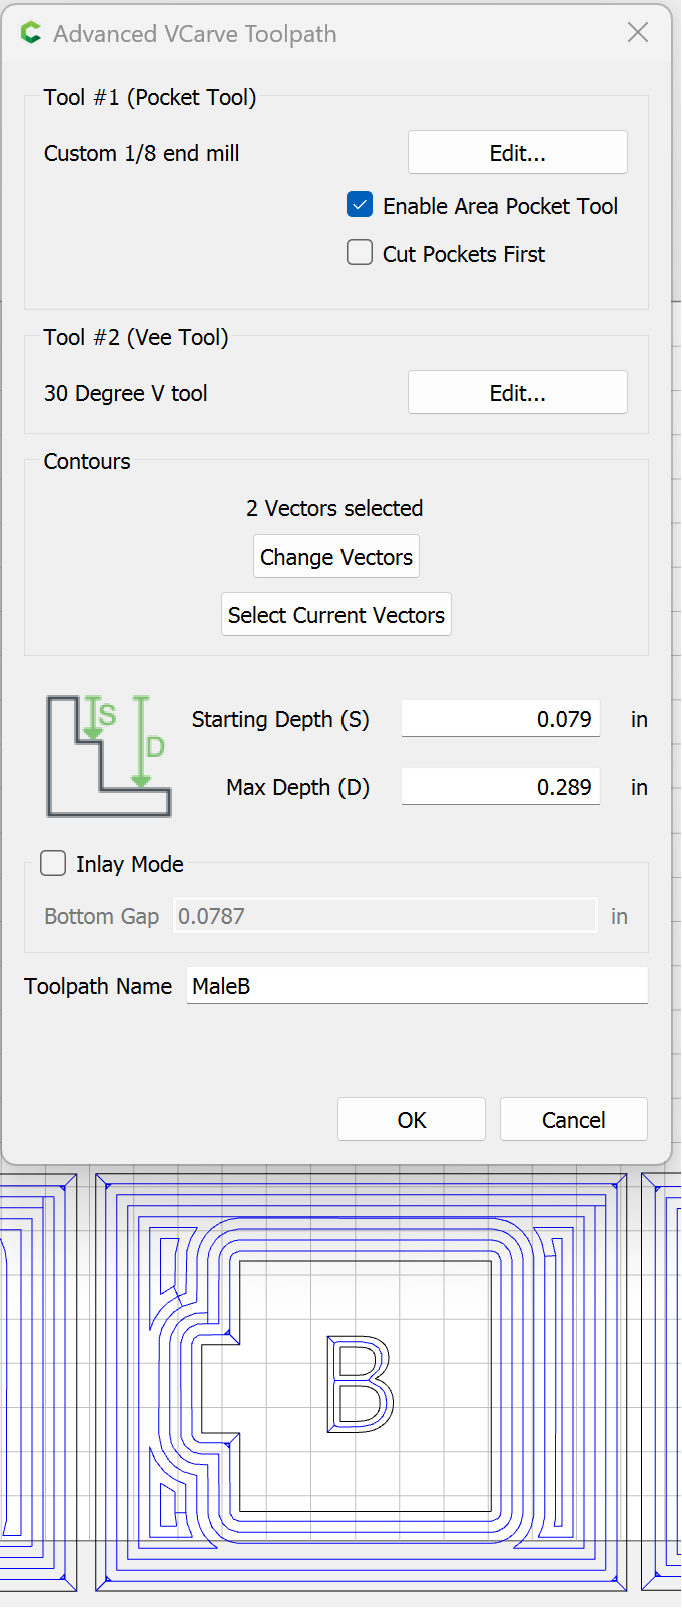
Start Depth, .079"
Max Depth, .329"
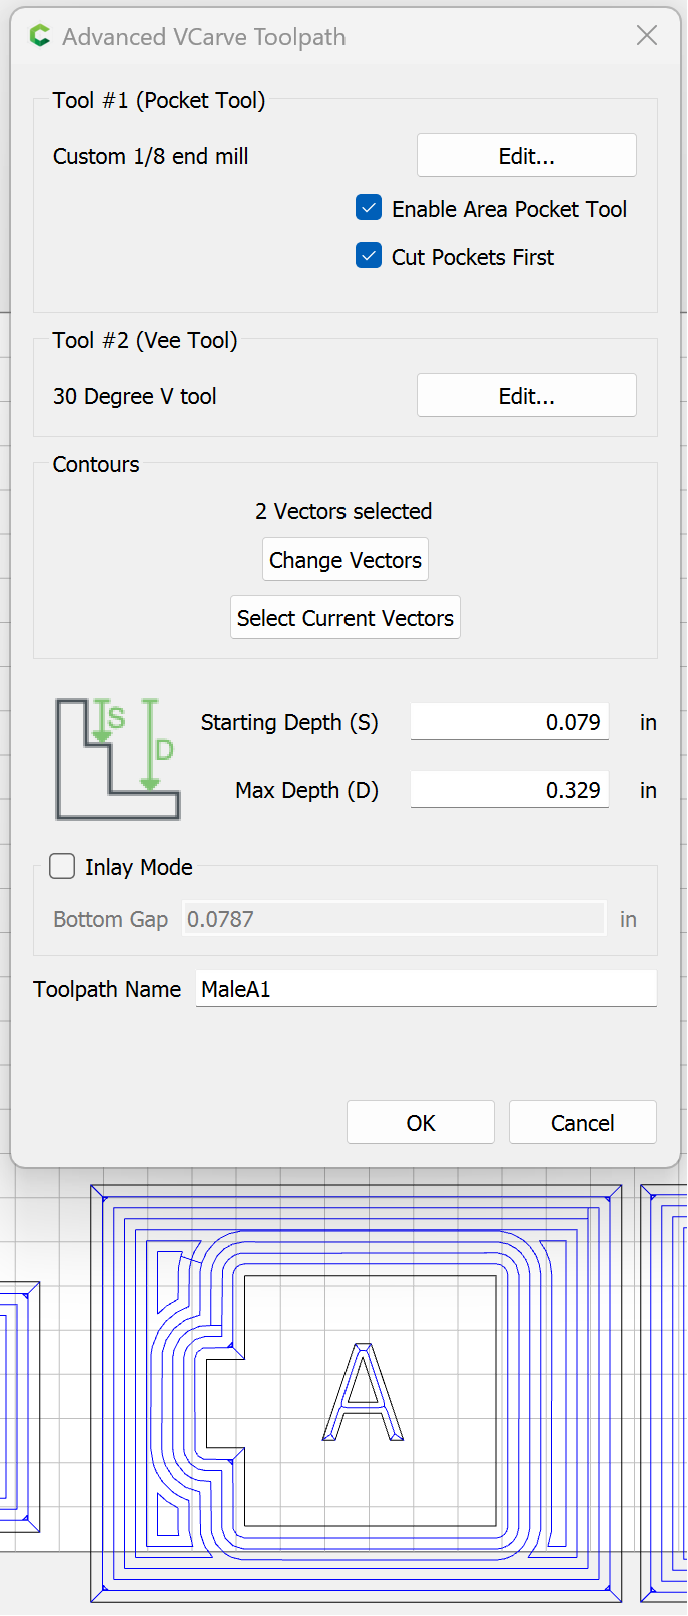
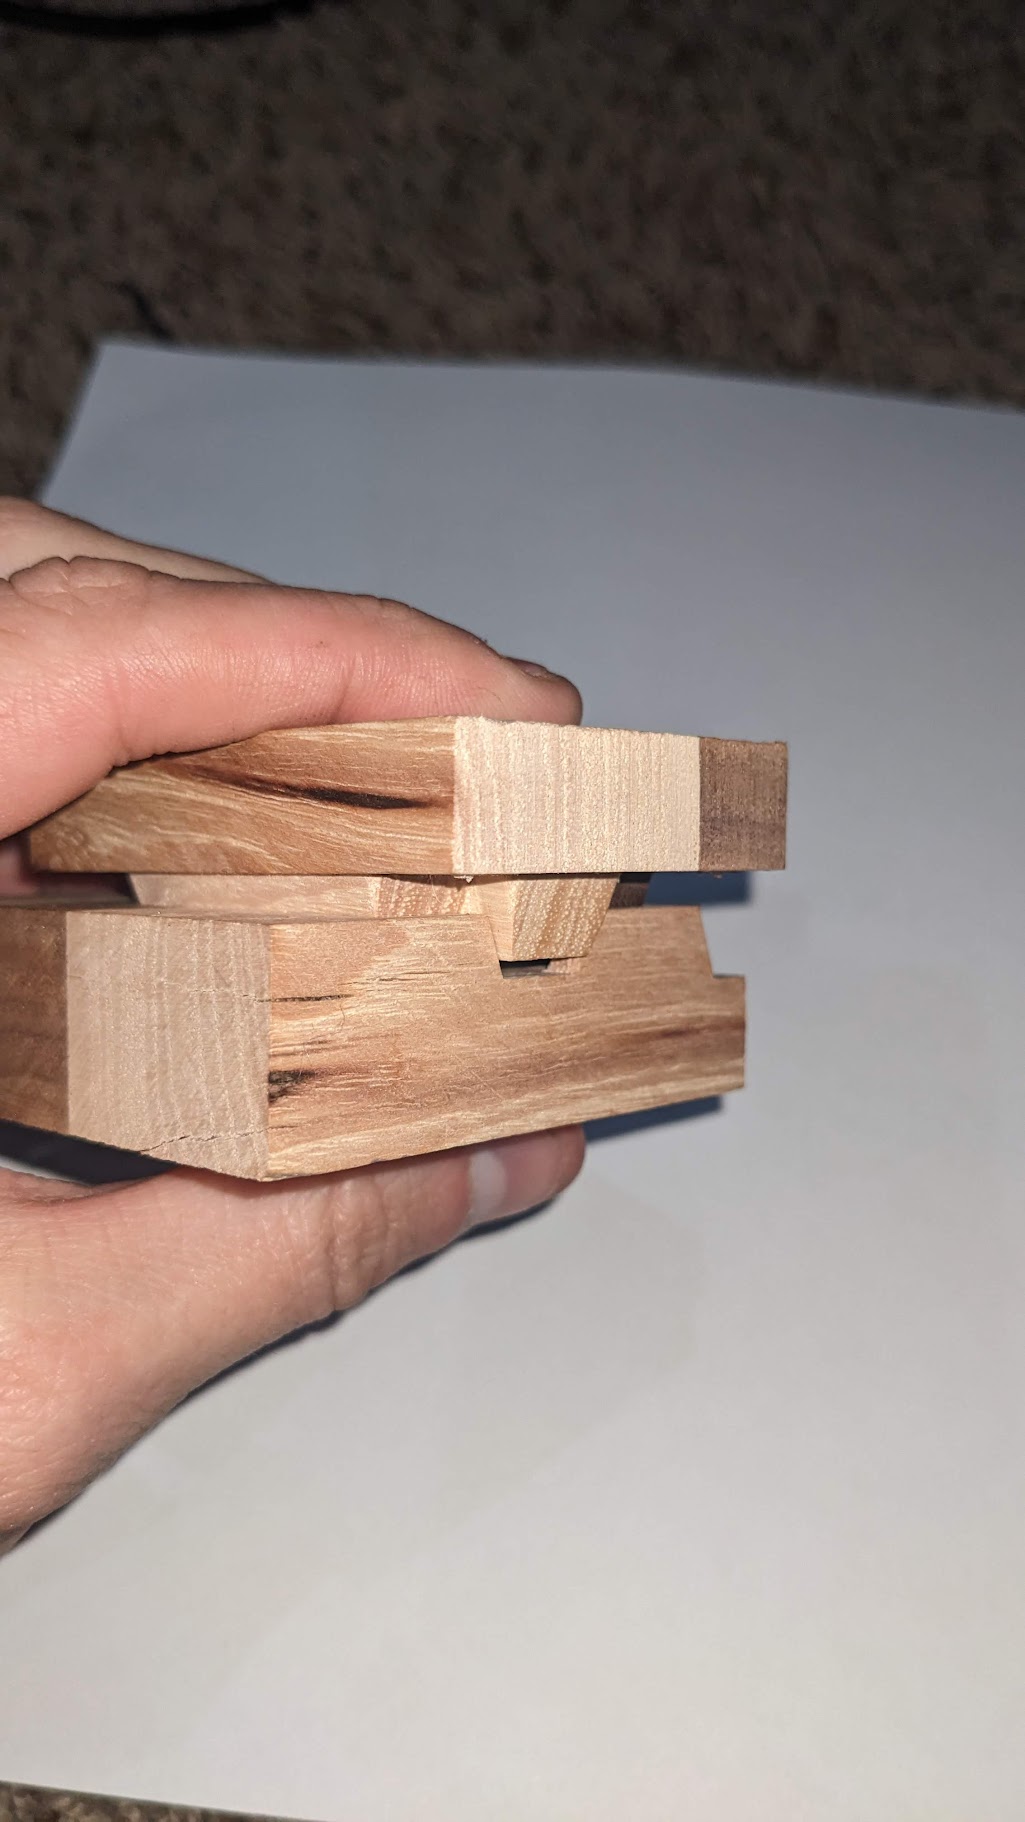
OK results too large or a glue gap and larger saw gap than i wanted.
Next: i lowered the max depth a little
Start Depth, .079"
Max Depth, .289"

again Snug Fit but same glue gap and slightly larger saw gap…
I am using a 30 degree VBit with a diameter of 1/4"
I am looking for what numbers i would need if I want .02" glue gap (.5mm) and i would like .4" (1mm) to .8" (2mm) saw gap. No matter what i do the new Inlay mode does not seem to work for me.
I have measured my resulting cuts and the cut depths match what i am asking for and if i cut a 2" square my result measures at 2" so my machine seems to be accurate.
any help would be appreciated i have a few inlays i want to do, but i can’t seem to get things dialed in right.
