Hi all, while I have found some good information on the site regarding acrylic, I still haven’t found what I’ve needed based on what I’m trying to create.
I’ve purchased some .250 acrylic which I’m engraving and attempting to color fill/paint the engraving.
I’m carving the text in reverse on the “back” side of the acrylic, so the “front” side will be smooth and clear. Based on the font that I have chosen, I’m vcarving with a 90 deg bit.
I’ve noticed I get some “clouding” which I believe it small bits of melted plastic, so I’m running a second pass at the carve and that’s helping a lot, but it’s still not perfect. I’ve just ordered a 1/32 and 1/16 up-cut single flute bits which should help as well.
Any advice anyone can give to give me clean carvings which will allow the paint to show through clearly without any “clouding”.
See if maybe that post (and the discussion around it) helps ?
If you need clear walls you may want to (carefully) use a torch after the cut, aimed at the faces to be cleared, it’s a typical post-processing on acrylic.
Out of curiosity, can you upload a pic of those “cloudy” cuts you get ?
Thank you as always Julien. As it is, the project has taken a turn away from acrylic, but I’m still going to play around with it. I don’t have a picture of it at the moment, because I color filled all of the tests already. I’ll see if can carve another one so you can see it.
I’m not cutting out a profile of a piece. I’m just vcarving names into a piece of acrylic. Doing at double pass really cleaned things up. I’ll look at the engraving recipe post to see if I can improve it even more. Still waiting on my diamond drag bit and should get delivery today of my single flute up-cut endmills.
Here’s a question for the group. I’m thinking of creating a backlit sign using acrylic. Basically what I’m thinking is paint the entire sheet of acylic, then carve on the painted side in reverse so when I flip the piece, and can have the light shine through the carved area only. Has anyone done something like this. I was thinking of mounting this on a piece of wood with some stand-offs.
Yes. It’s a favorite side project for my students. Reminds me I still have one left to finish for a student I had last spring. You’ll always get that diffused look, and you can do multiple colors by painting again after you engrave. Gives a nice glossy front.
I built lots of backlighted & internal lighted liquid cooling blocks for GPU’s, CPU’s, computer’s memory, Chip Sets, Solid State Drives, & Distribution blocks. I will post some pictures later today ISA.
How about unfinished? (This may have been lasered, but the effect is pretty much the same. CNC routing is more forgiving on bad paint jobs which are easy to do on acrylic)
Those look great! I really like the black one. I’m planning to make one for my buddy’s dock box at his marina with his boat name on it. I want to backlight it, so the name shines through.
Most I’ve done are black and back-lit.
I build the frames (wish we still had a shop class here) and the students do the design and usually add an LED strip.
Sorry if this should be obvious, but I am getting ready to make some small LED-lit light boxes/signs as gifts for kids’ rooms and wanted to know how you achieved the look of those two examples you posted pics of… Is it clear acrylic with multiple coats of paint?
I’ve done a bit of testing with scraps that are clear and colored and it seems to me painting the back of a clear sheet one color, (re-)masking and then carving letters and painting the other color may be best. Thanks for sharing!
No masking needed.
Several light coats of your main color, carve areas for color two. Paint with color two. Repeat as necessary. It’s a little tougher with more than two colors as you’ll have to set zeros exactly the same after removing the piece for painting.
The back will look like a disaster on the two (or more) color versions, but that doesn’t matter.
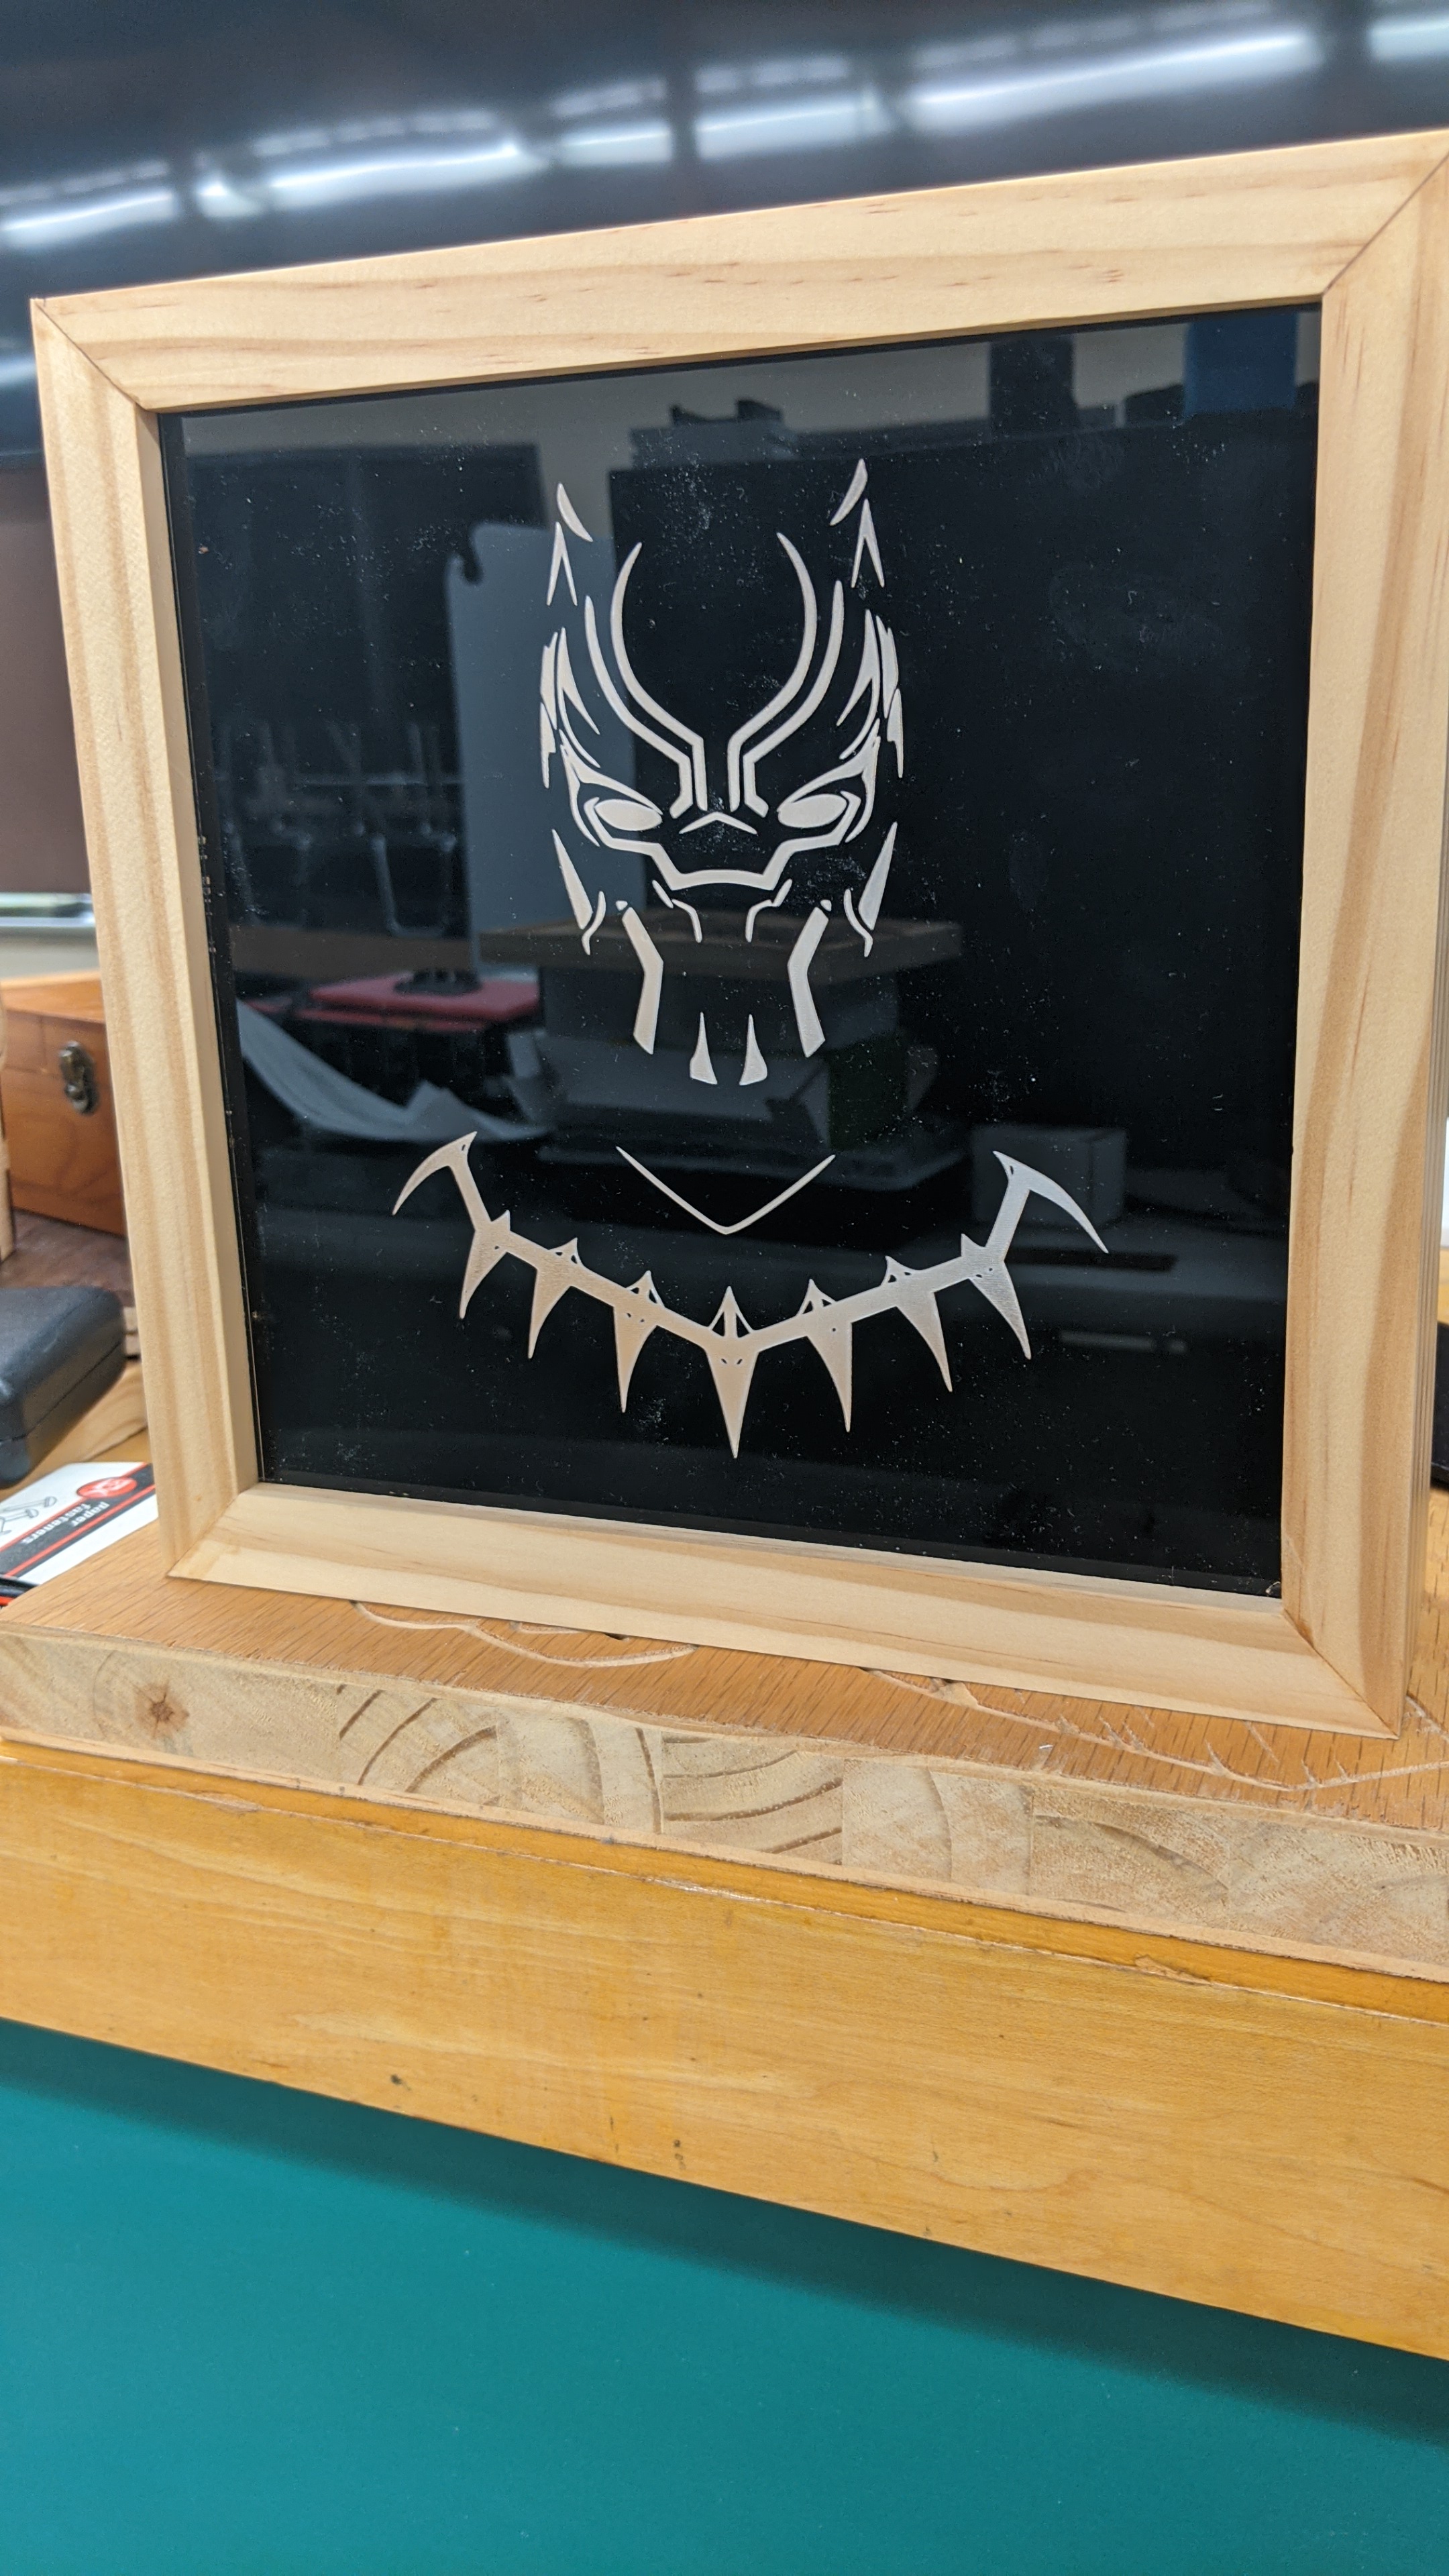
Examples above:
Black panther one - painted black, carved, done.
Blue and White one - painted white, carved design, painted blue, done.
I think that was just a 1/8" or 1/16" endmill. I’ll look for the file later. Definitely no v-bits.
The only thing that seems to matter was brand. I much prefer Rust-Oleum over Krylon for this. I’m sure there are better quality paints, but I’ve only tried those. All versions. You have to apply in several thin coats or it will crackle up…be patient.
Nope, peeled off the protective layer and sprayed.