This project is a “dice vault” to store dice for role playing games. After several iterations, I’ve got a working prototype, but my lack of experience is preventing me from getting good results right off the machine.
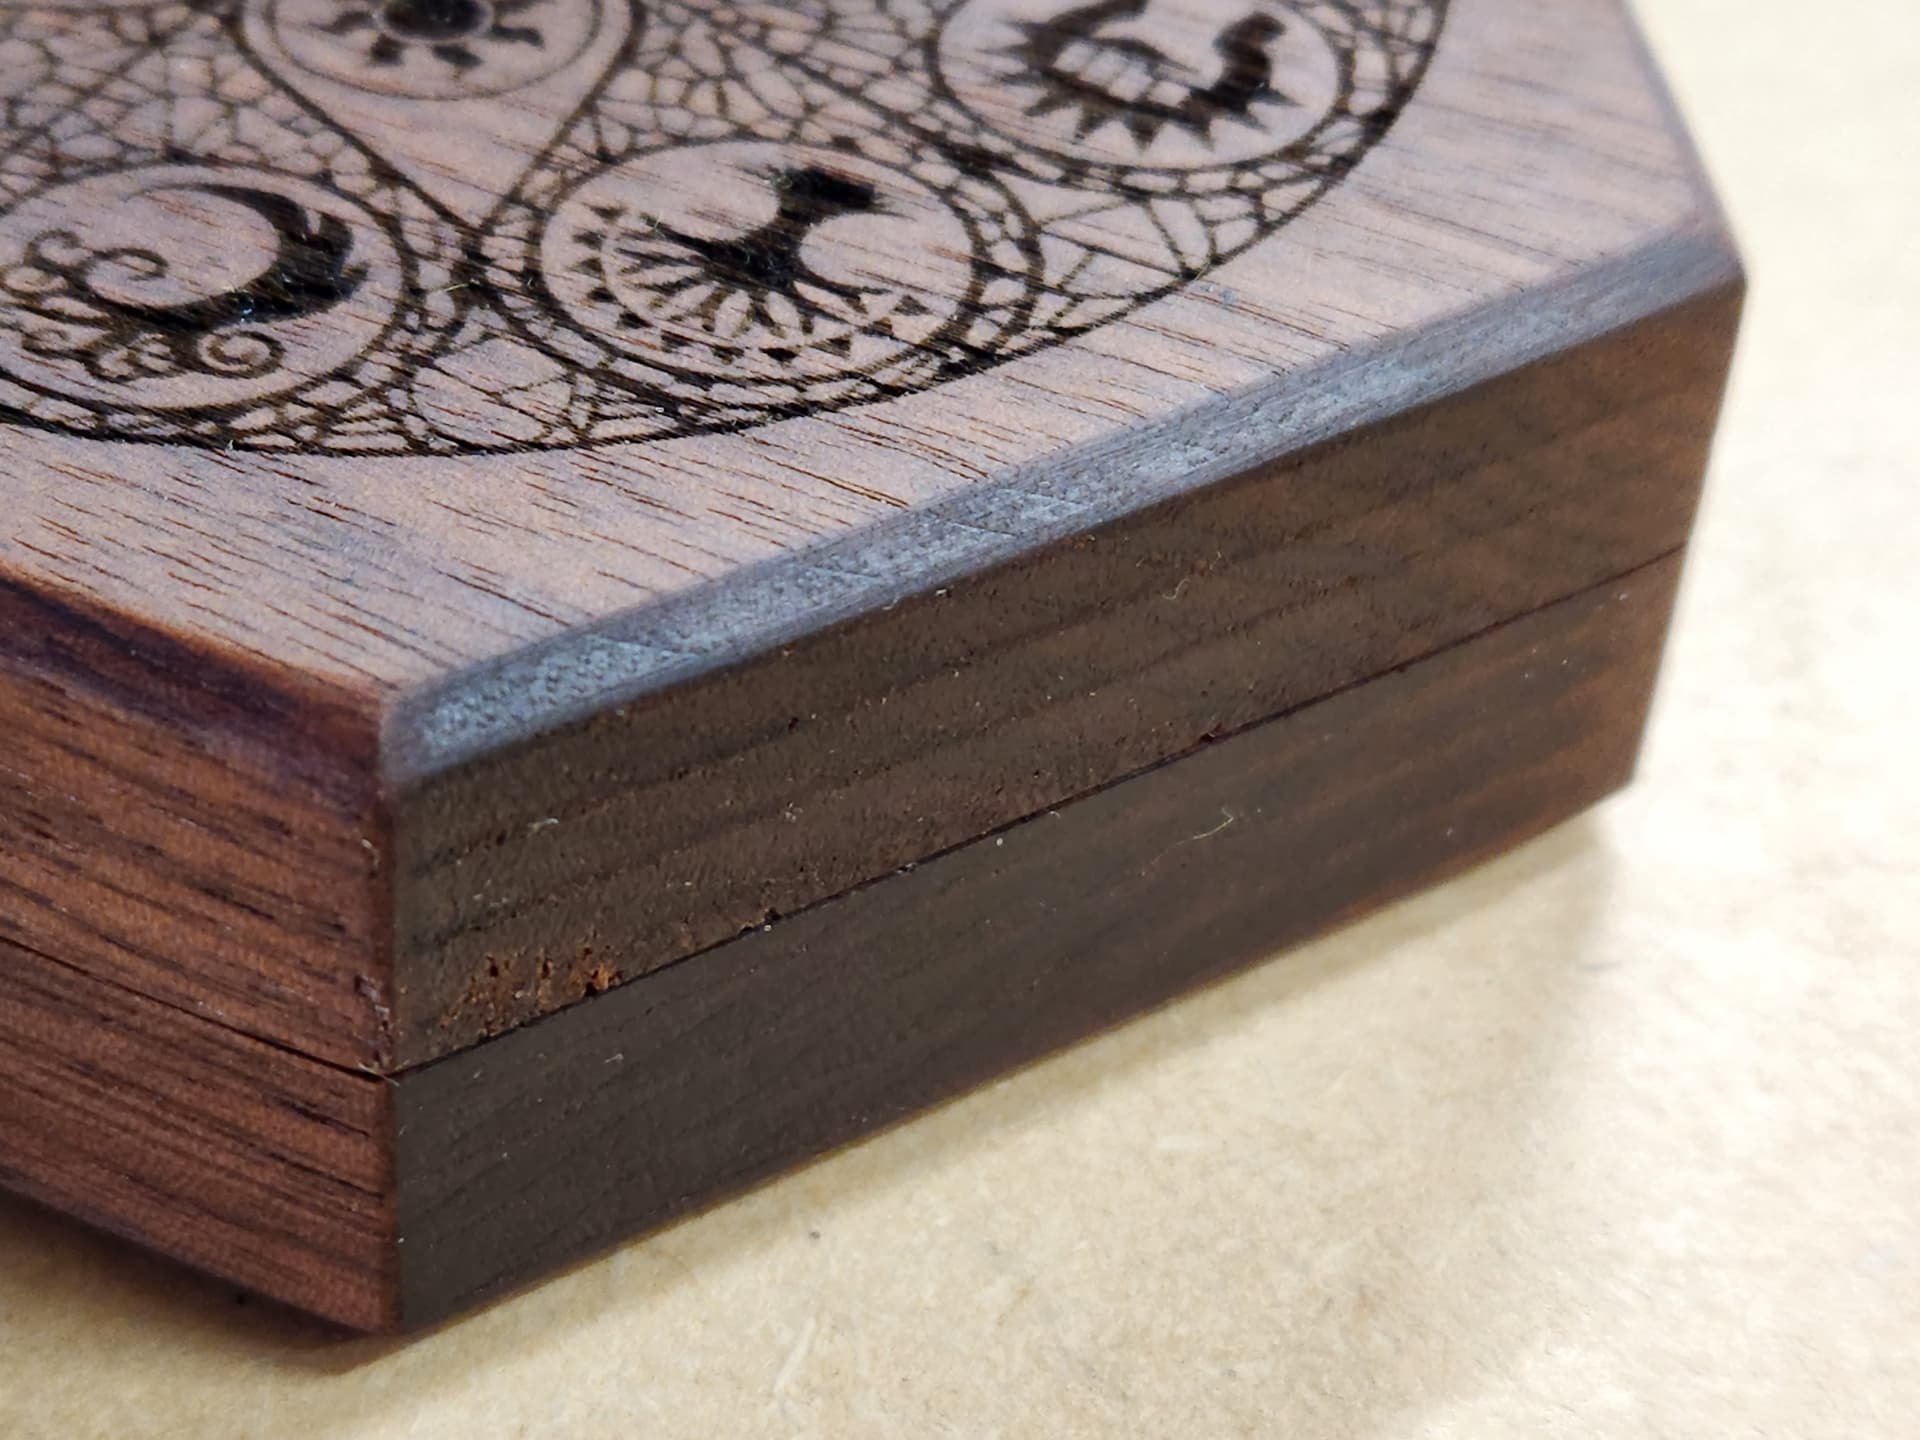
Issue #1: Tooling marks
Most of this project uses a 1/4" compression bit (Cadence CNC Jenny). I need to do a full depth finishing pass around the perimeter, but I’m unsure of how much to take off per pass to do this safely. Full depth is just over 1/2". Can you recommend how much to take off? Feeds and speeds?
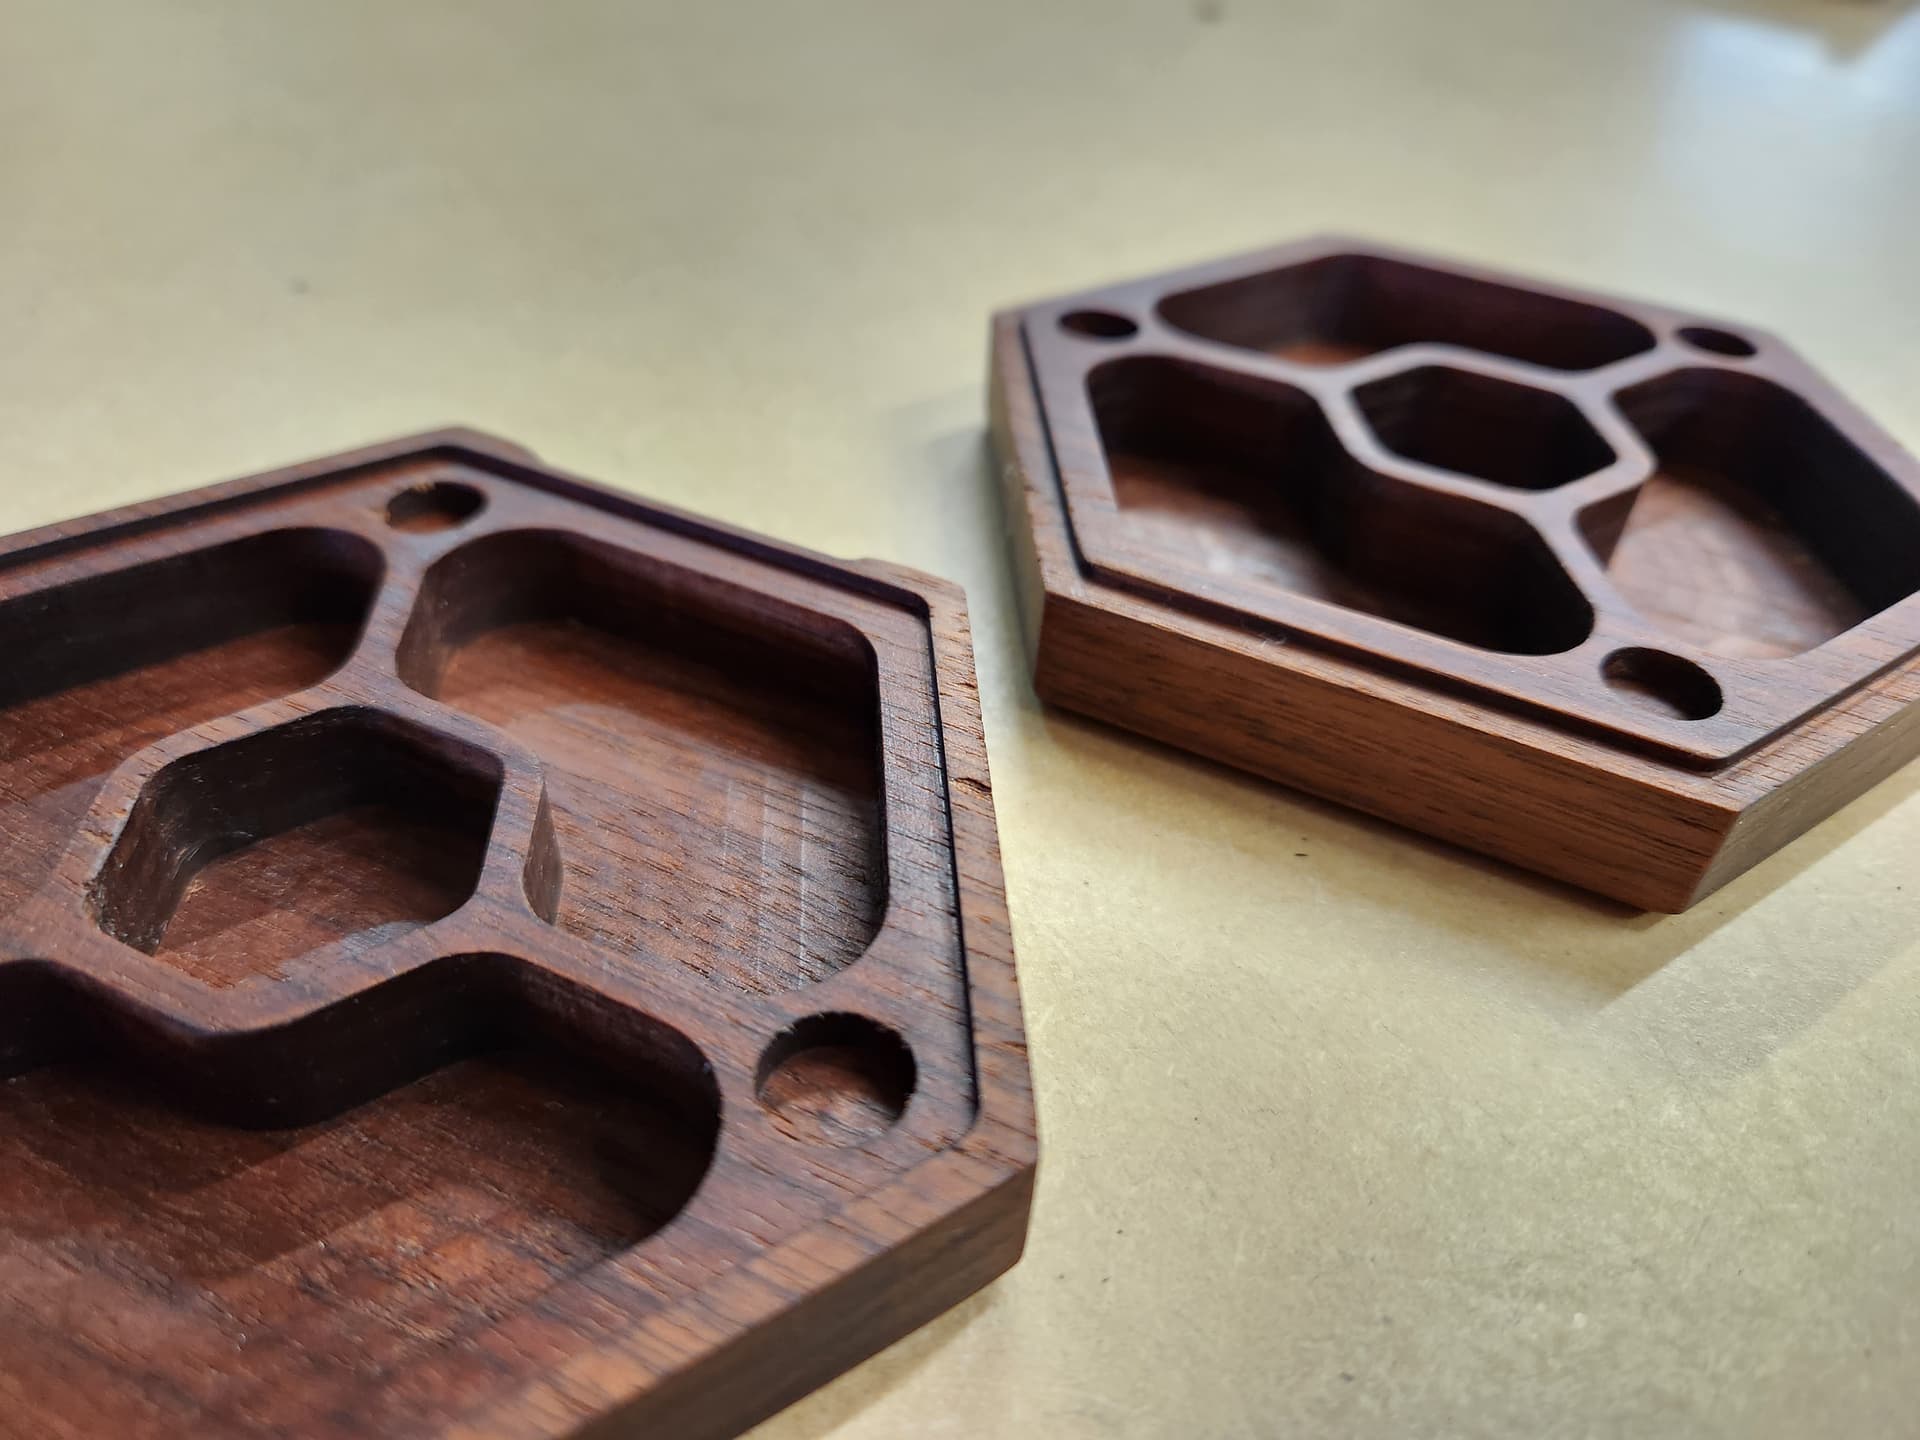
Issue #2: Fit
The two halves are machined separately. Here you can see the top has a lip that fits into the bottom. Right now this fit is very snug - it’s difficult to pull the two halves apart. How much should I take off around the lip to maintain a good fit with a little wiggle room?
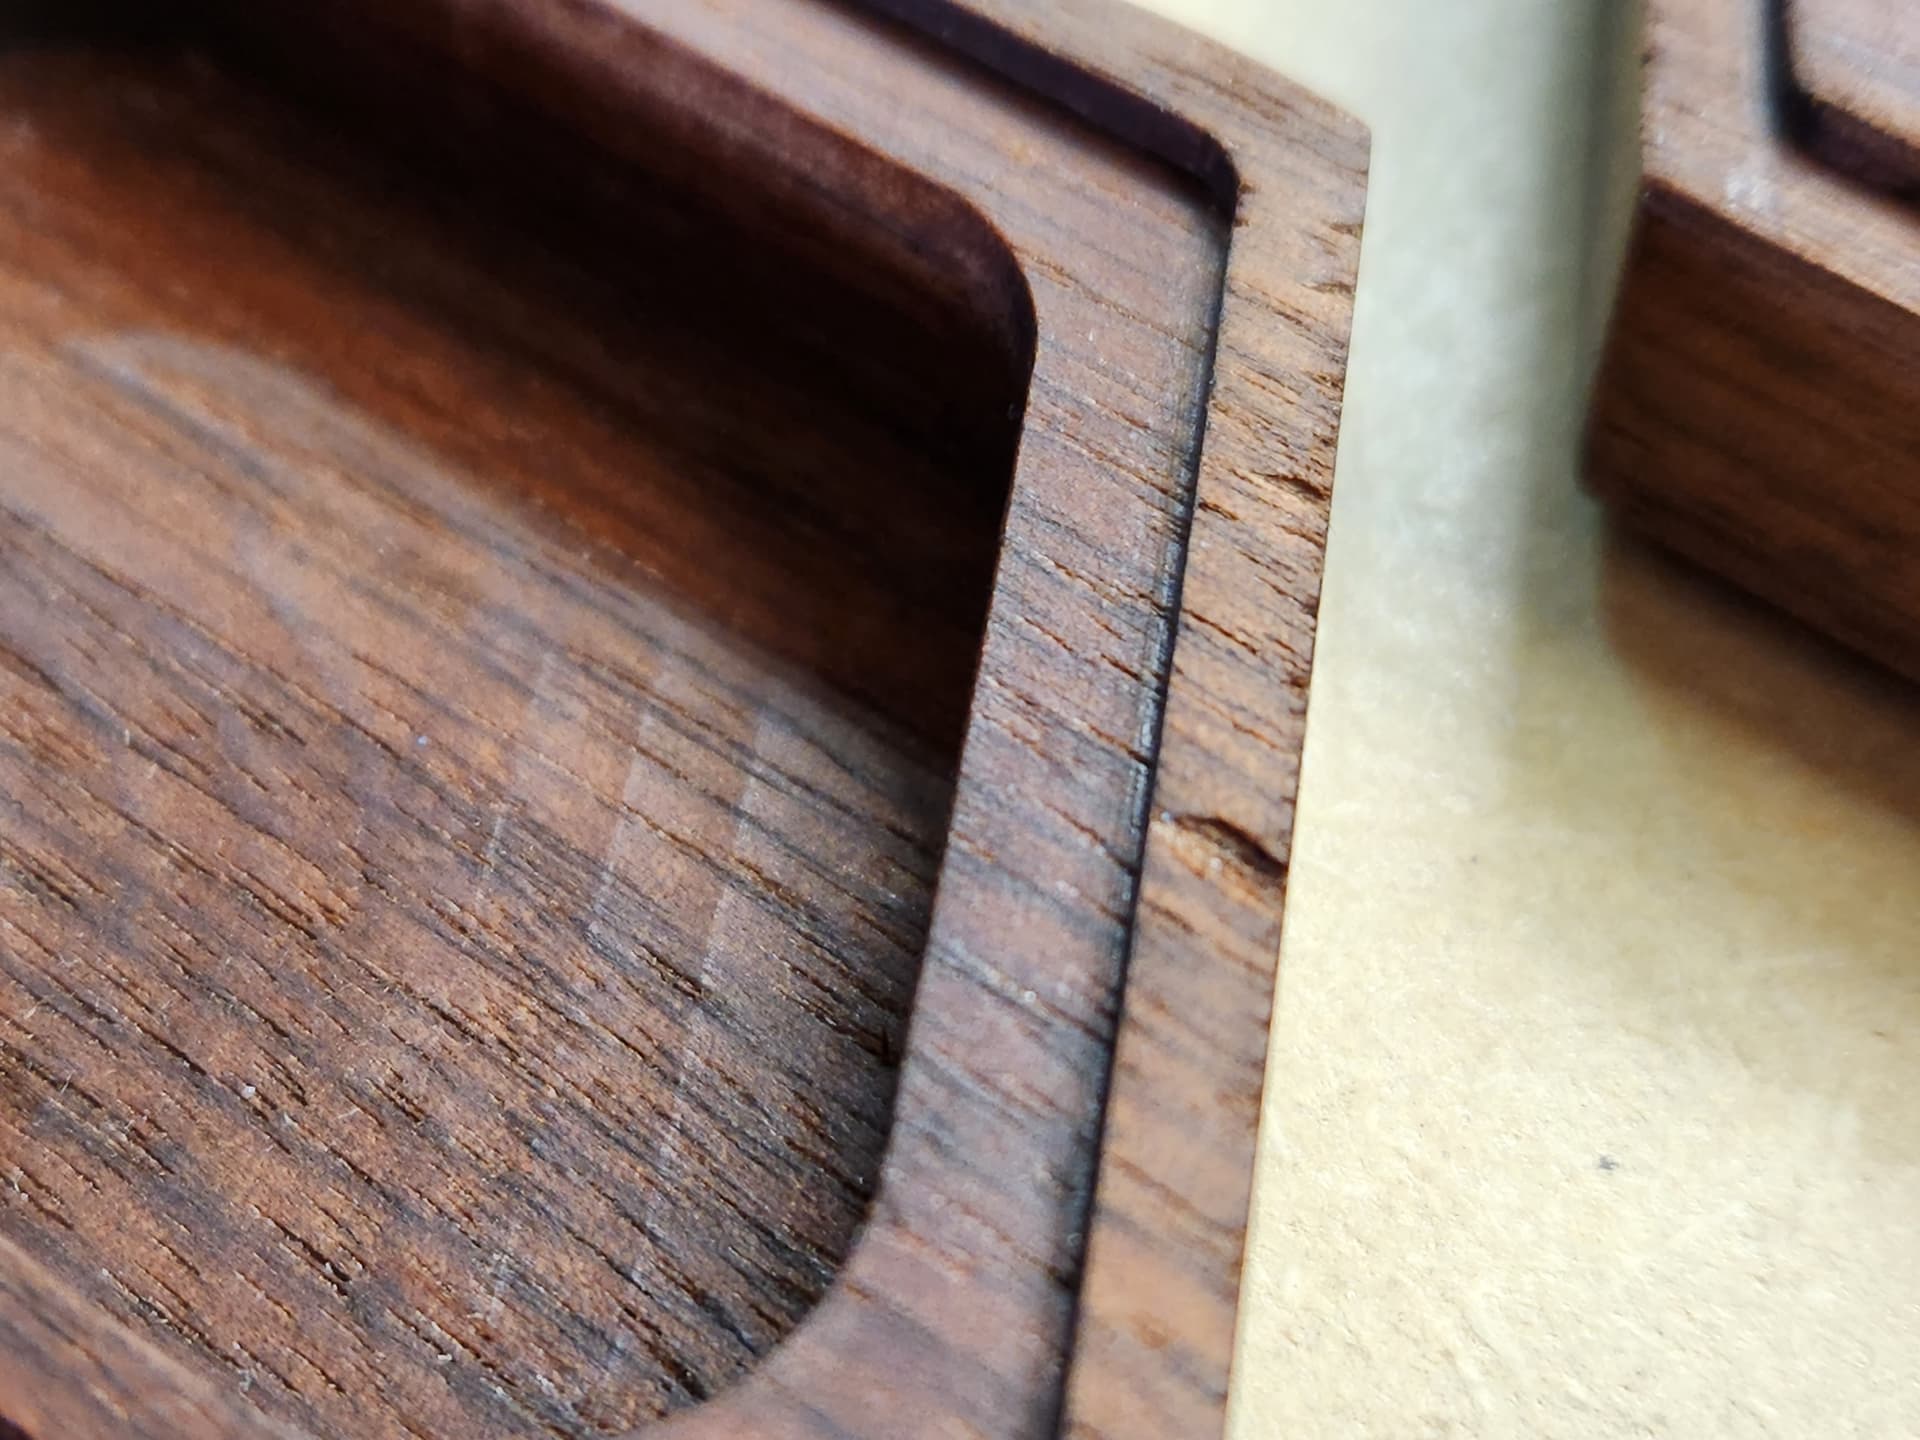
Issue #3: Tearout
Here you can see where fibers have broken away due to the compression bit. The lower 1/8" of the bit is upcut and it’s pulling fibers away at the edges. How can I avoid this?
Wood is a natural material — techniques to deal w/ that:
use a downcut tool
leave a roughing clearance and take a finishing pass
spray w/ a hardening fixative after the roughing pass
For lids, I like to make the lid first, then make the bottom, then I’ll inset the rabbet for the lid on the bottom piece by 1/40th of a mm and repeat the fitting until things fit.
You could make a filler as well using sawdust and glue into a putty and push it into the tearout spots.
Also having made these, I’d recommend a predrill hole for the screws for the magnets.
And also maybe run a chamfer on the inside instead of hand sanding those edges…
For full depth it might be easier to do sanding. What program are you using to create this? Carbide create or fusion?
I do have recesses programed for the magnets, though I figured I’d just use a self-centering bit after they’re glued in for the screws. I do want to create a chamfer for the edges - it’s on the list for the next iteration. As for sanding…I’ve tried. The tooling marks clean up well except for the end grain.
Because you are chamfering these after (I assume), you could probably leave some amount of stock (maybe 2mm?). I’d make a hex offset slightly larger (maybe .1mm) into a new layer, and use that to do the bulk of stock removal as your ‘rough’ contour and then use the inside hex (the actual hex that you are using) I’d use that as either a full depth or maybe 2 passes though really should be considered testing. I’ve not done this as of yet.
Looking at one of your pictures of the inside of the box it looks like you need to tram your router. You could also decrease step over and have less wavy lines. When you select the tool you can edit the tool and change the step over to 20%. It takes longer but the finished finish is worth it. Every time you edit the tool it is only for that toolpath. Next time you select the same tool you have to edit again. You could create a custom tool using most of the stock parameters and setup the smaller step over so you do not have to edit the tool every time you select it.
Yes, I am slightly out of tram. I’m not concerned about the bottom of the pockets, though. All of those will get a foam insert glued in and won’t be visible. I have created finishing passes on the visible machined surfaces that requires minimal sanding.