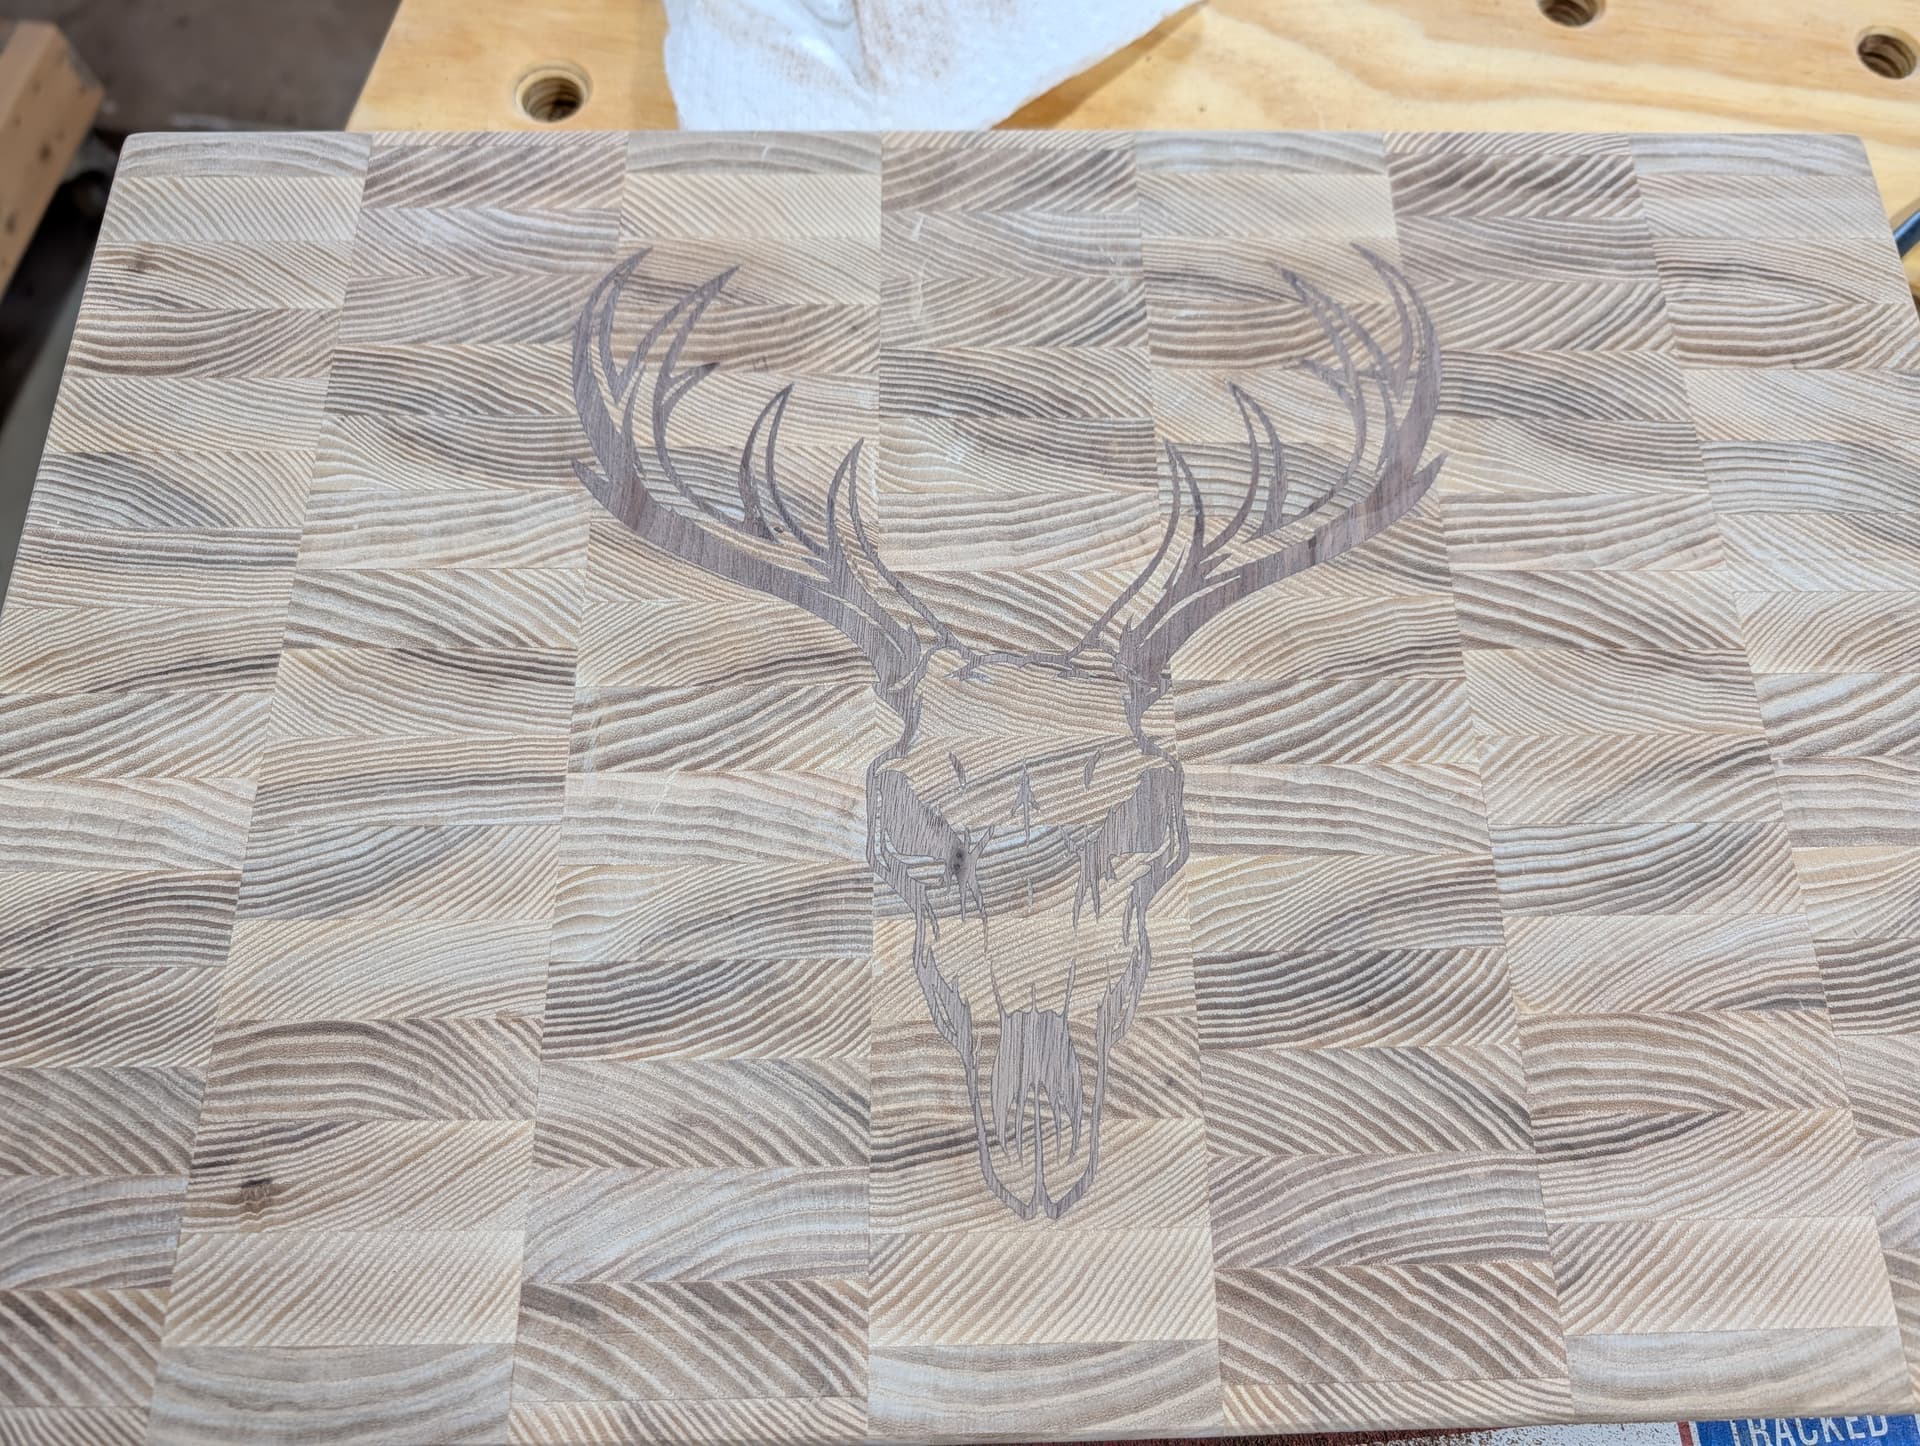
Help with V Carve Inlay

I made a cutting board and attempted a small v carve inlay and everything went well. For my next attempt I went bigger following the same procedure I had used before. For some reason I can’t get the plug to fit. The plug looks a little bit off from the engrave part. Was hoping for any tips.

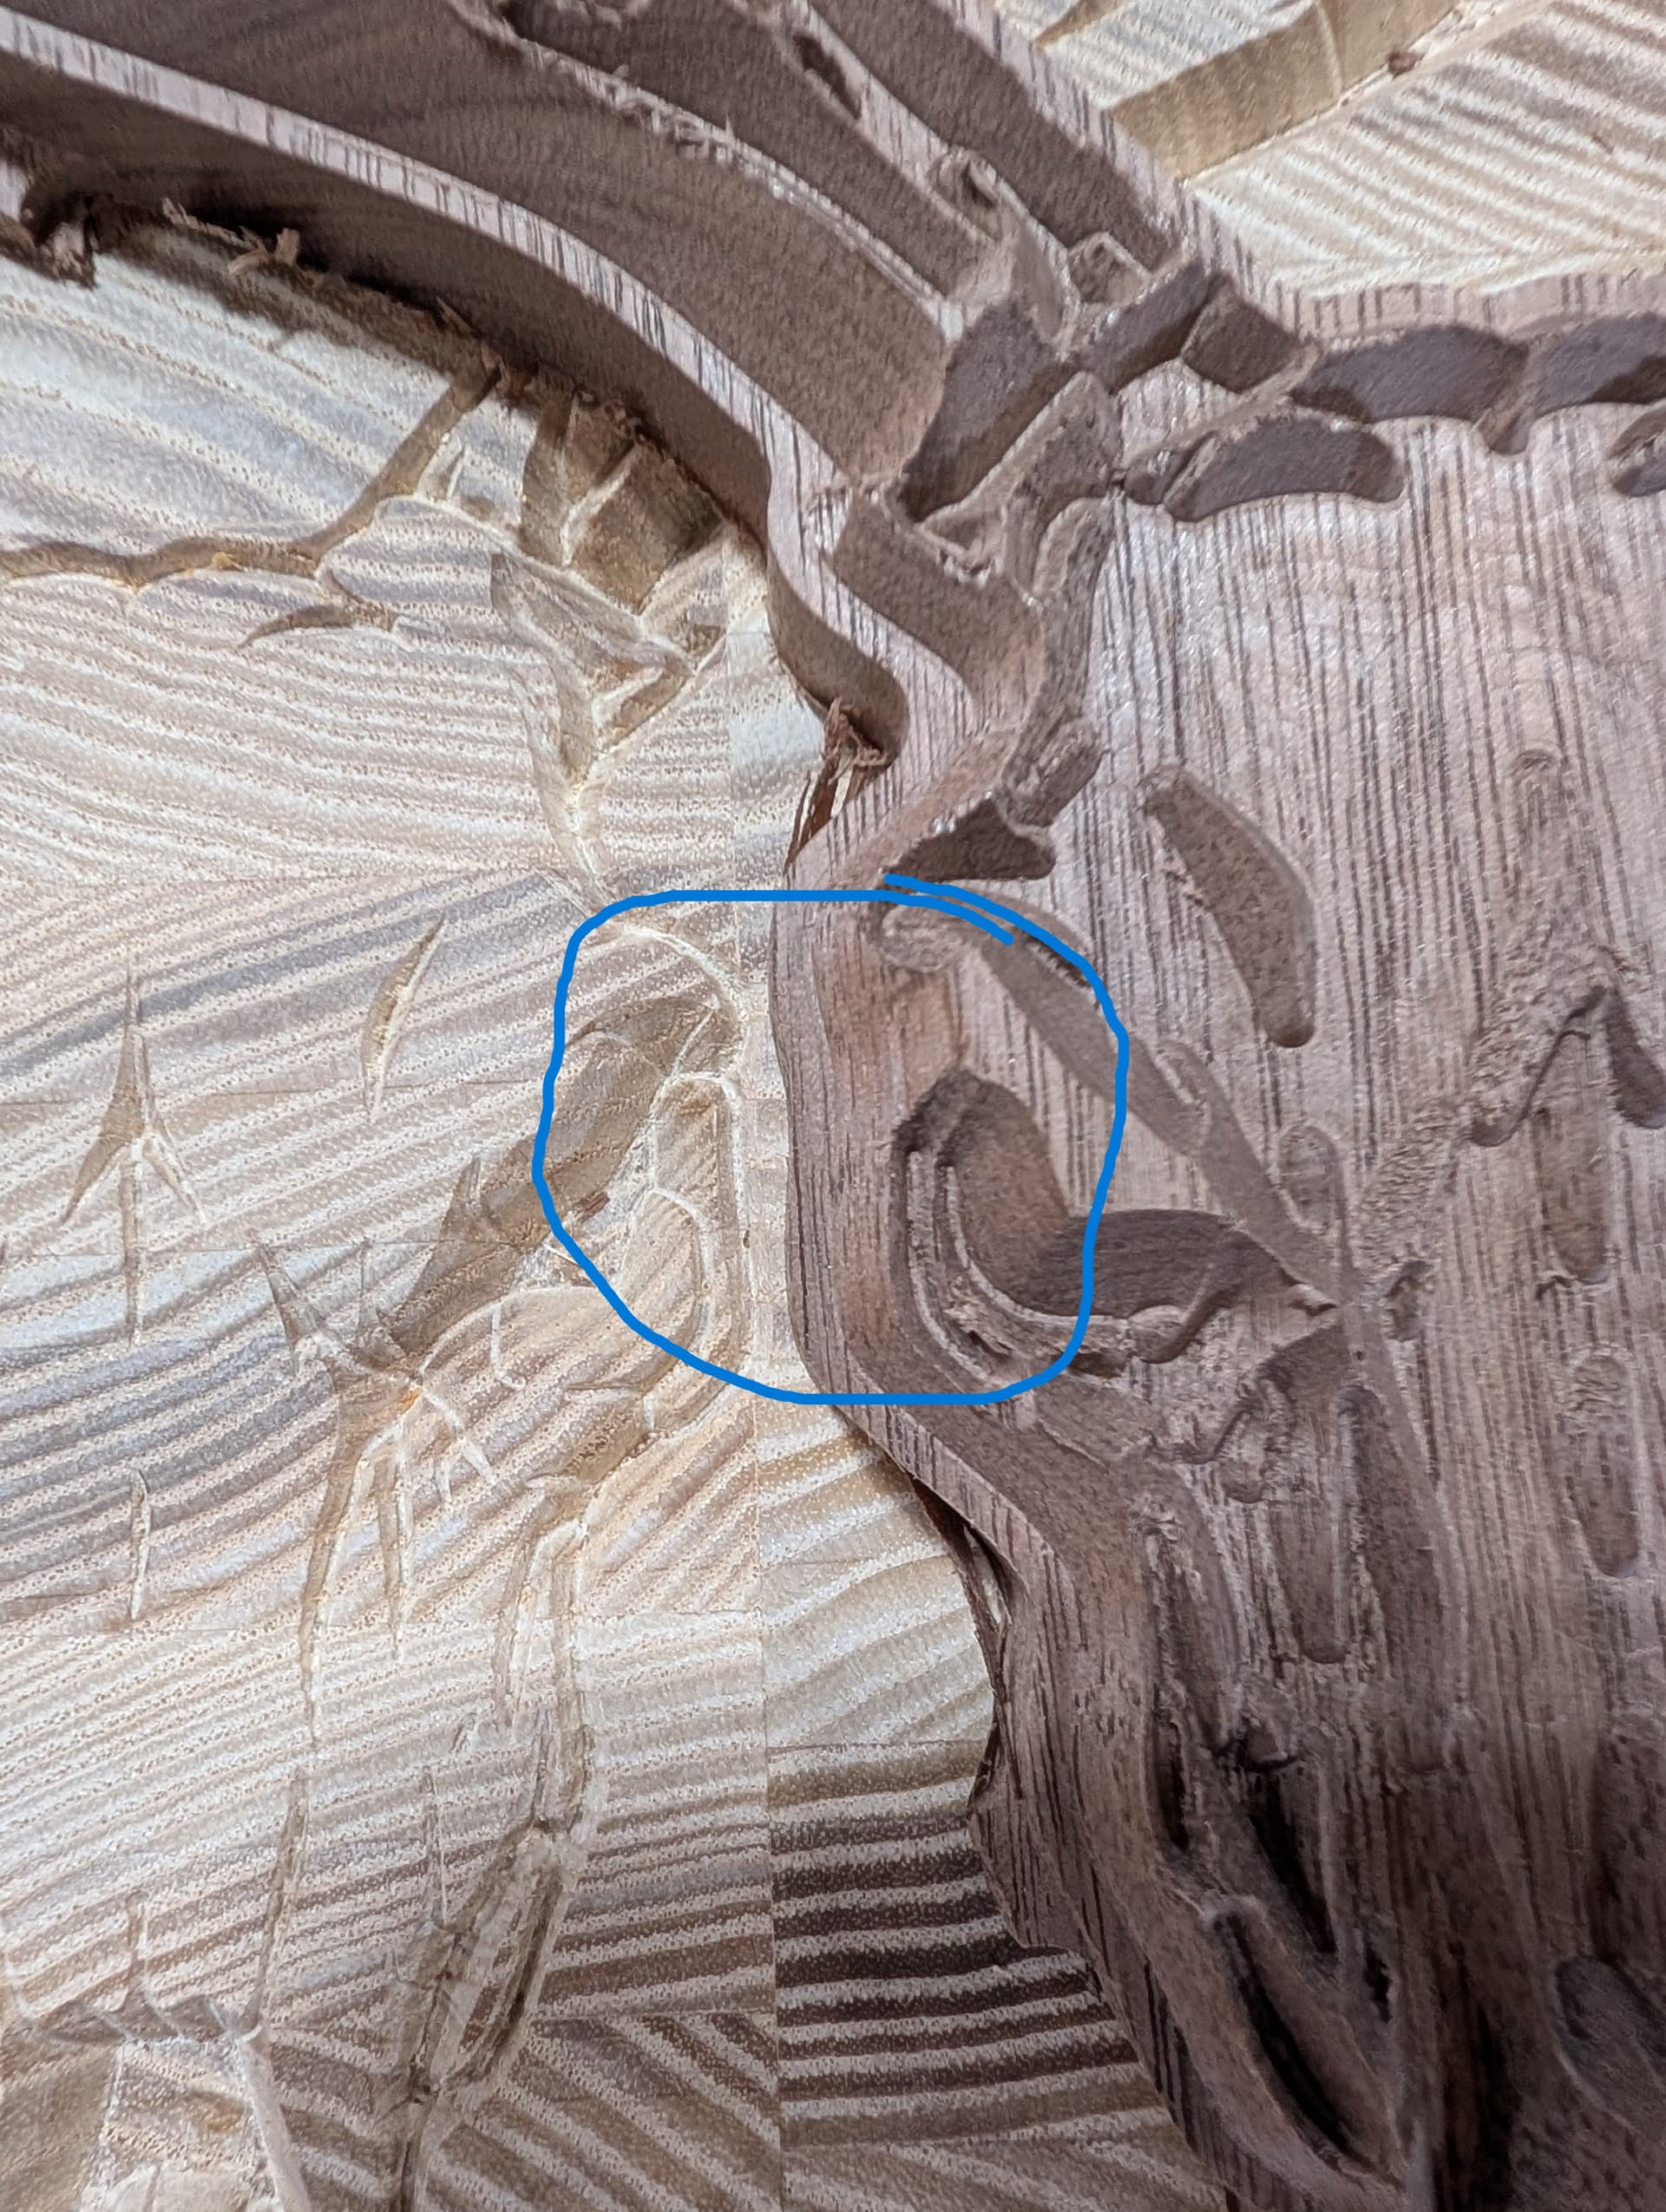
The right eye of the inlay and left of the plug is what is giving me trouble.

I’ve combined the file if anyone could take a look I would appreciate it!

Skull Combined.c2d (1.0 MB)

1 Like

Looks kind of deep to me. I applied my default settings to your file, give it a try in a piece of scrap.
Skull Combined_b.c2d (892 KB)

2 Likes

Thanks I will take a look tomorrow. Hoping I can salvage the cutting board and just redo the plug. I can get it almost to fit but the eye doesn’t seem to match. I double checked I flipped it so that wasn’t the issue lol.

On your simulation does it look like the outside of the right eye of the inlay matches with the left of the plug?

This is the part that is having issues. The groove doesn’t continue all the way through on the plug.

Yes it does. I can’t really tell what’s going on but my first impression was that it looked like a really deep cut.

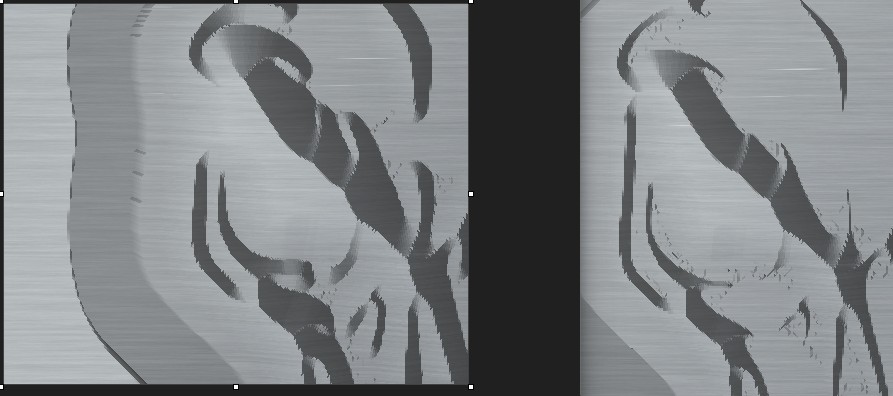
If I make the Top Gap 0 it looks like it actually fixes the problem. I guess I need to mess around with that.

At the depth your cutting your female side I would try something like .030 for a top gap. You want a little top gag so you can clamp the plug in tight while the glue sets up.
1 Like

For some reason in the simulation if I do any top gap depth it seems to mess up that ridge.

Have you tried a female max depth at something like .150 with a plug depth at .130 and top gap at .030?

Not yet. I was trying to figure out if I can somehow salvage the cutting board I already did the female engrave lol

Ended up setting top gap to 0 and for whatever reason that fixed the male plug to match.

3 Likes

This topic was automatically closed 30 days after the last reply. New replies are no longer allowed.