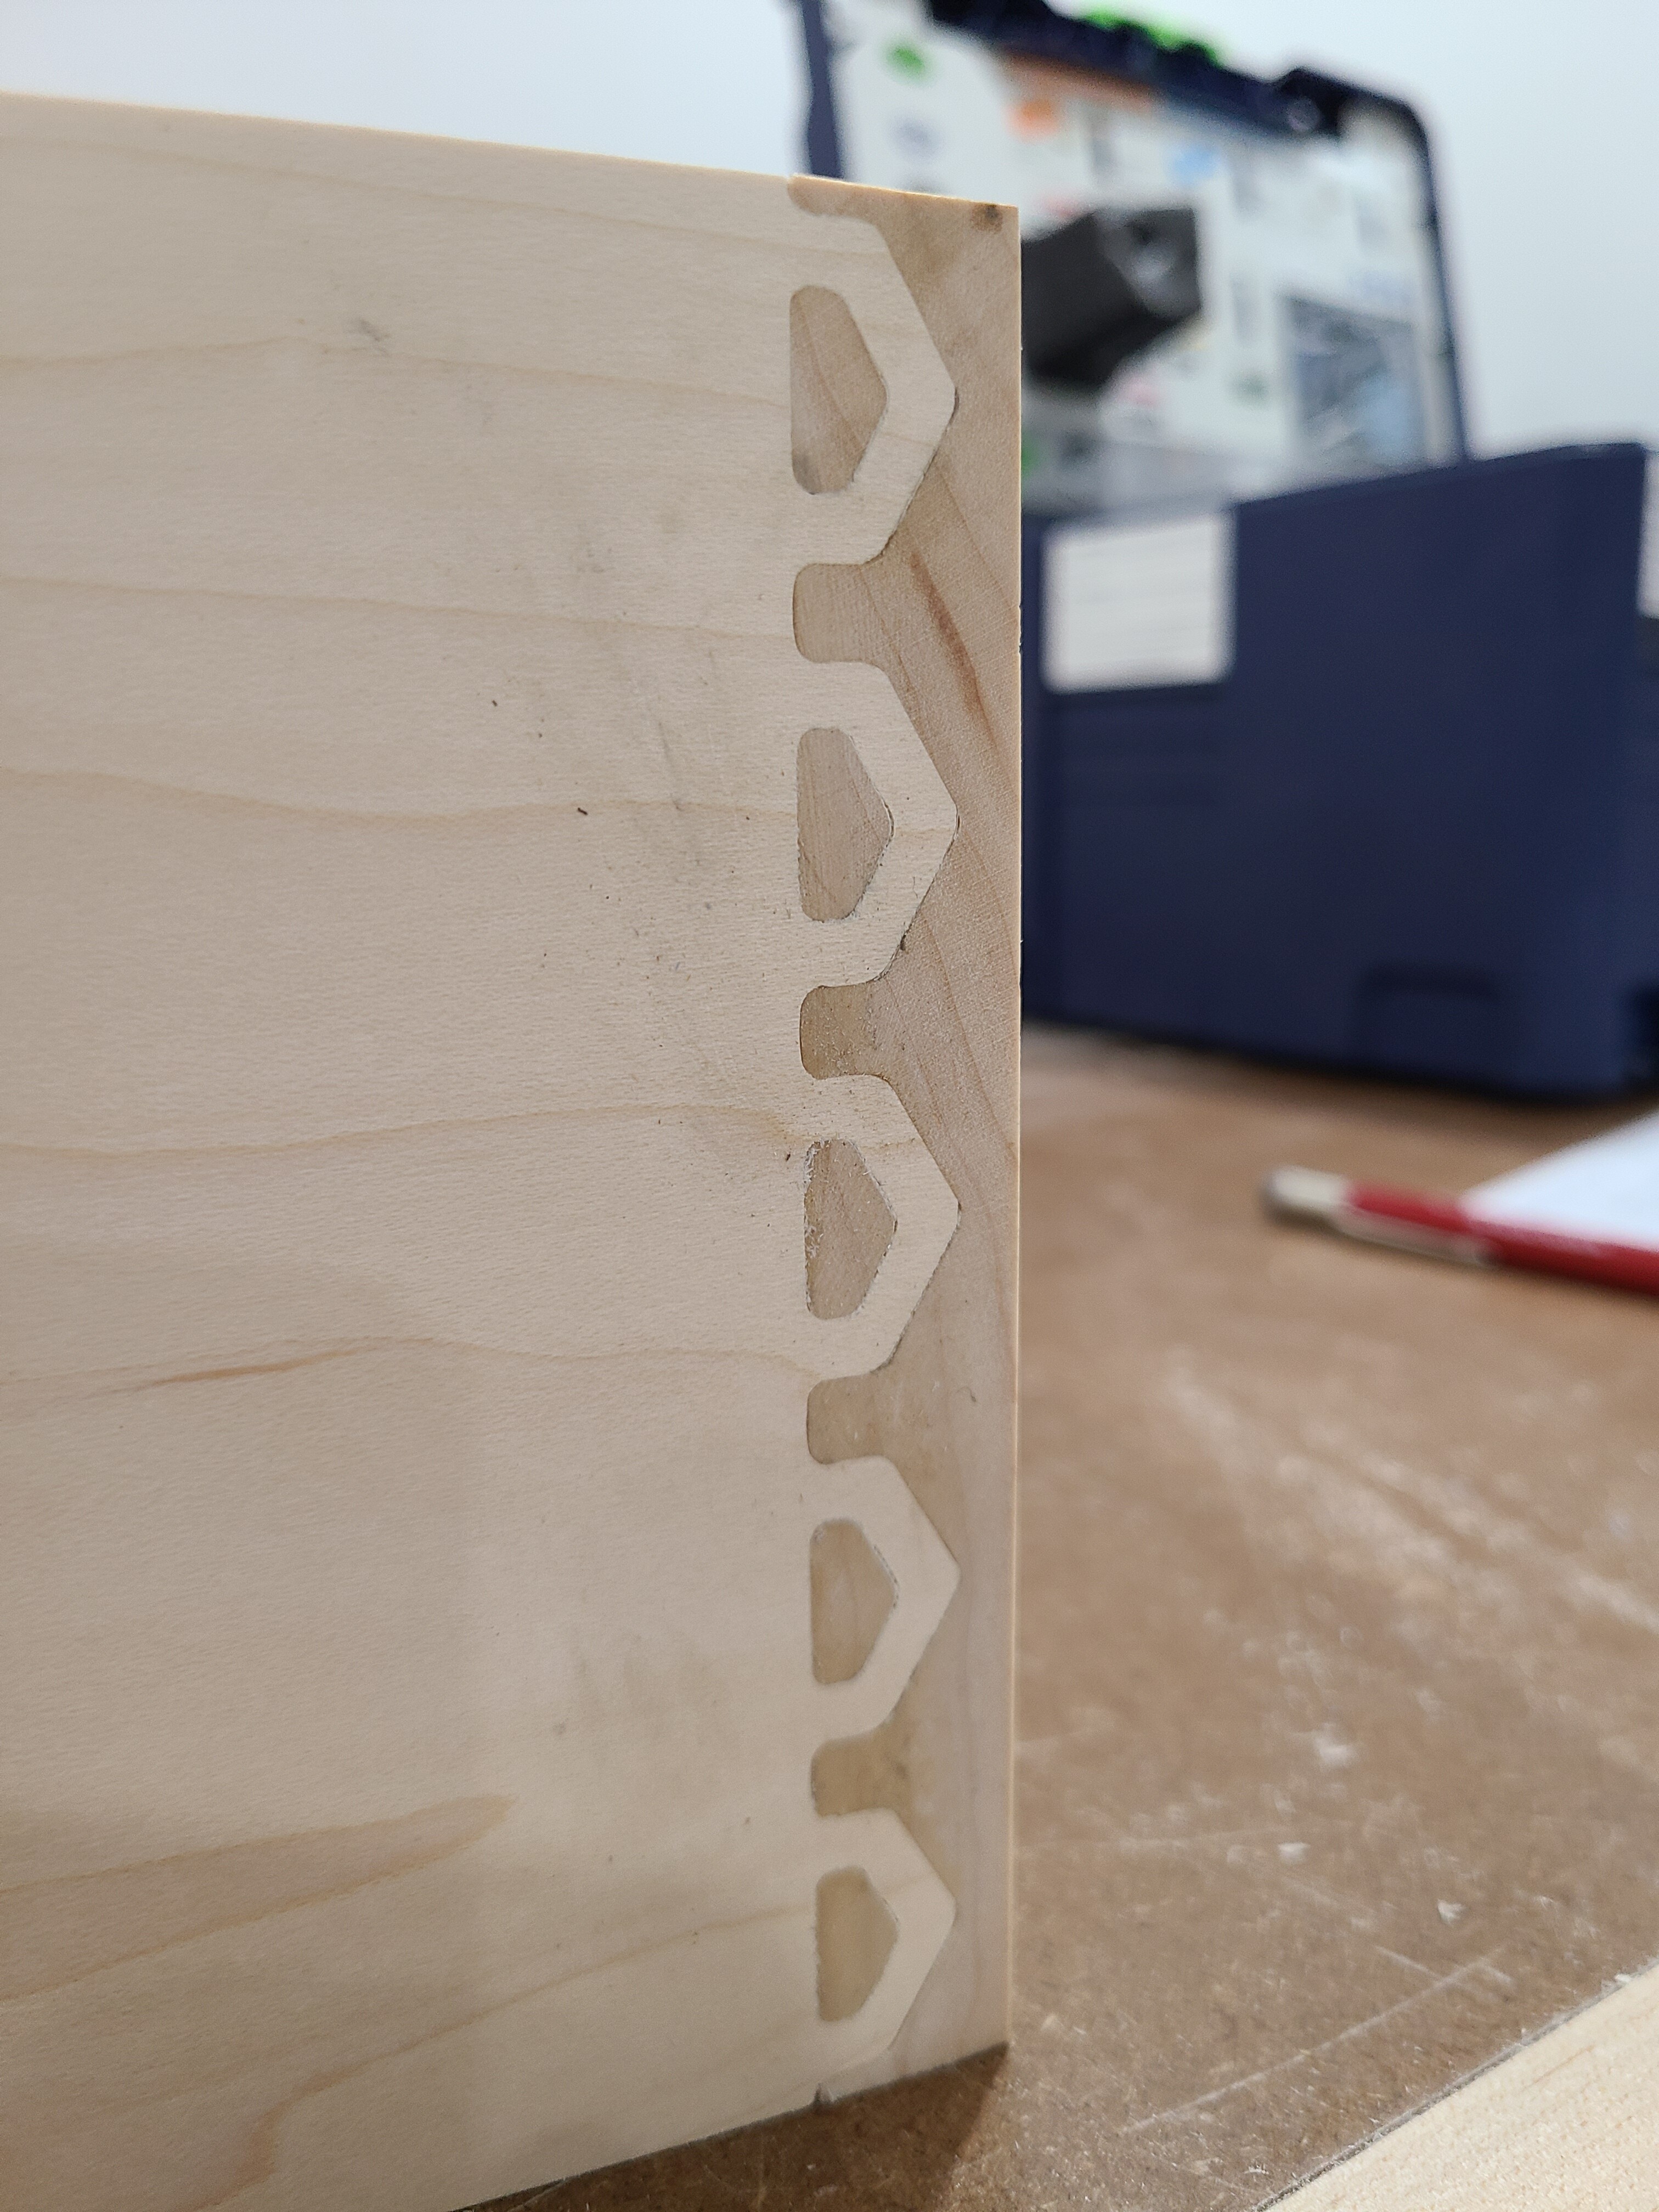
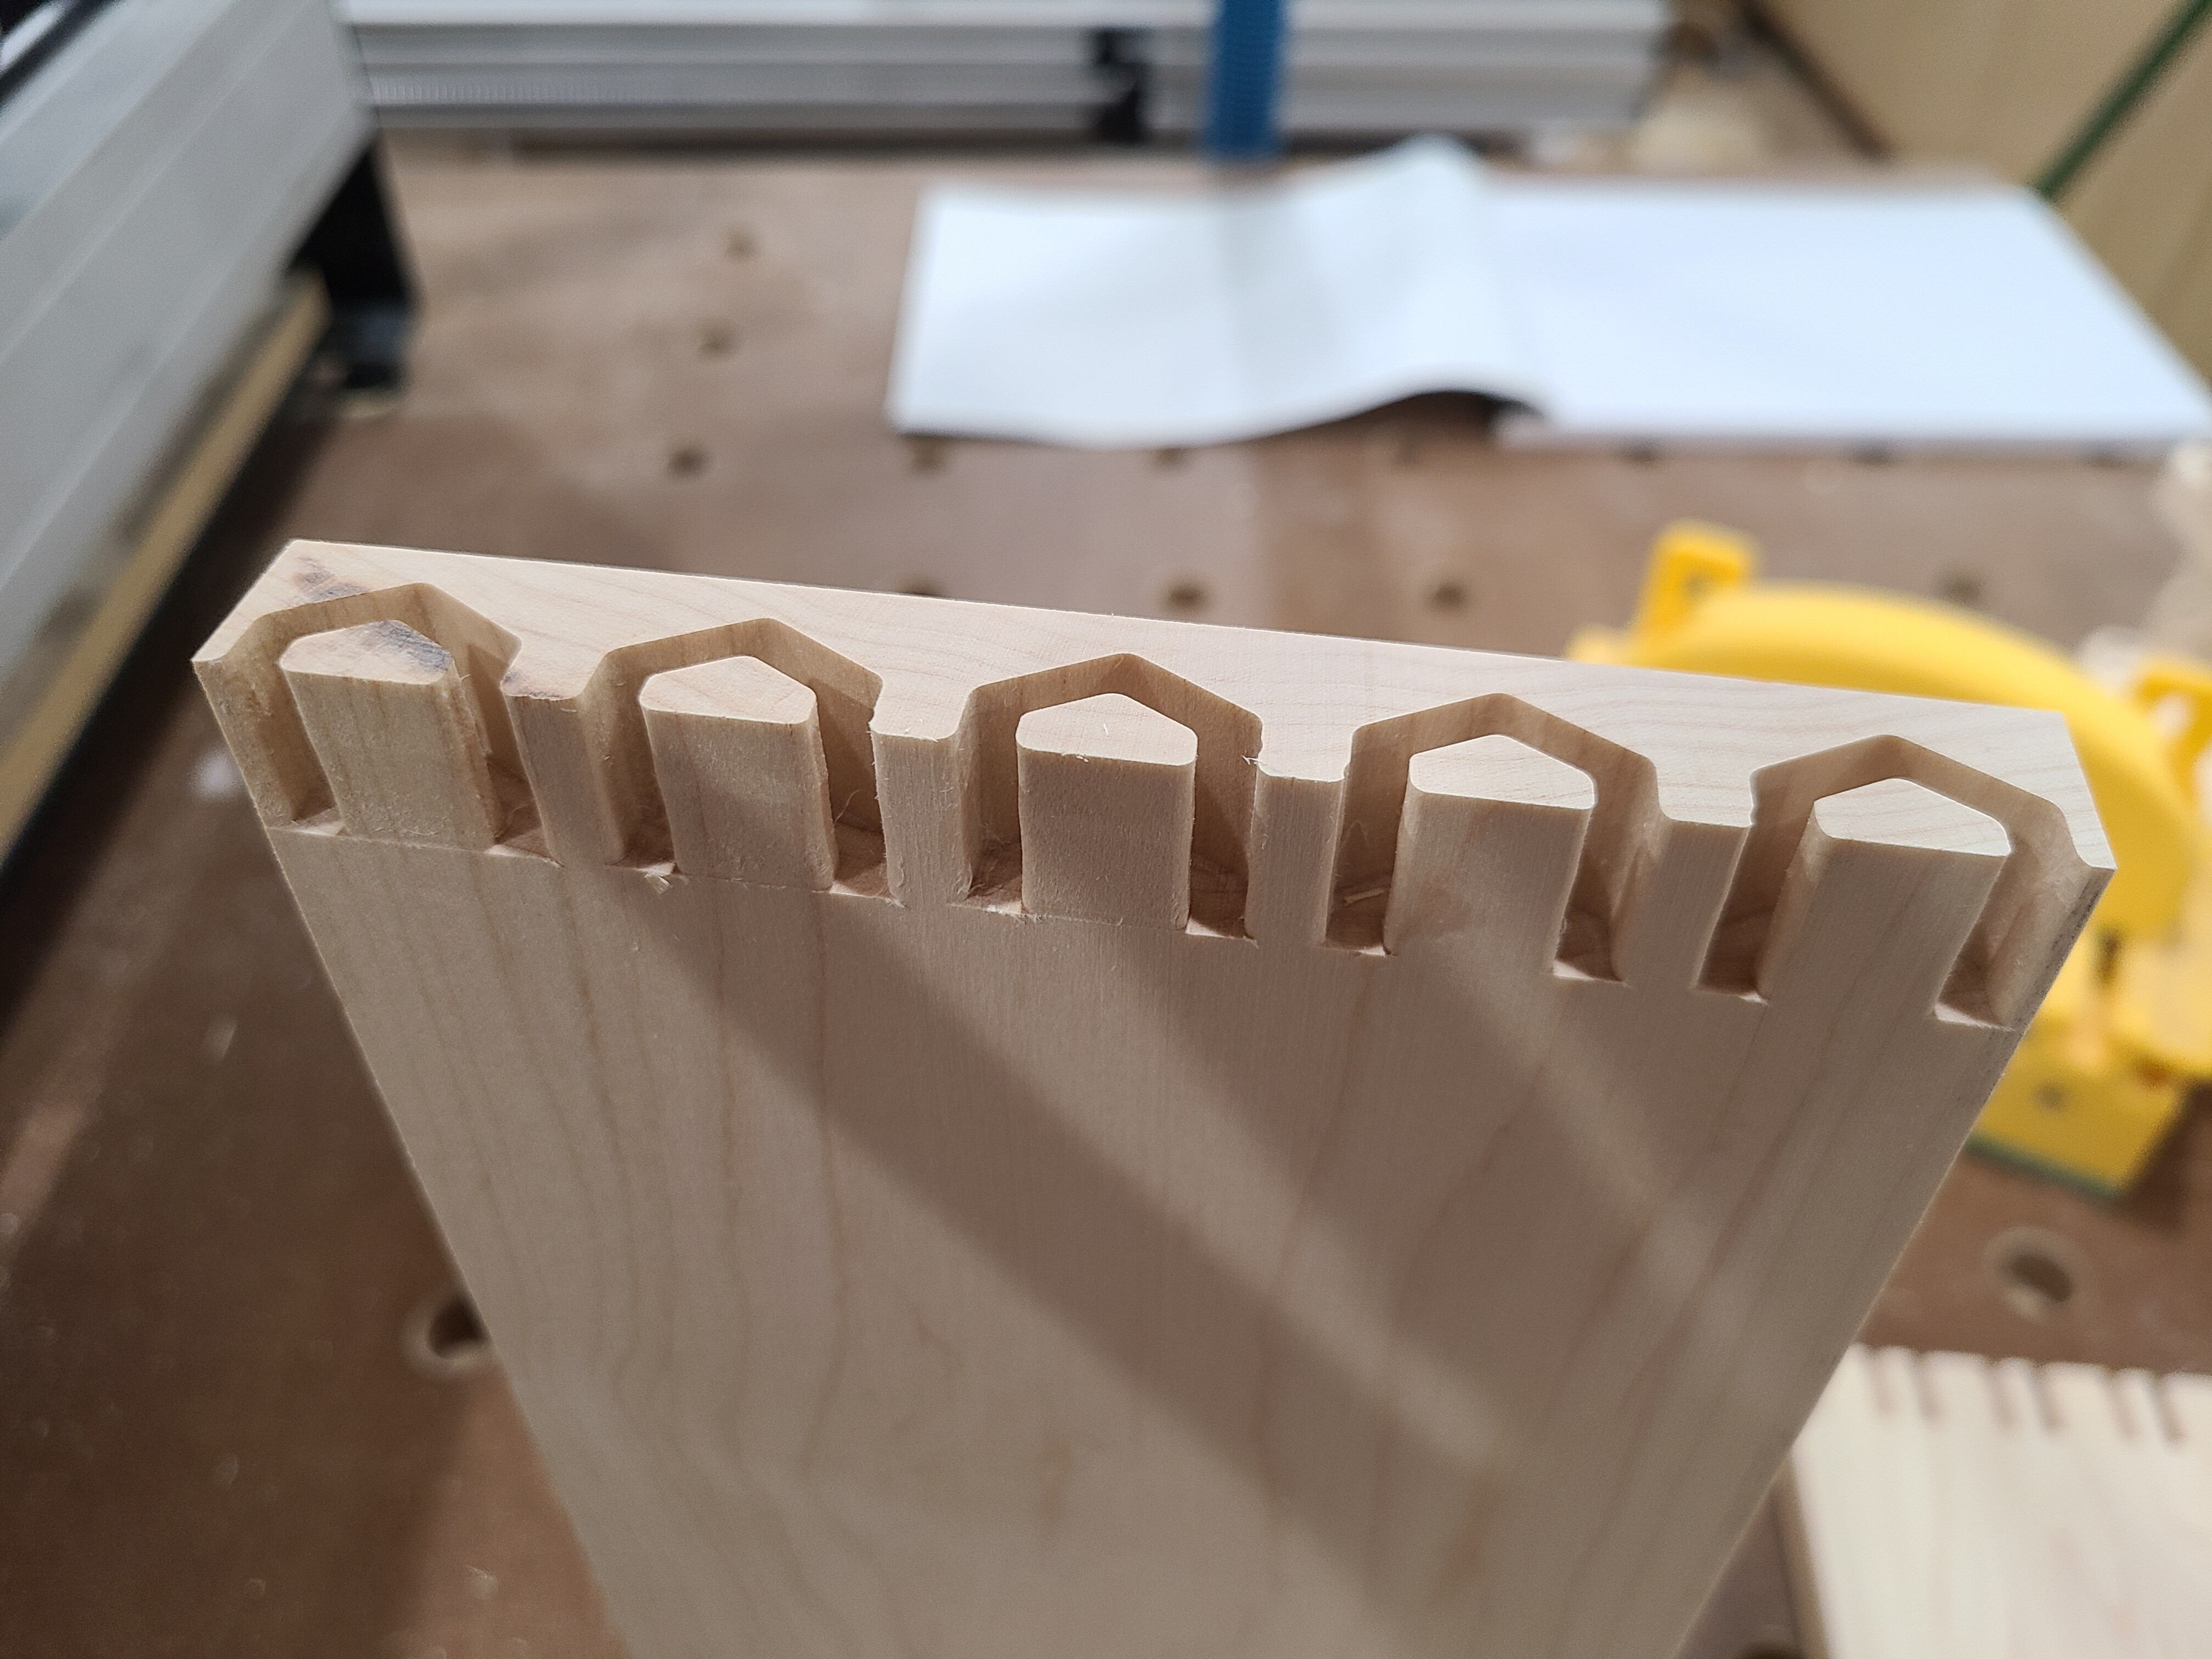
I’ve been remodeling a bathroom in our house. We went with hexagon tiles for the floor. I wanted a way to tastefully bring that into the vanity design, so I whipped up some hexagon box joints. I couldn’t be happier with how they turned out!

26 Likes
In the bottom picture are those the full width of the wood or just superficial. In the female socket above they look quite deep.
Nice work. They have had some analog router templates for a long time that make different things like hearts and other decorative joints.
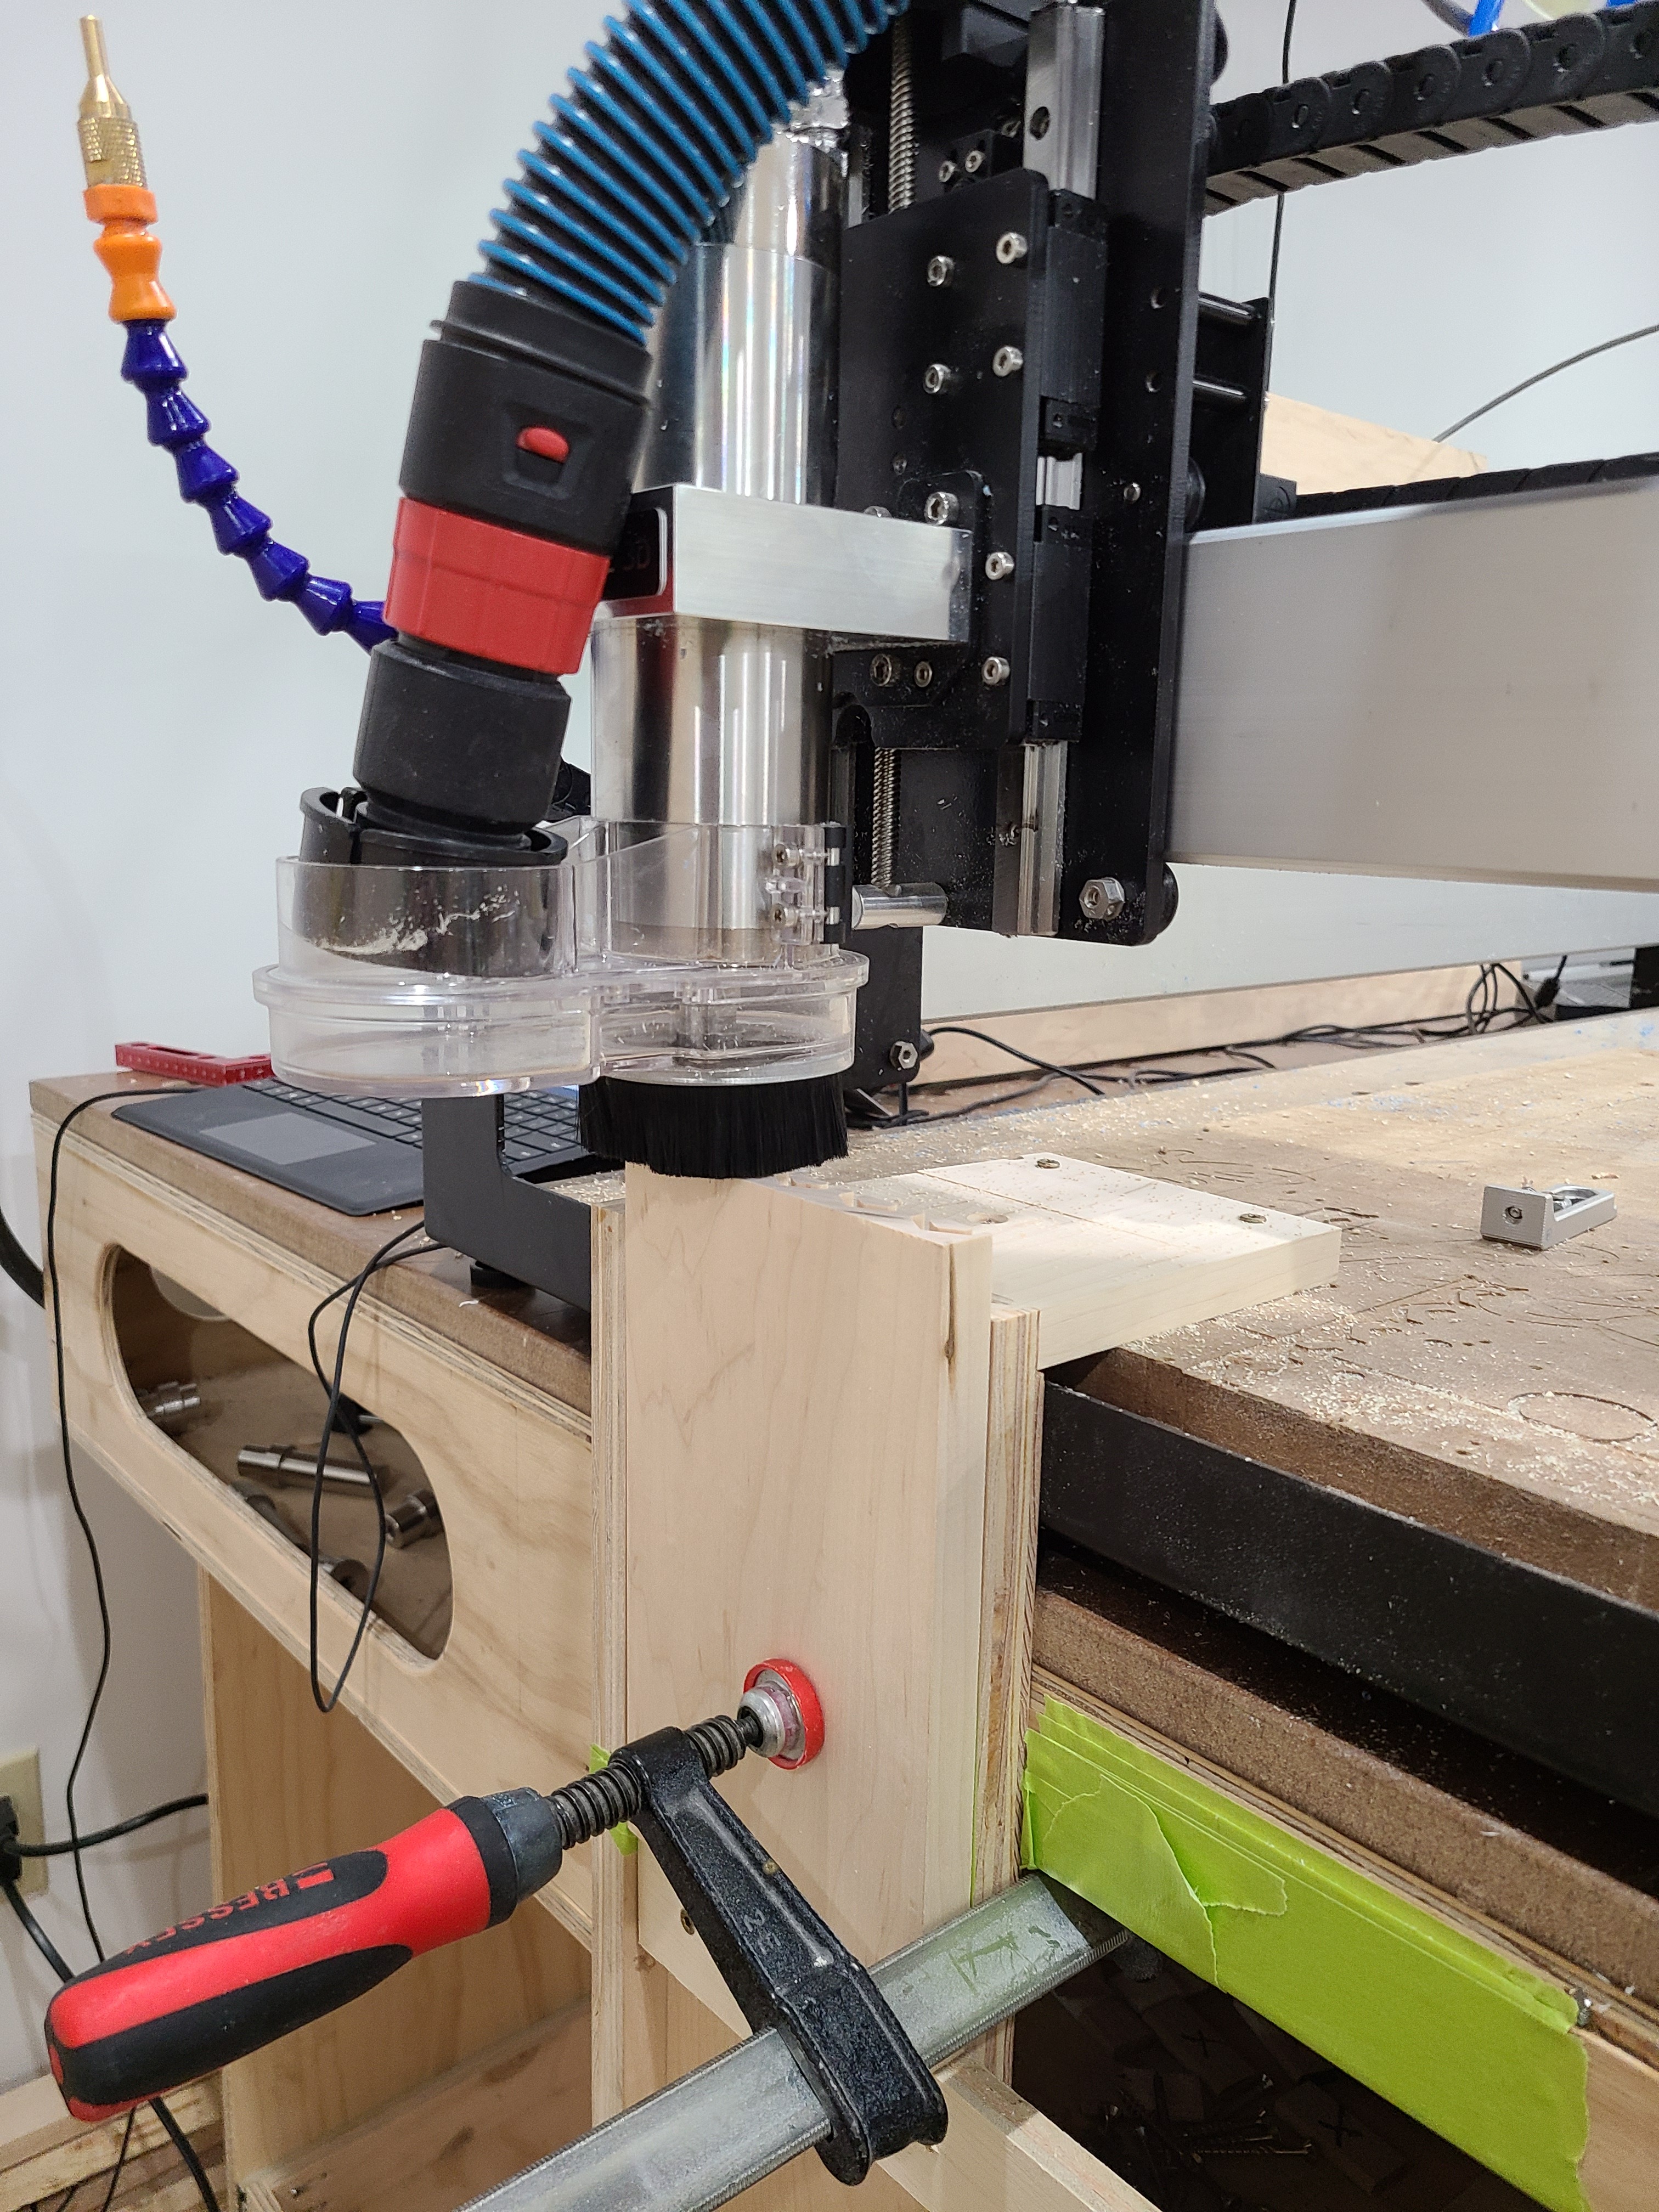
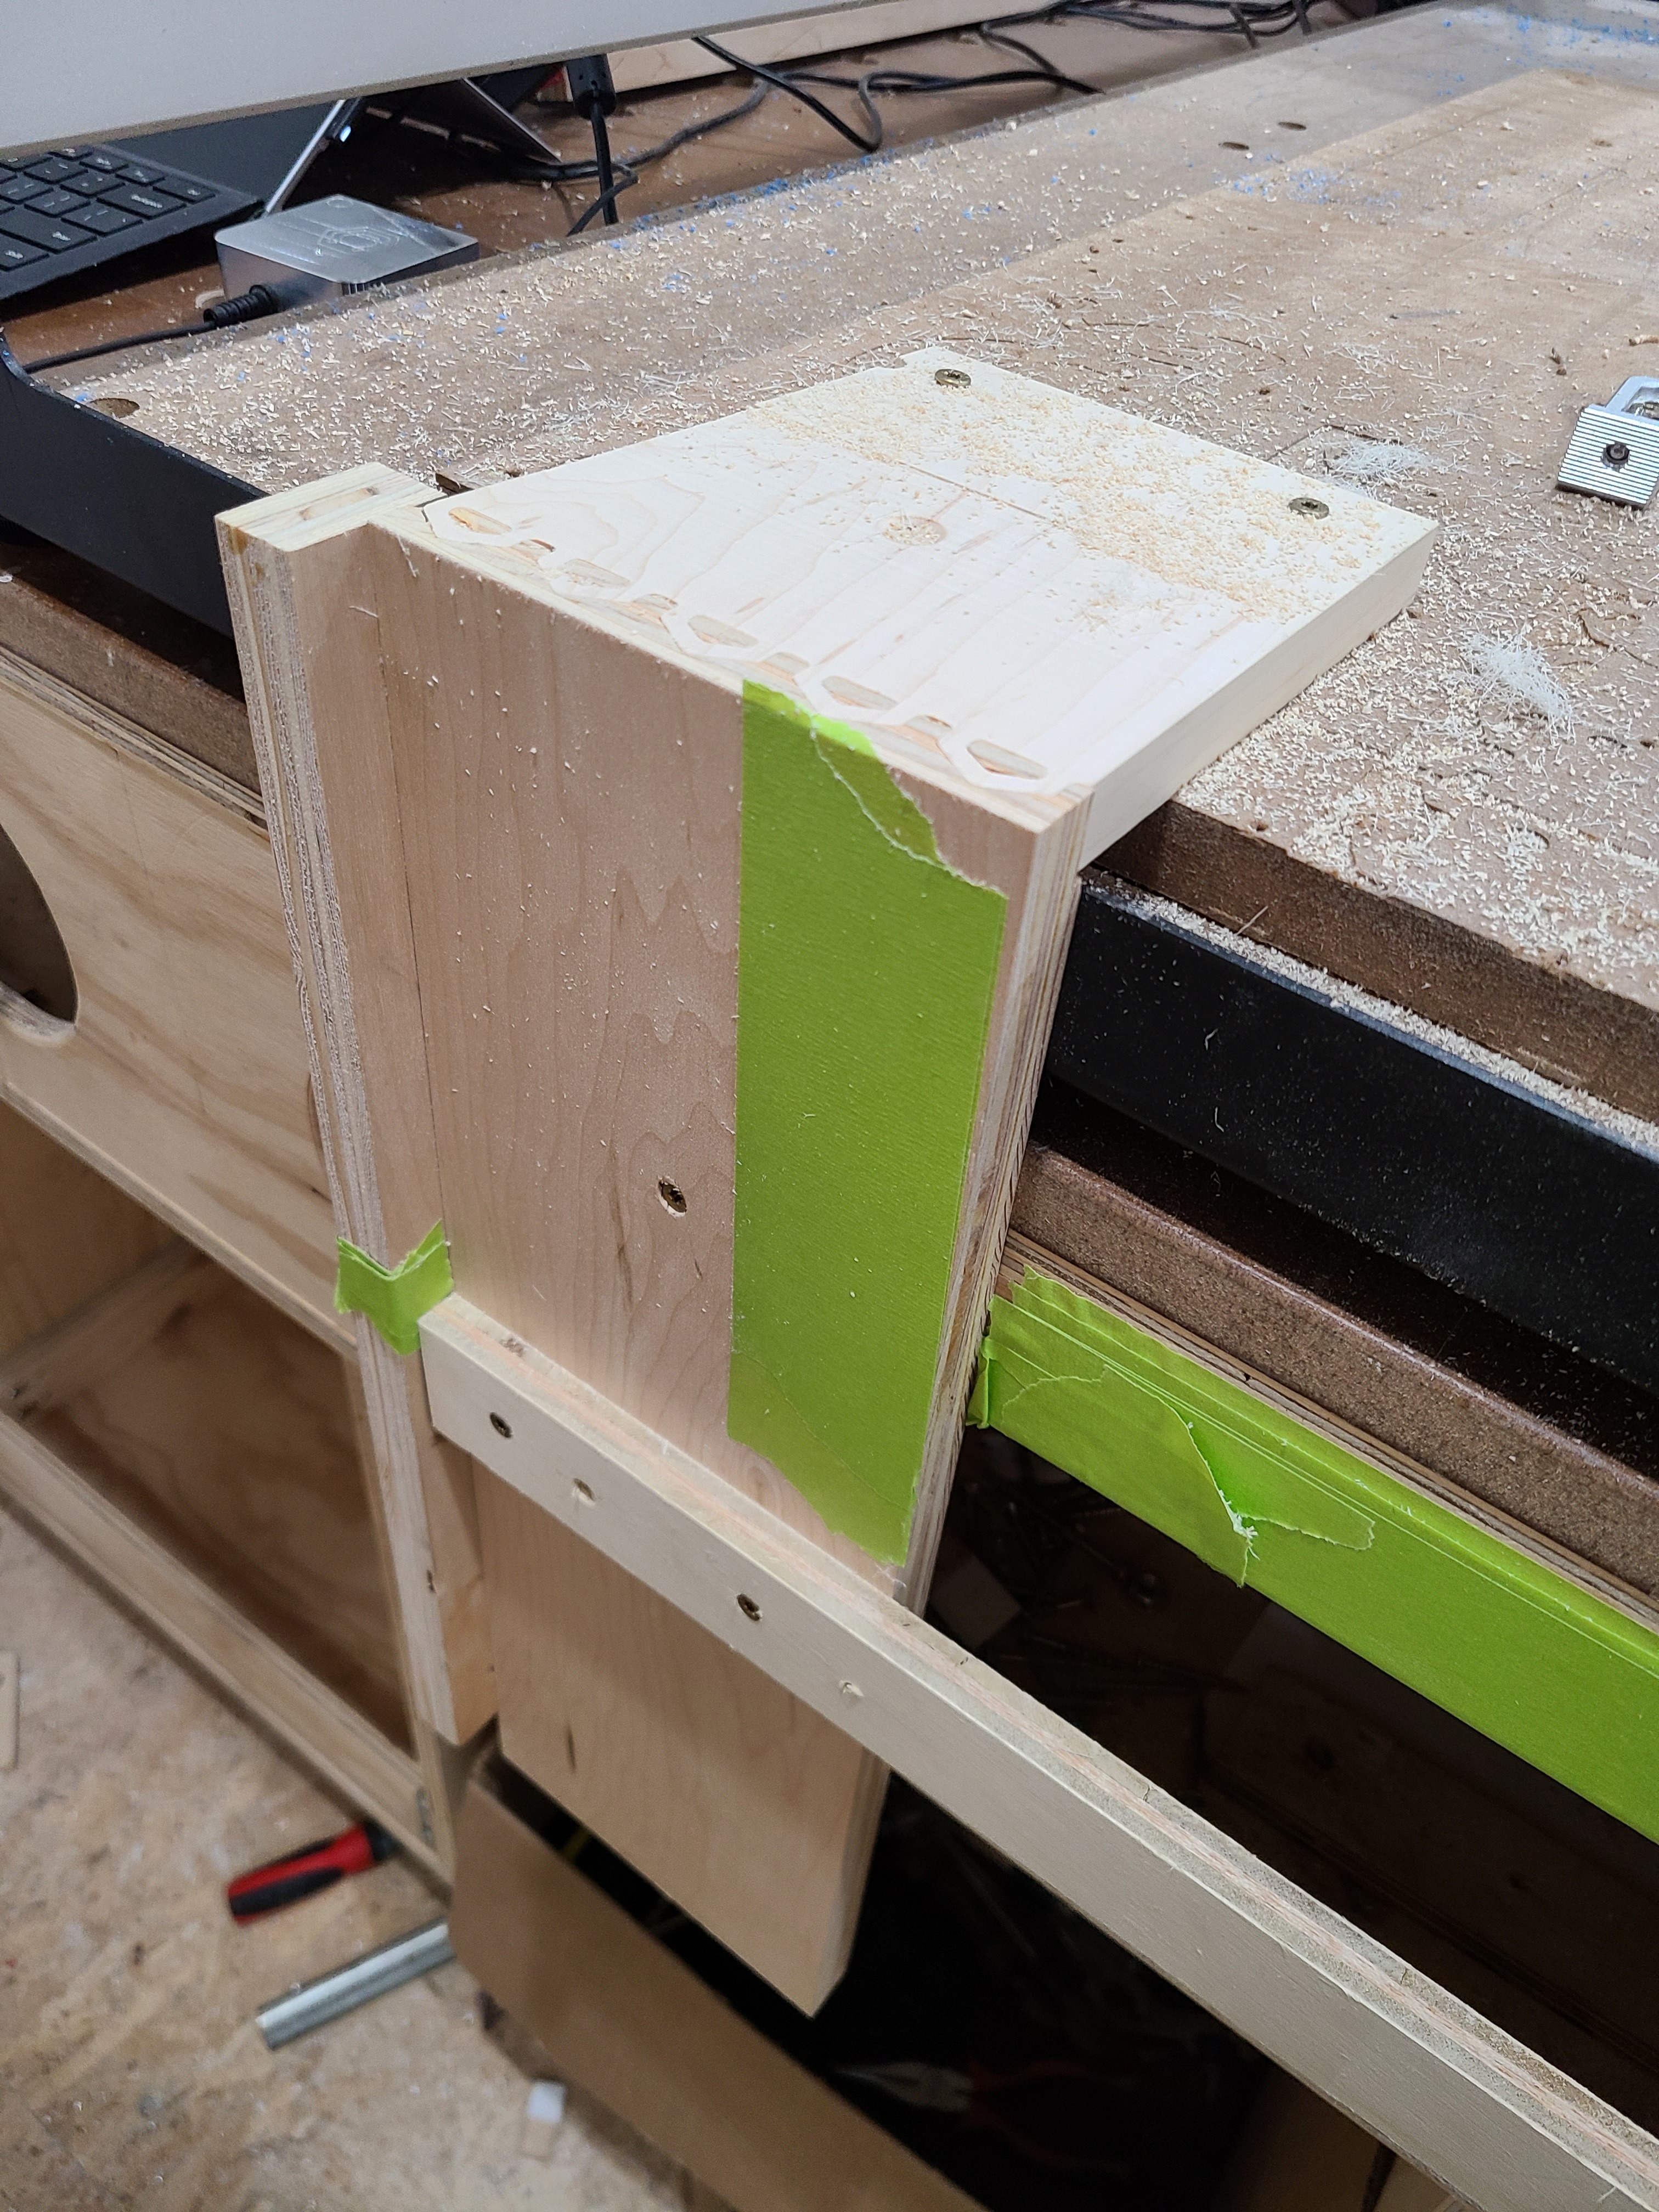
Can you share your work holding box on the front of the machine? Or is that a torsion box with cutouts and you are clamping through the cut outs to hold your work piece.
They are really awesome! I’d love to see some more details on how you did them. What CAD software did you use? Speeds and feeds? Bit? How long did the cuts take? Inquiring minds want to know!!
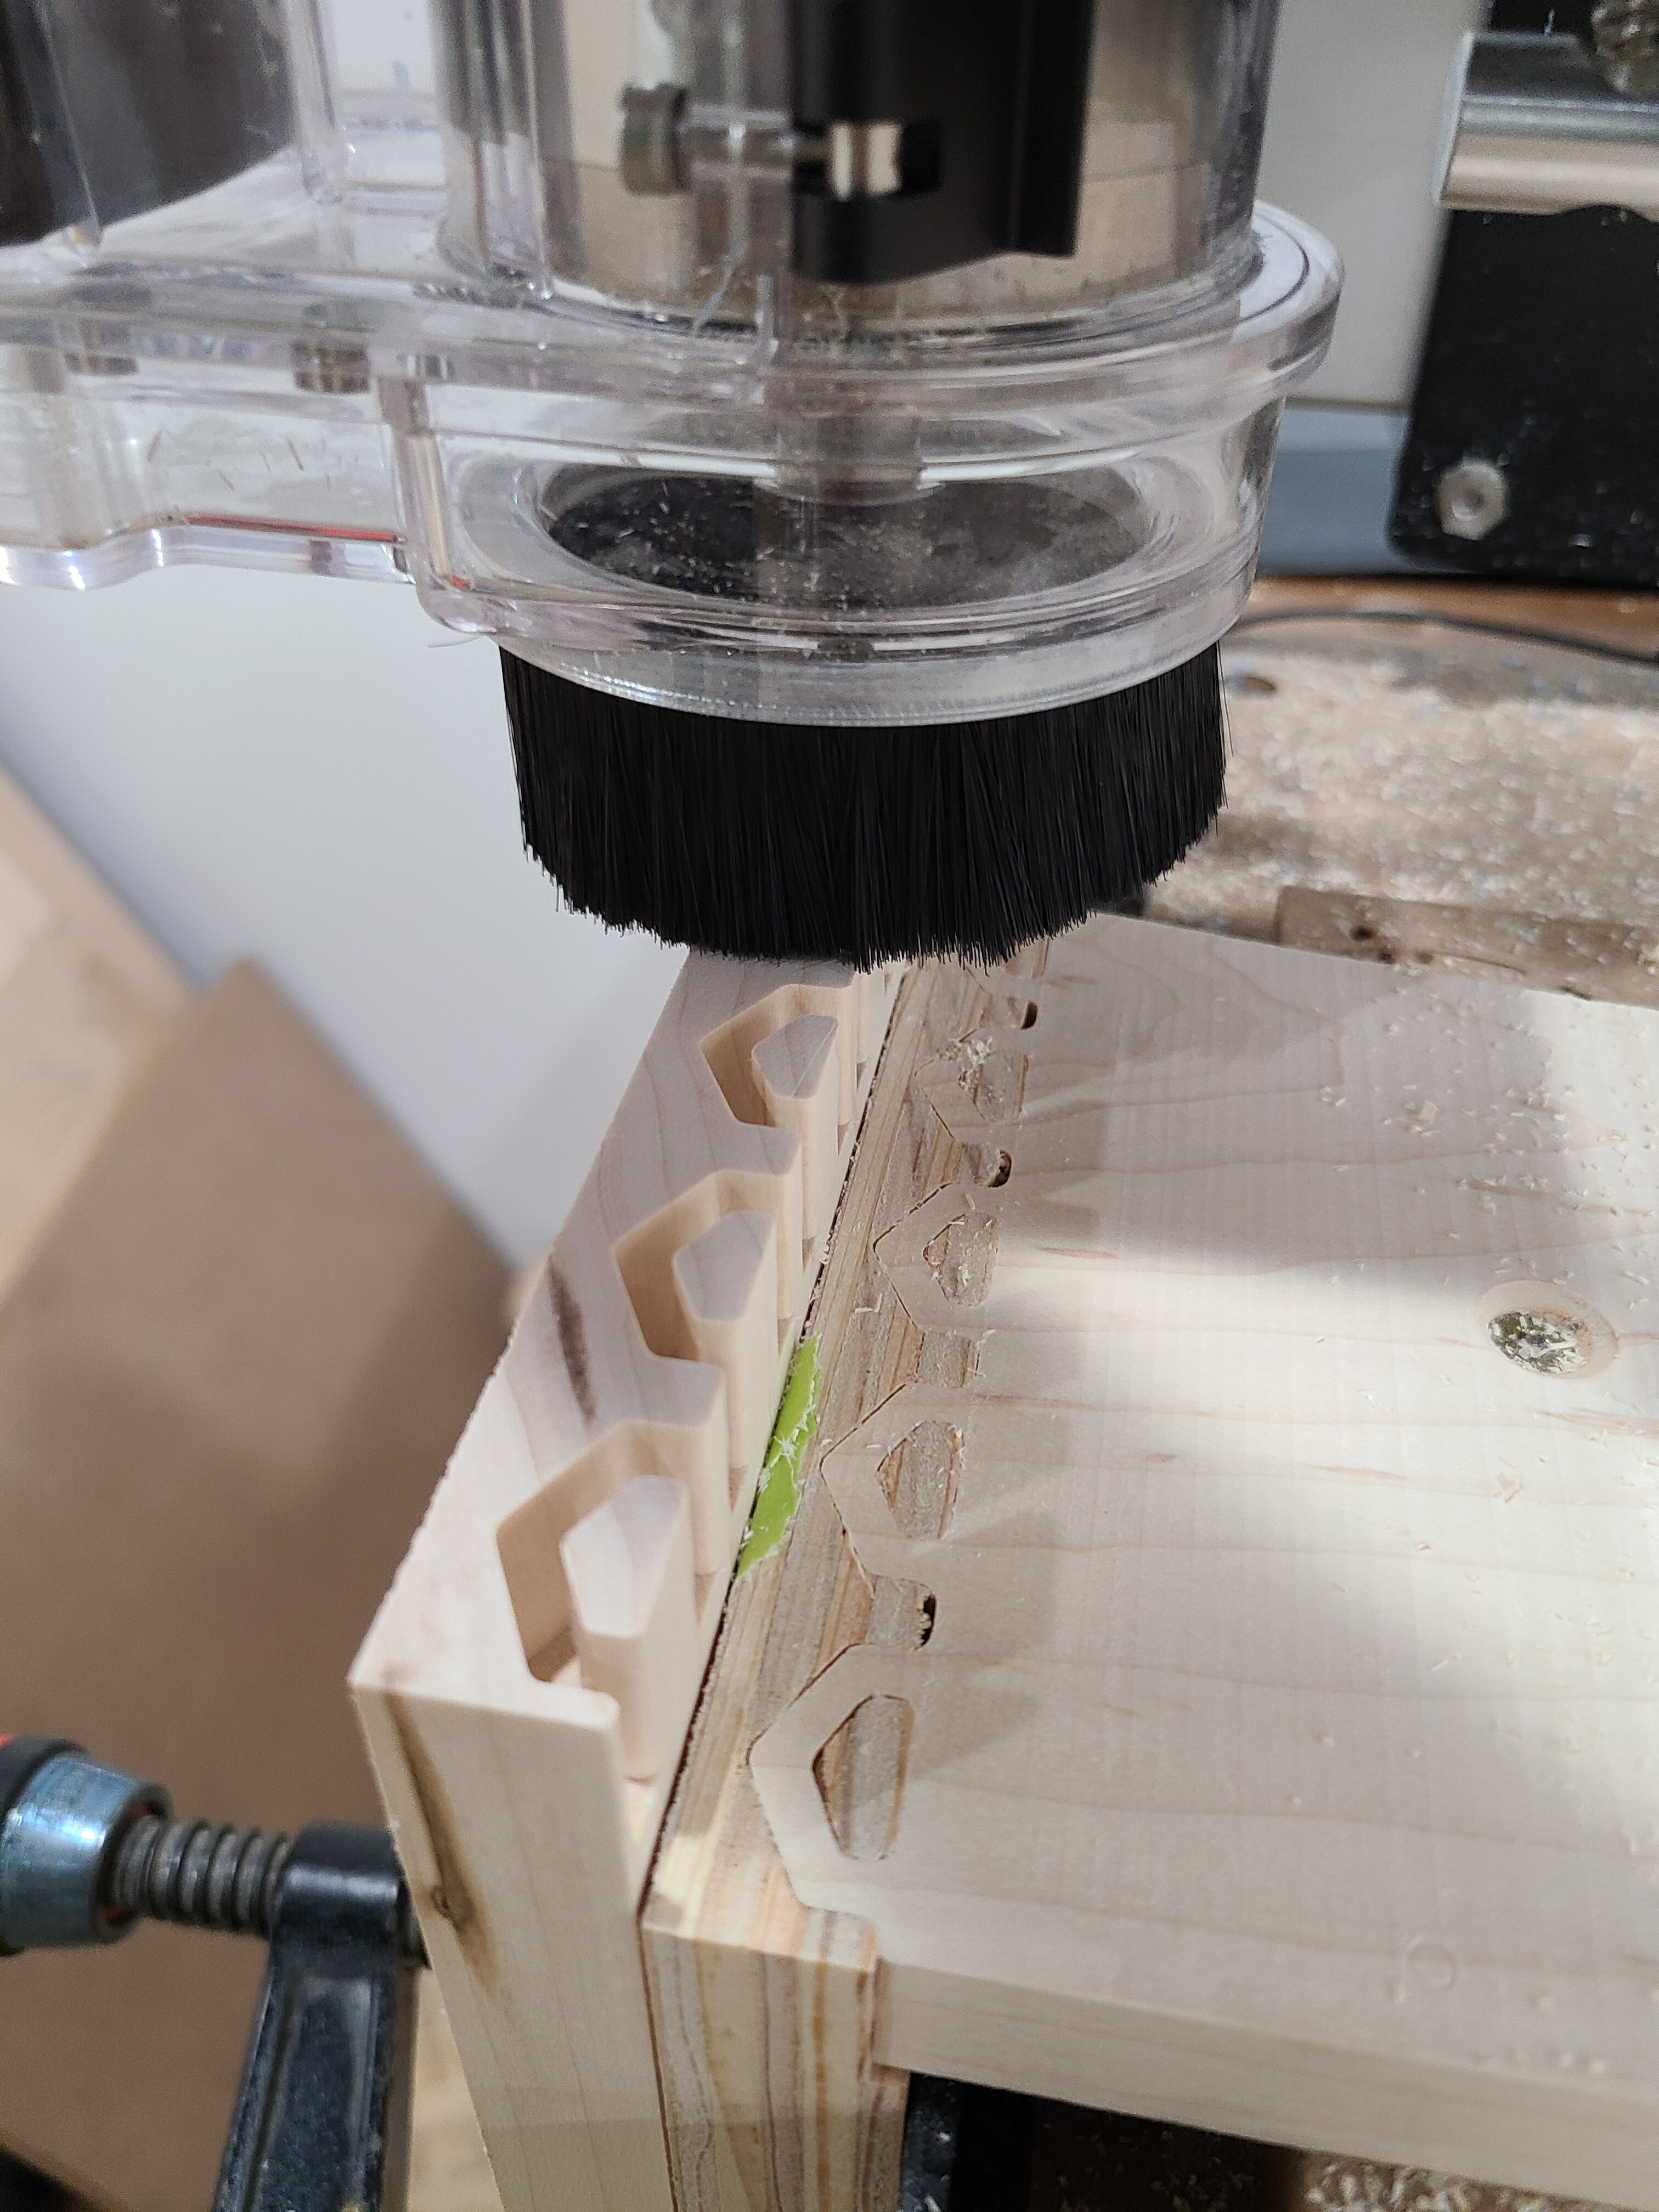
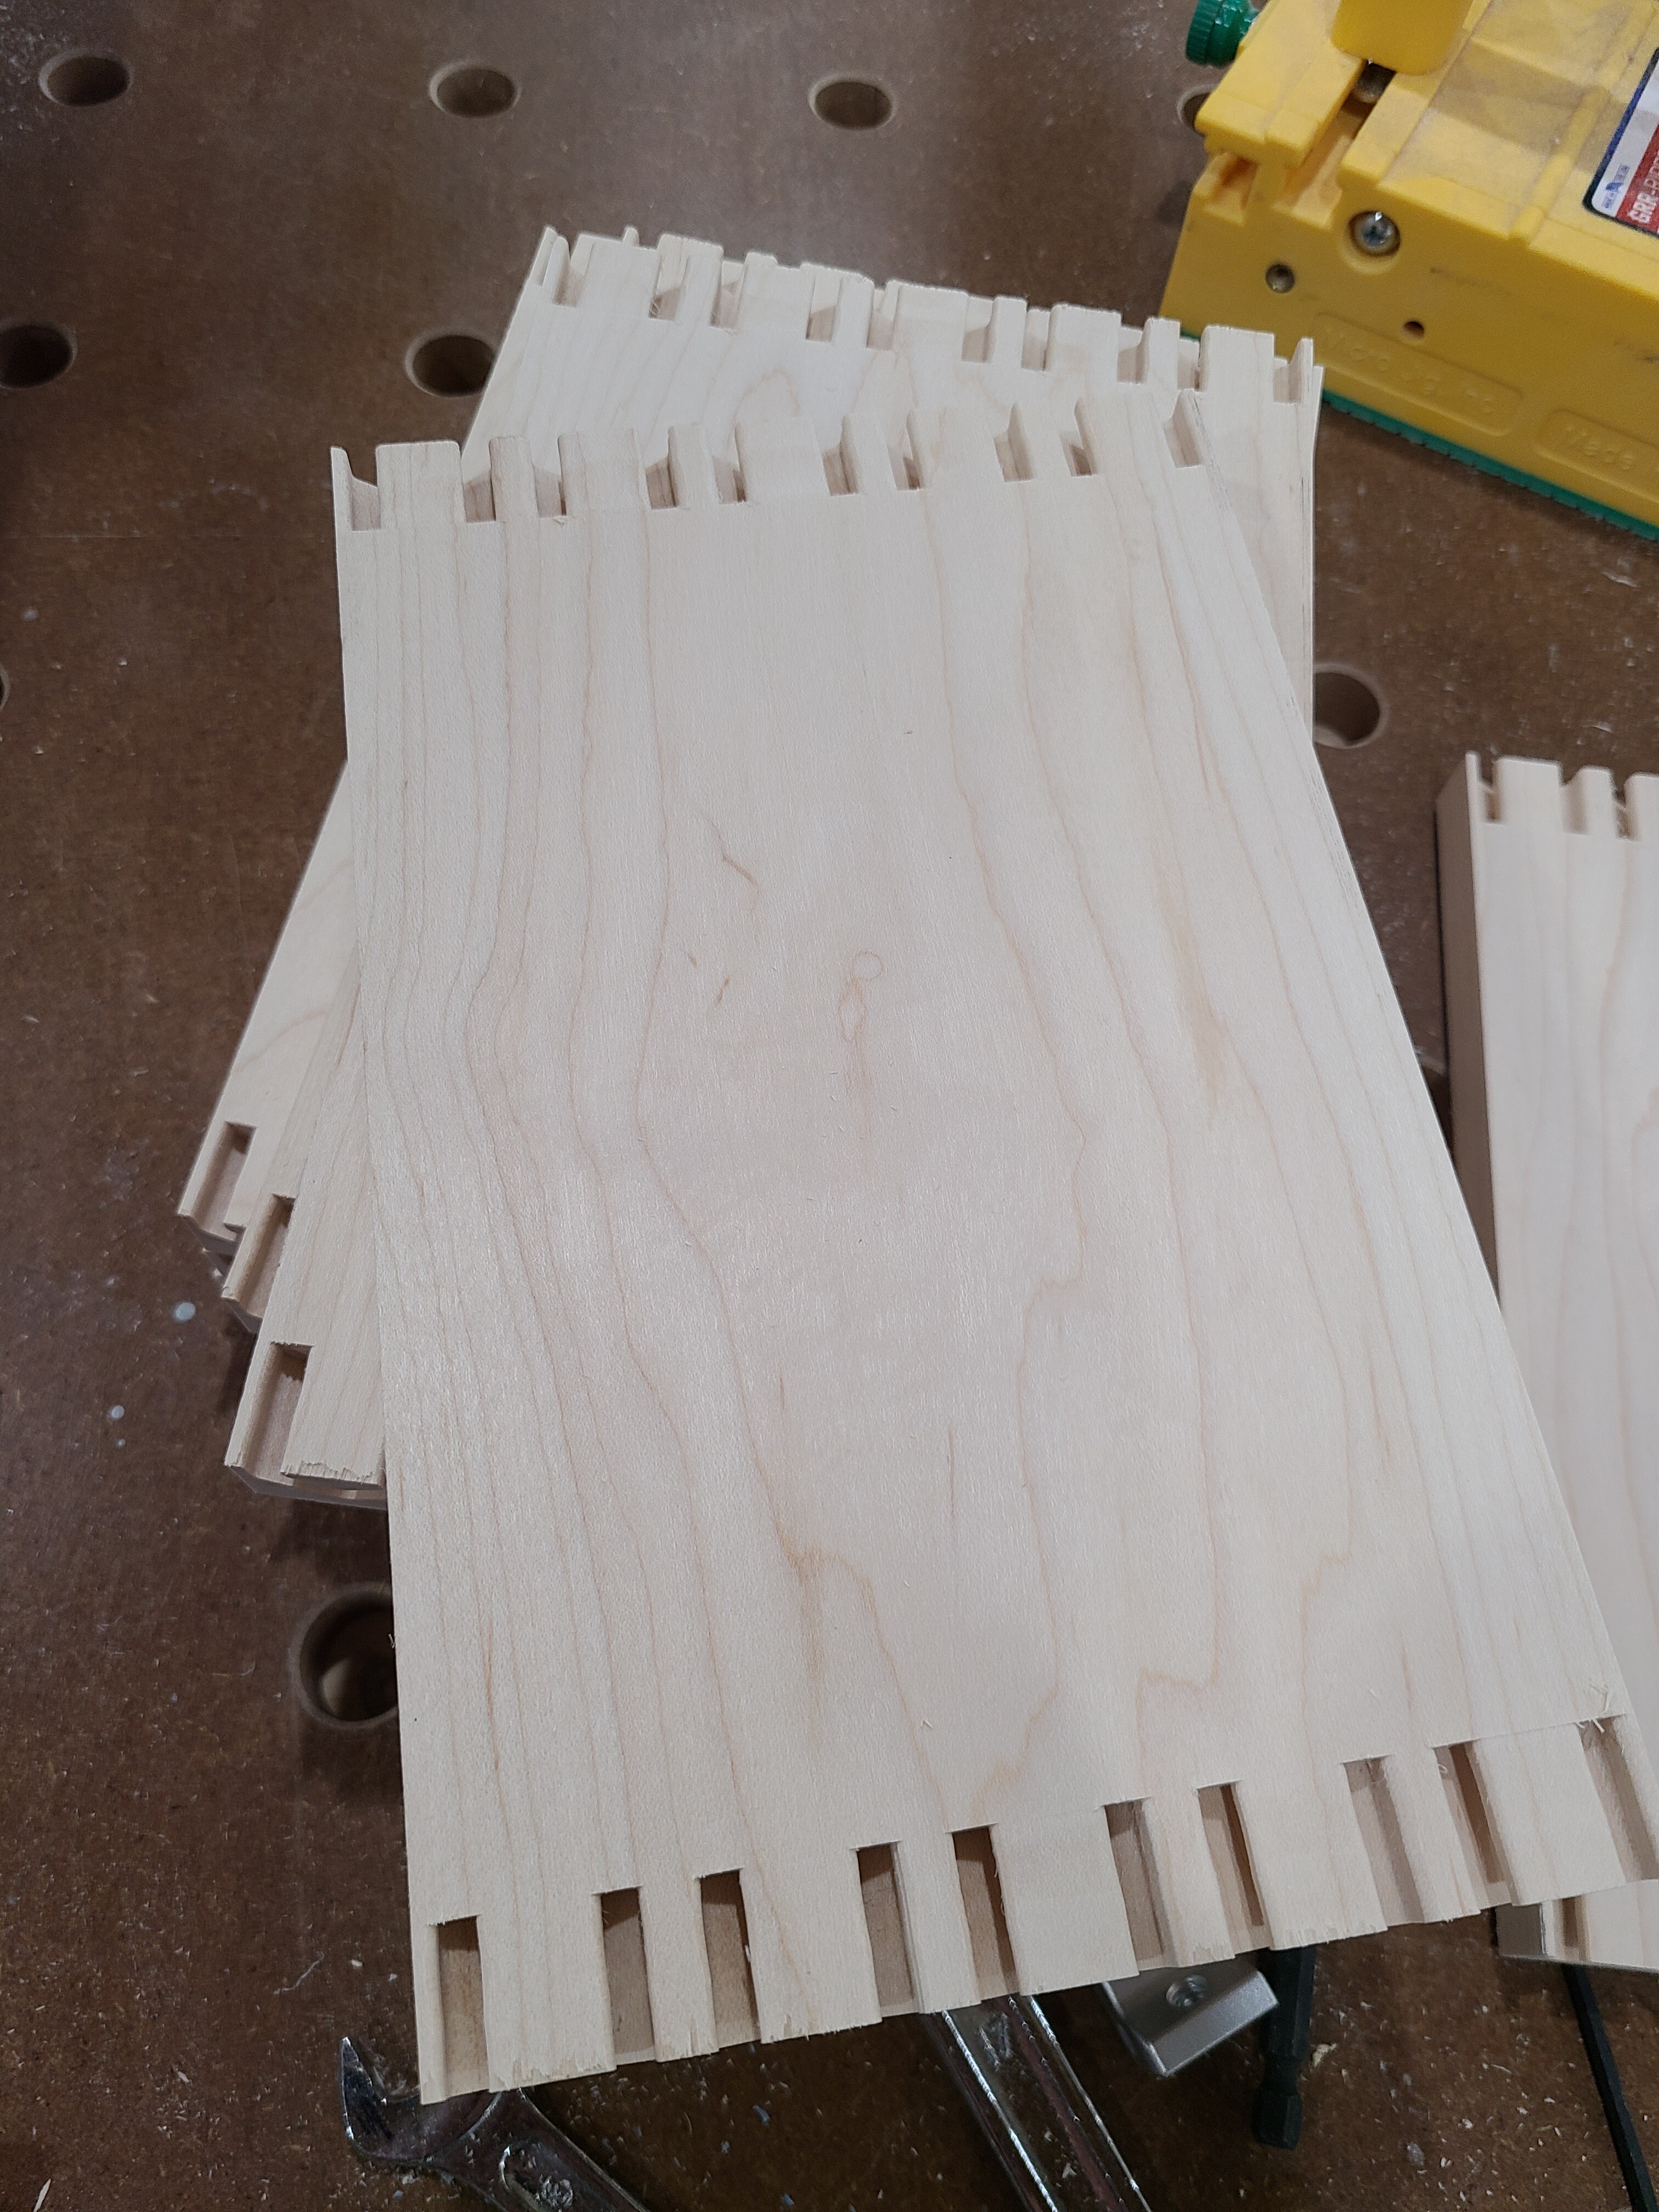
Thanks! The boards are 16mm width sockets are 16mm depth. I added a few more pictures. Hopefully that helps.
As for work holding… I have my CNC on a Ron Paulk style workbench. It’s not rigid enough to go at faster speeds so it will eventually be rebuilt with a better torsion box table, just not right now. Here are some pictures of the jig I used. This really was a proof of concept on the joint so I didn’t spend any time making a reusable jig. I can see me doing more vertical milling in the future so I’ll eventually come up with something nicer. I’ve seen some good designs around here.
Some odd things I’m sure you’ll notice about the jig:
- It was made out of some scrap - actually a test piece for the joint

- The right side was getting cut a little deeper than the left so I used the vertical green tape to shim it out a bit - that worked like a charm.
- The green tape on the bottom left was used to make the workpiece perpendicular with the top. The top was surfaced with the router so I was sure to get a nice vertical cut.
- Once I got those two things setup I clamped it to the through the hole in the workbench and attached my bottom support.
2 Likes
I’ll put some more details up there later today. I used Fusion 360. Ideally I’ll end making this into a parametric model so I can easily produce different sized joints in the future but the goal was to get this done so it’s a refinement I can make later.
1 Like
Nice work,
How strong did you find the hexagon cutouts to be with that cross-grain cutting?
What’s the wood?
It’s maple. I’ve pushed and pulled on them and they feel strong but I haven’t beat on them to try to break them. They’re a pretty tight fit and while assembling them I haven’t seen anything crack or break yet. While they’re not going to be dovetail strong they should be sufficient enough for a bathroom vanity.
If my boys somehow manage to break them there will be words exchanged 
4 Likes
It is always a delicate balance with joints that fit too tight or too loose. If you get them too tight the glue makes them swell and with wet glue and you cannot get the joint to come together it is a disaster. You can split the joints and makes for a bad day. Likewise if you make the joint too loose it looks bad. I could see with a custom joint like this one you might have to make a couple of iterations to get it just right.
Yep that is for sure! I went through probably 5 different test joints to get the cut and process dialed in correctly. Used some scrap plywood for most of that then switched to maple cutoffs when I got it close. The “tenons” on the shorter pieces I ended up having to reduce by 0.1mm for some extra room.
1 Like
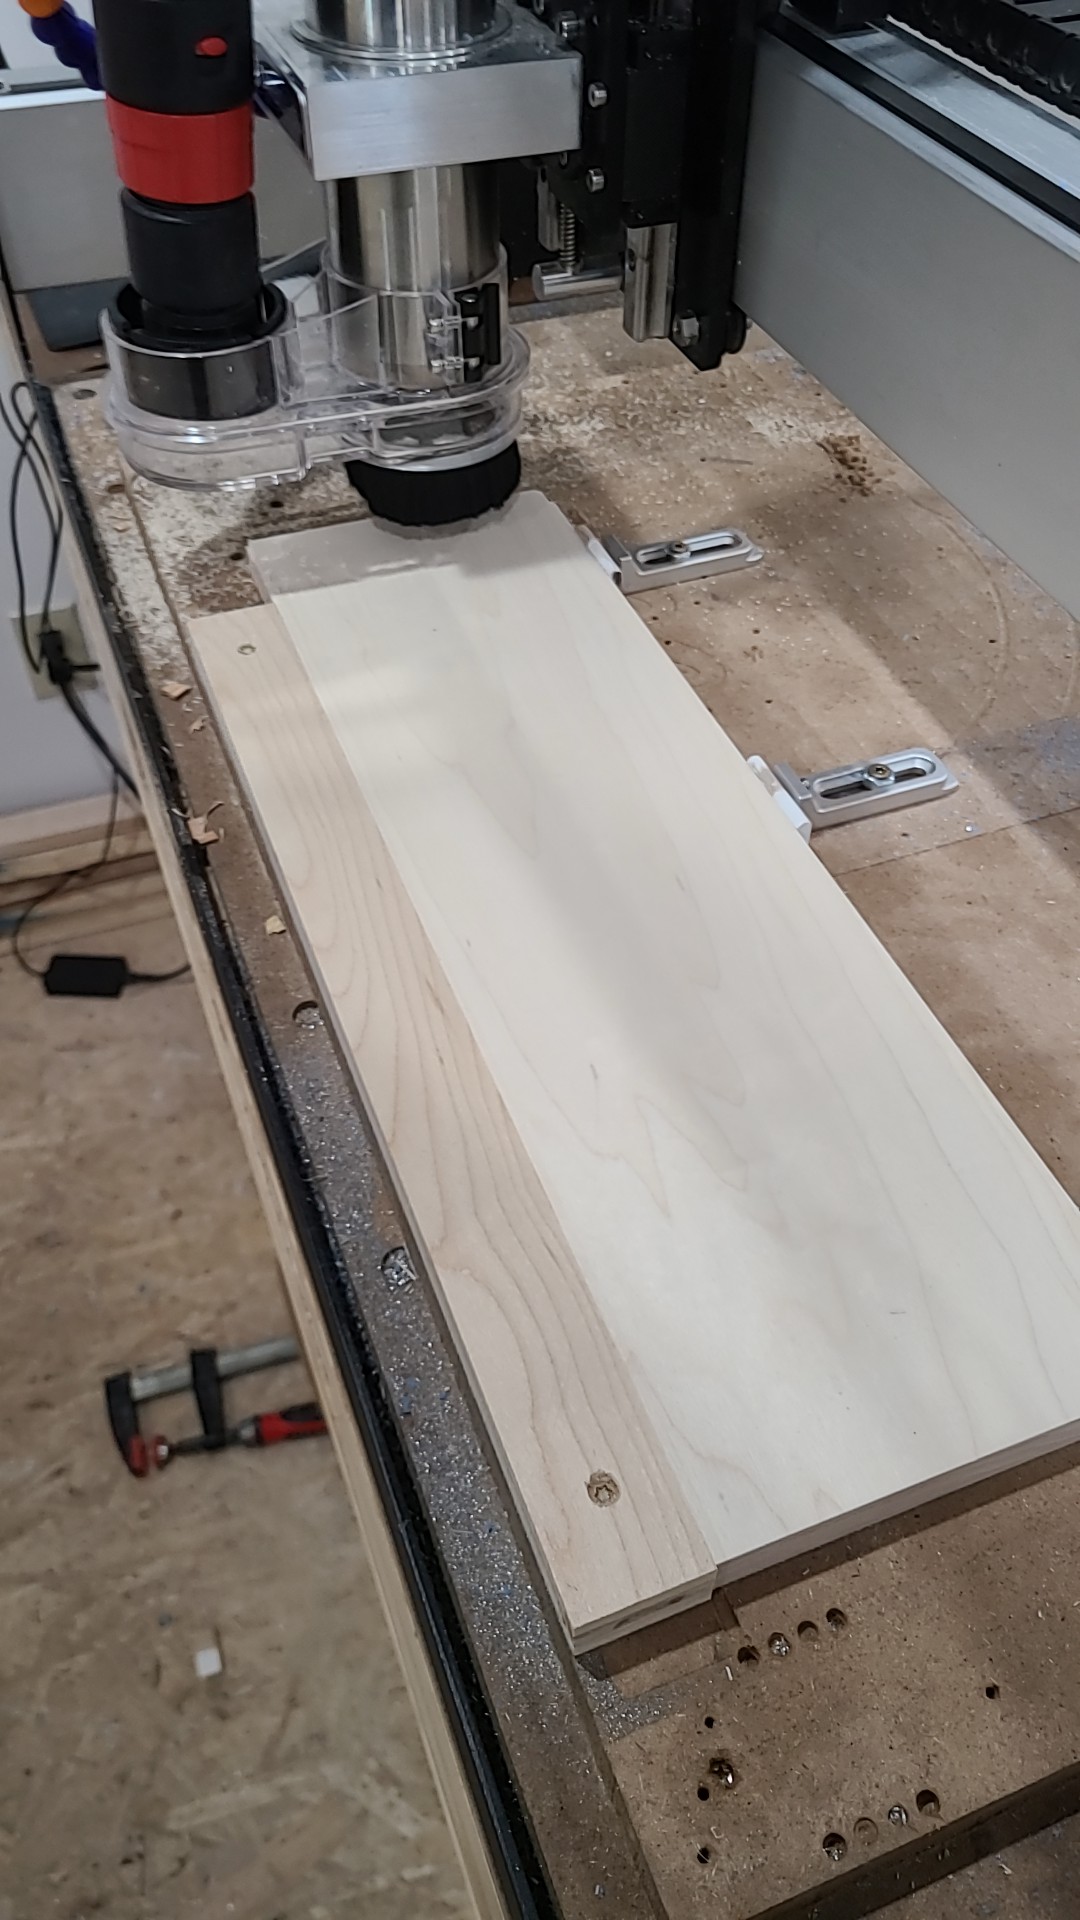
OK, I finally had some time to go back and look up some of my feeds and speeds. There definitely could be improvements made if I were going to make more of these but it got it done for now.
Endmill: Amana 46225-K
Long Pieces (with the mortise)
- Adaptive Clear - 18k RPM, 45 ipm, 0.0625 in optimal load, 0.125 in stepdown, left 0.03 mm material
- Contour - Finishing - 18k RPM, 20 ipm, full depth of cut
Short Pieces (with the tenon)
-
Pocket - roughing pass
18k RPM, 20 ipm, 0.0625 in optimal load, 0.0625 in stepdown, left 0.03 mm material -
Pocket - finishing pass
18k RPM, 20 ipm, full depth of cut -
Contour - I added this in to fix my fit - just shrinking the tenon by 0.1 mm
18k RPM, 20 ipm, full depth of cut
1 Like