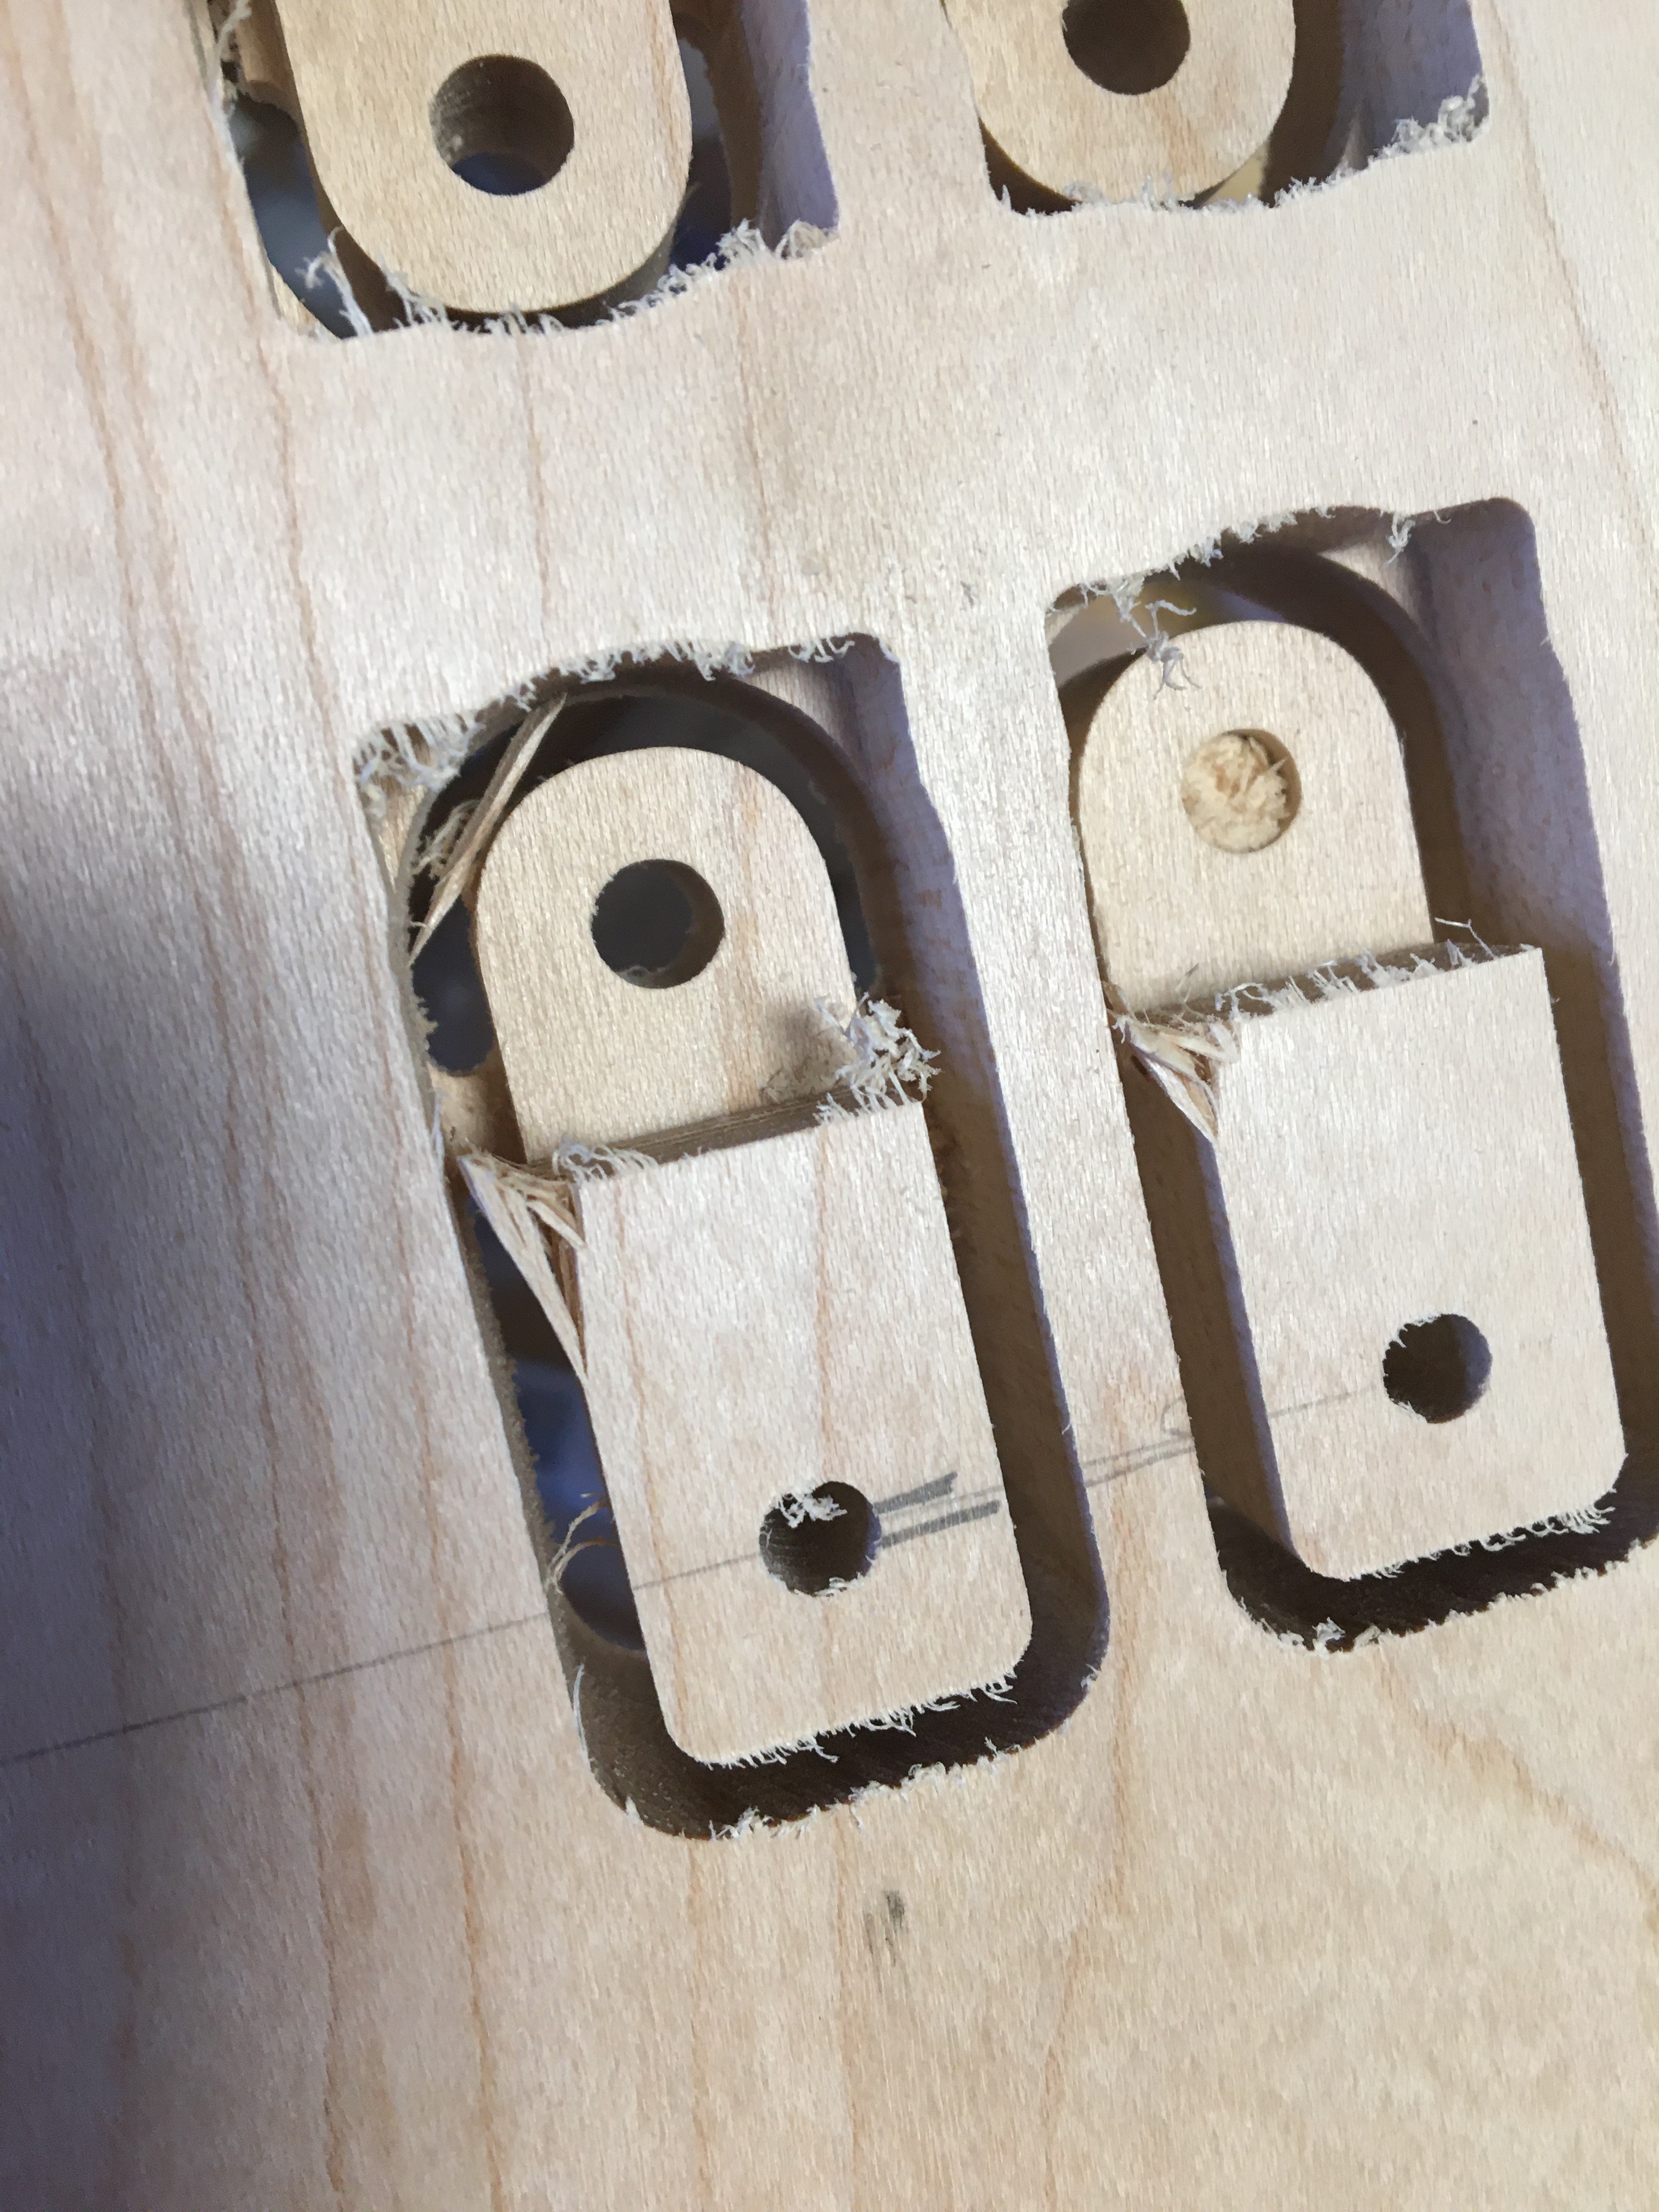
Should I setup my file differently to prevent the corners from chipping away? I’m using a new Spektra compression bit! I know it’s related to the rotation of the bit, but is there anyway around it?
See image please.
Thx.
The way I’ve addressed this sort of thing is to put a relieving cut against the edge where the chipping is occurring and machine that first.
An alternate approach would be to overcut the rectangle at the top of the photo, and then trim it back when making the straight cut, so something like:
Or, cut the pocket at the top first:
and then machine the outline.
To assist you, we need some more information. What are your speeds/feeds, DOC,WOC, are you using rough/finishing passes, etc? Have you tried a different grain orientation?
Will,
Thx, good tips. I actually did the second tip, I cut out a small rectangle first and then did the outline cut.
Overcut tip: do you mean give it extra waste to cut and then go over it with a final cut?
I haven’t tried a different grain direction yet. Does maple have the tendency to chip more?
Specs:
1/8" compression bit
Feed rate: 40"/min
Plunge rate: 8"/min
Spindle speed: 18,000
Depth/pass: .05
Note that a compression bit is only doing its compression thing when the depth of cut is much larger than its diameter. Here’s one of my 1/8" compression bit:
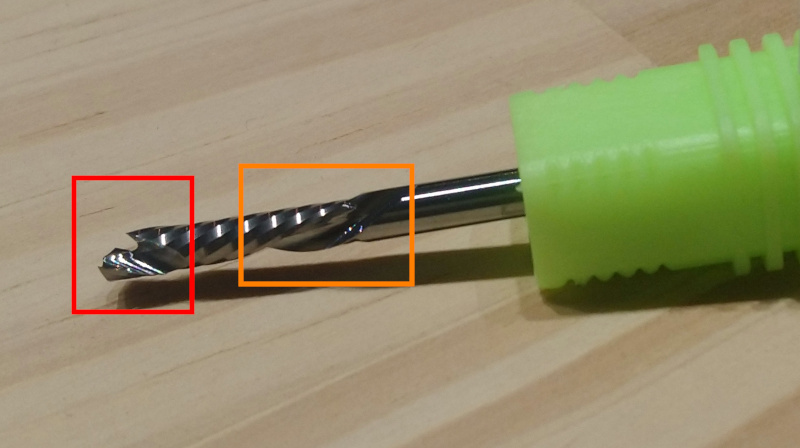
The red part is the upcut part, and the orange part is the downcut part, so the cutter needs to be quite deep into the material to have both the upcut and the downcut parts cutting at the same time (which is when one benefits most from the “compression” effect, the lower part will tend to pull the (bottom of the) material while the top part will tend to push the (top of the) material, leaving both bottom and top surfaces clean.
With your 0.05" depth per pass, you are only using the upcut part, so you might as well use a regular upcut endmill. Now, it’s not easy to cut as deep as required (~300% diameter) without causing excessive forces on the endmill.
I guess what I’m saying is that for that piece you are cutting, you don’t benefit from the compression effect so you might as well retry the cut with another endmill, you may not have those issues. I would try with a downcut endmill at the same cutting parameters.
1 Like
Good tip!
I’ll try my 1/8" down cut bit and see if that helps.
The splintering comes from the first few mm of the cut…so to your point…
I assume the diameter of the bit shouldn’t make a difference, right?
1/8 vs 3/16…etc?
Thanks.
Can I increase the depth of cut into maple using a 1/8” bit? More than .05”?
What is the rule of thumb for recommended depth of cut? Is there a chart?
it’s quite common to use “DOC = Radius” (e.g. half diameter) as a good setting.
but in reality you can make a trade… if you halve the feed rate you can double the DOC… to a limit.
now the limit here is that if your feedrate is super slow, you get burning of the wood due to heat build up… and also your chips will be more like dust than nice chips.
1 Like
It shouldn’t. Orienting your stock at 90° may help as Kyle mentioned, to cut cross-grain.
I have a few rules of thumb decribed here. But for regular slotting cuts that amounts to what @fenrus said: 50% of the cutter diameter is a safe place, so at 0.05" your setting was quite ok.
It’s possible to go deeper, especially if you max out your RPM (and increase feedrate accordingly), but it depends on a number of things (machine rigidity, the kind of endmill, the material,…) so it’s safer to start at 50%D, and if you feel brave you can incrementally increase depth per pass.
Make sure you keep the chipload above 0.0005" to avoid rubbing/burning.
Chipload is (feedrate in ipm) divided by (number of flutes x RPM).
In your case it was (40) / (2 x 18000) = 0.001", which is fine.
With hard maple I do about 20 ipm for feed rate. It is a touchy wood when it comes to using a router on it…go slow then work up your speed…
1 Like
All wood is subject to tear our when cutting 90 degrees to grain. In your pic the bit is cutting cross grain and that piece is unsupported and subject to chip out exactly what it did. Most Maple is straight grained, hard and brittle. The strategies above will help but it is always possible. You could try masking with Oramask. Easy Liner Adhesive Shelf paper, dewaxed shellac (multiple coats) or another hard top coat.
1 Like
another maybe simpler solution. It seems that right now you are slotting (e.g. contour in carbide create). Another option is to use the offset tool to add an outside offset shape of 1.25x the diameter of your bit, and then use a pocket operation… this will take much smaller “bites” out of the wood near your shape… smaller bites -> less violence -> less chance of tear out
there is also an order of operation thing. Normally one would do the cutout at the end… but the tear out happens on the sharp edge of a pocket. One option is to do MOST of the cutout as the very first operation. (just leave enough for work holding) so that there is no pocket yet… and just do the last 0.04" inch or so at the end
Ahh, I’ve never used the offset function, I’m learning something new!
Ok, let’s see if I understood you correctly.
My bit is 1/8" dia, so .125 x 1.25 = .156. Then, add do an offset cut to my original rectangle plus .156"?
I would have to subtract that (.156") from my first rectangular cut or the box will be too big. Yes?
I actually did do a pocket cut to create the recess cut, and it was my first cut, then the outline border cut.
(I would suggest flipping the order of contour vs pocket)
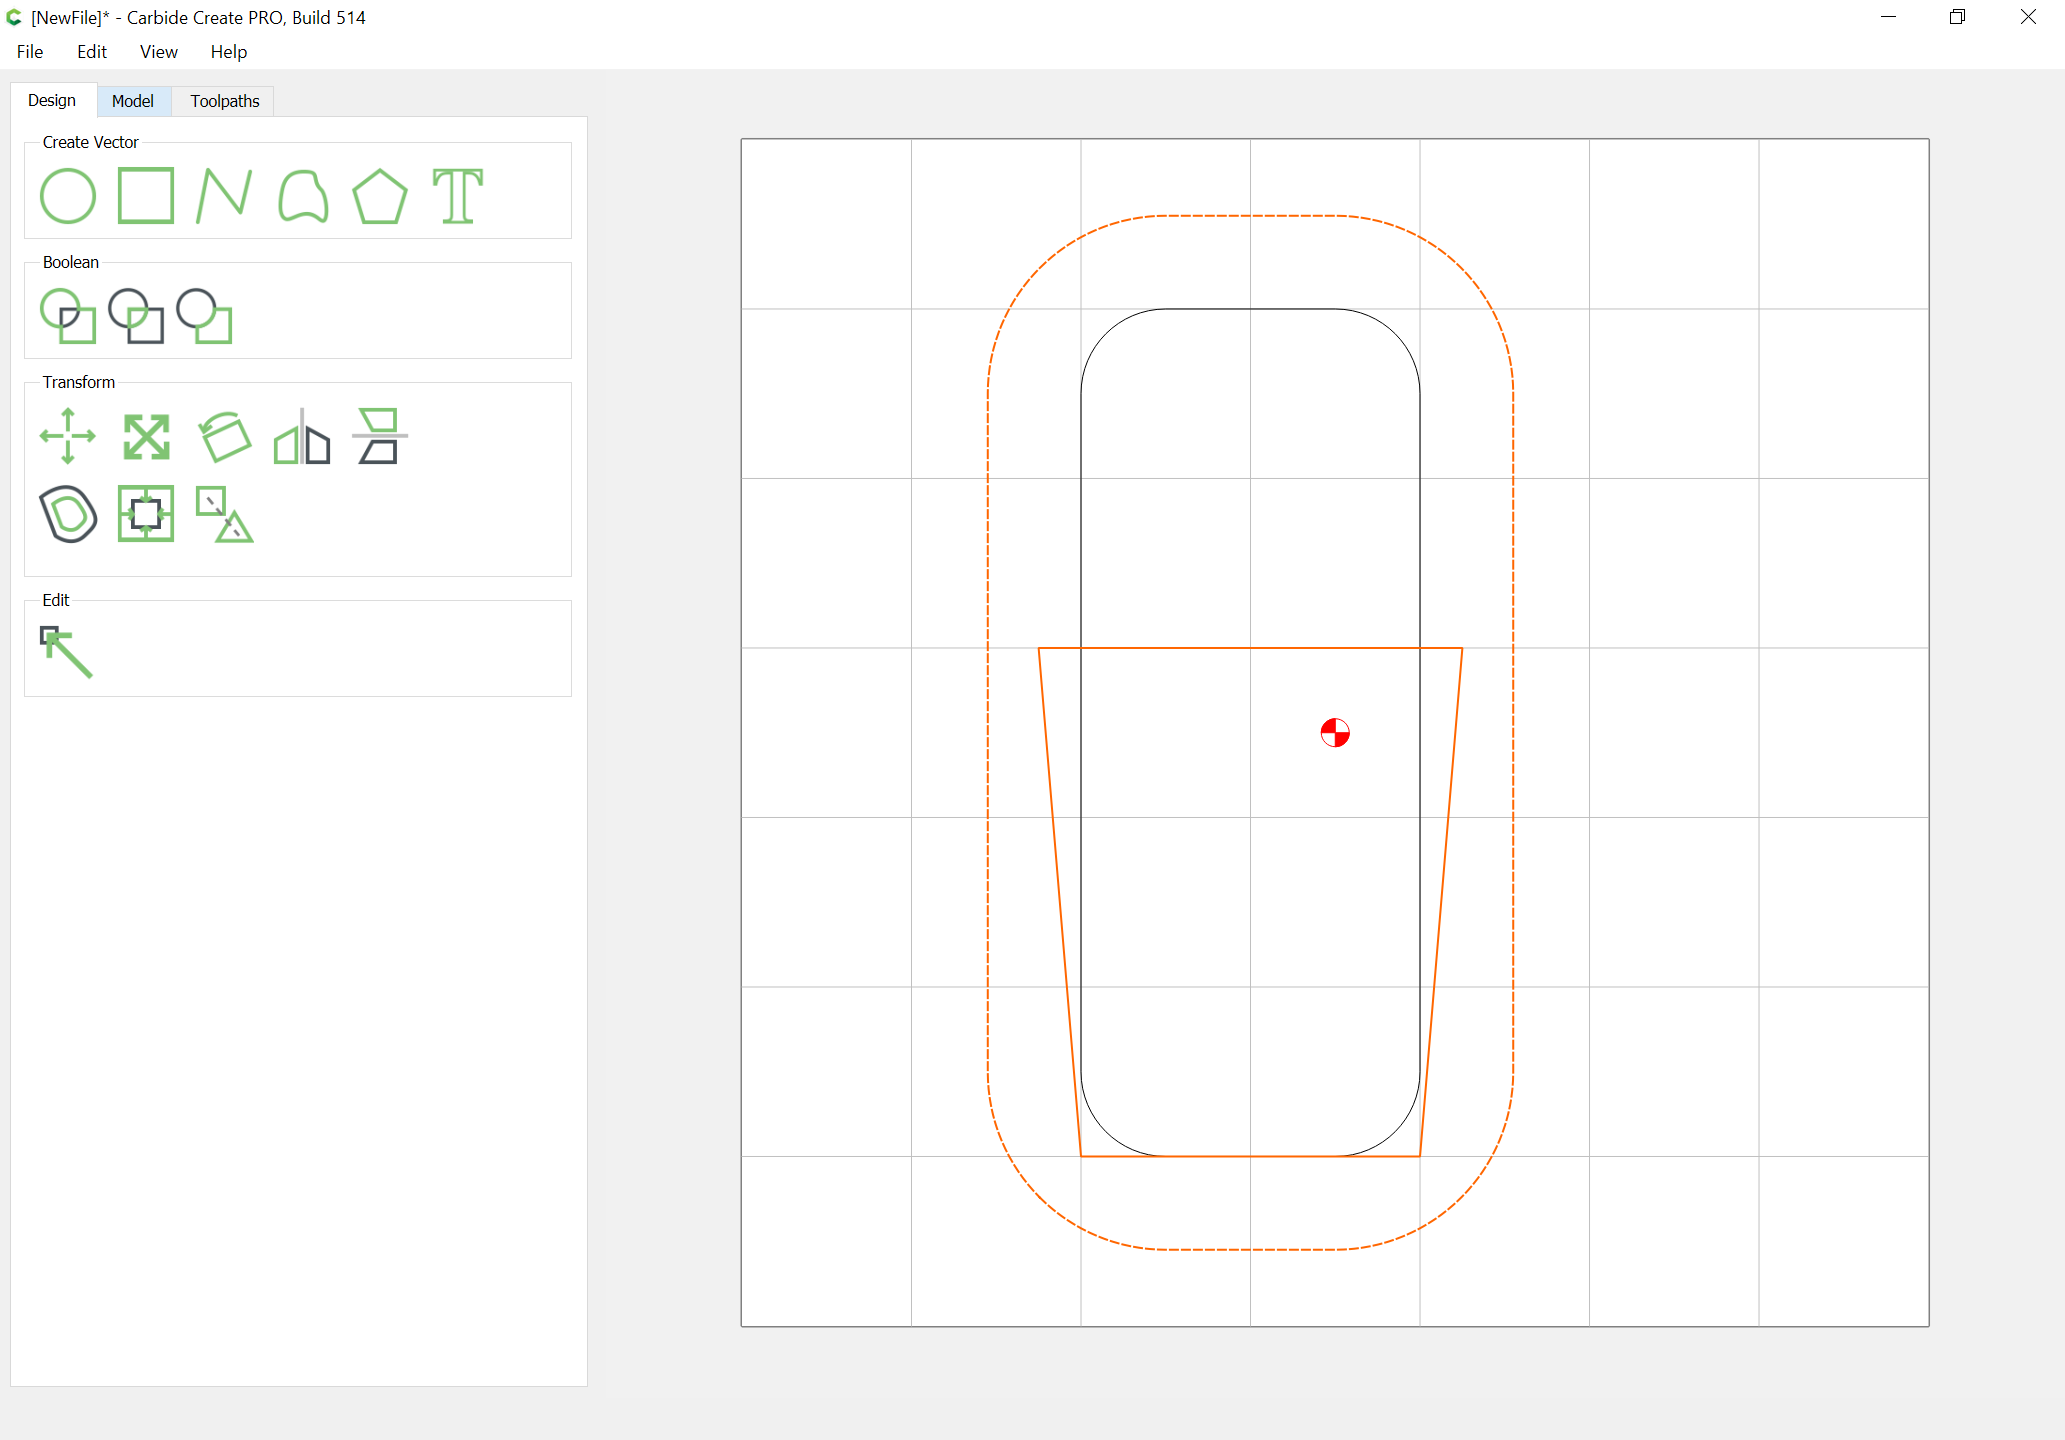
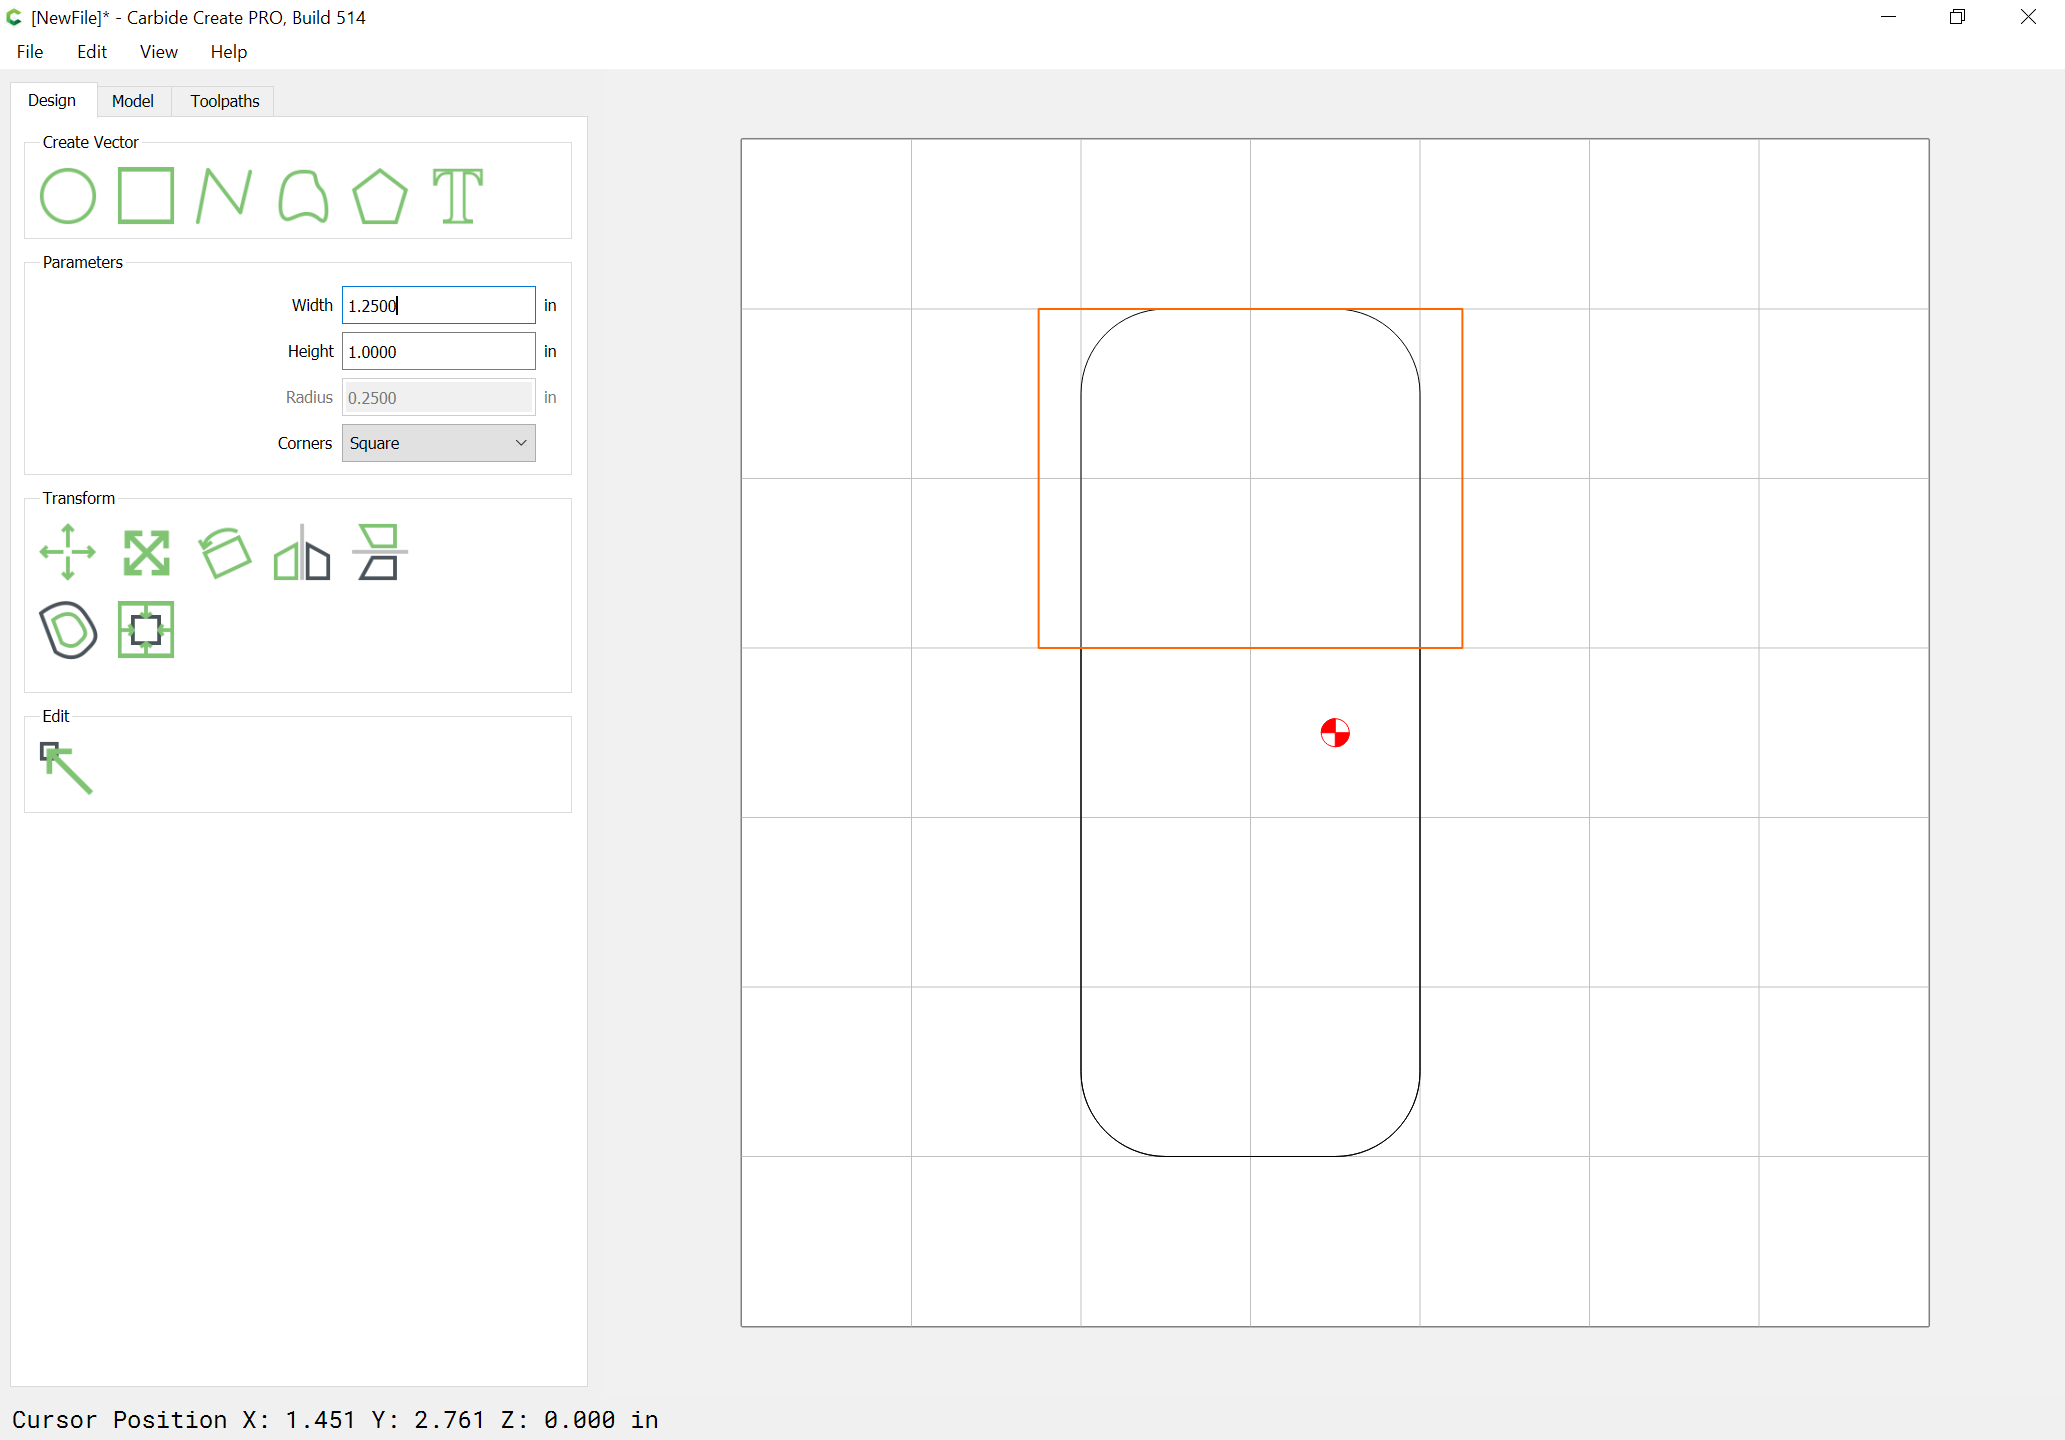
so I realize I did not explain super well, so I made an example carbide create file with to letter A’s. One (left one) I did a normal outside contour. On the right one I did the 0.156 outside offset and then made it a pocket cut like I suggested. Hopefully it’s more clear seeing it done than me trying to use words to describe it.
pocketvscontour.c2d (148.5 KB)
Sorry, why is the A on the right an entirely different font?
I don’t see the minor offset cut. And why is the pocket cut going around the small triangle?
And it looks like you combined the two As in the second one, why?

oh your computer does not have the same fonts
I’ll fix it hang on
does this one look better?
pocketvscontour.c2d (203.1 KB)
2 Likes
Arjan,
Thank you.
I’ll play around with the offset setting.
I have similar problems when cuttings puzzles. My solution: cut pockets that will leave end grain edges first, usually with an inside offset followed by a light finishing pass; than cut pockets along the grain (again, with a finishing pass). Also I usually use a downcut bit.
1 Like
This topic was automatically closed 30 days after the last reply. New replies are no longer allowed.