First, I’ve read the Shapeoko CNC A to Z (toolpaths, feeds & speeds, etc.) and I’m still not sure I understand. Also, I can’t figure out “finishing passes”, if that’s the answer.
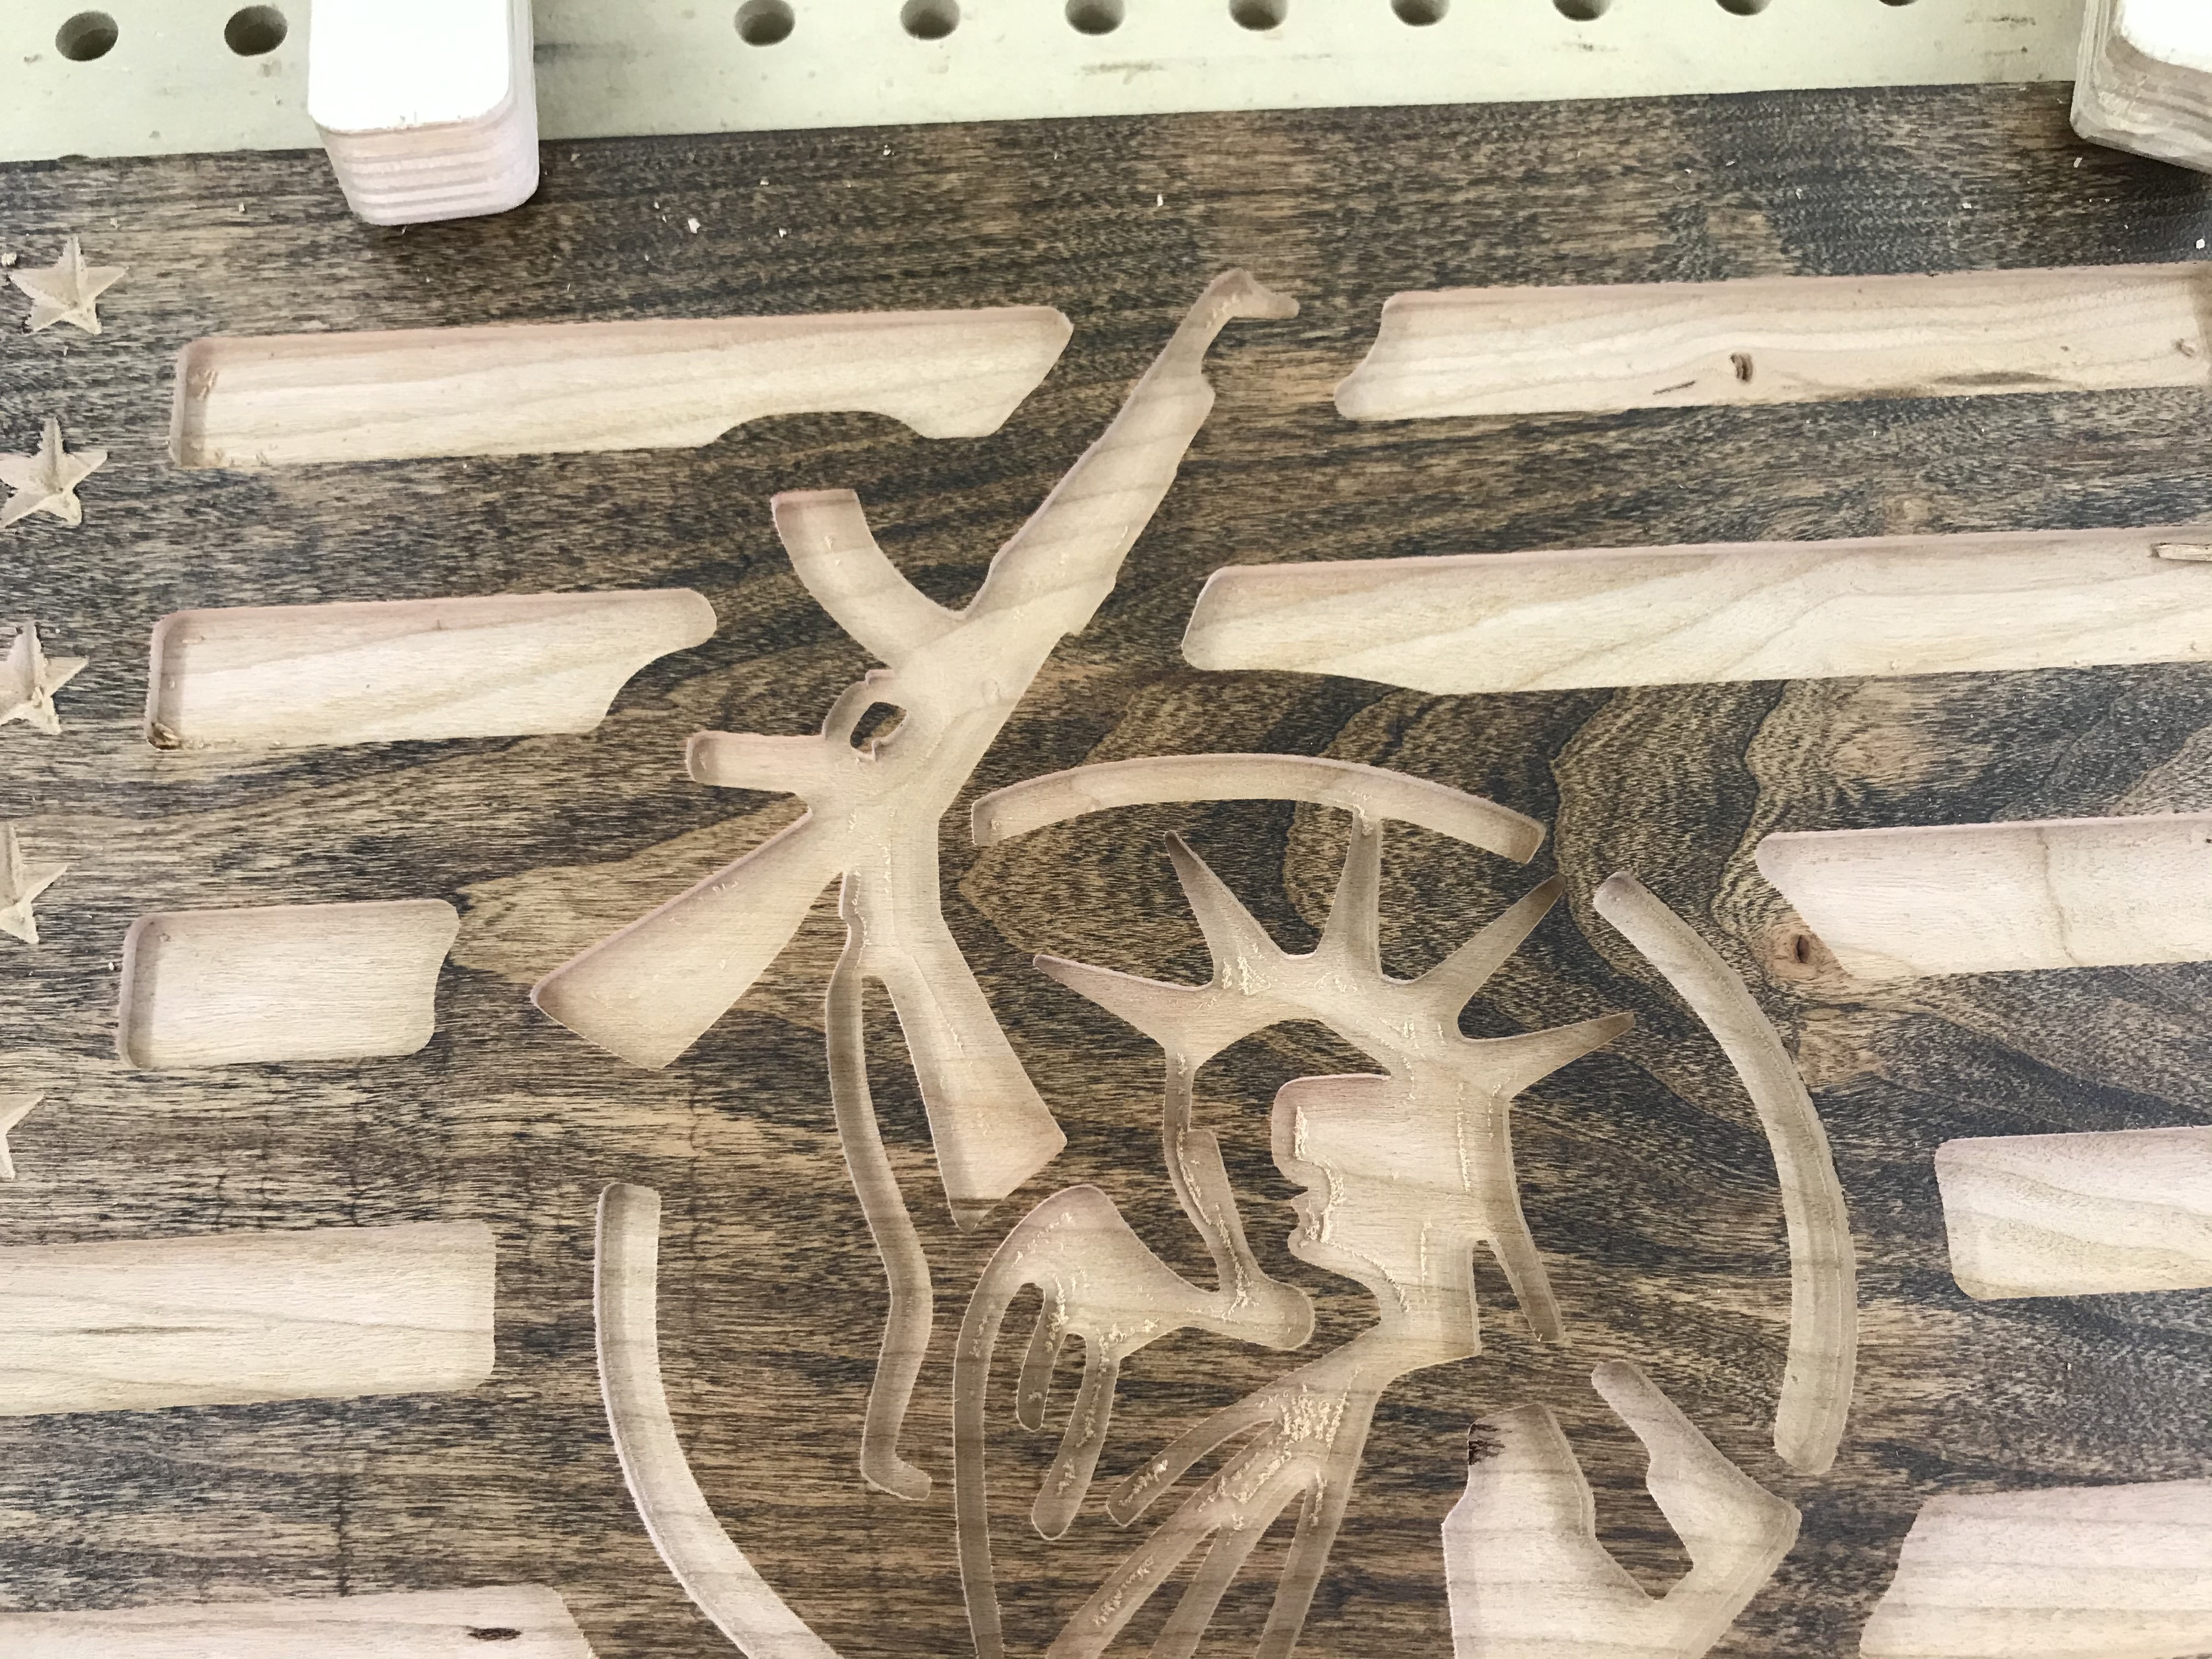
Question: How to I make these cuts better? I’m doing an insane amount of sanding and cutting with razor blades and it still doesn’t look good. I’d rather the CNC cut for an extra hour to clean things up than me spend two hours manually trying and failing.
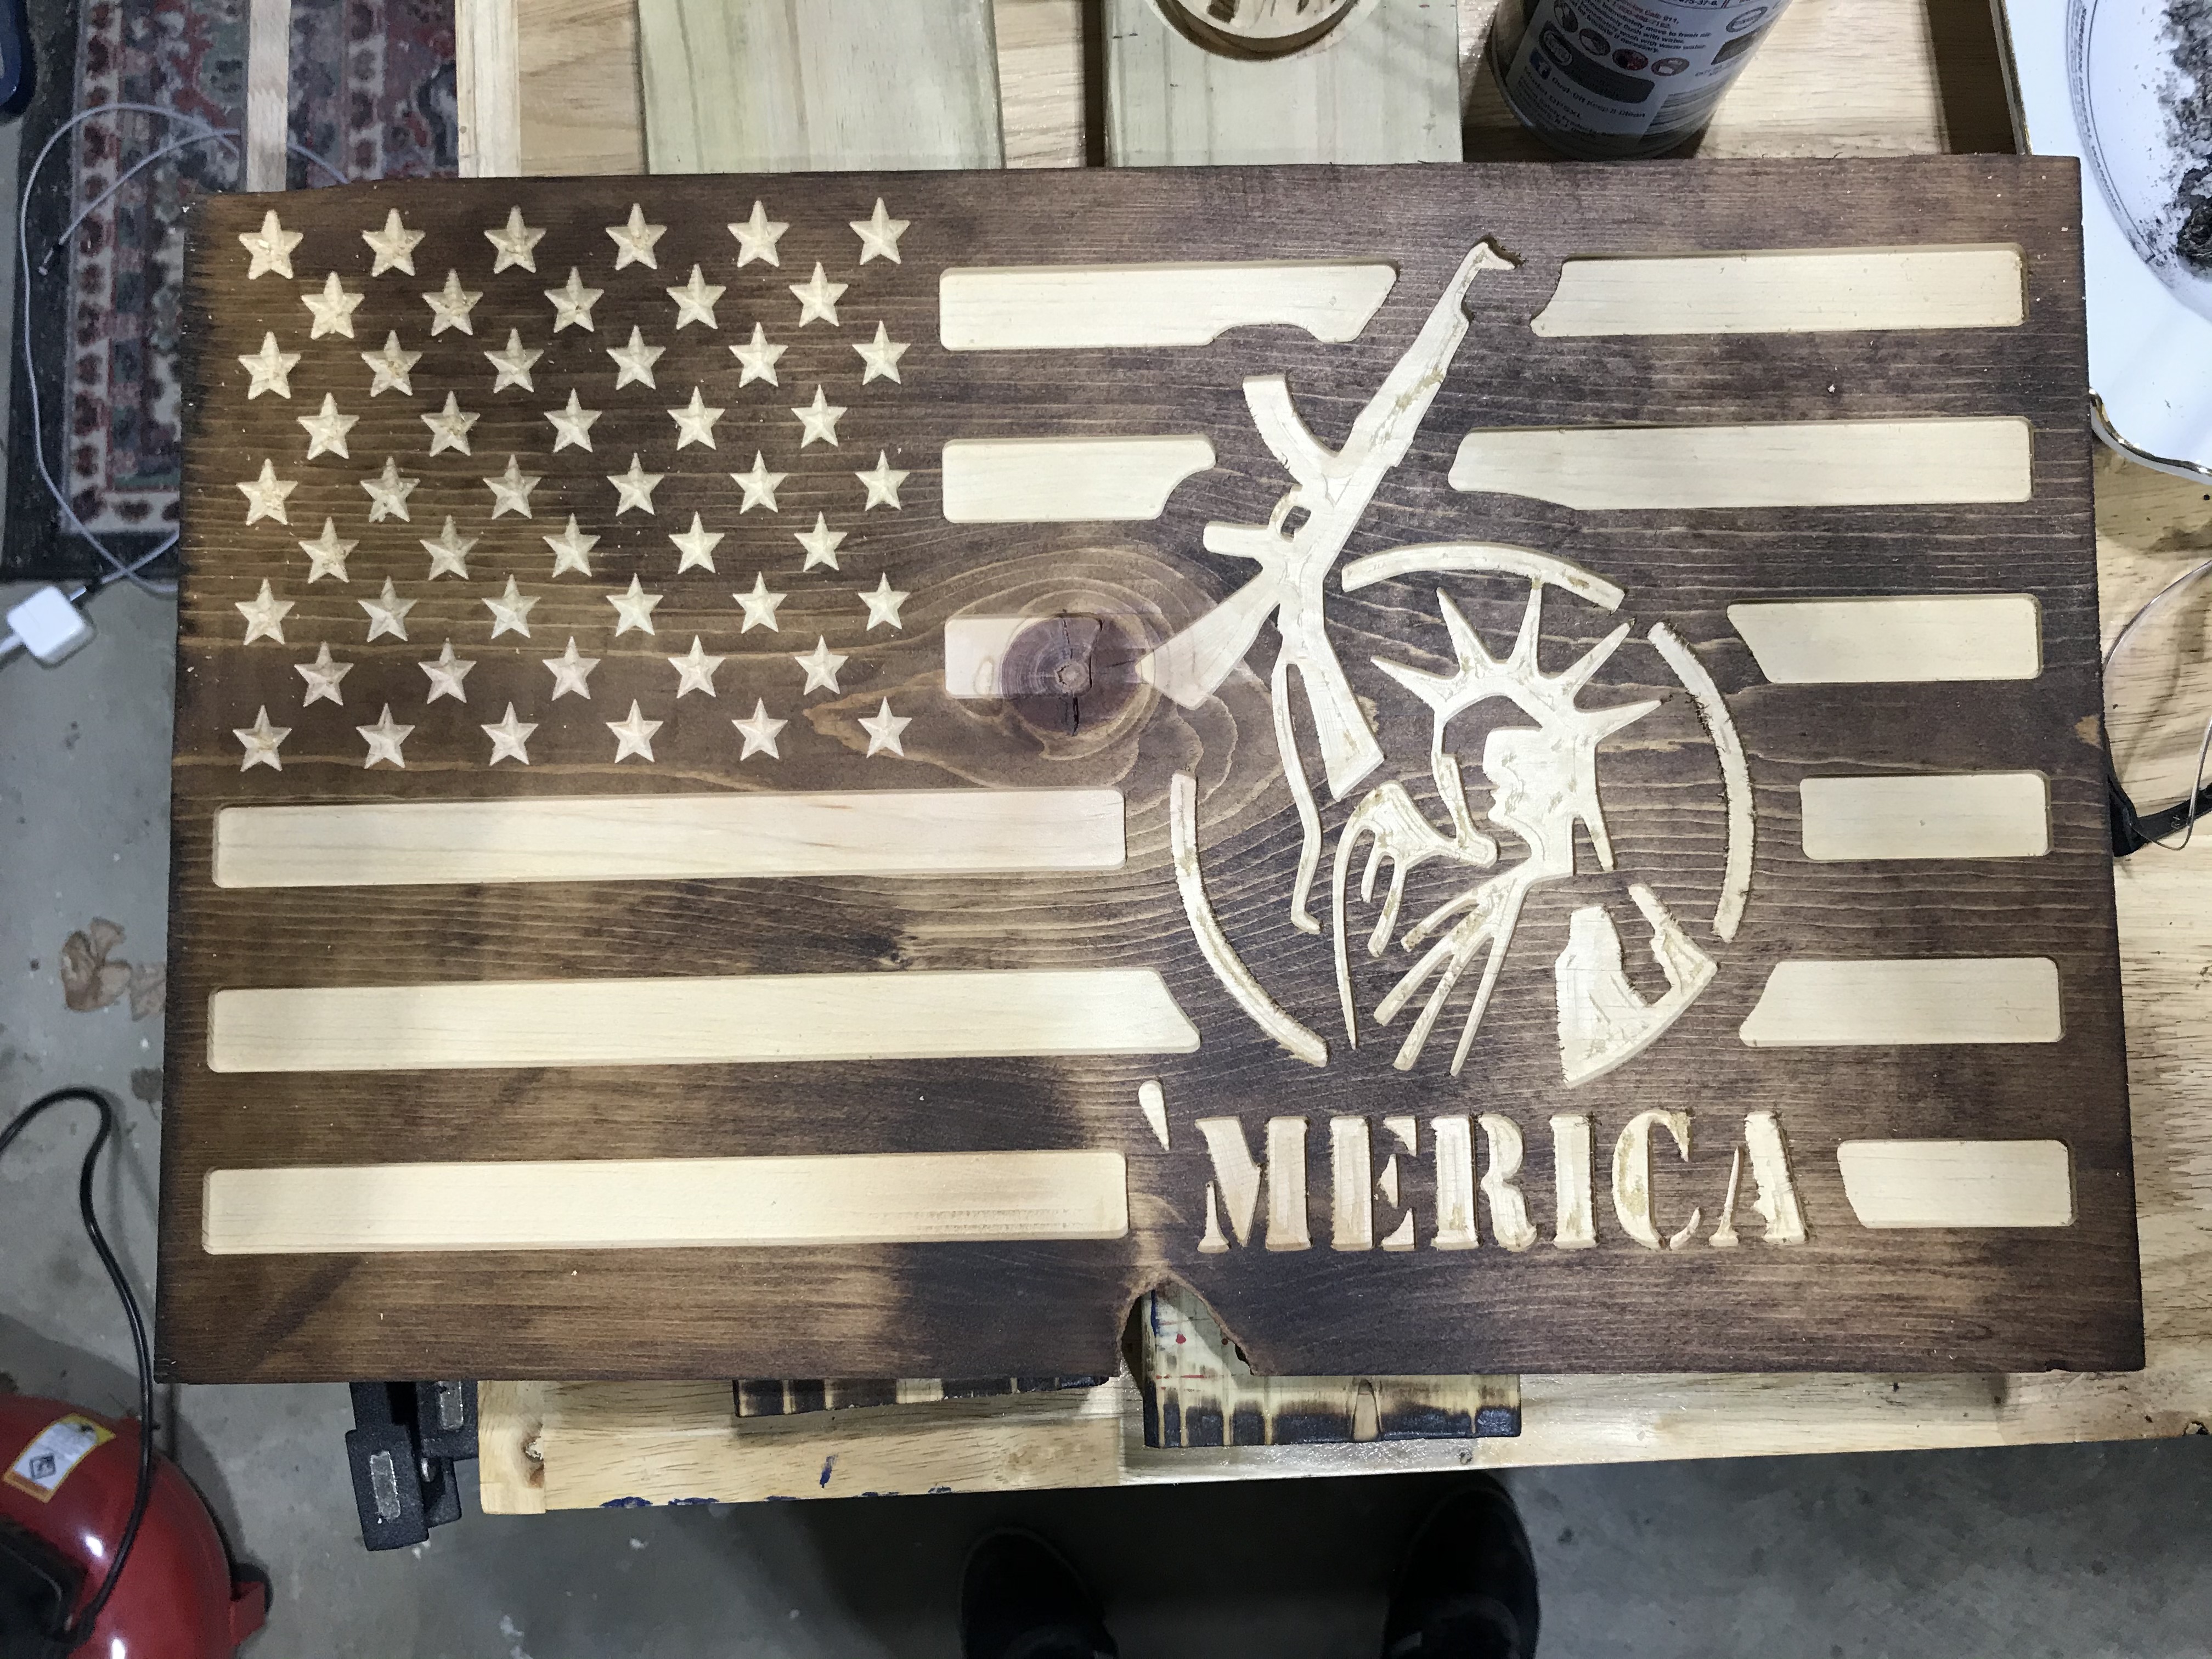
This was a good, solid, flat piece of wood (Poplar or Knotty Pine, don’t remember).
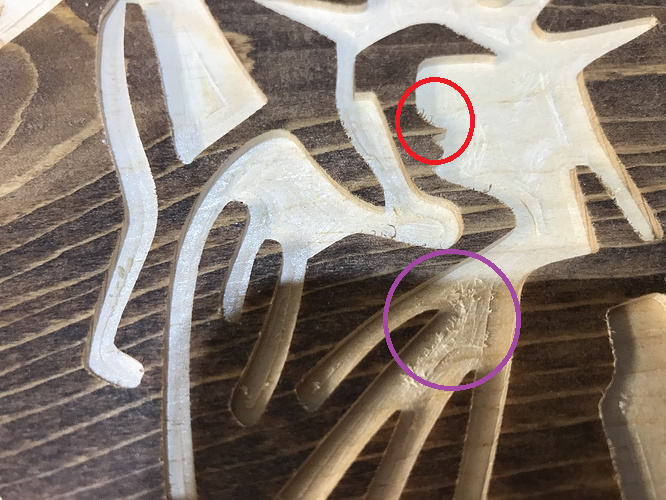
top edges tearout (red circle): this is usually addressed by using a downcut endmill, that will leave the top edges much cleaner (because the cutter “pushes the wood down” while cutting rather than pulling it up). You can either use the downcut endmill for the whole cut (simplest, but you may need to dial down your feedrate a bit as downcut have poor chip evacuation), or use it to run a separate “finishing pass”, which you would define as a contour cut that follows the edges to be cleaned-up.
pocket bottom tearout (purple circle):
usually, using an upcut endmill leaves a clean surface at the bottom, but it looks like you may be able to get better results by using a lower stepover in your pocketing operation. Also, do you have the stock Z-axis or a Z-plus or HDZ ? I’m asking since it seems like there is also a little bit of variation in depth between passes, and this may happen with a stock Z when the belt is not tight enough or plunge rate/depth per pass is a bit too high.
a common trick to artificially do a finish pass at the bottom of pockets, is to set your depth per pass such that the total depth is a just a little bit more than an integer number of passes. Say you want to cut 10mm deep. You could choose to cut 2mm per pass, which would be done in 5 passes. Instead, set your depth per pass to 1.95mm: this will force the toolpath to take a 6th pass, but this final pass will only have to shave off 0.25mm (10mm minus 5*1.95mm from previous passes). The benefit of that, is that this final pass at 0.25mm depth will put very very little force on the machine/cutter, produce no deflection, and should clean-up the bottom of your pockets.
Finally…well some woods tend to tearout more than others, and I dislike cutting pine for that reason.
this bottom tearout is either a Z issue or – what i’ve had-- the stock workholding being a bit loose. I have seen those when the wood was warping right under my eyes while I cut it.
But also when my V-wheels were not tight enough
To clean this one up what I would do is spray it with poly let it dry. This will protect the stain and stiffen up the fuzz. The with steel wool or the synthetic scrubby pads(my term) trace the edges. For the flat bottom rotory burrs…then sanding discs or wire brush attached to rotors tool…
On cutting it again…I’m still figuring that out. Looks like your using pine initial cut shallow as…like .01 and turn your spindle up to the point it almost wants to burn…after 1st pass slow spindle down to normal speed. Around that knot is tricky. Then once completed spray with a light coat of poly and run another pass just a hair deeper.
My process not perfect I’m sure many others have there own way.
The purple circle looks like cross grain tear out. A lot woods tear out when the cutting is cross grain but especially soft wood. They make some sanding swabs that look similar to Q-Tips. You could also use some sharp carving tools to cleanup.
@Julien Thanks! This isn’t the first time you’ve helped me tremendously! (And probably not the last)
Excellent info, and I actually understand it this time! Ok, to answer your questions:
Ok, I just ordered some down cut bits. A 1/32 and a 1/16 (Amana Tool). I have a Yonico 1/8 downcut that I purchased when I got my Shapeoko but haven’t used it and didn’t really understand what it’s for. I also have the #251 (1/4 downcut) so I think I’m good now?
I have the Z-Plus. For that portion of the flag, it was a #112 (1/16) with a .031 stepover, .050 depth per pass, 50 feedrate, 25 plunge rate, max depth .1000. Is that correct? I also just tightened the belt a bit.
Ok, finally understand finishing passes, thank you!! I will give that a shot.
Could incorrect tram cause this? Some areas are perfect, some are not, but they are in various parts of the cuts. That aren’t all on one side or area, they are random, so I thought it couldn’t be tram related? I’ll try the finishing passes, and use downcut bits, and try again.
About that 50ipm feedrate: depends what RPM you were using on the router, let me assume 18k, that’s a 0.0014" chipload, I would not go faster at 0.05" per pass on a tiny 1/16" endmill like that. If you used a lower RPM, then I would dial down the feedrate a notch. In soft wood like that it’s fine, and as long as it works for you that’s what counts.
It’s a good tool to have anyway for tramming, I bought a similar one and while I don’t use it often, it comes in handy.
Probably not.
I would look at @fenrus’s advice to double check workholding and whether you have any wiggle in your stock before the cut (just before the cut, if you push onto the surface with your finger in various places, do you see it going ever so slightly up and down with pressure, or not at all ?)
since you have the Z-plus (sturdy), the remaining suspect could be V-wheels: double-check that all four V-wheels of the X/Z carriage are nice and tight against the rail and none of them can spin freely
Got it - will do. I’m off today, so I’ll heading out to do some testing now.
@fenrus (and others) Can you recommend some workholding? I have some double sided tape, which works great for small pieces but it’s not all that great on large pieces. I also have the small wood ones from the T-track kit. I don’t have anything else.
Oh, I only got three of the small bolts and three of the large bolts with my T-Track kit. If someone at C3D can tell me what size they are I’ll go to the hardware store and buy them. Unless you want to send them to me, of course.
Oh, to clarify, I was missing those bolts, I got all the others.
Yep, picture showed 4 of each when I bought it. I originally though I must have miscounted but my work area was clean and they never appeared when I was done. They were in bags, too, so it must have been off from where they were sourced from and no one noticed.
opinions on work holding differ a lot. I tend to use double sided tape, and especially with downcut endmilils, that’s good enough most of the time. I pick it for the convenience (no tabs, no CA glue that glues my fingers together, and my endmill won’t risk eating the holder)
I also have learned that sometimes wood has a mind of its own and some piece will just warp no matter what you do. Things I’ve learned help a bit: if the “cup” of the grain is such that it points up at the edges, it’s more likely to come lose than if the cup has the grain lines point down.
Wow - talk about night and day using that 1/8 down cut! On the sections I used that bit there were zero issues, and very little “leavings” for me to remove. I also did the finishing pass (.001 I believe) and it worked great! Can’t wait to try the 1/16 and 1/32 down cut bits I bought!

 Ok, to answer your questions: