I want to cut a blind hole, say 65mm dia. Then cut the same shape that will fit in the hole with a small clearance. Its for kiddies to match shapes and letters. I drew the hole as a pocket . Not sure how to get the insert right. I am using pine and plywood.
You can select the shape you used for the pocket and use the Offset feature in CC to automatically create a shape that is a tiny bit smaller. The offset value should be the clearance you want. And then select that new offset shape and create an outside contour toolpath to cut that inside piece.
You may need a few tries to determine the correct offset value, depending on the type of fit you want
I would cut the hole using a 102# End mill (1/8) and use Offset Direction Outside/Right using Contour.
Add Tabs and set depth to cut all the way through the material.
Then use the same 102# End mill using contour and cut the letters out using Offset Direction Inside/Left. That should make the letters 1/8 inch smaller than the hole. Again add tabs and set depth of cut to cut all the way through the material.
You can pocket cut the shape and then cut the insert piece with a no-offset contour based on the same lines. The “slop” in the fit of the piece will be the radius of the bit that you choose to cut the insert piece.
Here’s an example. Cut pocket hole with Contour 1. Then Disable 1 and Enable 2. Resave GCode and cut letters.
Letters.c2d (8.5 KB)
Circle.nc (113.0 KB)
Thanks for all the ideas people. I found I still had to do a bit of trial and error but getting the job done. 
I did this project another way which might interest you. I used the 6mm craft plywood from menards for this same project a few years ago. I used a 1/16in endmill to cut the shapes out of the plywood with a contour pass. I then glued the plywood to a piece of pine. I glued some small finger holds onto the cutout shapes after painting them. Since they were cut from the piece glued to the pine they fit great with just enough room for my son to match them up.
Thanks Mike your idea is worth trying. Peter NZ
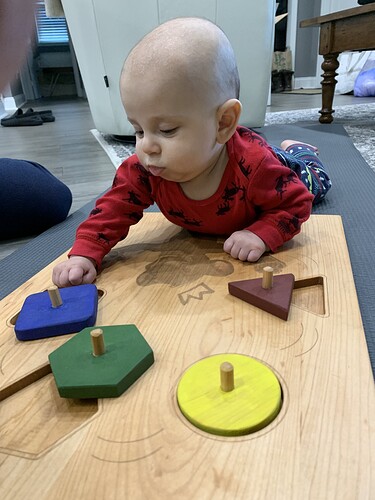
Took me a while, but I obtained a photo of my grandson playing with my version of the toy.
Here are the C2Ds:
Simba Gift 2.c2d (102.8 KB)
Simba Gift 2 Pieces.c2d (285.5 KB)
The holes were simple pocket toolpaths. The pieces are outside contours off of a small inside offset to bring the slop into play.
Since there is no Cut and Paste for objects in CM (We NEED that function!), I re-saved the pocket C2D under the “Pieces” name and then edited that one to move the objects around and lay out the cuts. I also added holes to insert small dowels as handles.
I finished it with Milk Paint in primary colors. The juggling simba photograph, outlines of the pockets, and motion lines were burned in using a laser with LightBurn software. I can go over the techniques for getting everything to line up … but that’s another post.
- Gary
This topic was automatically closed 30 days after the last reply. New replies are no longer allowed.
