When you have a piece that needs to be exactly straight, how are you lining up your pieces on the spoilboard to be square to the router? It feels like there’s a couple ways to make reference lines such as cutting a line into the spoilboard across the entire X or Y axis or even using a marker (to draw instead of cut), but how do YOU specifically do it?
In my case, I often have to cut a channel into something and want it to go exactly on the centerline. So it’s not that “straight” or the proper depth that’s the issue, but having it aligned.
I have a SO3 XXL. I also have a supplemental spoilboard that has 2" spacing for 1/4-20 Tee nuts.
I created a long L bracket that bolts down onto my spoilboard and when placing it on I loosely tighten the bolts and use the router bit in jog mode to come up and touch the edge of the bracket and then job in the X direction to the other end. I then adjust the bracket and job back and forth until the router bit is touching the L bracket and tighten the bracket down. I then give it one more check in case during tightening the bracket moved.
I usually leave the bracket on the spoilboard. It helps me get the material square to the router bit. Sometimes I use the painters tape and super glue to secure a project. If I am going to be cutting over the edge of the material I get it squared up with the bracket and glued down and then I remove the L bracket.
Here is the L bracket c2d file and cam clamps I use. You can simply modify the file for the spacing of your particular machine.
Simply remove/move the hold down holes as required for your machine. Dont forget to change your origin and the thickness of your material. This particular project was made with cherry but I have used oak and poplar in the past. MDF would work but it tends to be easier to get out of alignment due to its soft nature.
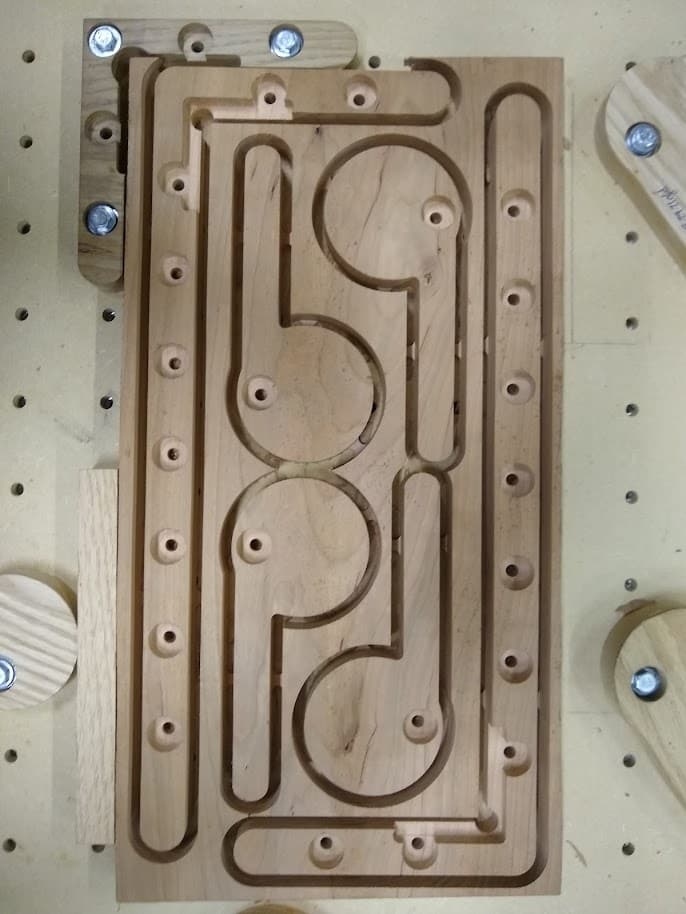
Here is a picture of the project when being cut on the Shapeoko.
You could use something like this. My spoilboard is full of threaded inserts, so I can position the square start point just about anywhere on my machine.
There is a minor restriction with using my L bracket. The cutout for the BitZero can only be used with material that is .5" or taller. If you are using thin material the BitZero cannot sit low enough to go over the edge of your material.
In the picture you can see my earlier shorter L brackets. That works well but when using the cam clamps the material can twist when tightening the clamps. with the longer L bracket you can tighten the cam clamps up in the X direction first and then tighten up the clamps in the Y direction and the project does not get skewed on the spoilboard. The shorter L bracket worked great but would allow the work to skew if you were not careful.
Thanks, I’ll keep that in mind! I’m getting a BitZero next week
What your file has helped me realize is that perhaps I should be making a fixture of some sort, using the L bracket. In the specific example I’m thinking, there is no 90 degree for me to reference first (guitar necks mostly). But, if I have the L bracket and a known square piece, then I can put lines on that square piece and align my center line.