I just bought the Shapeko Pro which has external dimensions of: 50" (X), 42" (Y), 19" (Z)
Question 1: Based on everyones experience…How many extra inches would you make the supporting work table (ie. 2 inches - so 52” x and 44” y)
Question 2: There are people showing foldable supporting tables for their xcarve (photo and link below), was wondering whether I could do this with the shapeko pro, or is there a concern that storing it vertically would damage the machine? https://youtu.be/tHxdxXSdV7M
Folks have done the vertical storage thing — not an issue, and to some degree my help prevent the V wheels from going flat.
I have my XL on a table which is pretty much just the machine size — in particular the machine is tight against the front edge so that it’s possible to use a fixture to cut joints into boards:
I think Brandon bought the Pro so he won’t have the fun of V Wheels, rails all the way
It depends on how you plan to use the table, like Will says flush to the front can be useful, especially for vertical workpiece jigs. If you have access all around the machine then you can get away with about the same size, if you plan to build an enclosure over the top then you should leave quite a bit more space horizontally and vertically.
I have about 3" around the sides and back on my table, which I can walk around. The room at the back is wasted (unless you want to tile along long workpieces in which case being able to stick through the back is a must) but the room at the sides has been useful.
This is a great question as I find myself in the same boat; I’m in the middle of clearing out space in the shop for the Pro I ordered a couple weeks ago, and the next thing to do before it gets here is build a workbench for it.
What I think I’m going to be doing, since in my experience there is never enough horizontal surfaces in the shop, is to make a workbench with a full 48x96 sheet top and split the area underneath with storage for flat stock on one side and room for a vacuum on the other.
I was going to do a 48x60 bench, but somehow after seeing how much space I actually have in the garage I talked myself into going big.
Excited for everyone to start getting thier Pros and posting pics! Can’t wait to see them and what people do with them.
Somewhere sensible to keep your laptop / PC near enough the machine to be useful but not with the keyboard in chip-flinging range is worth thinking about too, I put a sliding shelf on the front and it was a terrible idea, I keep filling my macbook up with sawdust whenever I machine in the front right corner…
if it;s just a bench with access around it, you only need a couple of inches.
But eventually you’re going to build an enclosure of sorts (to keep the dust, if not the sound, in) and then you need more. Also if the space is in a corner near a wall, keep at least like 4 inches from the (side) wall in case you ever need to reach (if nothing else, to clean)… but if it’s a table with space around you can be skimpier.
I have the XXL and made my bench an even 4’ square. I find the extra space around the unit highly convenient.
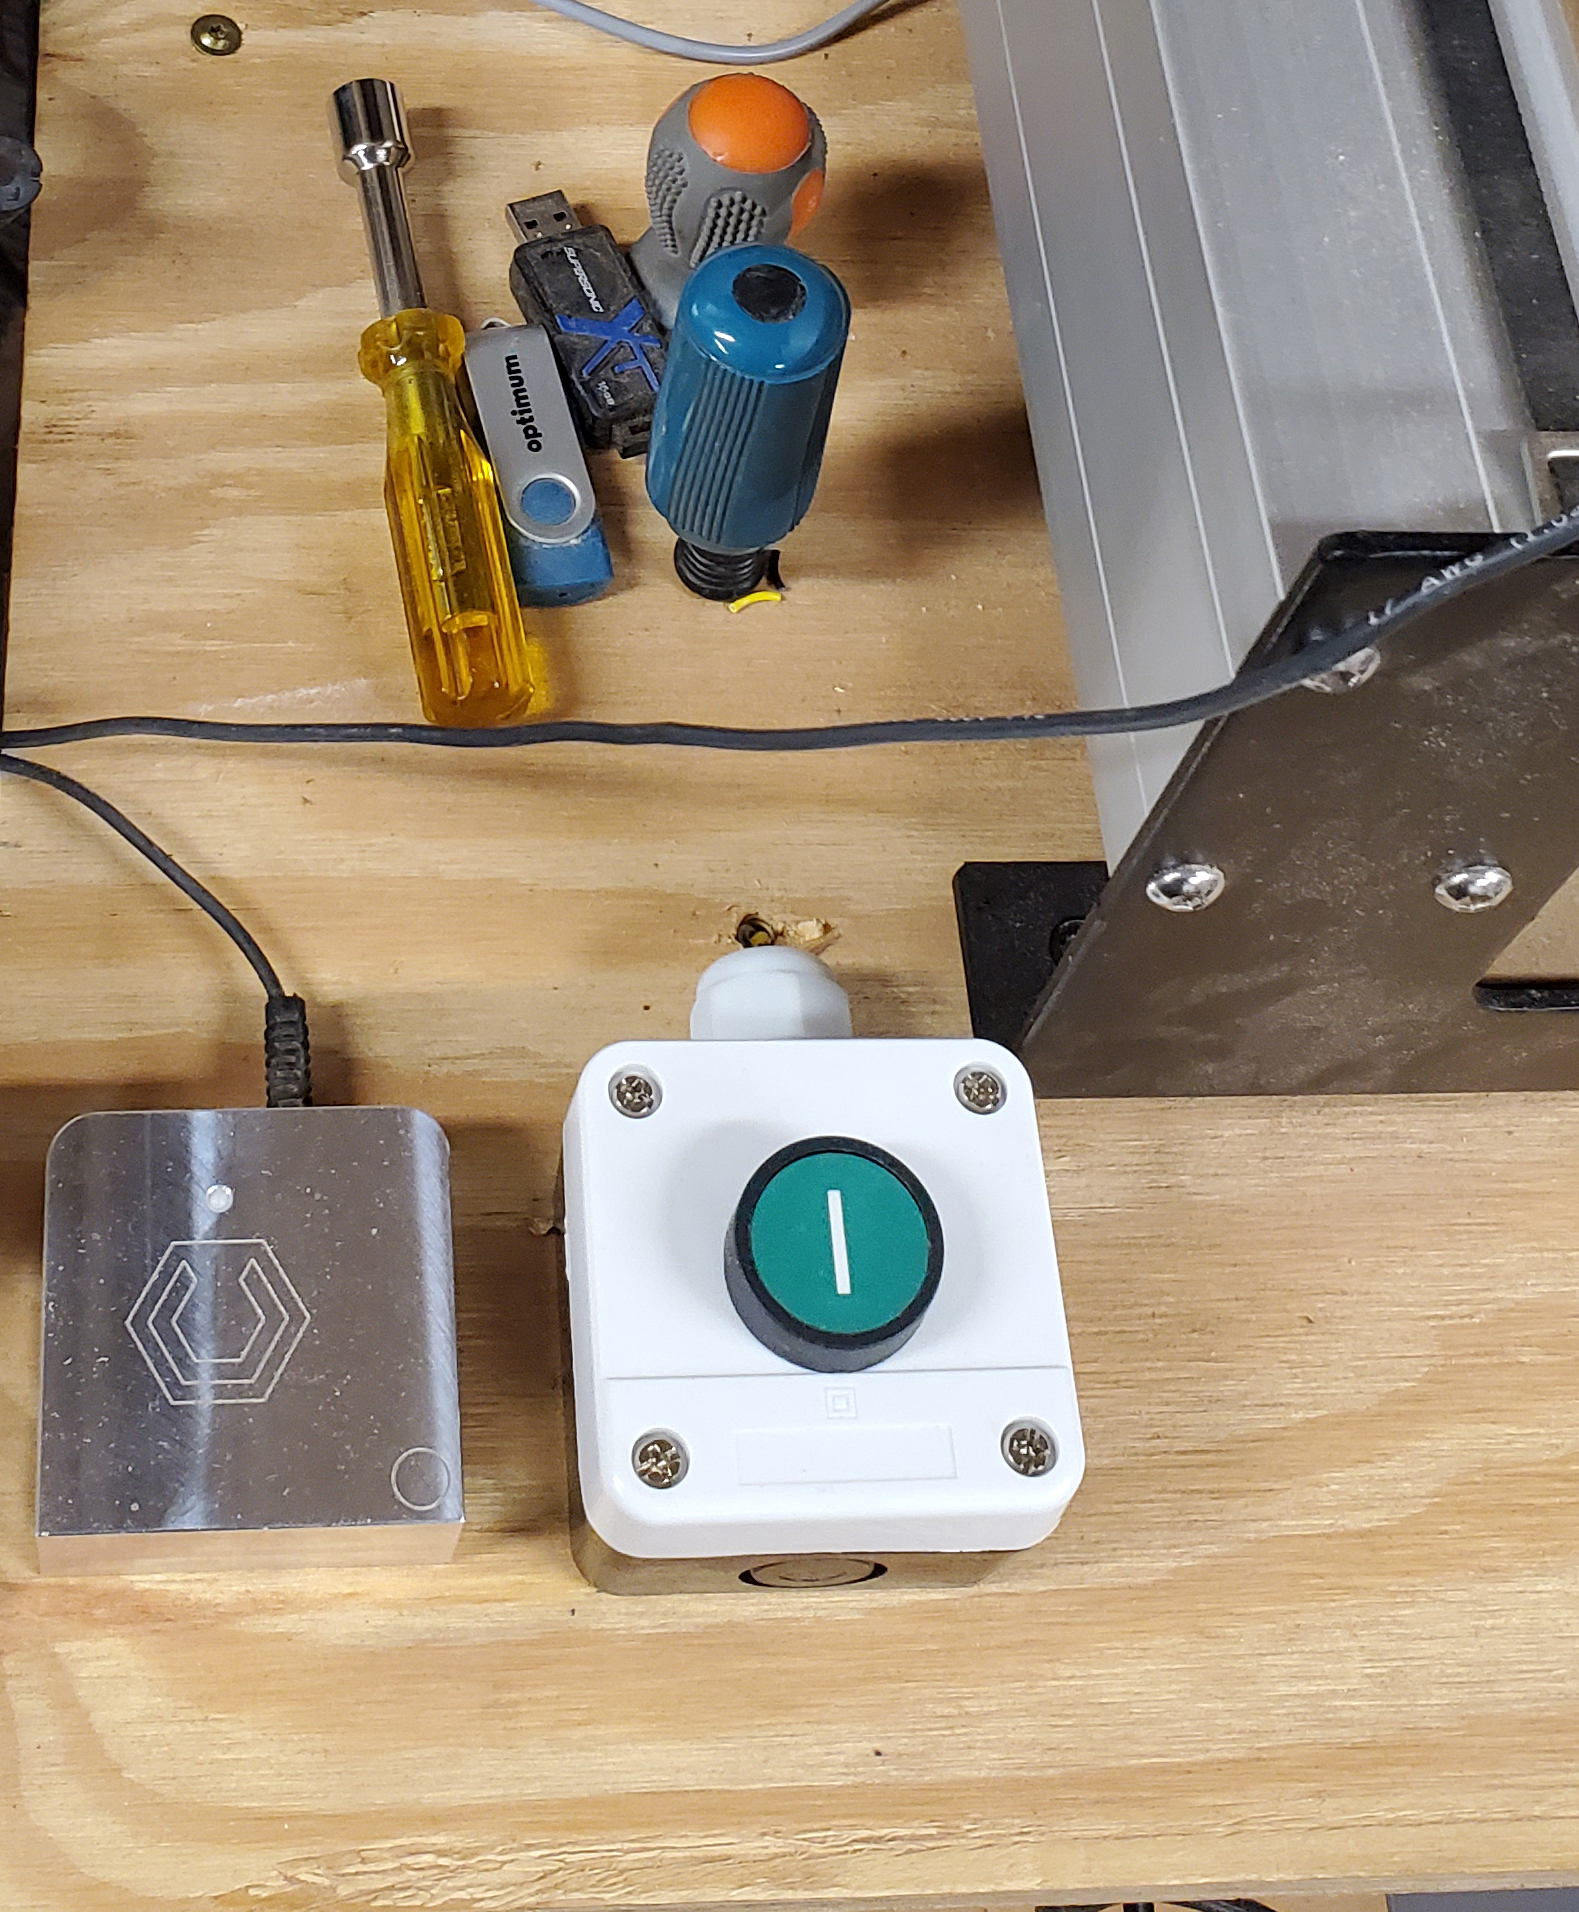
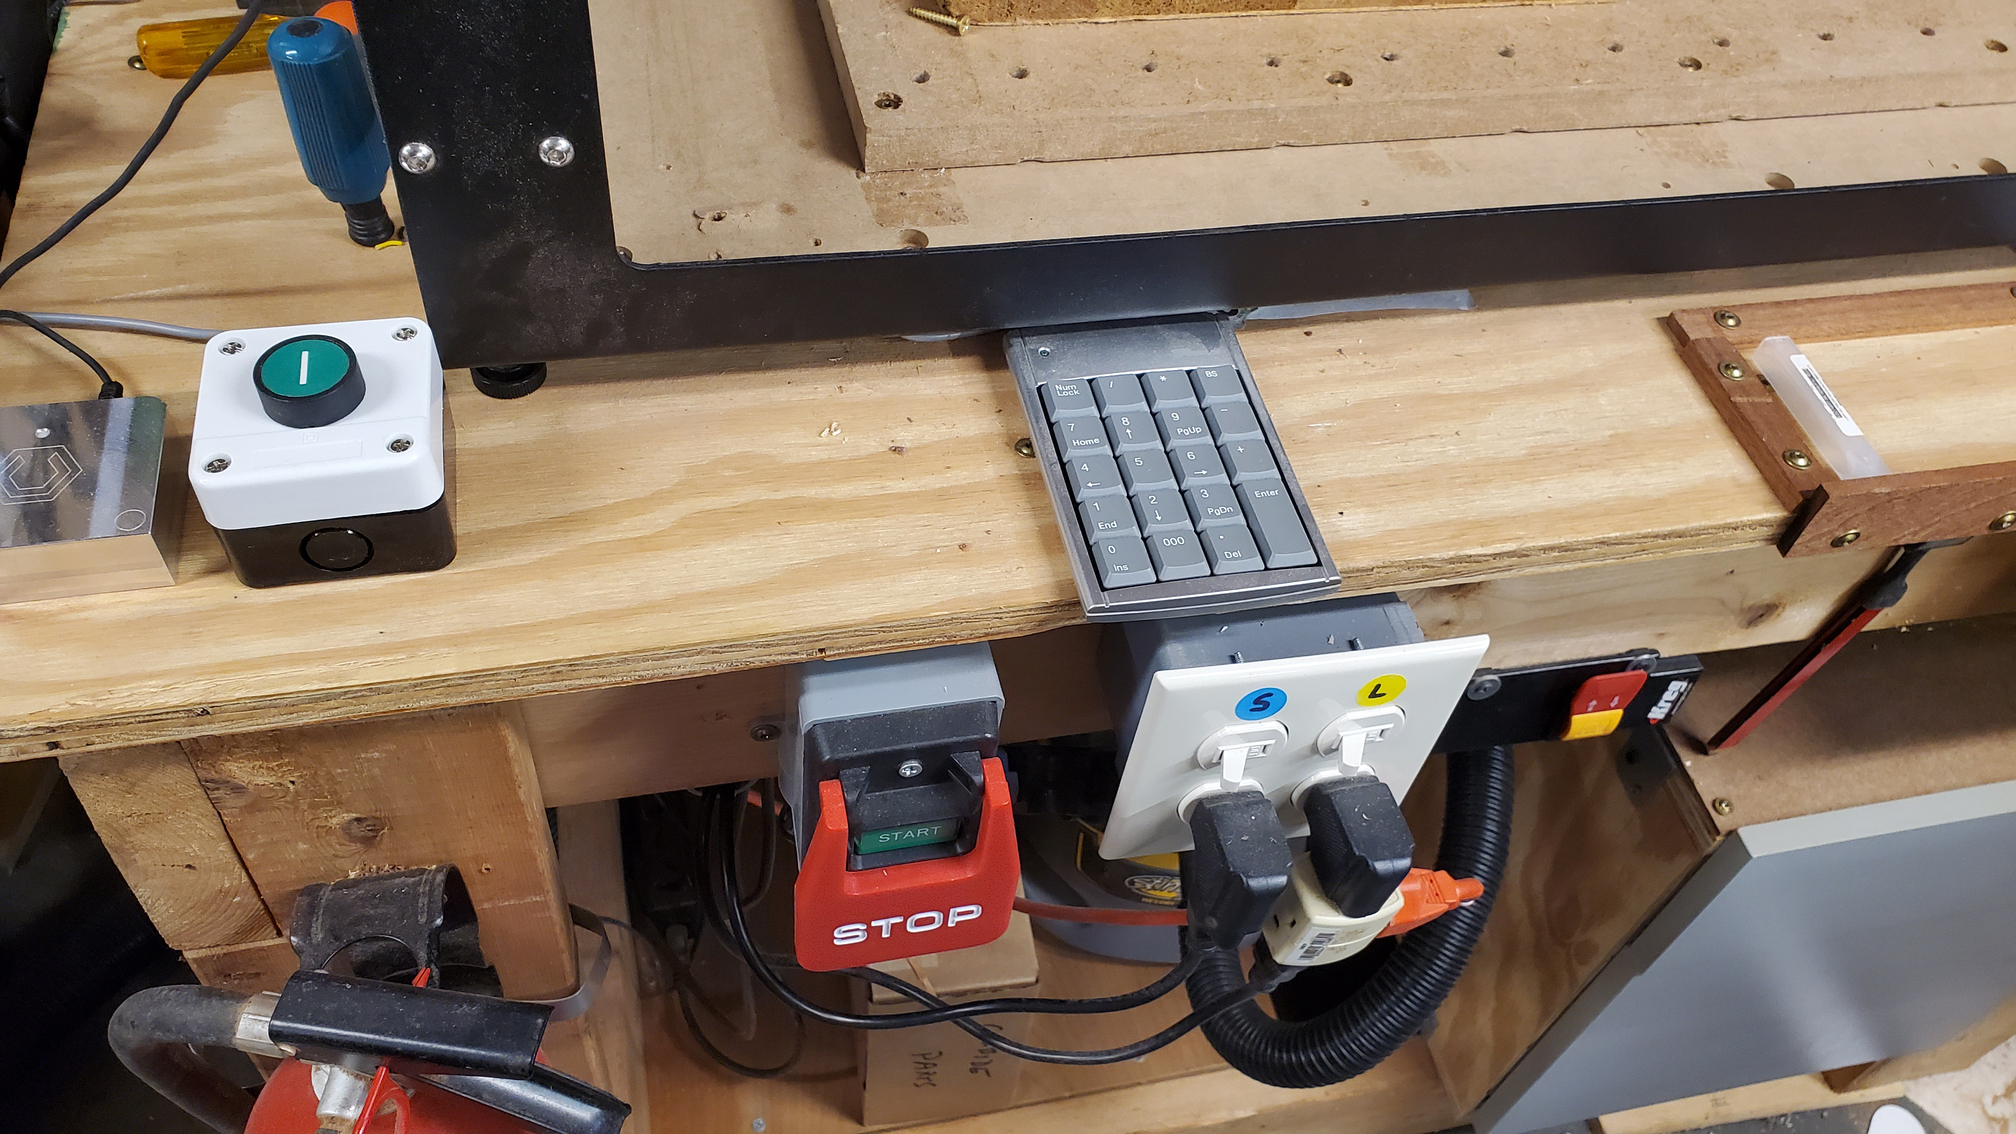
The bench was constructed of 2x6 dimensional lumber and plywood, which lets me customize to make things that are always used - always available. For instance, I drilled holes through the top to store screwdrivers and wrenches that you need for clamps and such - each in their dedicated holes. I also recessed magnets into the face of the unit onto which I stuck a pencil (with a metal clip) and a tape. I drilled holes in the top just under the power box, to allow wires to drop below the table and out of the way, for a cleaner look (Note below, the permanently mounted pause switch below has its wires coming up out of the table just before entering the enclosure - the phillips and flat head screwdriver are “stuck” into the top).
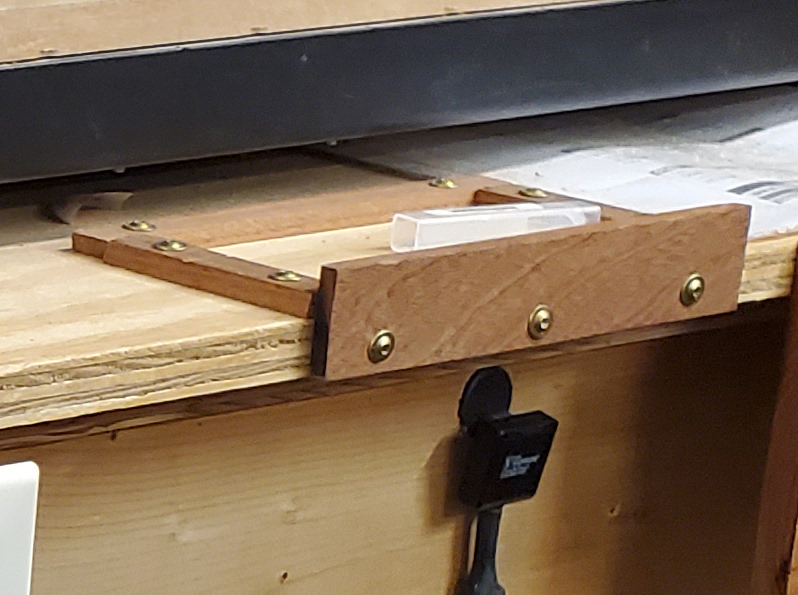
Using the space in front of the Shapeoko, where the head parks for bit changes, I mounted a low profile square of boundaries, which prevents bits from rolling off onto the floor, even if they drop out of the collet. If I want to do end grain routing, the area is low enough that I can slide the unit forward…but I have not had the need for that yet, and It’s really good to have the space in front of the unit!
Lastly, to the front of the bench, I mounted the panic switch, pause switch, a spindle toggle, and separate light switches for the Shapeoko itself, my Laser power box (and laser warning sign - the switch turns both on and off together), lights, and vacuums and a fire extinguisher. Below, I mounted the double drawer from an old desk (grey fronts in the photo below), to hold bits, the laser, and clamps and such.