How to approach very large pockets

I have a large piece (22in x 35in) and I need a massive pocket. Currently the time is around 312 minutes with the #251 1/4in End Mill. If I switch to the McFly and ramp in, it comes down to 198 min, but the inside corners are way too rounded. Not even sure if the McFly will work for what I want.

I have looked at the Rest Machining, but not sure I really understand it as it doesn’t seem to simulate what I need.

What is the correct way to do very large pockets and still get the crisp corners inside.

If the is a link to a video or some topic I missed, please feel free to point me there.

Thanks in advance.

For actually crisp corners I would recommend an Advanced V carving — but REST machining should work — post your file?

Thanks for any help. I am sure I am overthinking this, but I cannot seem to figure out the right approach. 5+ hours seems to be a bit much for something that seems this simple.

Large Pocket.c2d (1.1 MB)

First, an Advanced V carving:

which previews well with sharp corners:

You’re removing a lot of material — it will help to optimize feeds and speeds, see:

REST machining (if you have Pro) would work as:

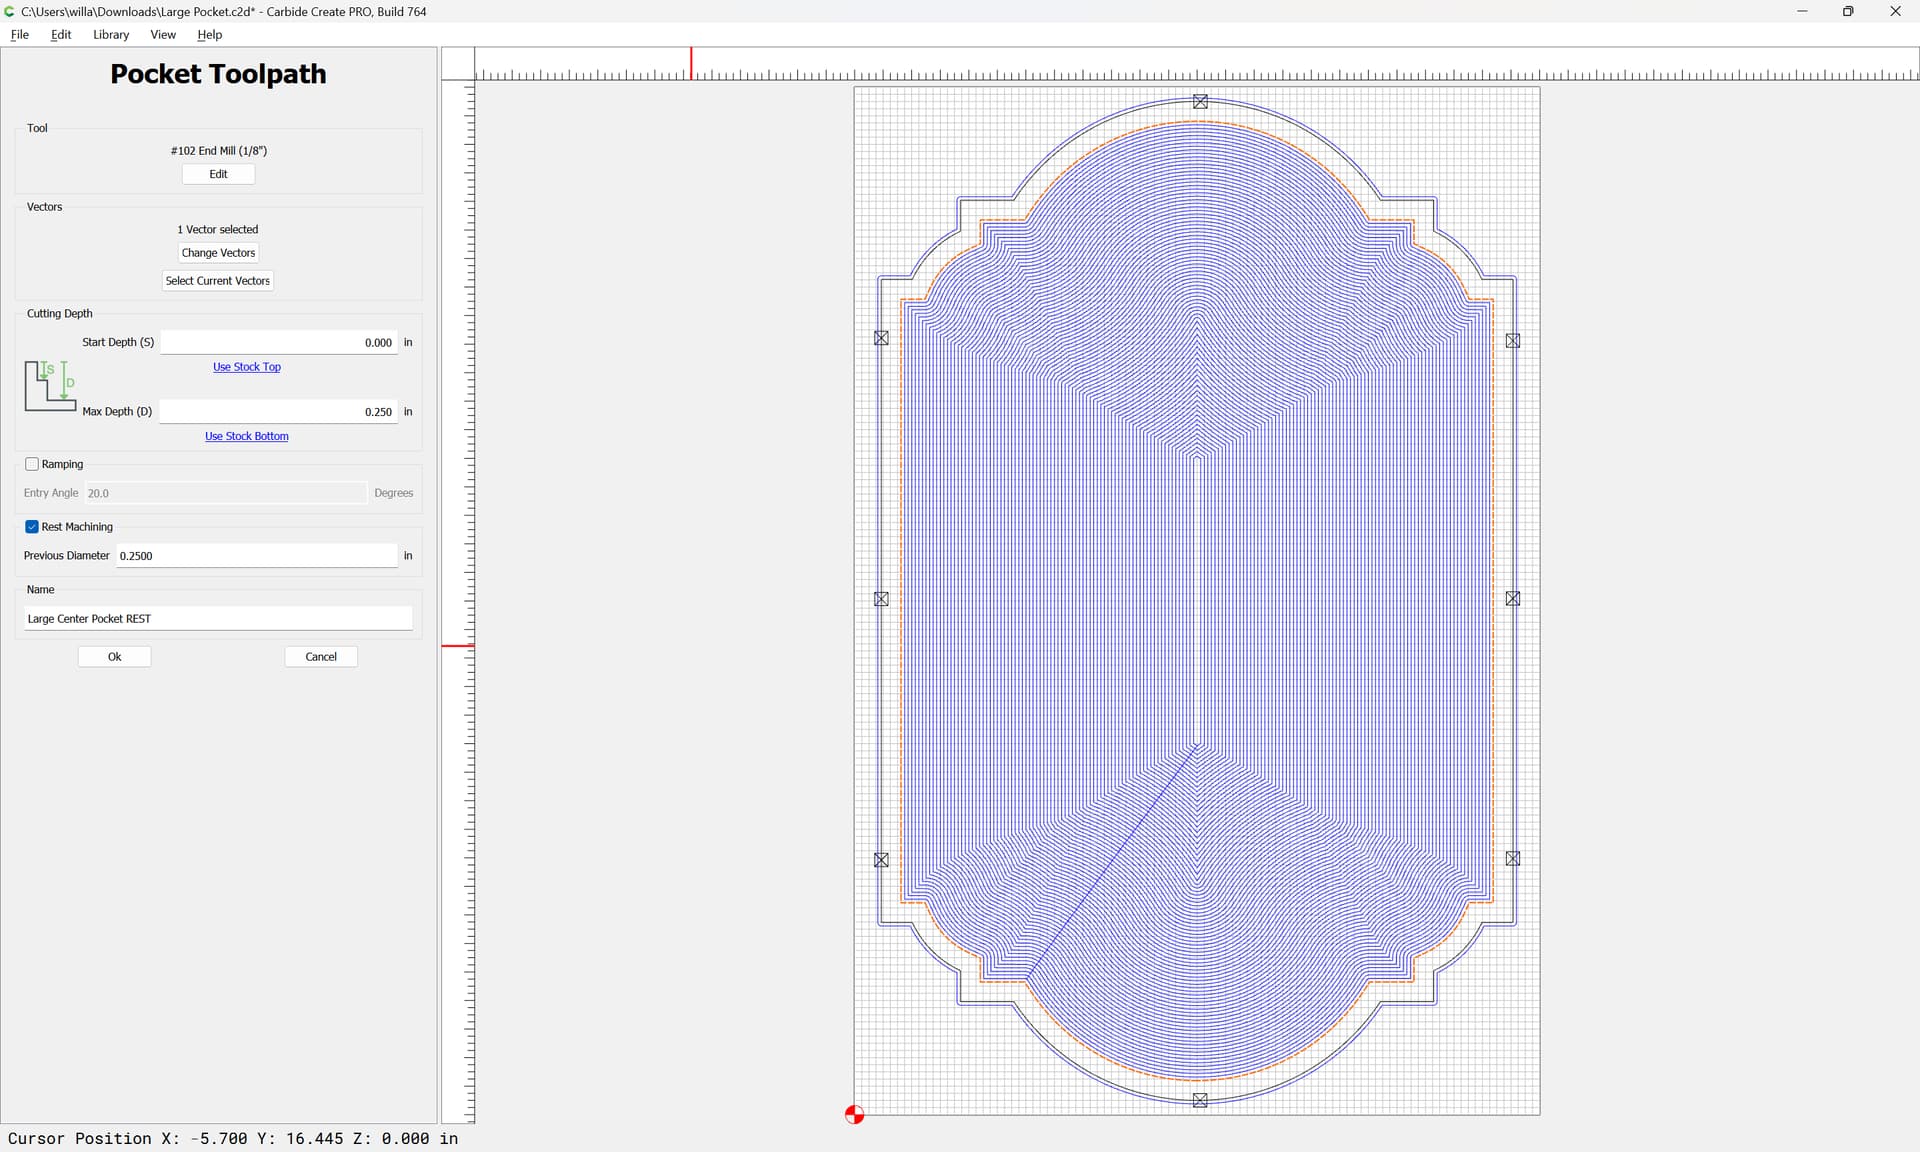
and you can see the material which it would remove:

Note that rather than cutting a slot the same width as the diameter of the endmill:

(esp. one which is greater in depth than the length of the cutting flutes on the tool in question)

one should add geometry:
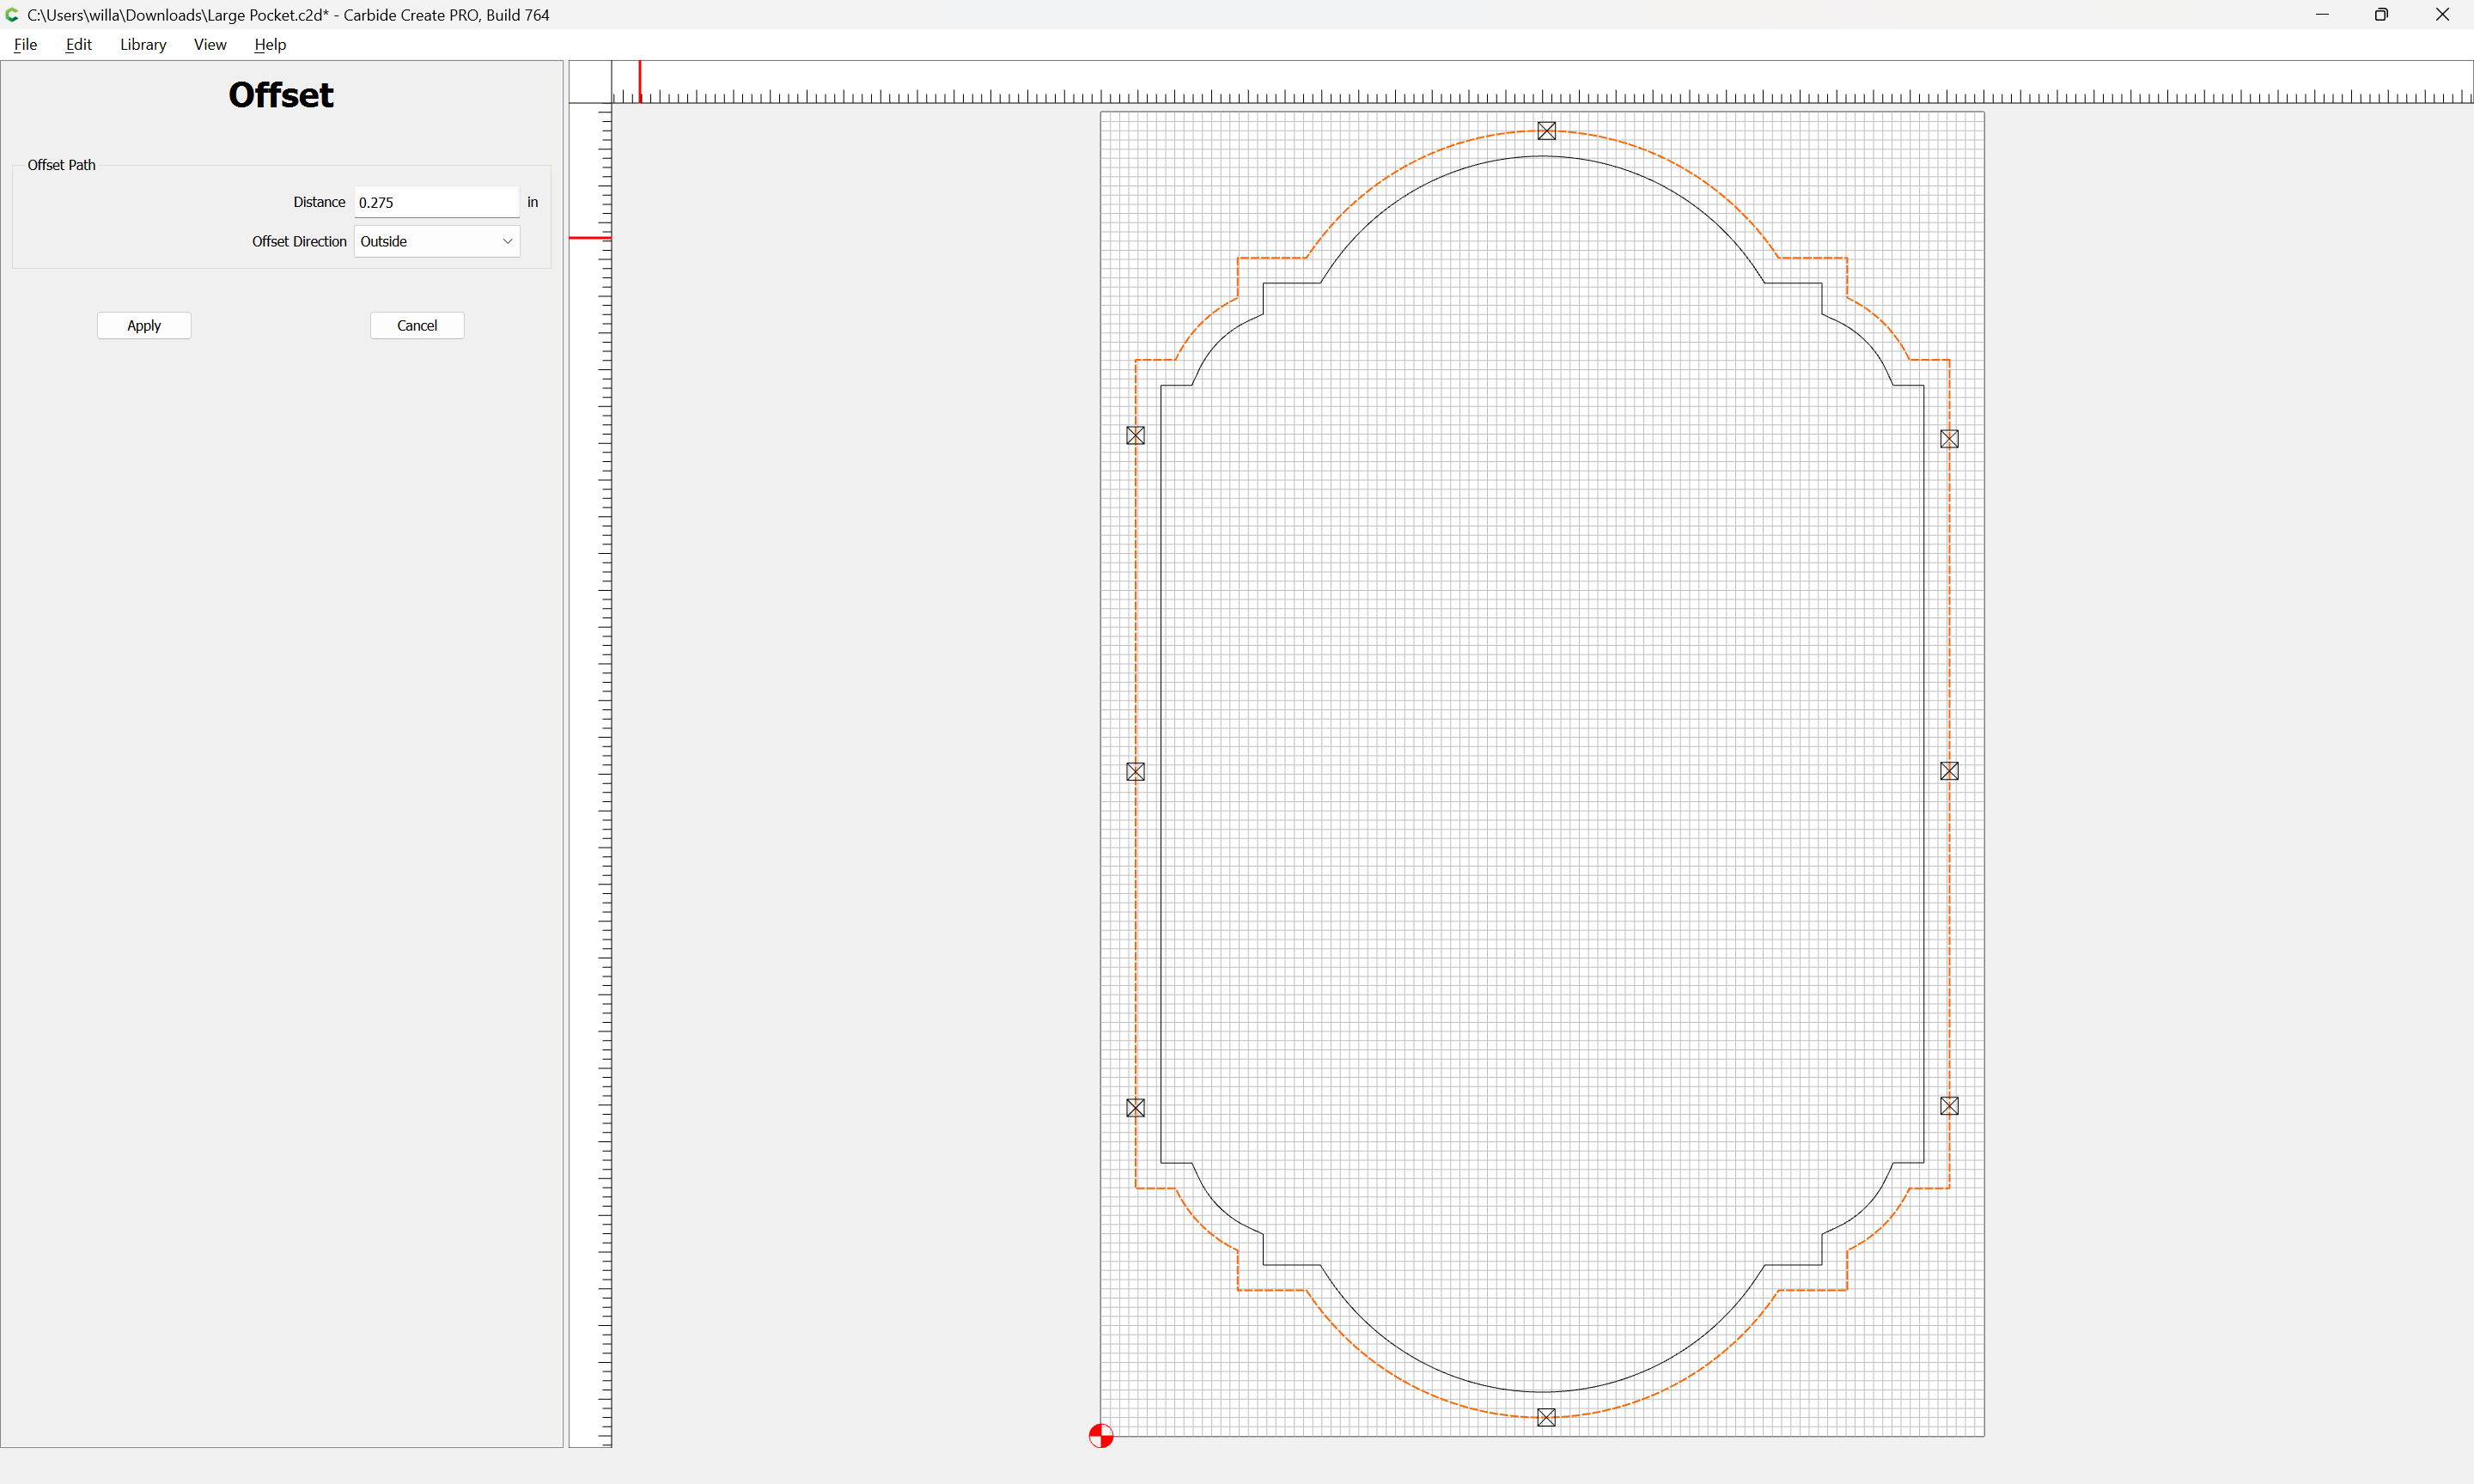
Apply

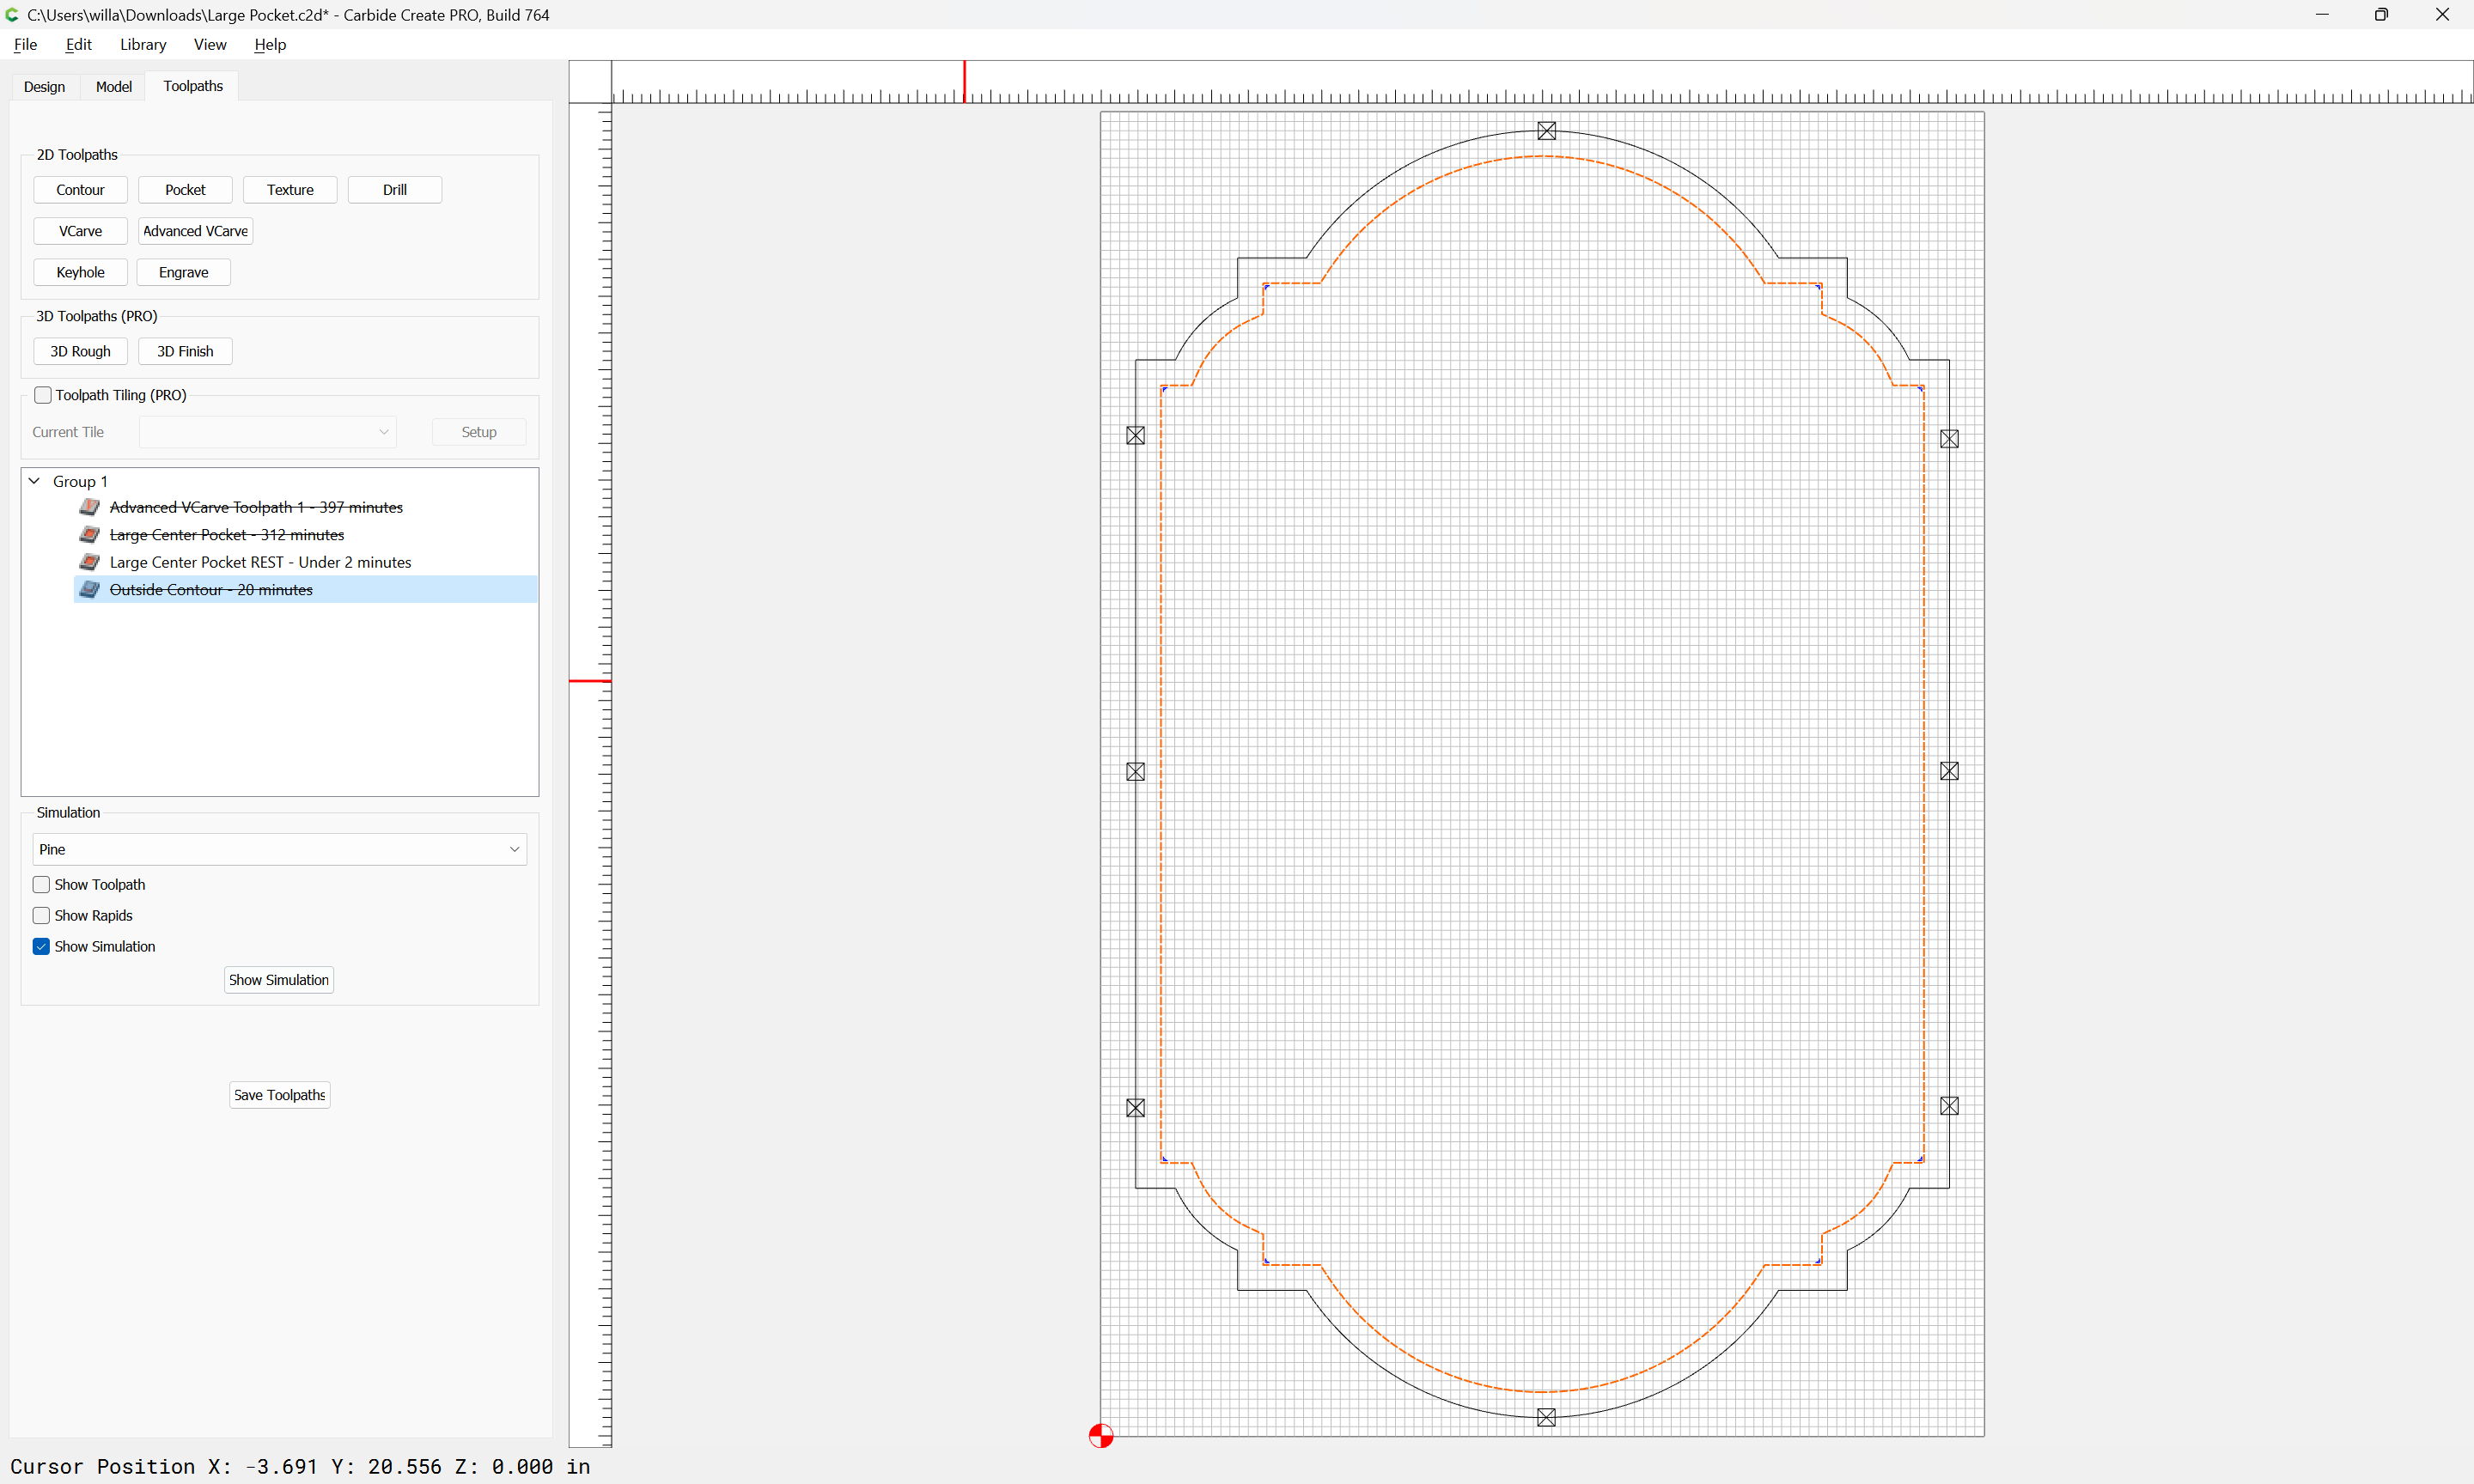
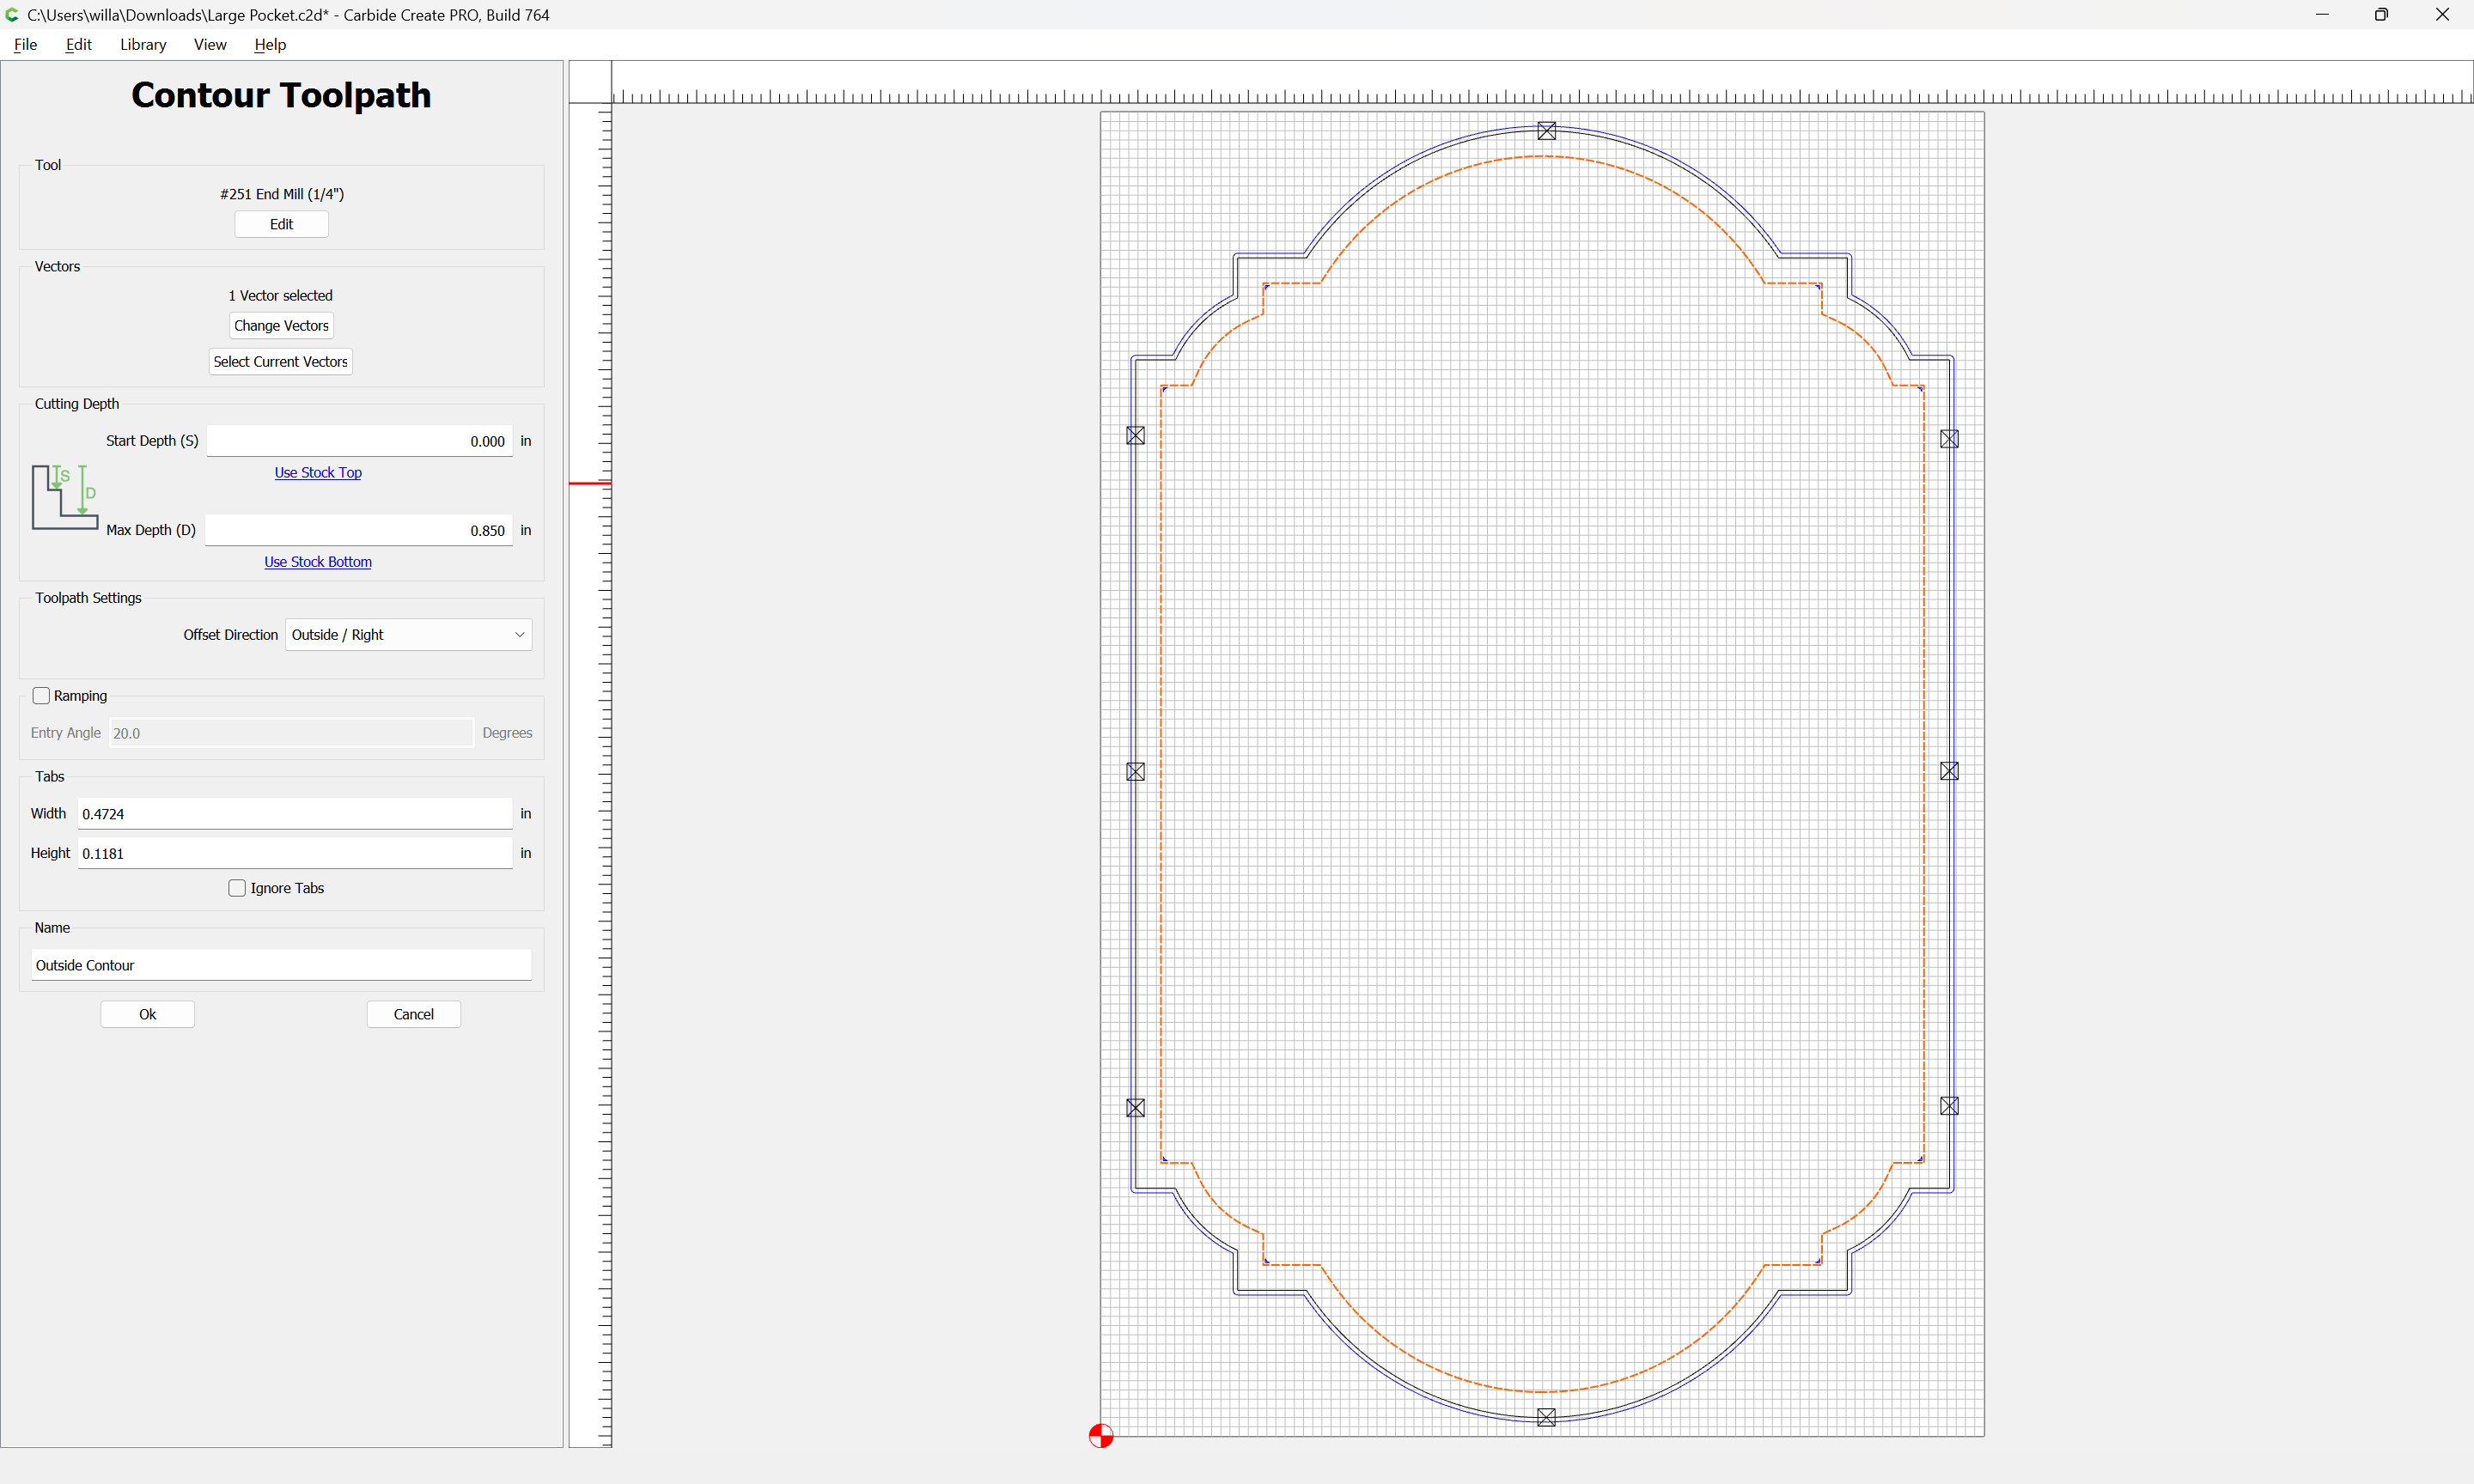
and cut as a pocket down to tab height:

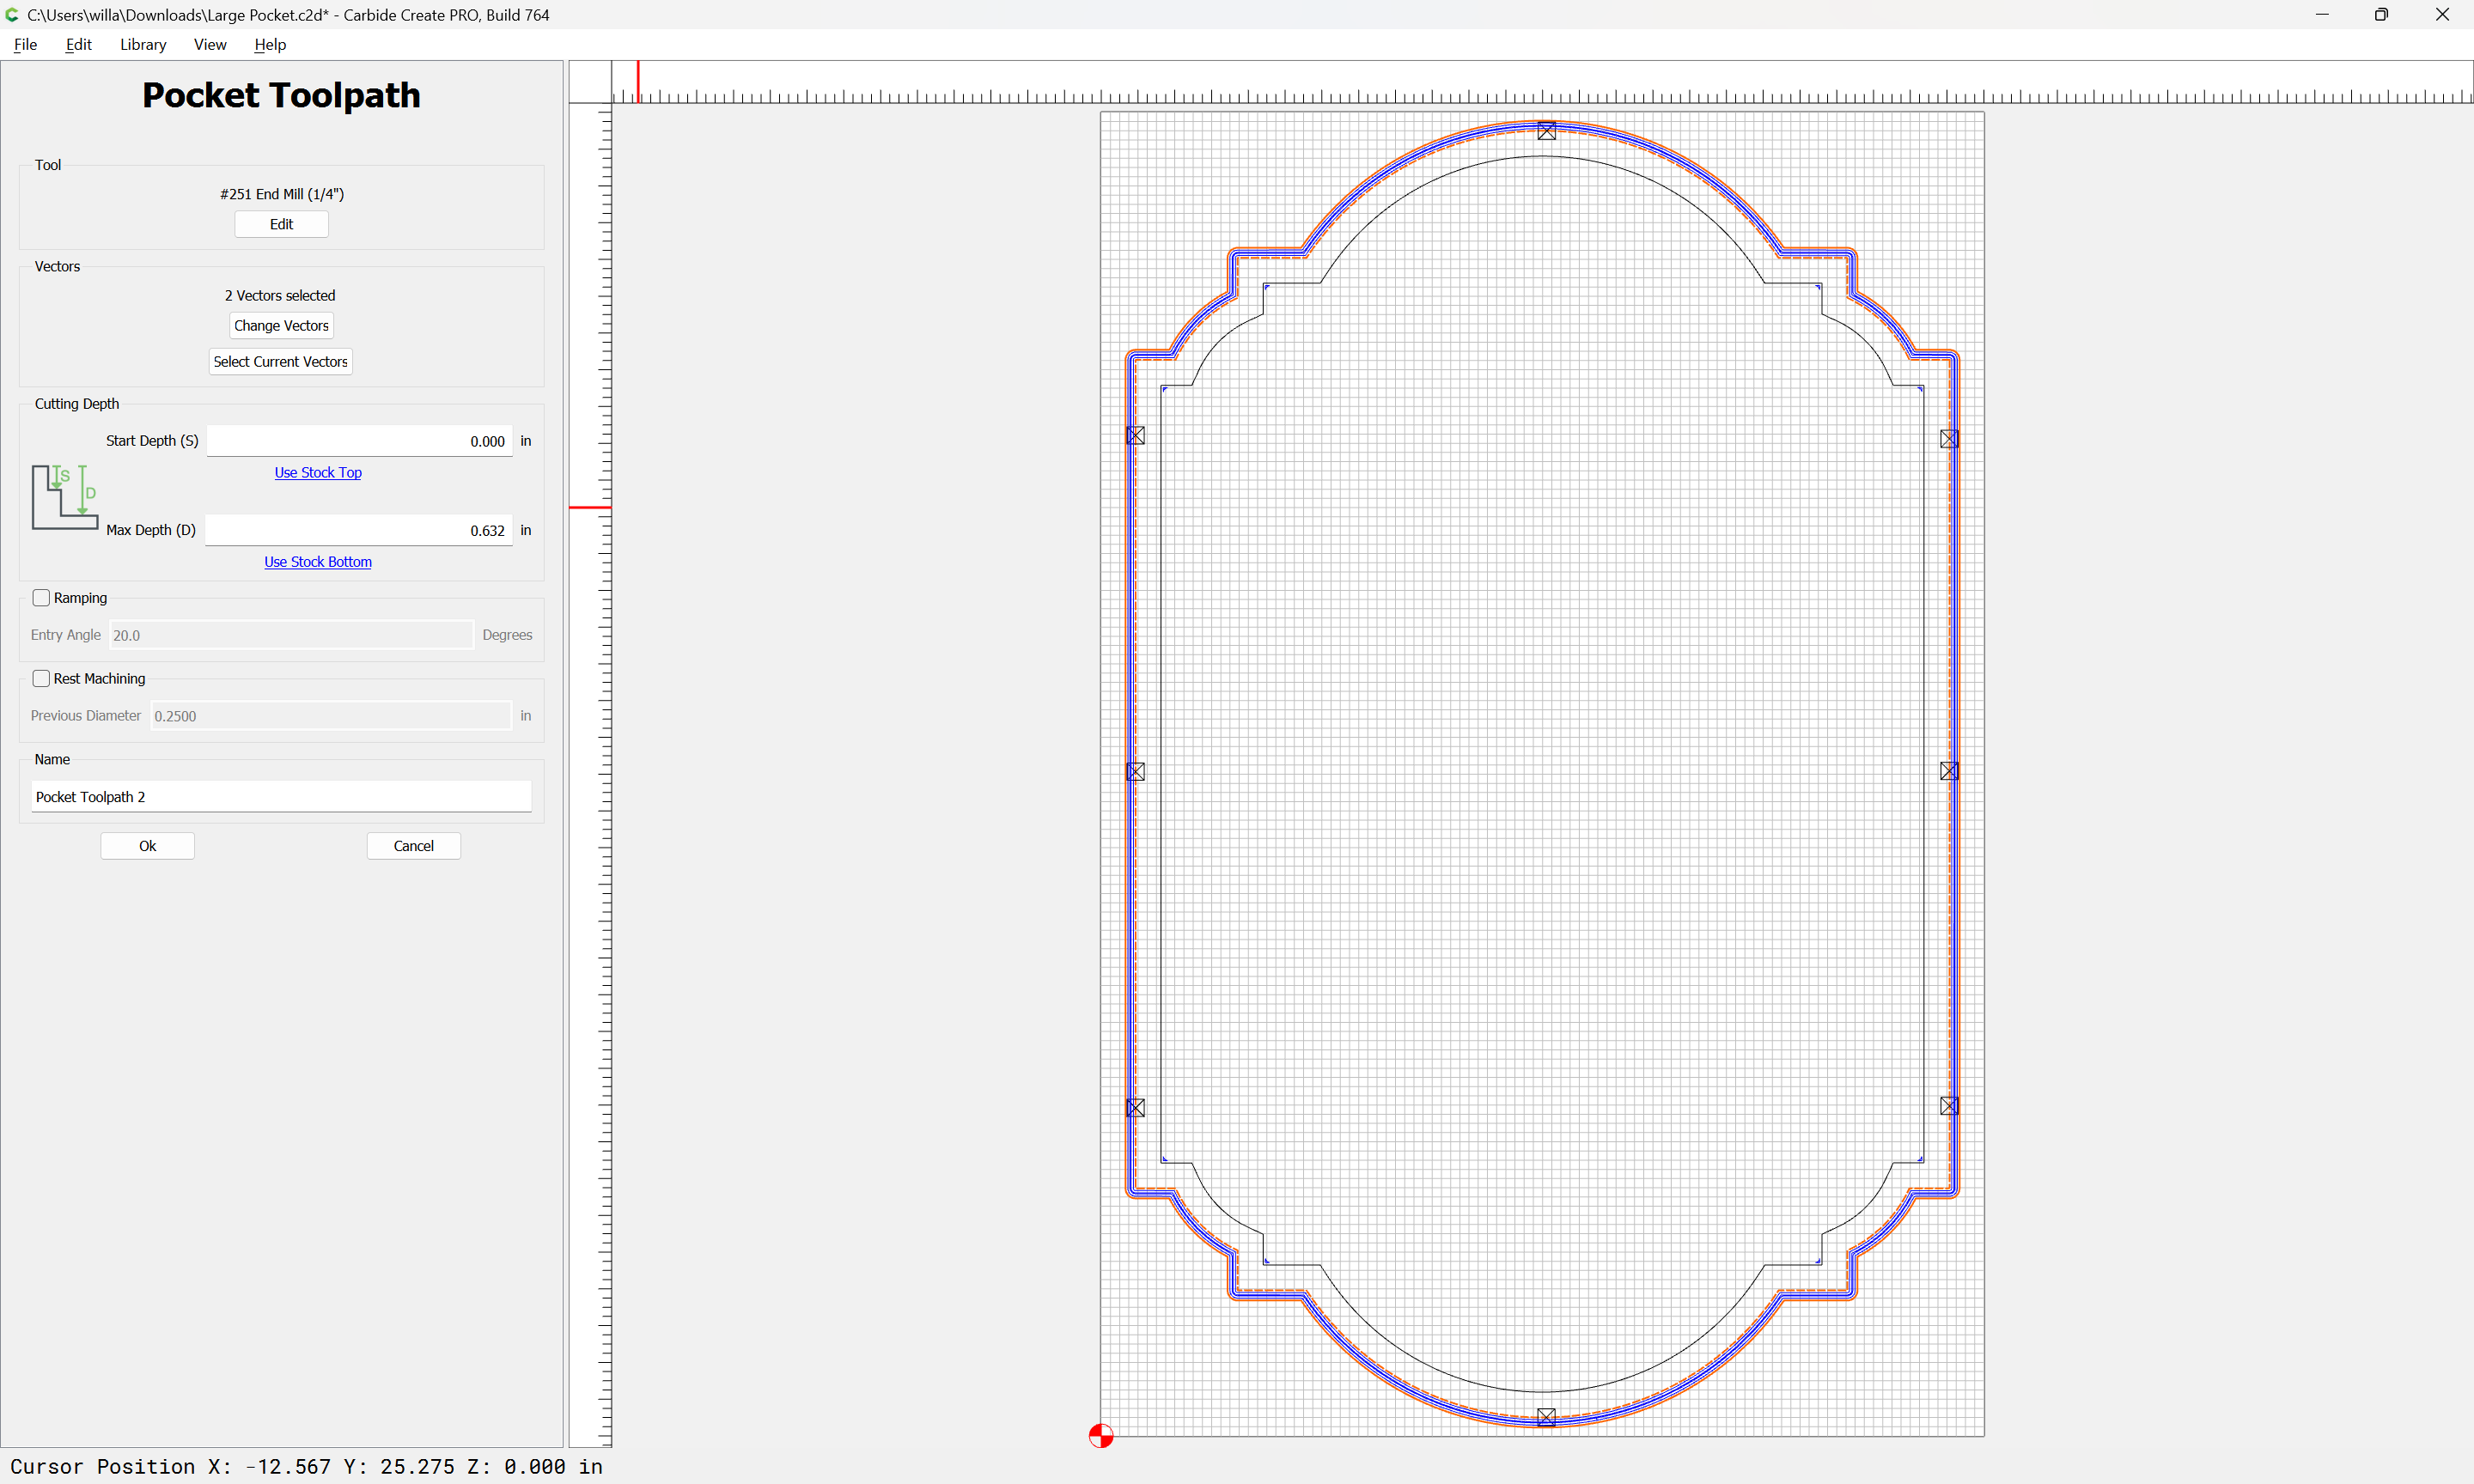
and then allow the cut to finish with the perimeter cut which will cut the balance of the material — if desired, it could be started at the bottom of the previous pocket:

If you’re making a frame, perhaps you would want to make it out of separate boards rather than a sheet good or glue-up? See:

1 Like

You are awesome. Thanks for the quick and thorough response.

I had considered making the frame separate but the person who wants this was really wanting as one piece. I will go through this and see if it helps.

Thanks again!

I was recently pocketing a plaque with an 8.5" X 11" X .125 Depth. I was using the #251 and it was going to take 49 minutes. So doing such a big area is going to take time. Depending on the material you can increase the speed in CM up 10% at a time. You can increase until you hear screaming of the router and then back off 10-20%. Unfortunately big areas take a long time to pocket. @WillAdams is suggesting an advanced vcarve and that would work but will still take a long time to get the pocket done. The benefit would be as he pointed out sharp corners. You can use a 15-20 degree vee bit and the pocket would have minimal slope on the sides.

The rest machining works by first doing a pocket. Then you pick the same pocket and pick a smaller tool and there is a checkbox to give the previous size of the tool. Then only the corners are machined and not the whole pocket.

Rest Machining Tool path:

Original Tool Path for pocket:

So not sure what you are going to do with the pocket but you could use a corner chisel to square the pocket. You project looks like a mirror maybe.

Everything does not need to be done on the CNC.

1 Like

Thank you both for the advice. I am going to do some testing/playing with the rest machining and more advanced v-carve on some smaller pieces with the information you provided.

Originally this was supposed to pocket the entire area and have raised lettering in the middle. We did some testing with that using Advanced V-Carve on some smaller pieces and the raised letting just never came out the way everyone liked. The large pocket was to be a bit of a last ditch compromise to give the solid piece pocket they wanted.

In the end I was able to convince them that this was maybe not the right thing to do for what they ultimately needed. Honestly stencil and sandblasting would most likely have been more what they first wanted, but I do not do that… currently. I wound up using the CNC to cut out the profile but I used my C02 laser to engrave the border and words.

You are correct about not everything needing to be done on the CNC, but it is my new hammer and everything is currently a nail! :smile:

I think the end result still looks good and they seem to be happy with it.

Again, thanks for all the quick replies and advice!

5 Likes

Another way you could have done that is to vcarve through a mask. Then paint the lettering some color. You would have had some depth and color to the lettering. Lasering for color is a bit bland. Even black would have been more suitable.

So, in the end, the customer got what they settled for. I thought for a bit that you were going to pull-the-rabbit-out-of-the-hat. When you are the master, though, you need to give them something better than what they ask far. That will come with experience and time. You will be rewarded for that.

PS. One thing about pocketing a large amount of material out of a solid piece is that you will relieve stresses inside the material on one side. That flat plate that you wanted to create would have bowed up severely, and you would have had to start over.

3 Likes

That is very true. I’ve used pieces of wood I thought were quite aged/dry, flattened them nicely, started carving into them & had the edges of the piece start curling up off the waste board during the machining(used masking tape & crazy glue for hold down)! Could not believe how quickly the wood started changing shape!

Another way to decrease pocket cutting time, especially if it’s not all the that deep, is with a 1" - 1-1/4" surfacing bit. Keep the DOC low & you can run it rather quickly & with a large step-over over the majority of the pocket - be sure to use the ramping option too!

This topic was automatically closed 30 days after the last reply. New replies are no longer allowed.