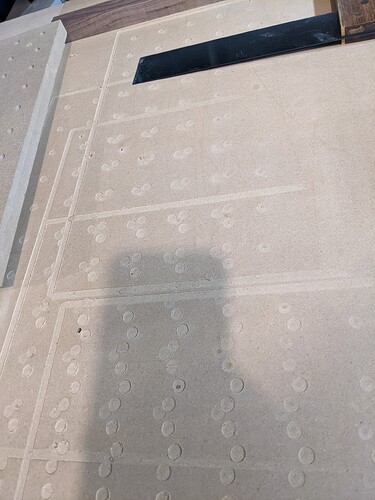
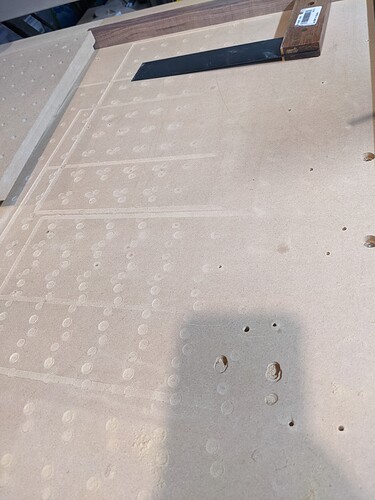
I just upgraded my Shapeoko 3 to a 3XXL. I didn’t have any leveling issues with the 3 and now I’m getting this weird why access drift. You can see in the pictures below as I move towards the middle or the back of the CNC it goes deeper. I believe I have everything squared within a pretty good tolerance. I haven’t done a leveling yet because I’m creating a threaded waste board to put on top and then I was going to level that with a 1 in bit. But am I missing something else? Or maybe the belts too tight or too loose? I just don’t remember having this problem in the past.
Hi Mike,
It could be that the MDF bed is not of perfectly constant thickness, or that it’s slightly more elevated in the back that in the front, either way if you plan to add a threaded wasteboard on top of that, there is no need to worry too much: surfacing this additional wasteboard should take care of any front/back/left/right unevenness. You should only be concerned if you still get uneven depths after surfacing the new supplementary wasteboard.
Thanks John. I am not exactly sure how to create a g-code file for surfacing. Is there a template or something out there that you are aware of I can use as a starting point? I’ve never surfaced a board before
@gdon_2003 wrote this nice pdf tutorial a while back that may be of interest (surfacing part near the end) :
You can also contact support@carbide3d.com
@WillAdams probably has additional references
I posted a file for doing one slat at a time, but I’m not finding it at the moment.
Please check the machine mechanically, and the wiring — if you continue to have sudden Z-axis plunges, let us know at support@carbide3d.com
Hi Mike, I have just gone through something very similar to what you are seeing. I bought the expansion kit for the 3 XXL but combined it with my XL to get an XXXL. One thing I found was that the three metal plates that go under the MDF had significant upward bows that the weight of the MDF did not remove. They can be straightened by taking them off the machine, supporting both ends and progressively adding weight to the middle to bend the bow out. They will probably not be perfect but you can improve them. Once that was done I cut a new single piece of MDF to cover the entire bottom. I recommend you do this also-replace the two pieces that came with the kit with a single piece. With the machine all together I checked Z zero from end to end and still had 0.150 inch difference. This was confirmed by measuring from the MDF to the top of the Y rails. This 0.150 inch hump was caused by the button head screws not pulling the MDF down tight to the end pieces. Some of the screws were binding in the threads. I ended up running a tap down through all the threads and now everything pulls down. I worked on it tonight and it is looking more level. My goal is to get the first MDF piece pretty level, then surface it with a 1 inch surfacing bit, then attach the wasteboard and surface it. Then drill about 800 holes for threaded inserts. I could have surfaced out the 0.150 inch hump, but by looking into the cause I was able to eliminate most of it and will probably be better off going forward. Cheers.
Good to know. I am way past the point of being able to do that. I already have my secondary waste board almost down. Once its all down I will surface it with a 1" bit. I did the same as you. Have 6 sections of threaded board with 540 threaded holes with 2 t-tracks. If I have any issues I will end up taking your suggestions.
This topic was automatically closed after 30 days. New replies are no longer allowed.

