I have been dragging my feet asking for help… but alas I can’t figure it out. I have uploaded the very basic file that I have recreated for a friend. I guess what I’m trying to do is create a reverse pocket. Leave the image get rid of some stock around it. I only need the depth to be 1/4" or so as we are going to pour some dark epoxy around the card itself. The only thing I can figure out is to do a 3d cut that is going to take 16 hours or so, and even more time if I try and do it with a smaller bit to get all the details of the card. Any help would be great please and thank you
Spade Card 3d.c2d (350.3 KB)
Hi @Smokeyhawk,
There are a few things there.
First, 16"x35.7" is a large piece, and removing 1/4" from its thickness it going to take a fairly long time whatever you do (just to manage expectations).
Then, that example you attached is 2D, not 3D, and from your description (“leave the image and get rid of the stock around it”) there is no need to use 3D toolpaths.

2D pocketing toolpaths should work fine unless I misunderstand what you want to do
The problem with using 3D toolpaths on “raised” 2D shapes is that there are vertical walls, and the horizontal raster roughing+finishing approach does not work great for that, you will get un-smooth walls where the horizontal passes of finishing endmill will be visible,

unless…you use a very small stepover, but then the finishing will take forever on such a large piece.
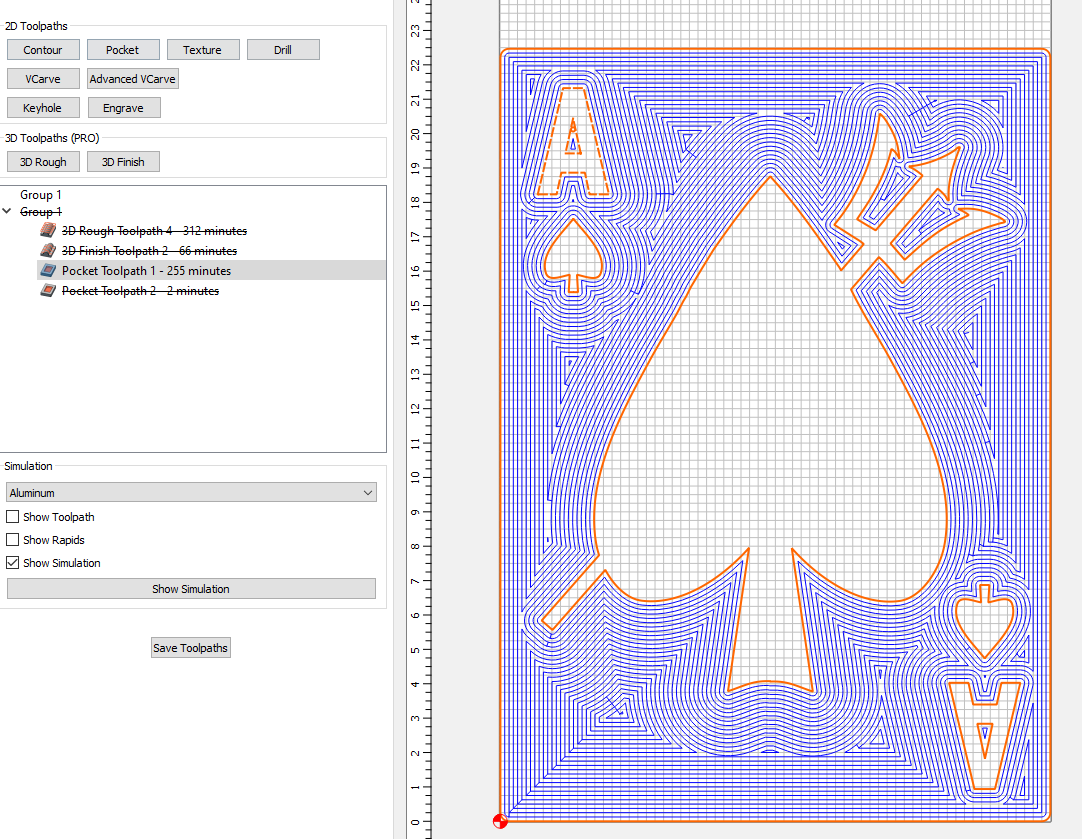
If alternatively you choose instead to mill this as a regular 2D pocket, with the same #201 endmill and using the same feeds and speeds, the “roughing” part of the job now takes a more reasonable 255min
but of course the large 1/4" endmill won’t quite make its way into the tightest corners of the vectors, so you will need the equivalent of the 3D finishing toolpath but in 2D, which is another 2D pocket but with the “rest machining” option checked. Here’s what it would look like with a 1.8" endmill:
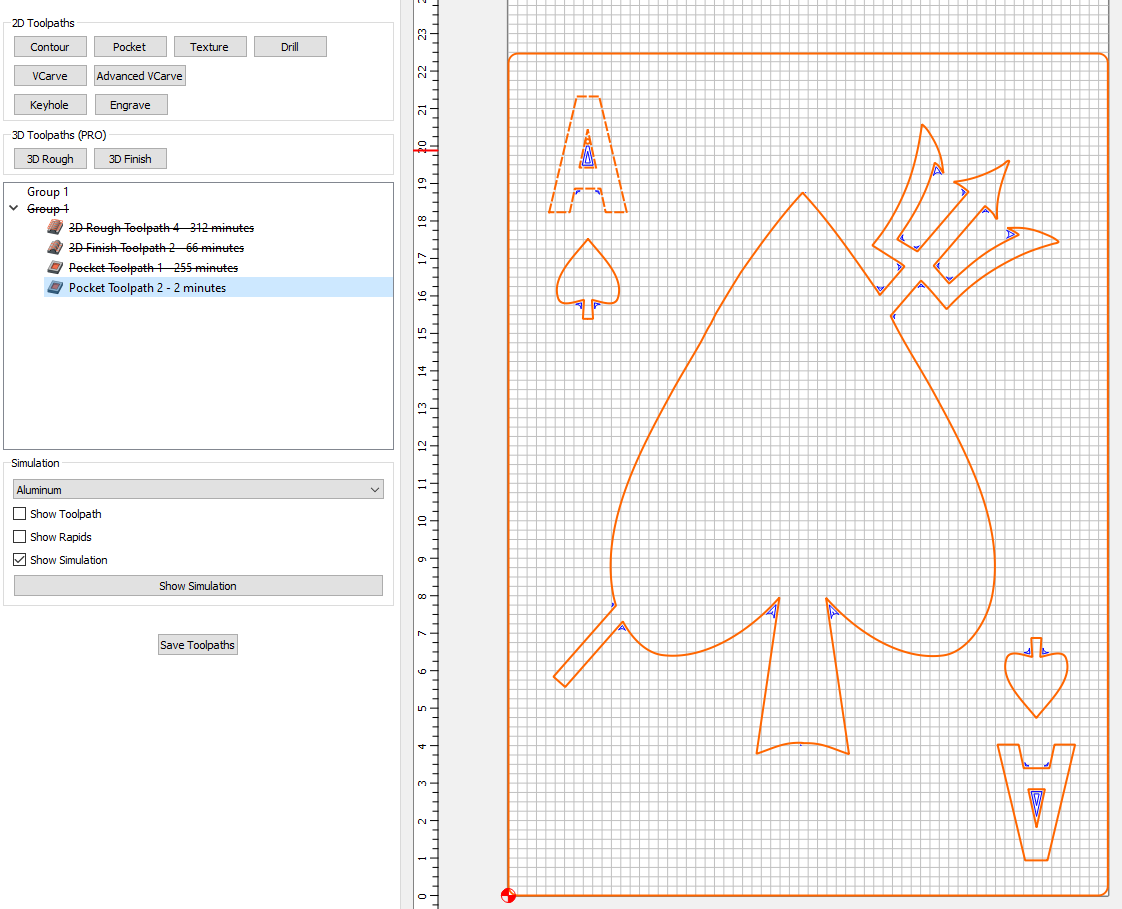
The machine will only go and mill those inside corners. You will still be limited to inside corners rounded to 1/16th radius due to the 1/8" endmill. You could decide to do this finishing pass with a smaller endmill (say 1/16"), but it will be tricky to find a 1/16" endmill that ALSO has a 1/4" length of cut
Another interesting approach for this would be to do an Advanced Vcarve toolpath, using a the #201 1/4" endmill for “clearing” (the equivalent of roughing) most of the material, and then using a vbit to cut the contours of the vectors. The great thing about vcarve is to it will get you sharp inside corners.

In this latest example, with a #201 for clearing at the same feeds and speeds you used, and a 60° vbit for “finishing”, the advanced vcarve toolpath takes a more reasonable 274minutes to do it all, and the result will be nice and sharp:
Finally, once you have set your mind to one of these approaches, you can then aggressively optimize the cutting times like so:
- first of all, a given endmill spinning at X RPM and moved at Y ipm feedrate cuts will cut the same size chip as the same endmill spinning at 2X RPM and moving a 2Y ipm, so more or less the same effort on the machine in both cases. Which means, you cna bump up the recommended RPM and feedrate by a given fixed scaling factor, and it will still cut the same. So in your case the recommended RPM was 18000 and the recommended feedrate was 60ipm, if you have a trim router you could choose to run it at 30000 RPM and increase the feedrate by 30000/18000=1.66, so set it at 100ipm instead of 60ipm, and it will cut the same, BUT you have then reduced the overall cutting time by 1.66.
- then, you can try and use a more aggressive depth per pass. Experimentation is key here, and depending on the material you won’t be able to push it too far, but in many cases you can definitely go deeper than 0.04" per pass. Even going to 0.05 or 0.06" per pass will significantly reduce cuttting time.
Hope this is not too much information thrown at you, but hopefully you can pick a few things that apply to what you want to do
4 Likes
As @Julien said the .25" removal will take some time and is overkill. So I cannot resist this. Dont forget the joker! The Ace of Spades
")
2 Likes
Gotta love Lemmy and his Rickenbacker
Thank you so much. I have looked a few times and I can’t seem to find the rest machining option. Other than that I think I will try and cut it both ways and see how it goes
1 Like
Rest machining is an option for Carbide Create Pro, so if you don’t have the pro license, you won’t see it.
1 Like
ahh, I do have pro. I must have opened the wrong one. I see it now thanks
This topic was automatically closed 30 days after the last reply. New replies are no longer allowed.