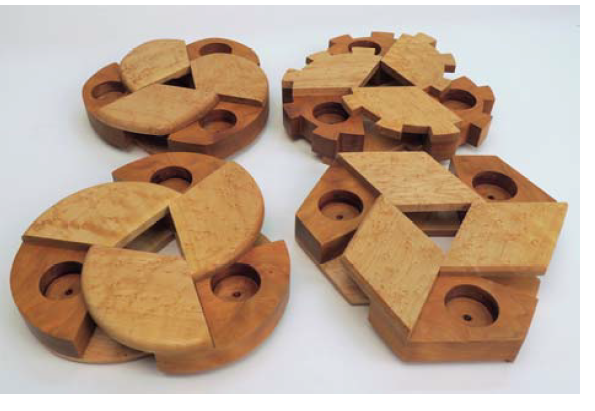
I am working on a puzzle box for my Wood Working Club meeting Saturday. I found this and thought it was intriguing. The puzzle consists of 9 separate pieces per box. The box is about 6 inches round but you can make a hex, a gear, a heart and a round box from the same parts.
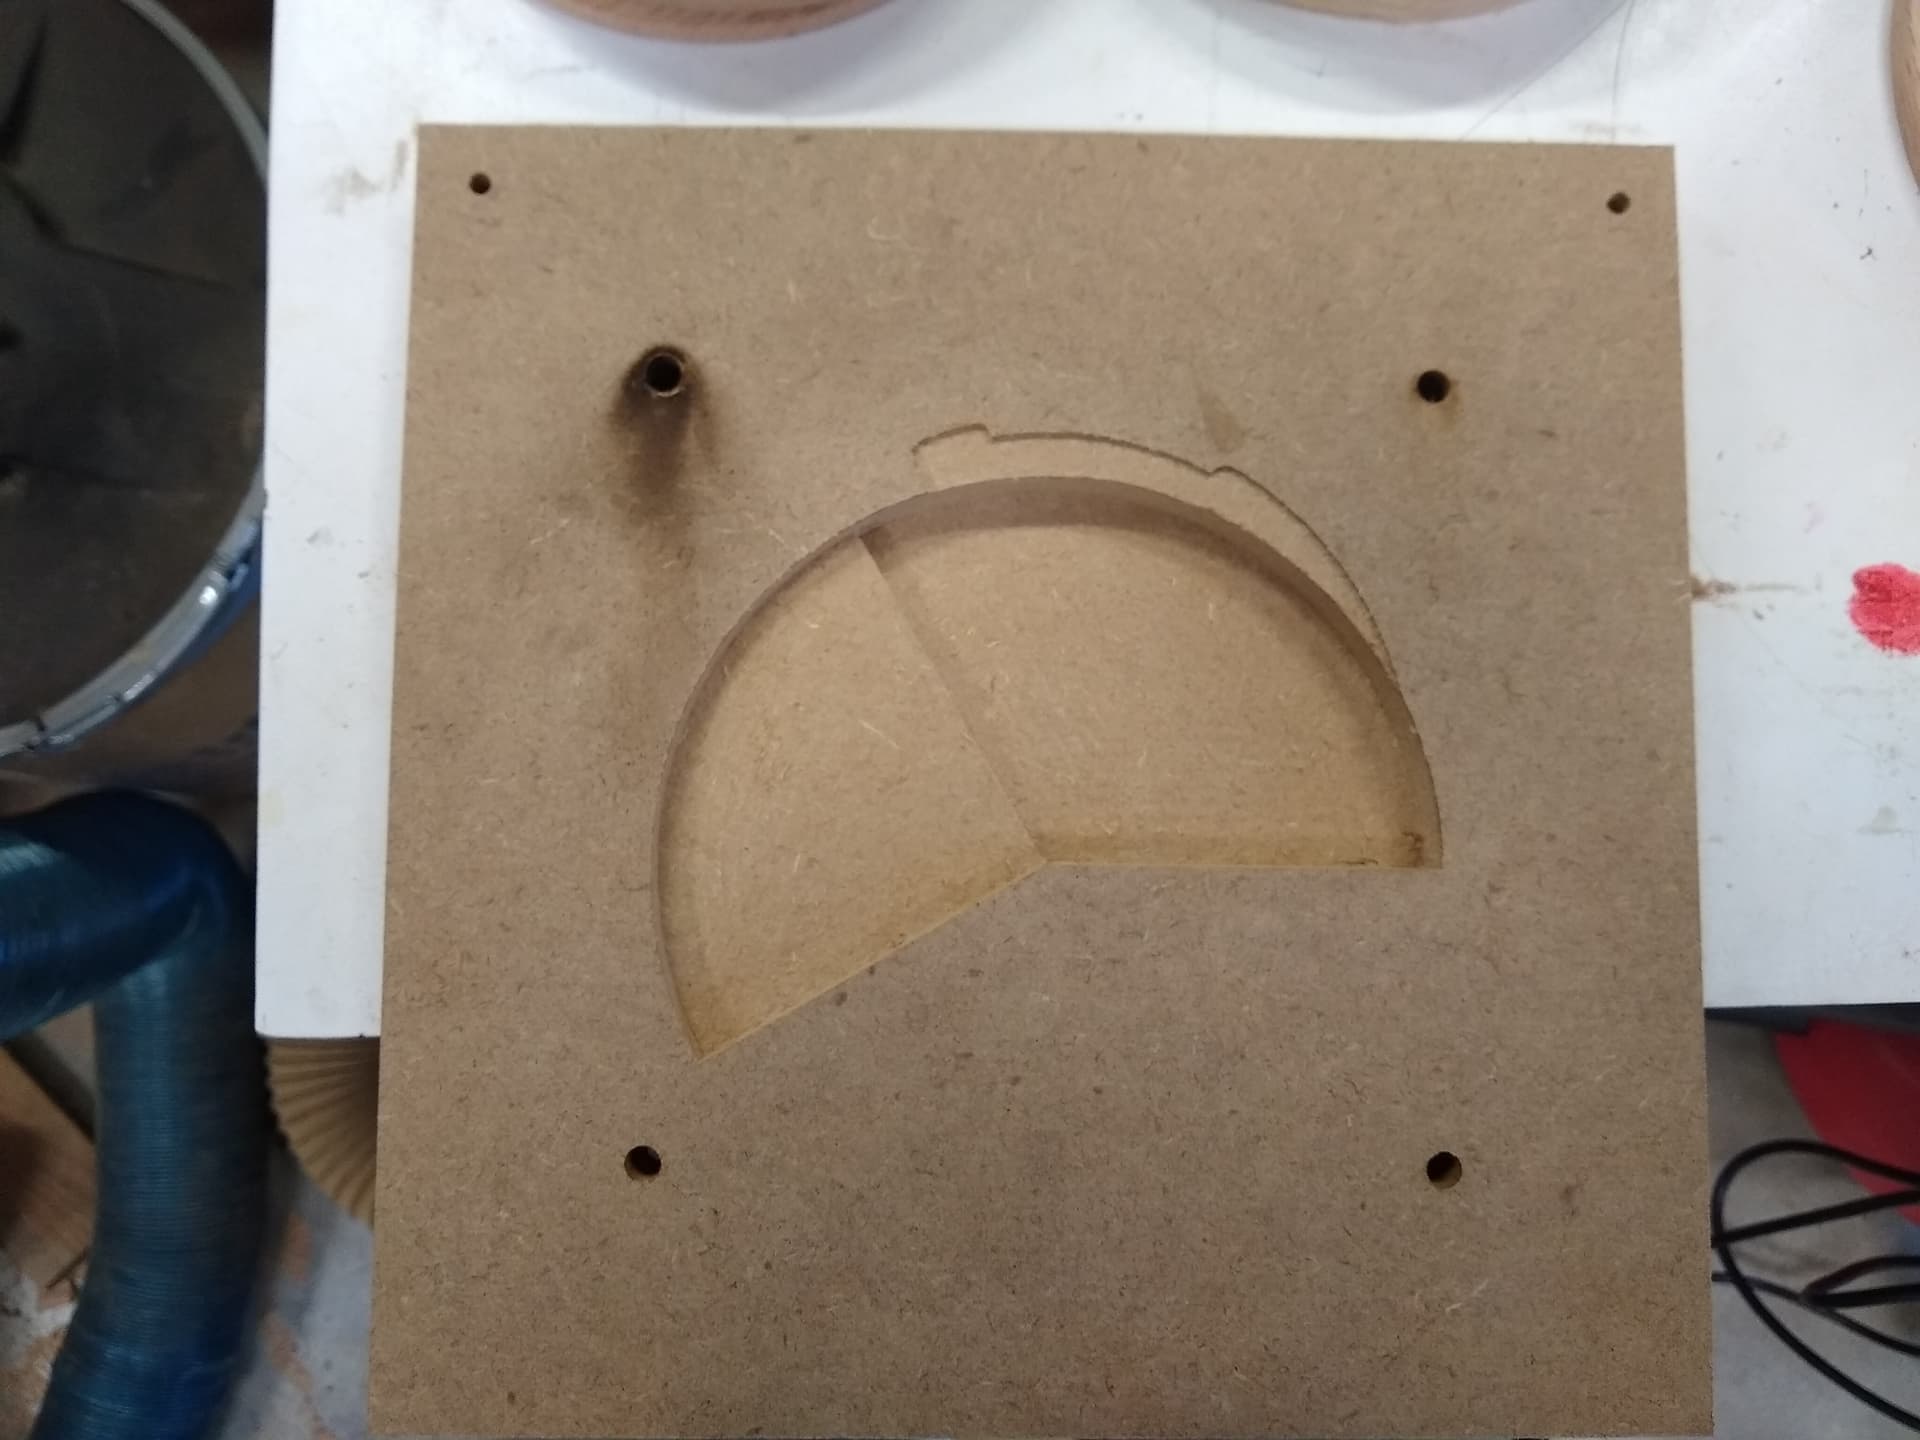
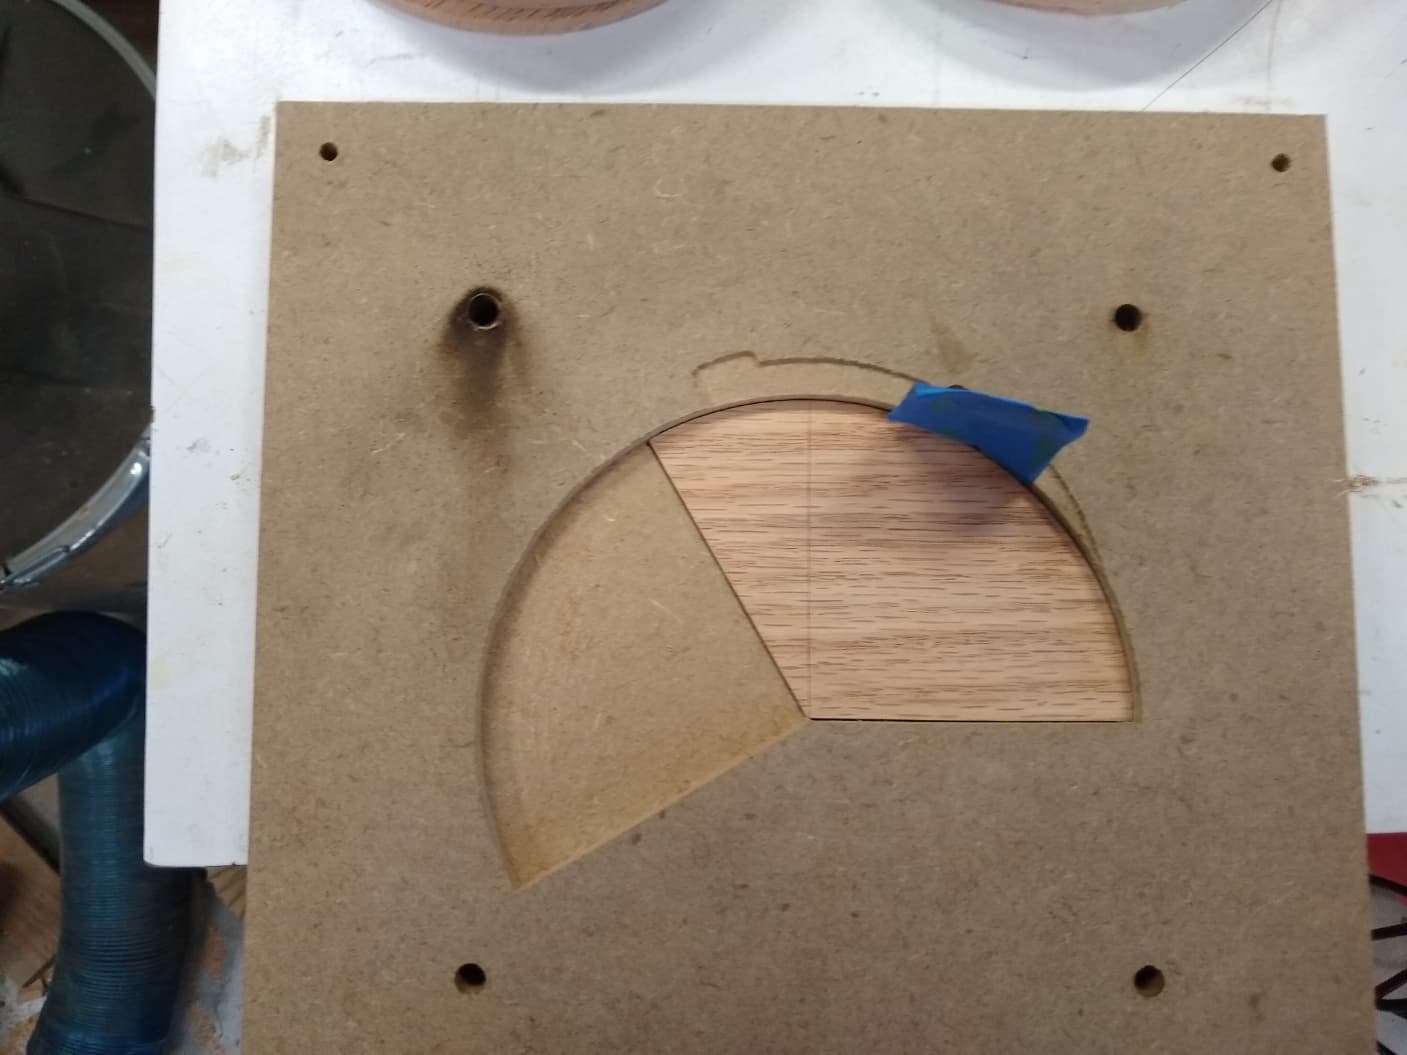
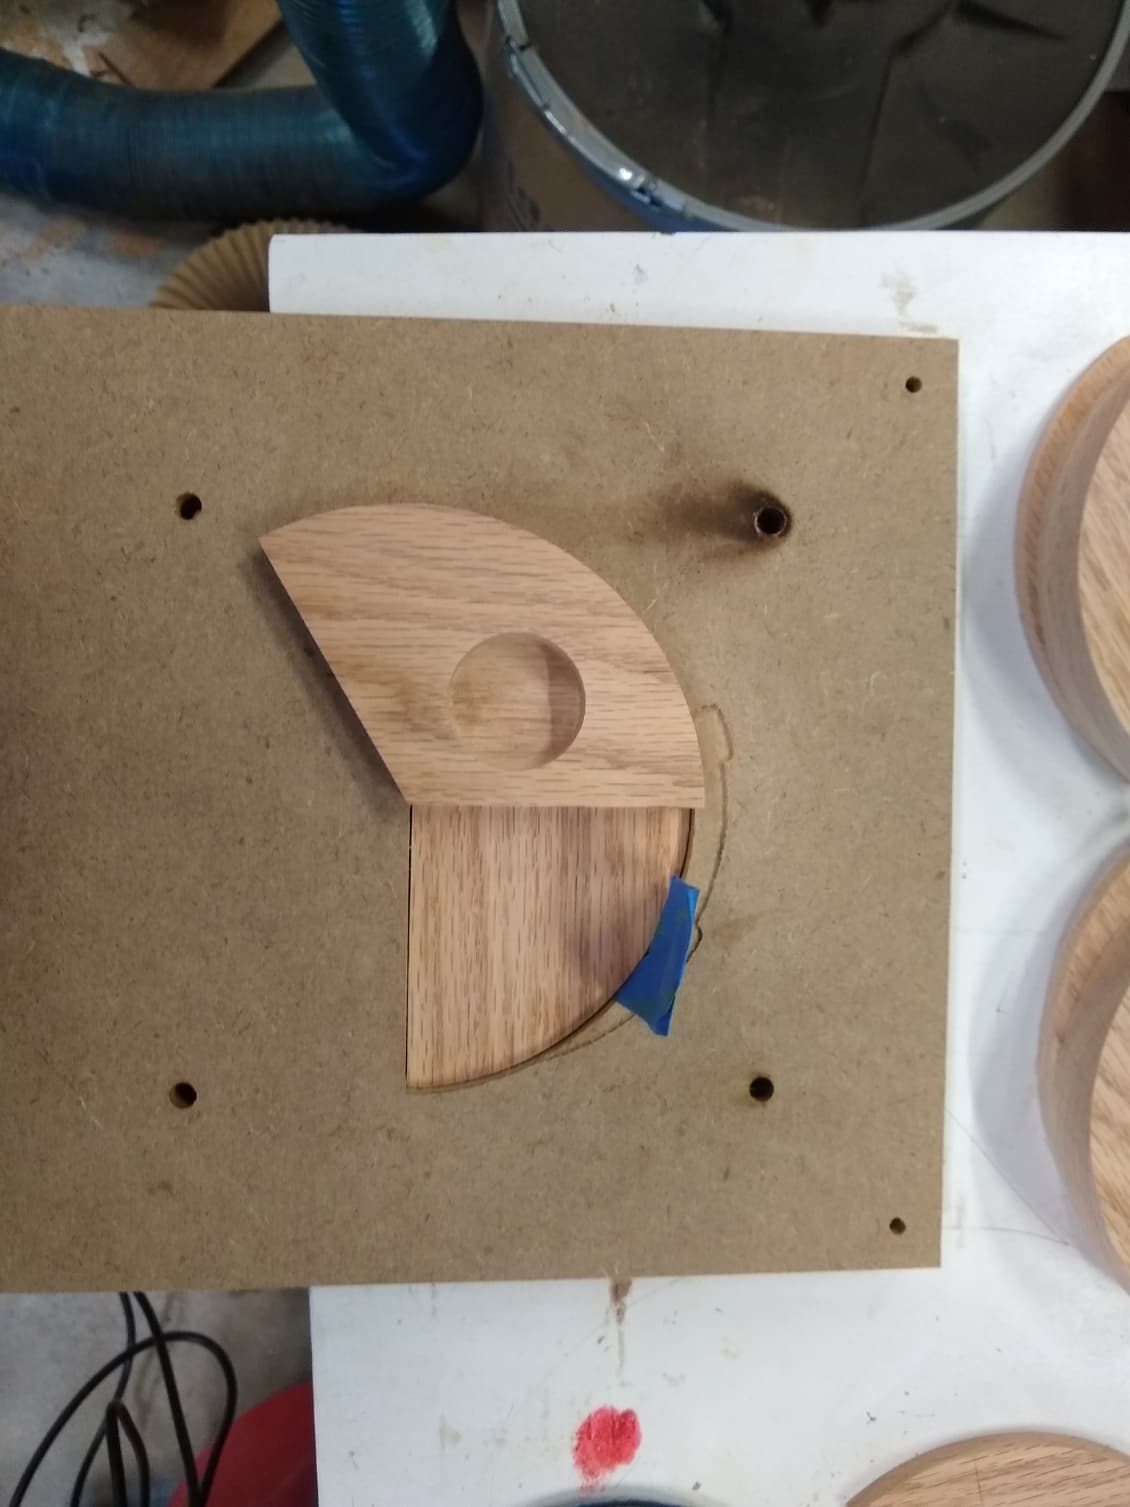
The 9 parts to each box are 6 of one thickness and 3 of a thicker material. So cutting on the Shapeoko was easy. For the gluing of the parts a cut a gluing jig to make sure everything is lined up. The only drawback is the jig will be slow to glue up each piece.
If you look at just the jig you see a little boo boo. I originally made the cutout from the same drawing that I used to cut the puzzle parts. After a little bit of depth I paused and realized the cutout would be too tight. I stopped the job and went into CC and made a tiny offset. I had originally picked both objects and centered them on stock. On the redraw I had to move each part away from each other to get the offset and I forgot and lined up to the origin and not the center of the stock. I started cutting and stopped again and went back to CC and fixed my mistake. Luckily no harm no foul.
I started thinking about how long it would take to glue up all the 3 puzzle boxes I had. I have plenty of scrap MDF so I cut 3 more gluing jigs for a total of 4. This should speed things up. Once I get all the pieces glued up I will be able to fine tune them tomorrow and assemble them. I will use Watco Natural Danish Oil to finish them. This will add a little bit of lube to make them slide easy.
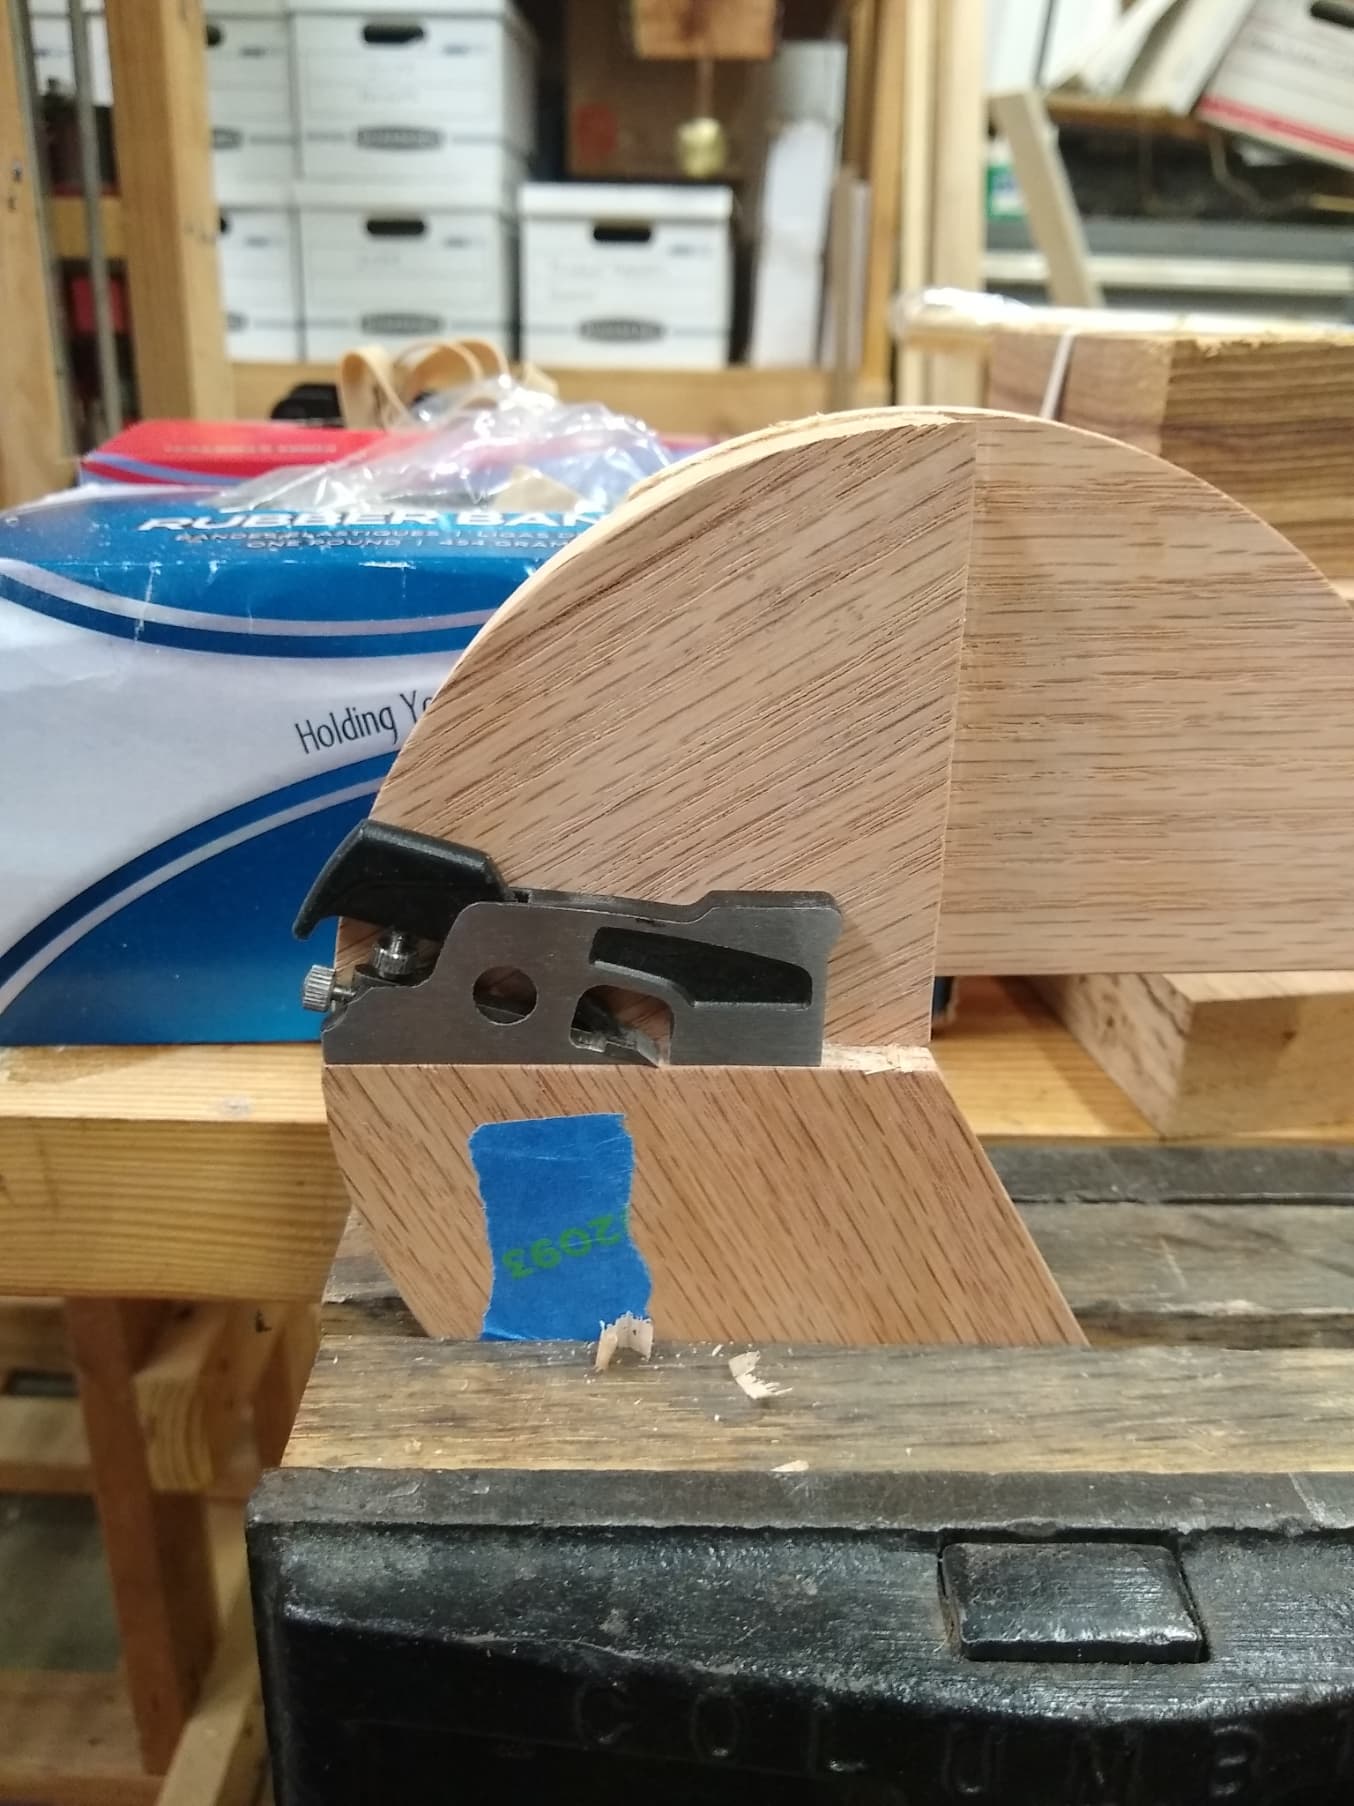
I got all my parts glued up. The box was very tight and got stuck. So I figured out when I glued it up some of the blades were slightly skewed. So to fix it I started with sand paper but eventually got out my miniature Veritas shoulder plane. The little plane is 1/4" and I had got it before Christmas and had gotten it specifically to trim the top of boxes made on the Shapeoko.
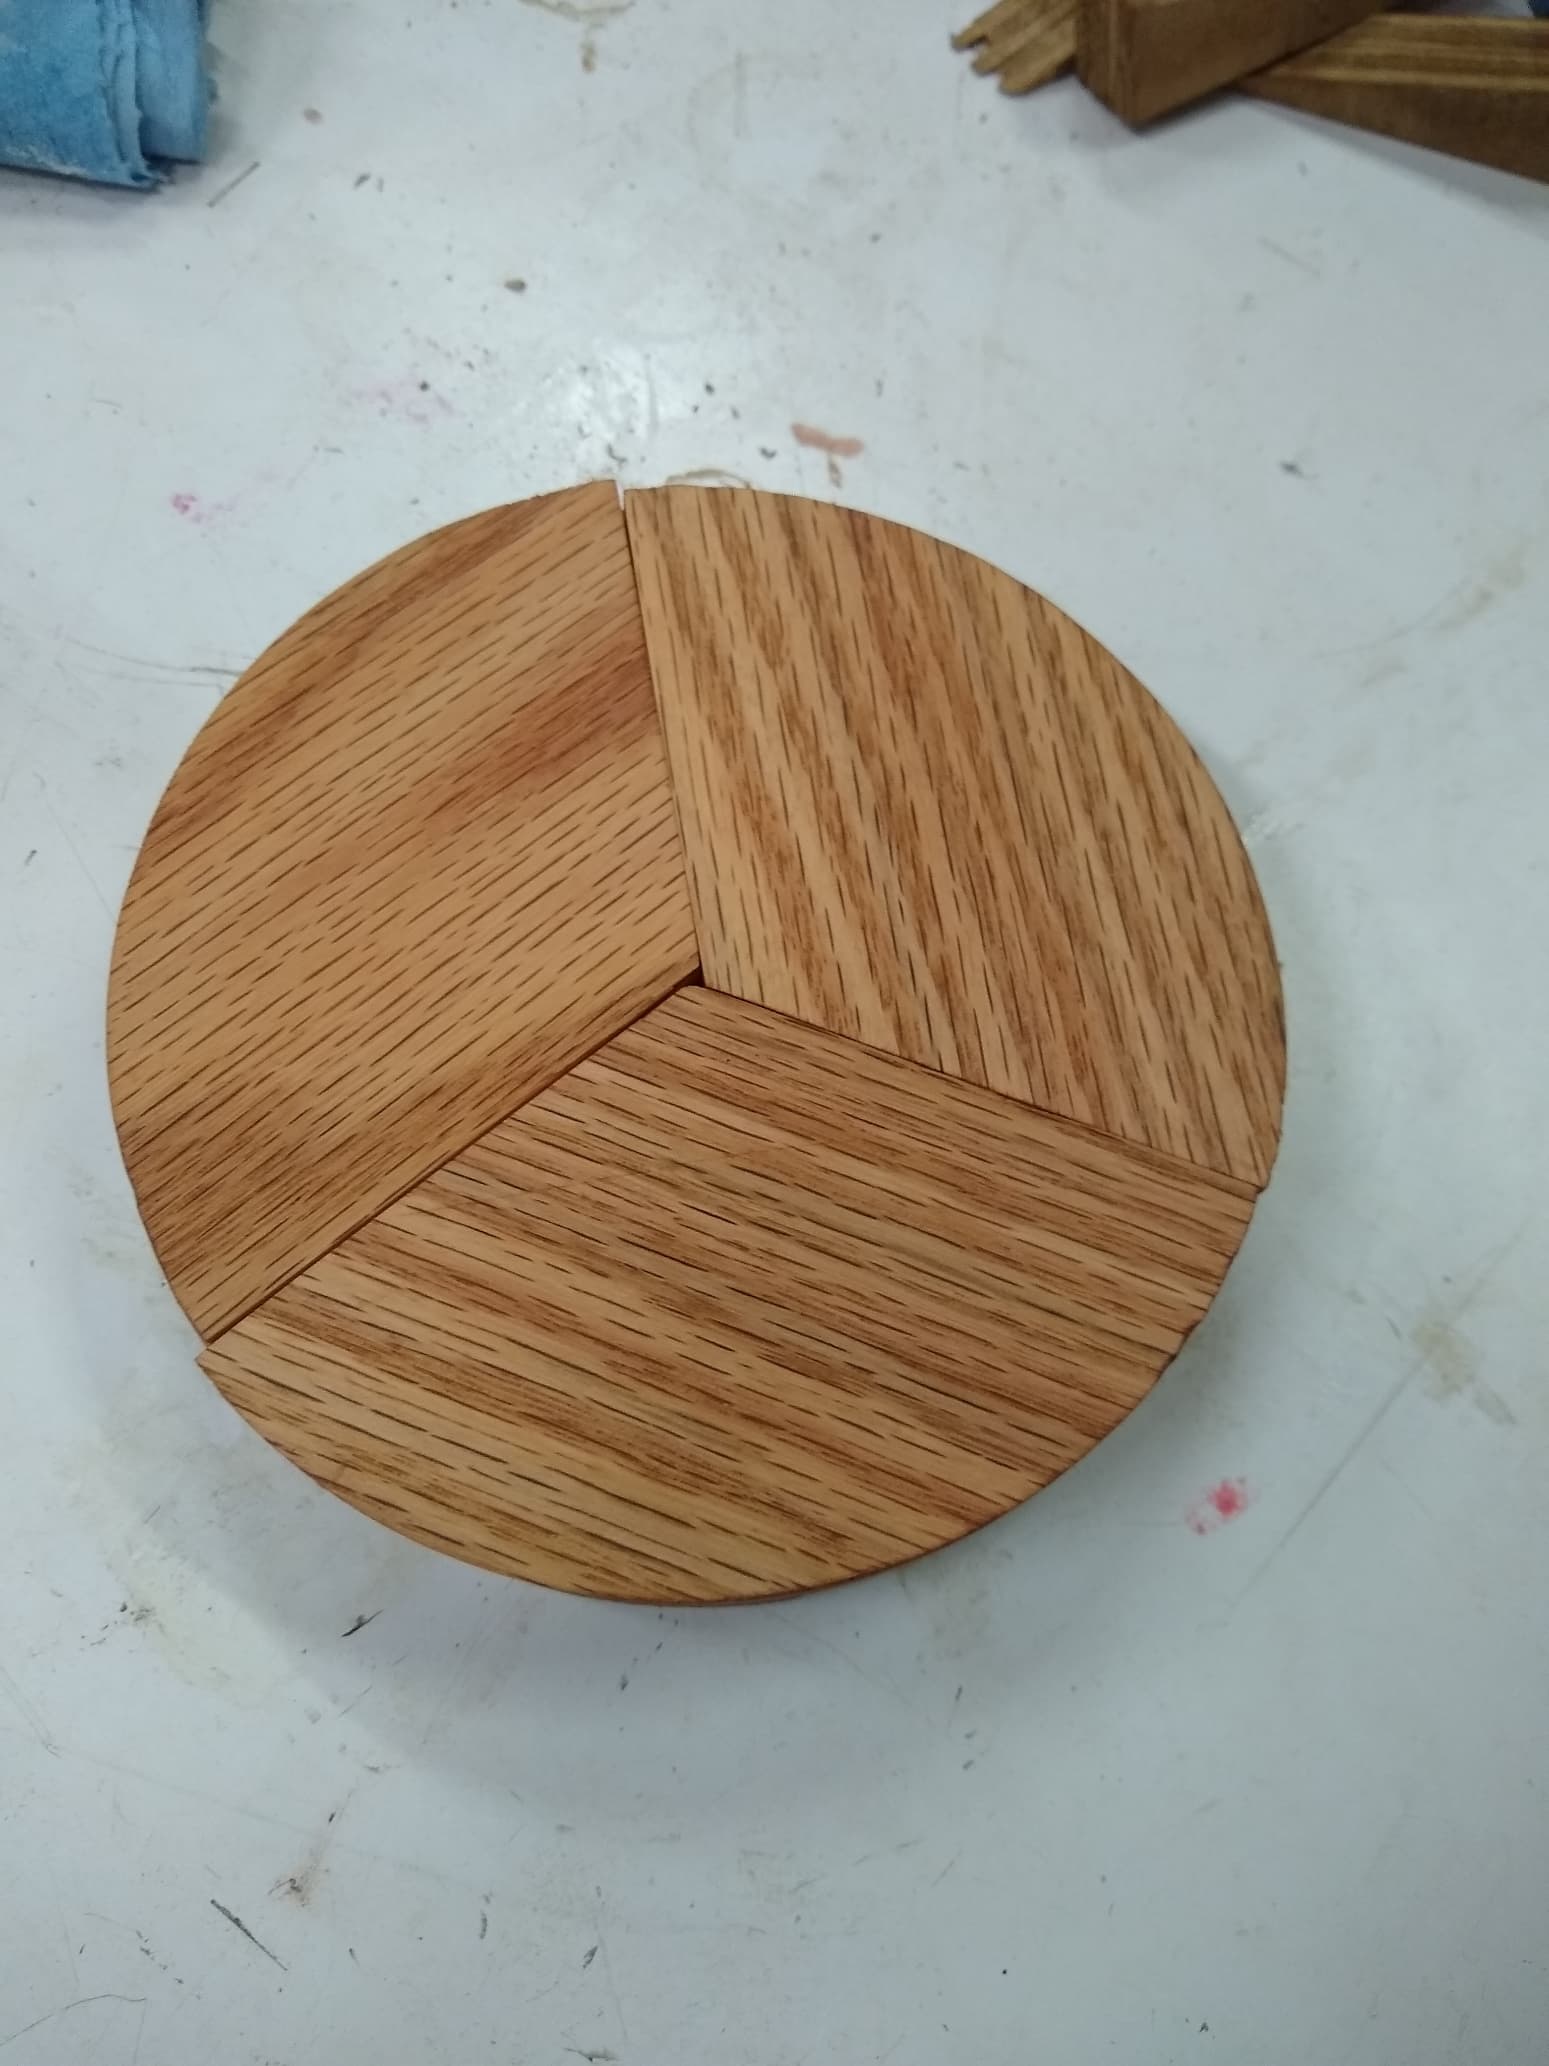
Now I have 1 of the three assembled and working. I put a wax finish on it so there is some lubrication to help open the box. The plan for the box does not explain well how to assemble or open the box. I finally figured out you just have to grip the box by the top and bottom layers and twist. If you try to move the center section you will never open the box.
So tomorrow I will assemble the other two boxes and will try the Watco Natural Danish oil on one and if that works that will be used on the third.
What I learned that the machining was very good but during the glue up being off just a degree or two will make the box not work.
Now that I have the box together and working and able to open and close it I was so happy after being frustrated all day trying to open and adjust the box.
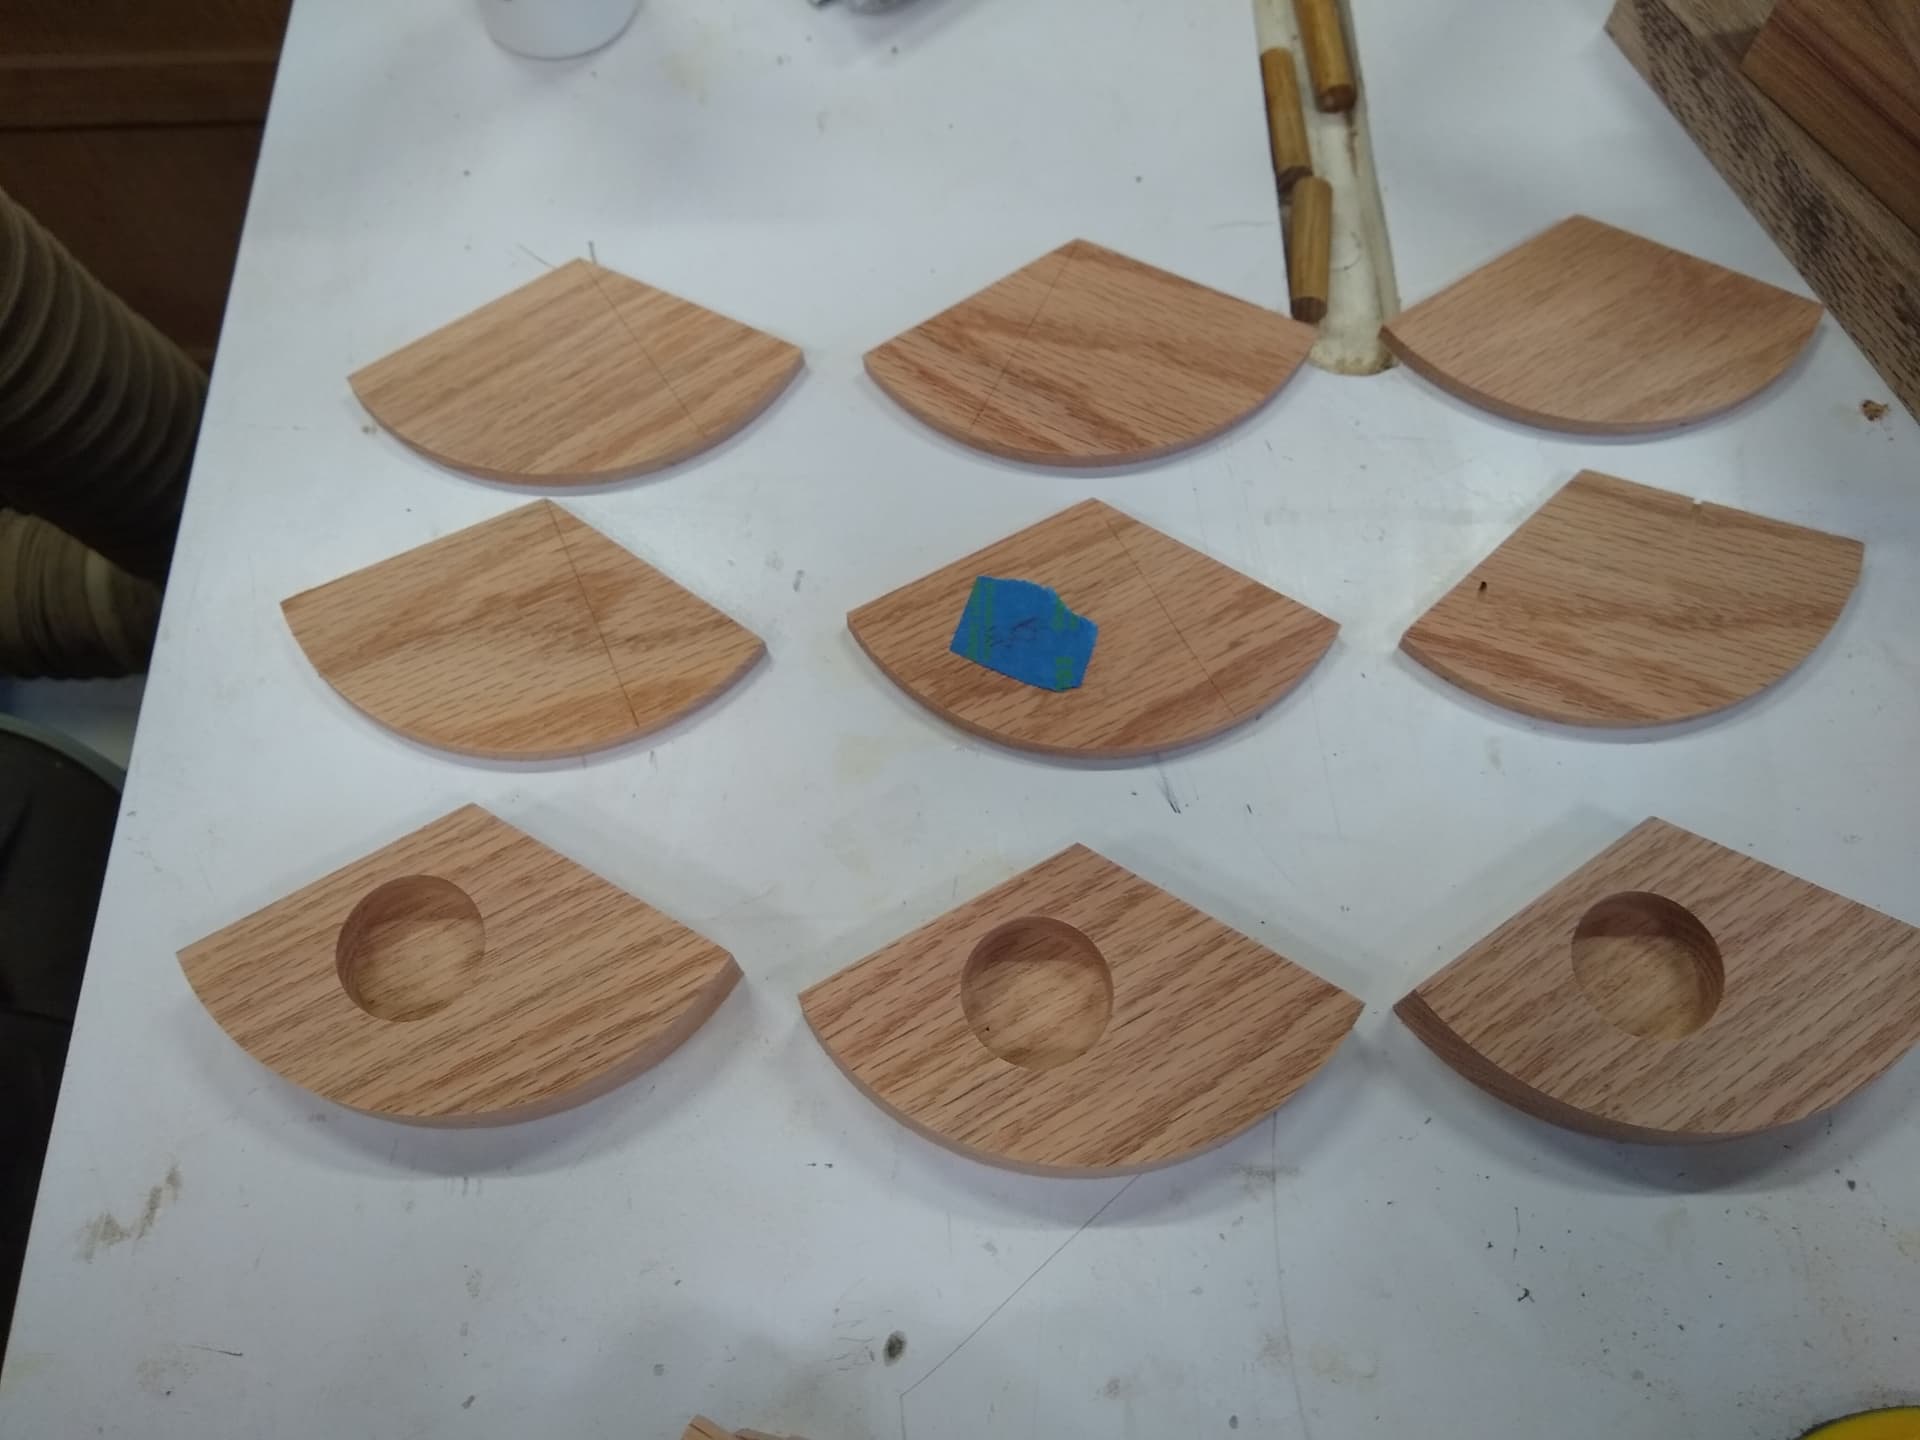
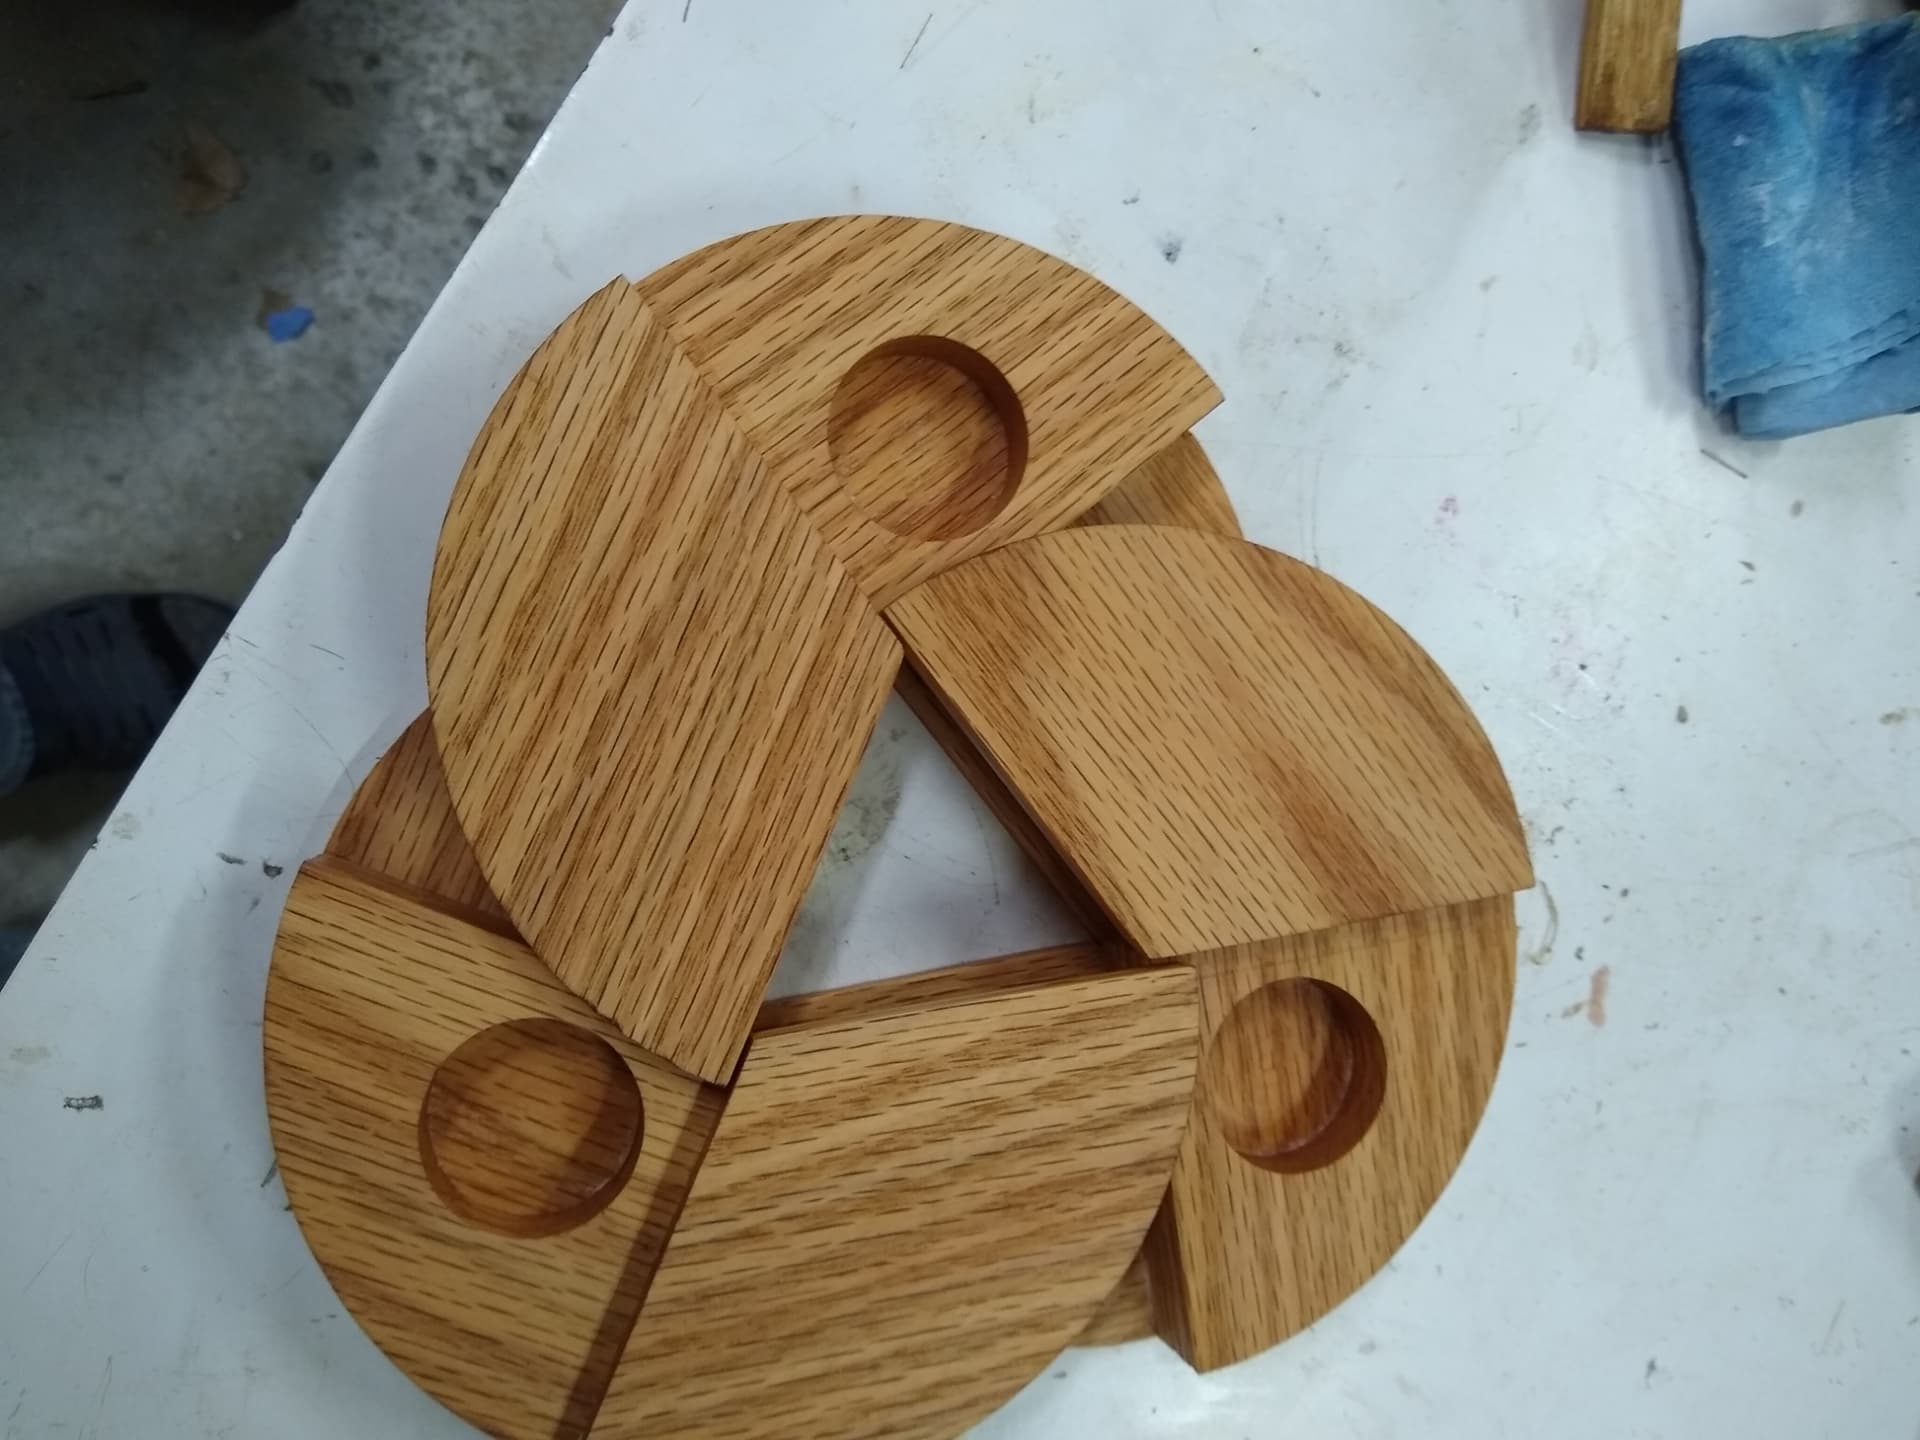
Here is the c2d file and the jig to use for gluing up the parts of the box. These files were enough to make 3 boxes. So you need 6 of the top and bottom pieces and 3 of the center pieces for a single box. You can reduce the material size to fit what you want. The center and top and bottom pieces are the exact same shape but the center ones are thicker and have the hole for a compartment.
So after a project it always good to evaluate the project. In retrospective I think that maple and walnut may have been a better choice. The Oak worked. Secondly I used .75" for the center section and .25" for the top and bottom sections. This worked but I cut 18 pieces of the top and bottom for the 3 boxes from two different pieces of oak. I should have paid better attention to grain matching for the top of the boxes. You can see in the picture of the box closed two of the pieces grain match and third still does not quite match. This was my first attempt and in the future if I make this project again I will pay more attention. Although two different pieces of oak were used they were cut from the same board that was .75" and re-sawed to .375 and then planned down to .25". The difference is likely two of the pieces came from one end of the same board and the third likely came from the second board and maybe from the other end. The project still works and looks good. The last thing I need to do is create a 6" disk to use to put on top of the box with carpet tape and use my router table with a pattern bit to flush the outside of the box so it is perfectly round. Right now it is slightly off likely due to the gluing errors. However that is easily fixed. I could do it on the Shapeoko but finding the exact center and securing the box would be more time consuming than just doing it on the router table.
So all 3 boxes are finished and we had our Wood Workers Club of East Texas meeting today about toys and puzzles. Everyone liked the boxes. I gave two of them away to the attendees. This project was fun and is a prelude to making an engagement ring box for my Grandson. This box will not be the one but it was good practice. The original plan was an analog one but I drew the parts up in CC and cut it out.
The box top carving was done on the Shapeoko 3 XXL with HDZ. I put a celtic cross on two of them. I had to move the box to the three positions to carve the celtic cross and I did the first one with all 3 of the same thing. I was working on the second one with different images and started the first one. While I was working on the computer the first one finished and like a robot I just moved the box and started the second one. Dooooh!!
So much for my great plan. However the celtic cross looks good. I painted the fairies and one of the celtic cross boxes with acrylic paint. The third I just applied Watco Natural Danish Oil. I put a quarter in each pocket. The main reason for the carving is you cannot tell the top from bottom. If you had something the the cubby holes it might fall out when opened. So to tell the top from bottom I put the carving on it.
I bought this plan and it is copyrighted. So please go to the website and purchase the plan for $2.49. I have included it so you can see how to make it but again please support the creator and spend the little bit of money.
EDIT: Removed the attachment here, since it was not posted by someone who had the rights to it.
P.S. If anyone has an engagement ring box plan/file please send it to me. Thanks