Just to be sure: are you using XYZ probing, or are you probing for XY, and then re-probing for Z only? that wouldn’t work as the “Z (only)” probing requires that the probe be fully seated onto the stock surface, not overhanging the corner as is required for X/Y probing.
I always do corners (X,Y,Z) and have the probe hanging off the edge. I also hold it so it doesn’t move.
As a test I did X,Y and then did Z separately by putting the probe on the top to see where it set the Z. It consistently sets the Z .02xx inch deeper than it needs to be with both separate X,Y and then Z probes and the corners probe where it does everything (X,Y,Z).
Do you see any mechanical play on the Z axis/router shaft itself?
1 Like
No, it’s tight. I wen’t through the vwheels, and the belt as well as the axis itself. I had to adjust the router back as it was tilted forward and I found zero slop.
The depth is also consistently off, which leads me to believe something is incorrectly calibrated somewhere. It’s not wonky. If I set a pocket depth to .375 it’ll carve down to .4. Same with the zero, it’s always off about 32nd of an inch.
I read somewhere having the HDZ setting instead of Z-Plus could cause this but I made sure to double check the machine configuration in CM. Could CC be causing the issue? I design on one computer and cut on another.
And manually zeroing Z with the paper method instead of the probe, works fine ?
Can you measure the thickness of you bitzero v2 (with and without including the corner), for the sake of covering that ground ?
Let’s also double check your Z calibration value just in case. In CM, Settings section, click the log window button at the bottom, then go to MDI tab and send $$: what value does $102 have ?
After that I’m out of ideas, it’s worth asking support@carbide3d.com maybe they can puzzle it out for you.
1 Like
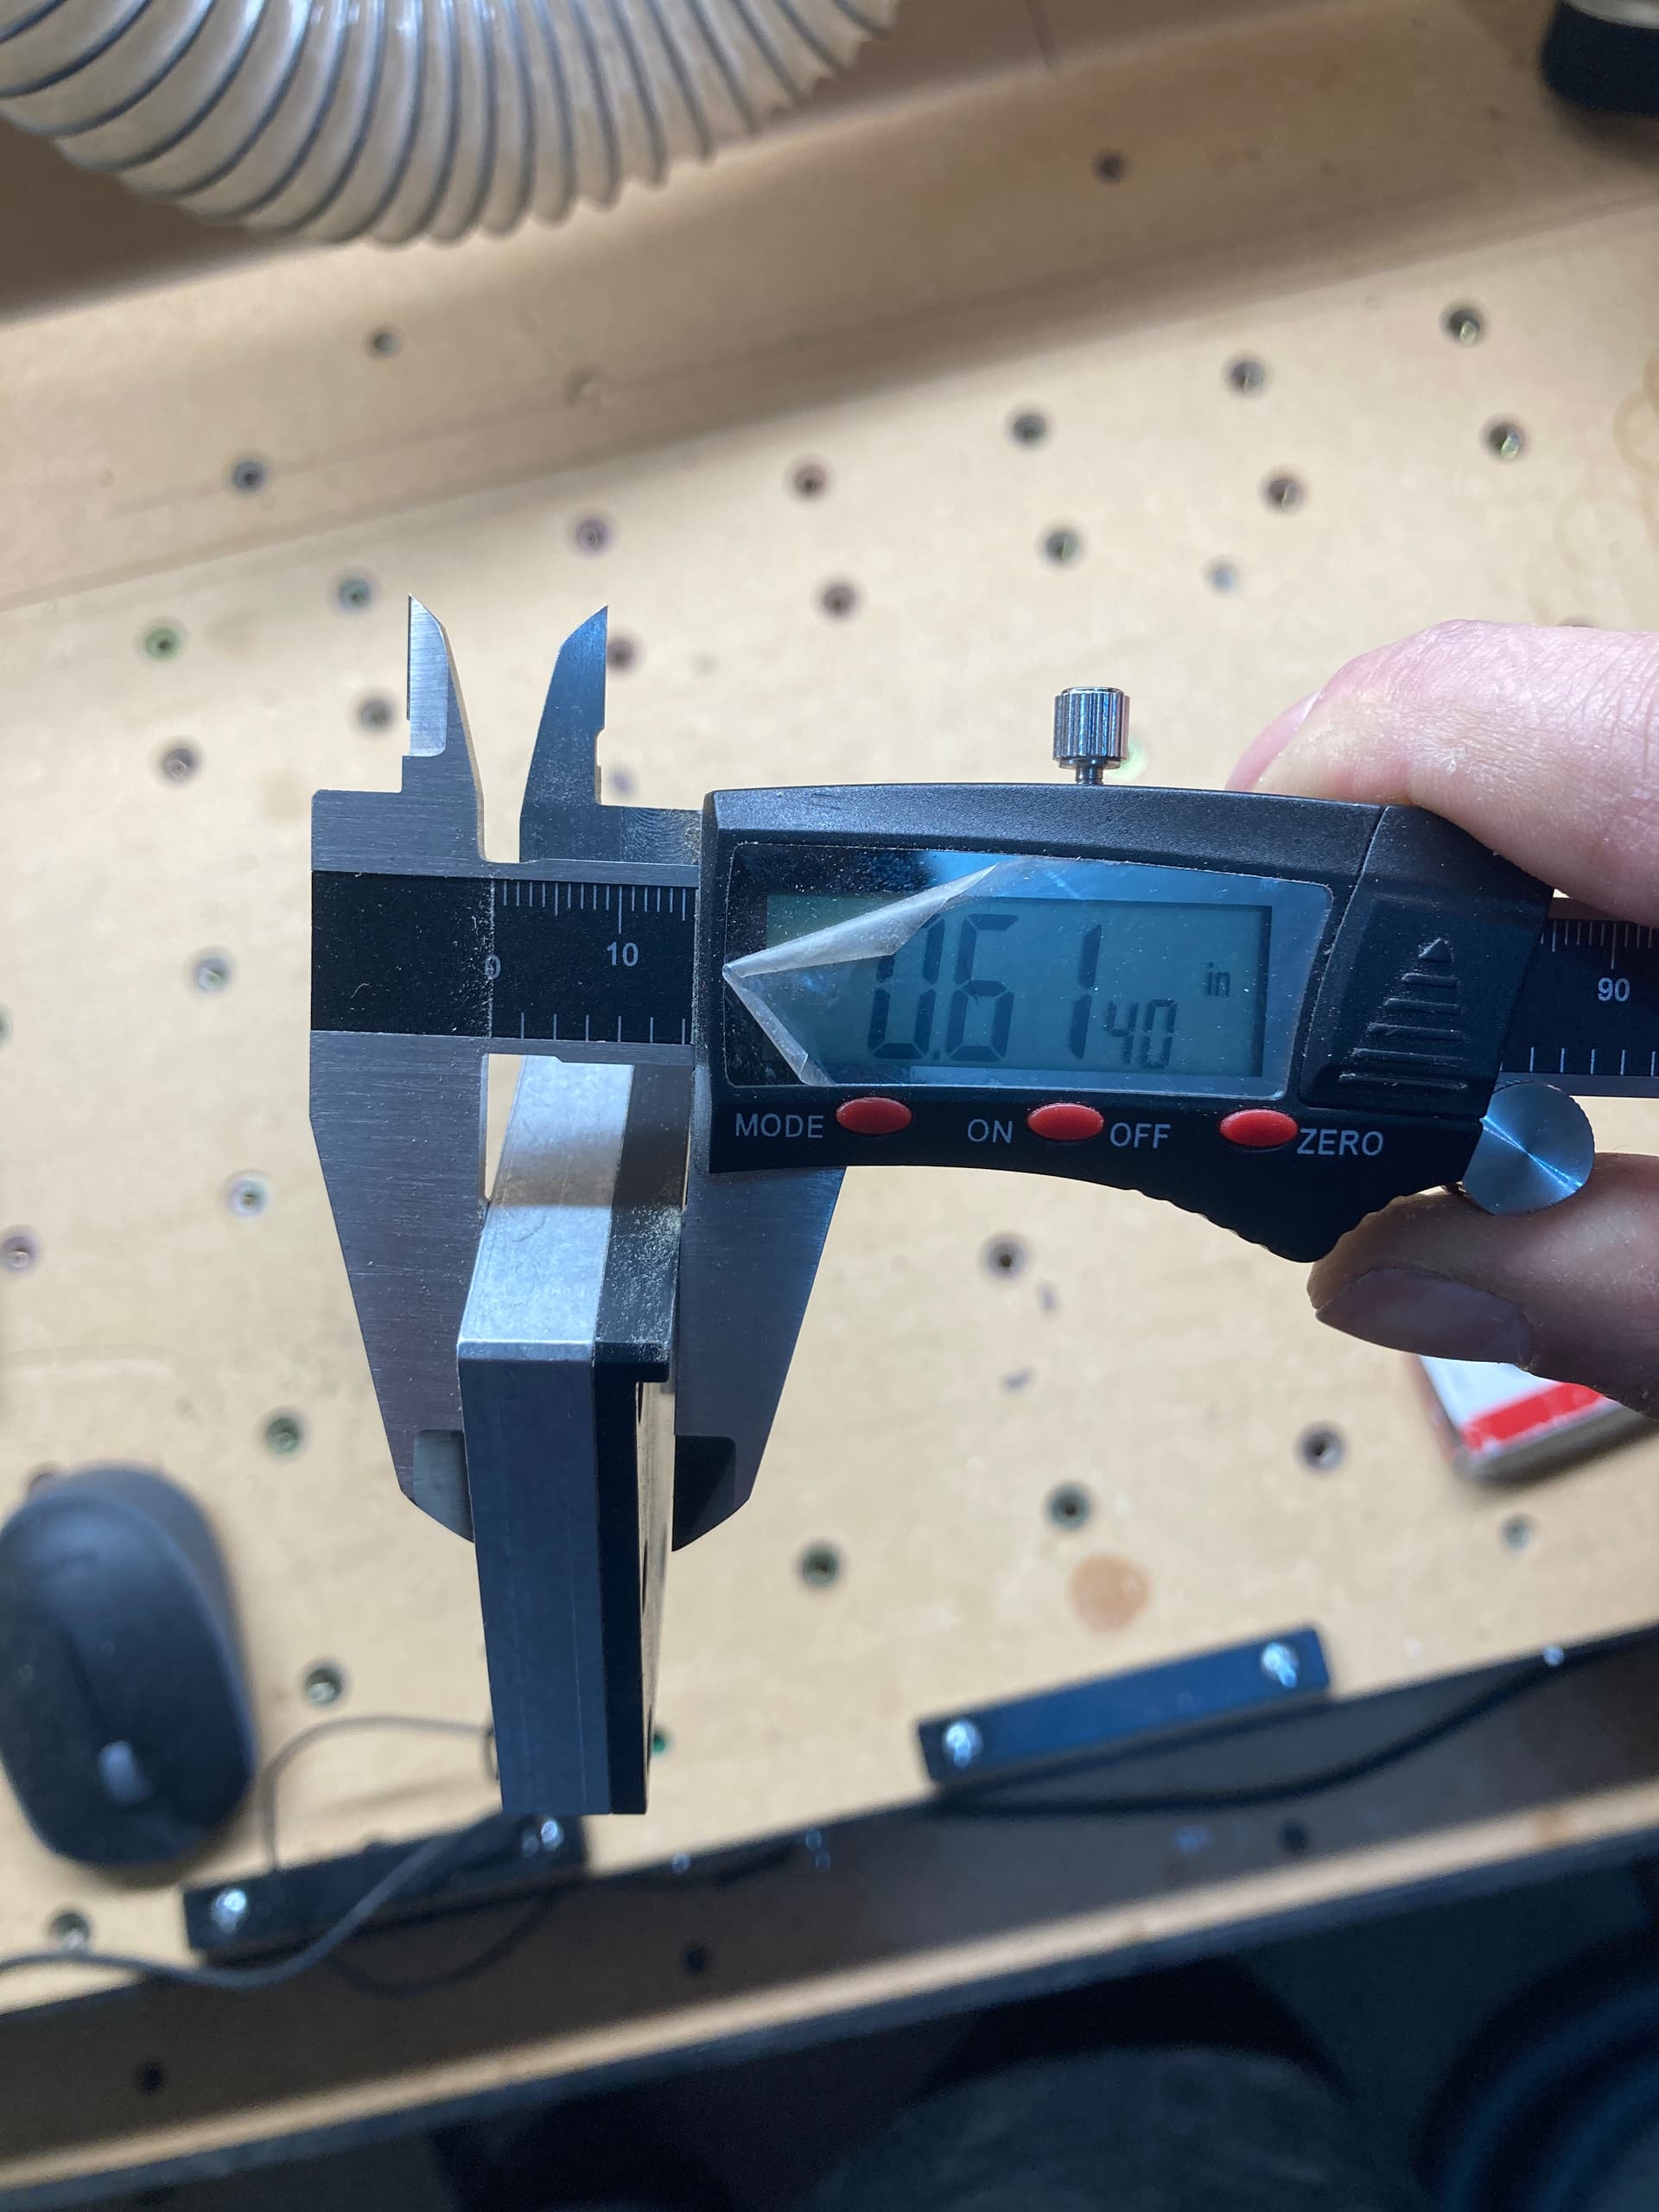

Here are the bitzero measurements. I followed your instructions for the $102 but this is what i get.


Sorry, I meant sending $$
( the colon was just part of the sentence)
No problem the $102 value is: 200.000. I’ve opened a support case with Carbide and they think they may have an idea what it is. I’ll probably hear back tomorrow from the.
Okay this last post is for anyone who may have issues like I have in the future. I will break the problem solving into 2 parts.
Inconsistent V Carve
This was due to using thick double sided tape also my router being out of square. I remedied this issue by screwing my wasteboard to the stock MDF board, and using a framing square on the body of the router to square it to the table. I did this by loosening the support beam screws and rotating the whole assembly until the router was square.
Once this was done I flattened the board. For hold down I use CA glue along with side pressure clamps. Now my engraving is consistent across the entire piece.
Cutting too deep
After reaching out to Carbide support Fleming narrowed the issue to the 1/4" probing pin that came with the bitzero. I instead used my 1/4 endmill with the bitzero and my depth was perfect. Here is his response regarding the issue and how to avoid it.
I always suggest using a flat 1/4in and/or 1/8in endmill to probe with the bitzero instead of the probing pins, this helps keep our job setup a bit more simplified and reduces the potential mix up of Z offsets.
If you’re looking to perform just a single V carve operation, I suggest setting the X and Y zeros manually and then using the bitzero to probe just the Z axis.
For other multi-tool projects, I suggest following the same workflow we just did-
-Install first tool of project
-turn machine on and initialize
-probe using that same tool
-start jobAlso, those probing pins have a flat bottom that notoriously take the bitsetter magnets with them, just another reason to use standard endmills for the bitzero and bitsetter.
This topic was automatically closed 30 days after the last reply. New replies are no longer allowed.