I’ve had my shapeoko for about a year now, and this issue has been persistent since the day I bought it. I reached out to carbide to try and resolve the issue initially and nothing worked. I’ve been lurking the forums for the past year reading threads but nothing address my issue.
I’ve done everything to rule out potential issues and I’m stumped as to what more I can do besides there being something wrong in the software.
First, my waste board is flattened to the machine, and my tramming is spot on. I know this because every time I cut pockets the depth is consistent and almost perfectly flat every time.
I always plane my wood to the exact same thickness, that way I can remove the variable of an uneven board causing an uneven engraving.
I purchased the bitsetter and bitzero to always get a consistent zero. Although the incosistent engraving happened when I did the paper trick and now it’s happening with the bitzero/bitsetter.
I purchased a 30 degree vbit to make finer engravings instead of just the 60 and 90 I’ve been using.
Now here’s where I’m stumped, after doing all that, the inconsistent depth only seems to happen with the V-carve and it happens say 2/10 cuts. I will load almost identical files. The end mill and any other bit I load will cut to the exact depth prescribed by my gcode, then I load the v bit and it’ll just barely scratch the surface.
The preview shows proper depth with whatever bit I choose, but the actual cut is shallow enough that I have to drive my Z down manually to get the text onto the board.
I uploaded the most recent Gcode file that has caused me this issue. If anyone has any ideas I’m all ears.
My suggestion would be to re-check zero at the center of the V-carving and re-run only the V-carving text, if need be, iterating down until you get a good result.
You covered the usual suspects. You might try surfacing vcarve jobs 0.010 inch to make sure the surface is flat in relationship to the router. Put pencil marks all over the surface and when they all disappear you surface is flat. Vcarving is very sensative to small deviations in the surface.
You did not say how you are securing the material. I have surfaced my spoilboard and my 1/4-20 bolts were lifting the spoilboard because my bolts were bottoming out on the base board.
Make sure your collet is tight. The down force can cause your bit to rise up the longer you vcarve. Also check the spindle bearings. Just grab the collet and try to wiggle it. Also check all your vwheels for proper tightness.
I use the scotch double sided tape and I use quite a bit, as I’ve had piece break loose before. I also cut it with scissors to ensure it doesn’t fold up or become uneven. I’m sure I could create a clamping system but this is cheap and quick for right now and it works.
My collet is tight, I’ve had my endmill come loose so I make sure she’s plenty snug before starting. I will double check my V wheels to make sure they’re tight as well.
I use cam clamps but also use blue painters tape and superglue. The superglue works well for parts I dont want tabs. I am careful to not overlap tape and it is a fine line between too much superglue and not enough.
Could your double sided tape be flattened in places more than others. With the superglue I run a J roller over the whole surface to get an even surface and good adhesion. The smaller the v bit the more surface deviation can cause carving quality problems.
I can try and switch up the clamping option to see if that helps, because right now the depth issue has happened all over the waste board. The picture I upload was in the lower right, whereas I usually do most of my vcarving up in the top right.
I’m really thinking there’s something up with the software, as one piece it’ll carve flawlessly with no issue, and the next it barely carves the letters…
Anything is possible but if it was the software many more people would be complaining. Whatever is wrong is local to your machine.
What type of Z axis do you have? The Z-Plus and HDZ are not likely to slip and loose steps. If you have a Belt Z axis look at your retract height and belt tightness and condition of the belt of the Z axis itself and belt pulley set screws tight and in position with one on the flat of the motor shaft… Did you check your router mount to make sure your router is good and tight? If you grab your router by the body can you rock your router?
Sounds like you have tried to cover everything. If it is somehow your procedures used try to review your workflow step by step.
Even though you stated your spoilboard is level and router trammed try to surface your work piece with a fly bit and do some test v carving to see if you have an level spoil board. Try a large scrap piece of plywood and do some carving in the four corners and center to verify the levelness of your spoilboard of isolate the problem to a certain location. You could make a series of circles with increasing concentric pattern to see if there are any low/high spots consistently.
Hey thanks for this, I will go through everything tomorrow and report back, because I put on two more pieces and the same thing happened with the shallow cut. I believe I have the Z-Plus.
Okay, over the weekend i completely replaced my spoil board and screwed it into the actual mdf and got rid of the double sided tape.
I made a pocket cut and on a piece of wood set to .375 depth. On the northern part of the piece it cut .35 and on the southern part it cut .375. Now I double checked the thickness of the wood and it was off that exact 2 hundreds of an inch on the north side. My zero was set on the low corner, not the high corner and the pocket has an obvious slope to it. Shouldn’t the pocket be at least flat?
I checked all my screws and v wheels, everything is tight and secure. Where would be the next area I should tackle?
I took it off as I needed to get it out it was a customer order. I ordered a tramming tool that has digital gauges on them. I will check the tramming to the wasteboard (which I leveled to the cnc) and see what I get. I did notice the left to right was smooth as butter, but the north to south had a lip. I’m not sure if that was because of the cheap bit I used, or if the CNC was off. I will run another test with stock that is uniform all the way across and update.
Ridges after flattening the spoil board show the router is not square to the table. If the ridges are on the sides then you need to adjust the router left/right. If the ridges are on the front and back then you need to tilt the router. To tilt the router you insert foil or brass shims at the top or bottom of the router mount.
Even a perfectly trammed router can leave very fine lines. If you can just run sand paper over the spoil board and remove the ridges then leave it alone. But if you have large ridges adjust the router again.
To level the spoil board mark all over the spoil board with pencil marks. I use a 1 inch fly bit with 50% stepover. Take 0.010" off the spoil board in a pocket operation. If any pencil marks zero the router for z where the pencil marks are and rerun the leveling program.
I set up my fly bit for a 0.010" depth of cut. By setting up the bit for the 0.010 doc and t he pocket for 0.010 I get one pass of the leveling program.
Here is the setup of my Whiteside 1" 6210 bit and this will work with any 1" fly bit.
Yes the ridges are on the front and back side, so I believe the router may be tilted. Tramming should show this as it fits into the router like a bit and has two gauges on either side. It will come before the end of this week so I will get that trammed, and use your feeds and speeds to run another flattening pass. I will report back once I have that all situated.
I held up a speed square to the spindle nut, and noticed a gap on the front and back side. The left to right were dead on. I loosened the rail bolts and rotated it as far as I could backwards and it now reads almost perfectly square. This is assuming my square is perfect, and the nut is perfectly square to the router. I have more projects to cut before my trammer gets here, so I will run a few more passes and ensure my wood is even all the way across and we will see if that helps the situation.
Dee,
I had a similar problem and I cannot say I found the solution for yours. I was using up cut bits and the bits appeared to be lifting the board as they cut. And once lifted, sawdust got under the board and it stayed raised. And, as someone else said, vcarve is very sensitive to the elevation of the material. Part of my solution was the final could of cuts were shallow and with a straight cut bit. I also started to put hold downs in the middle of the material, obviously outside the cut area. And this increased the amount of material used.
Now I have the problem you experienced 1 out of 10 instead of 5 out of 10.
Good luck with it,
Rex
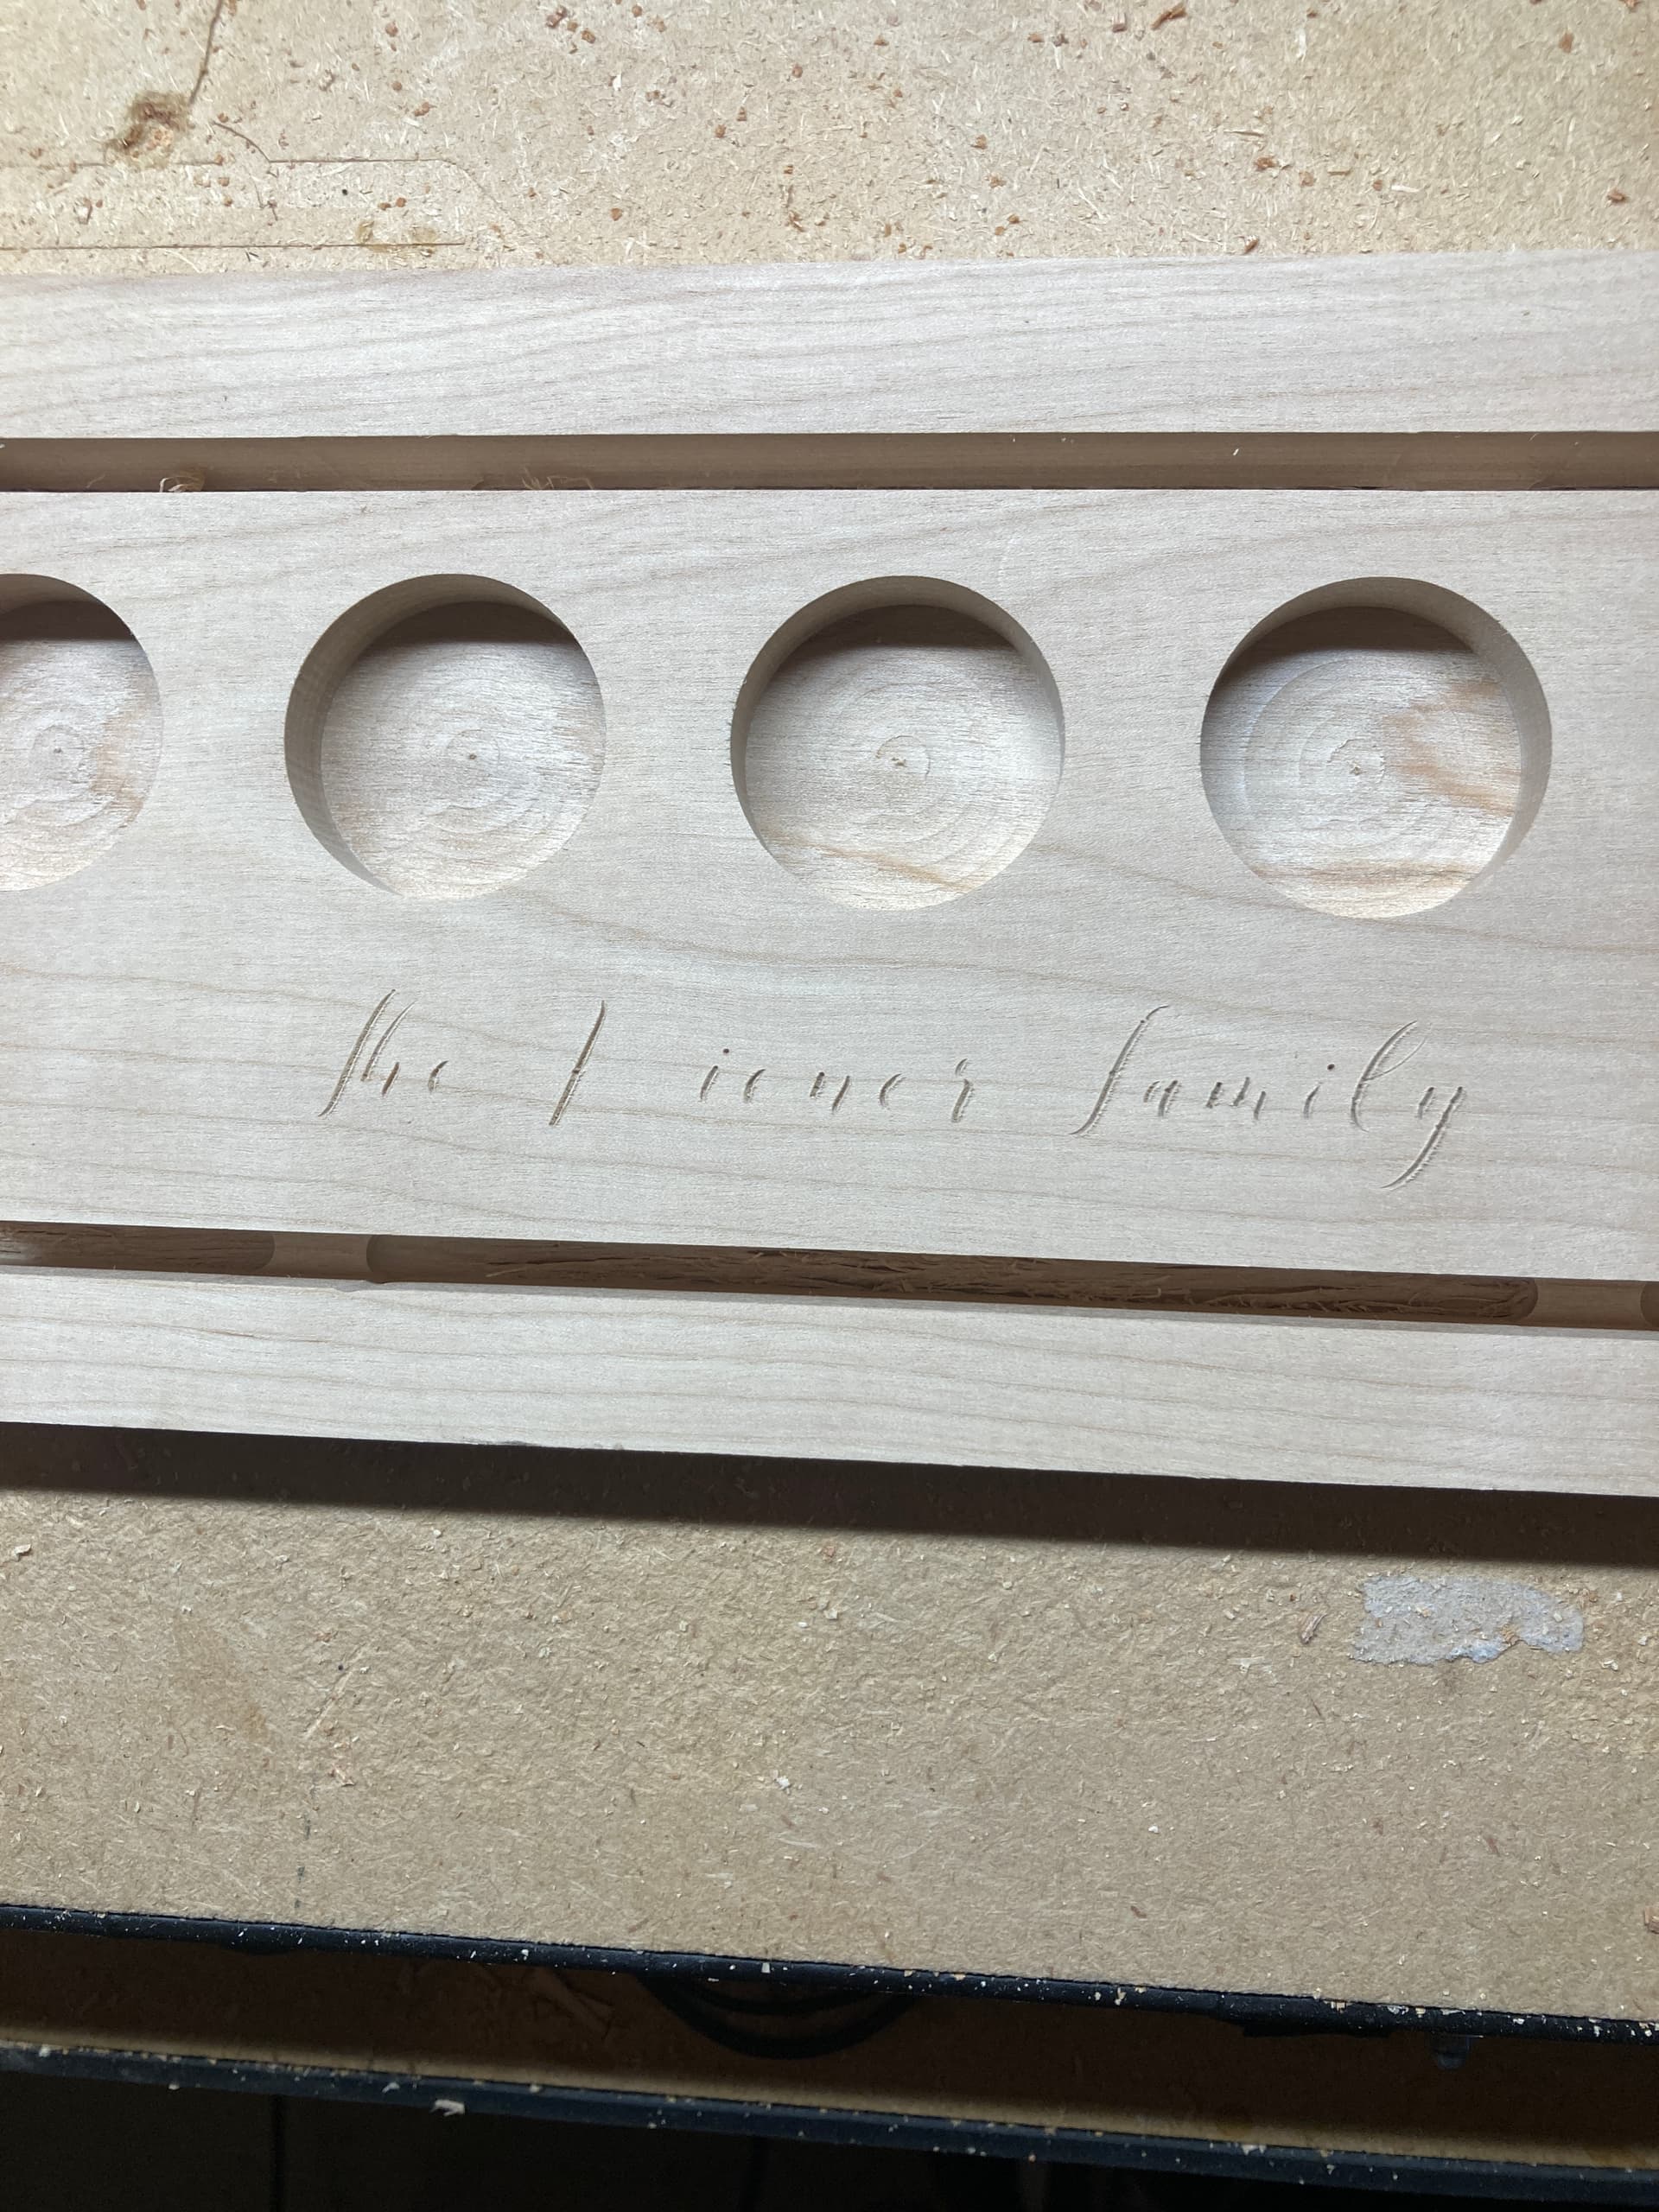
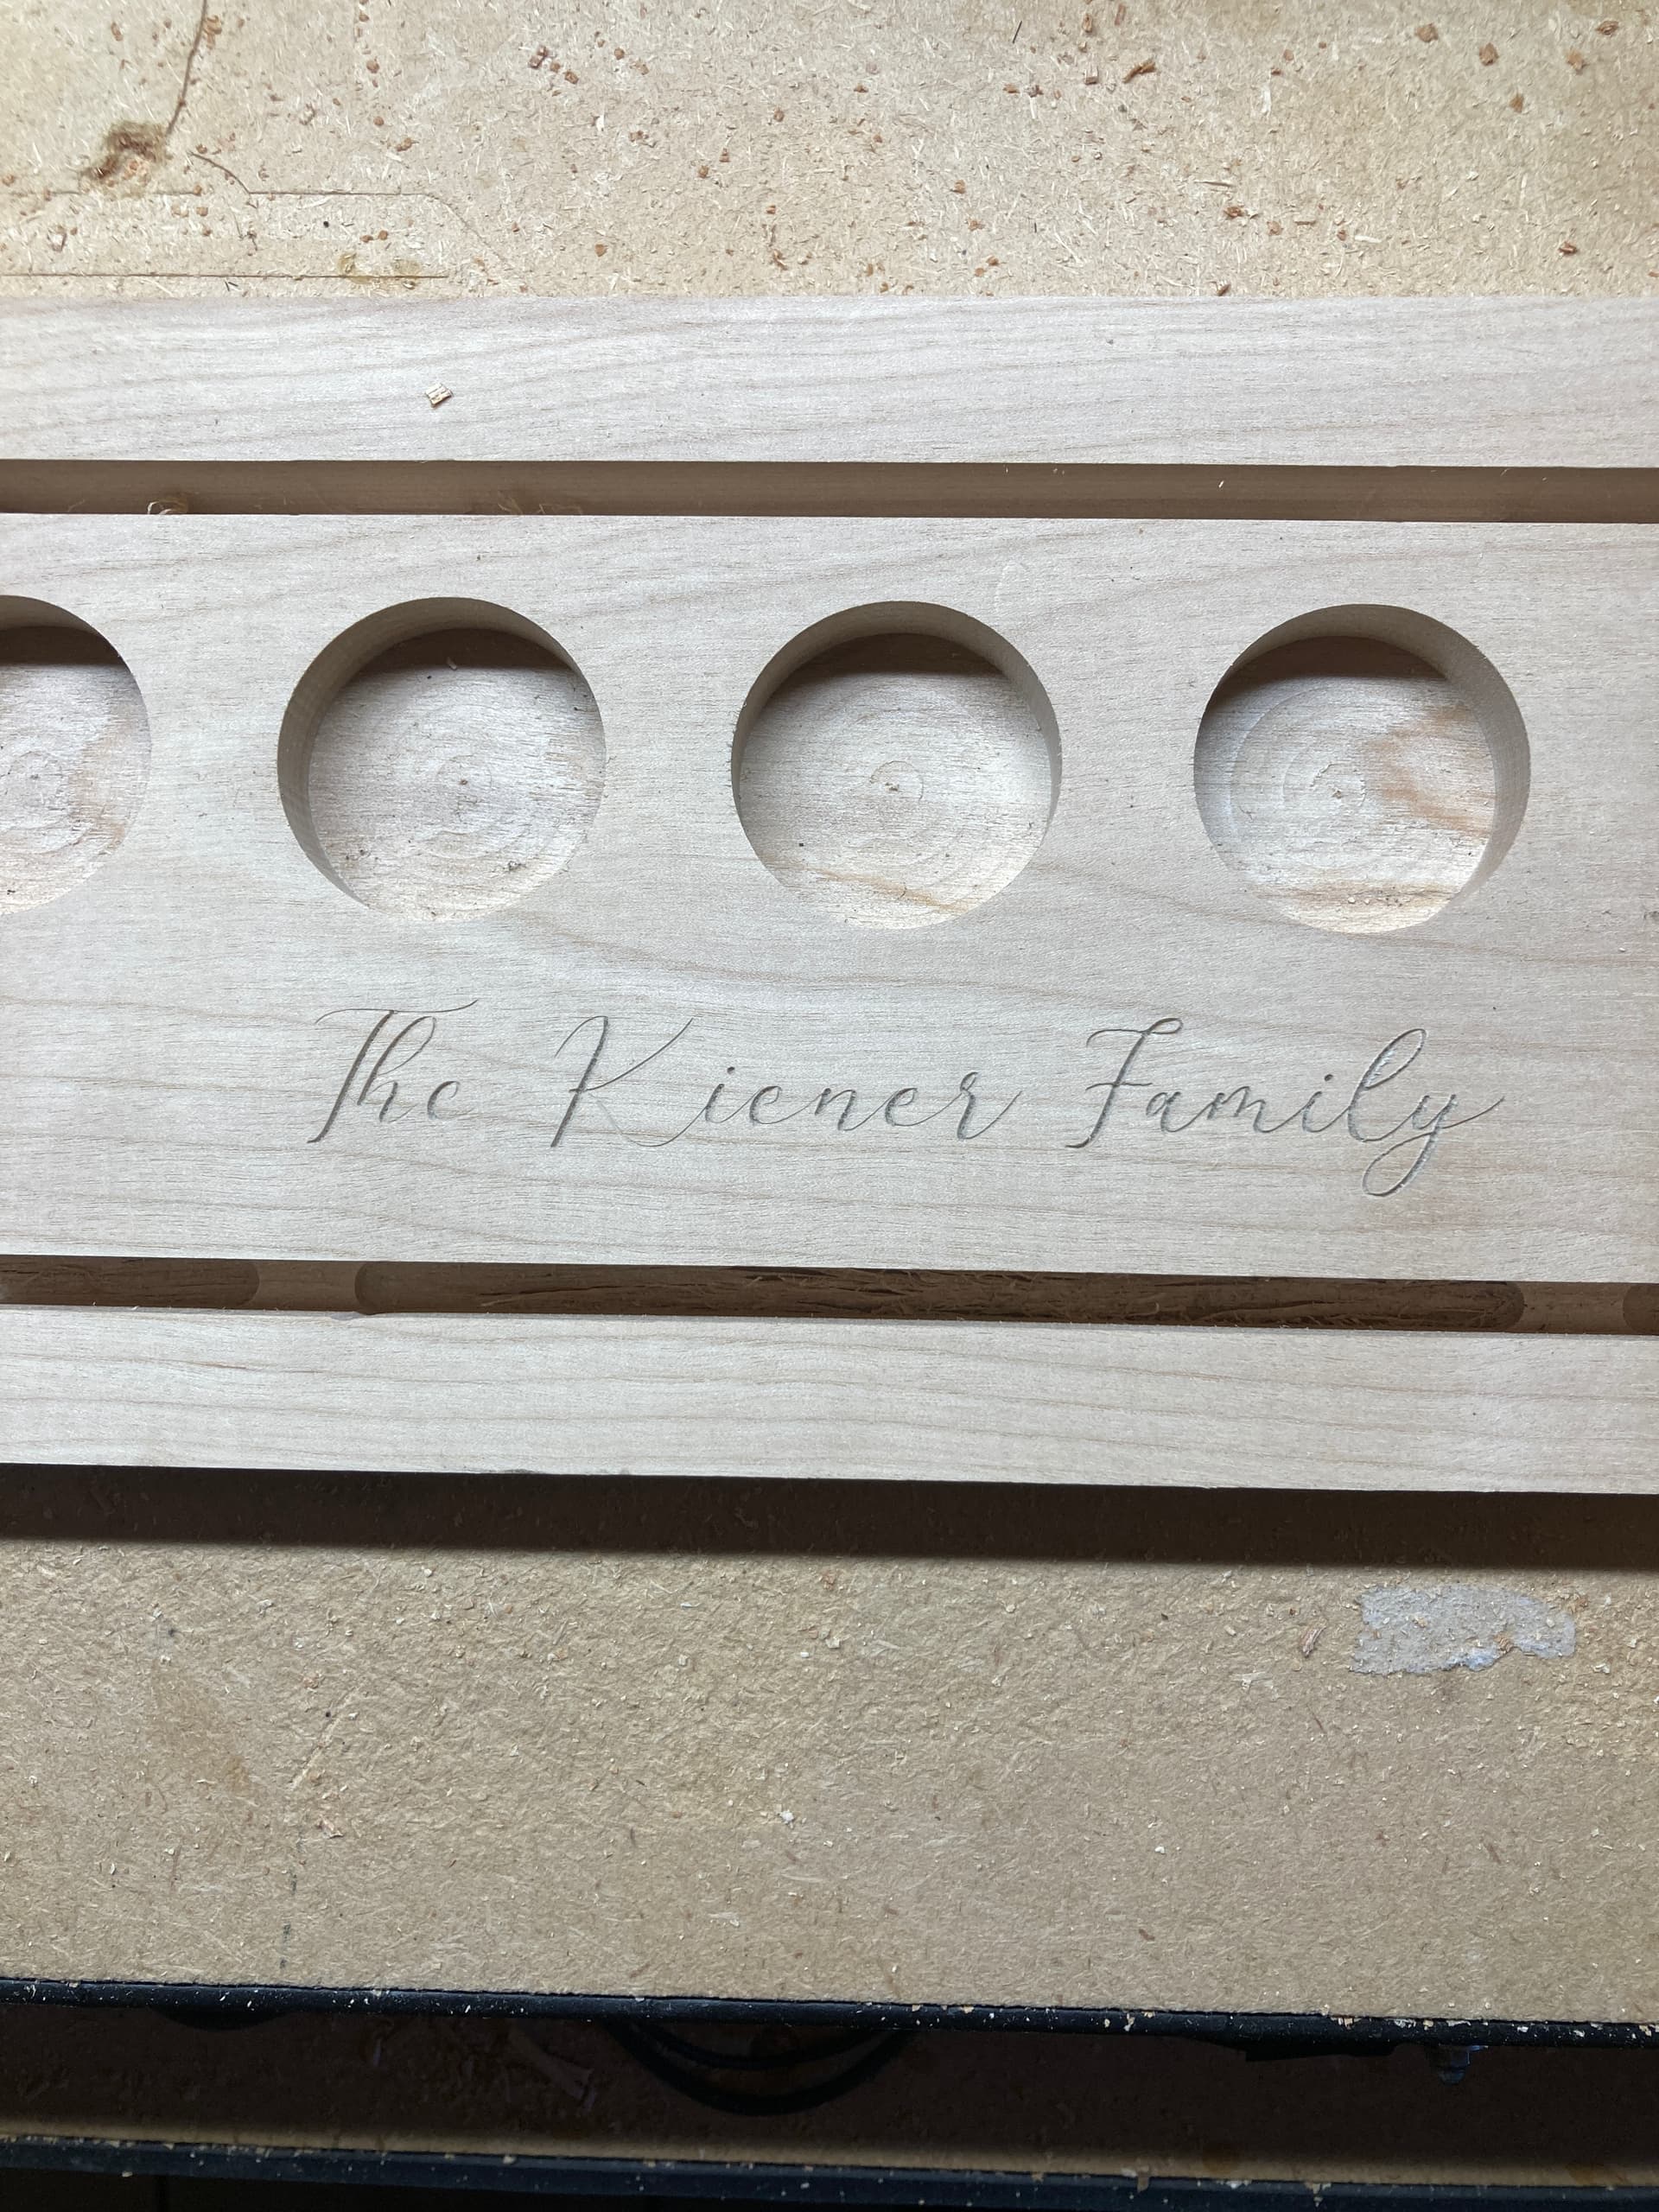
I was about to write paragraphs about how I have no idea what it is, but I think you nailed it. I had an issue with the depth as I was using hold down clamps, but I decided to try CA glue along with masking tape.
The engraving went a little deeper than I expected, but otherwise it looks completely even. I either have to stick to the masking tape/ca glue or be more conscientious of how I clamp the top of the workpiece. I think having the clamps just barely putting pressure evenly across the board will help.
I’ll report back if the problem persists, but I think this may be it. Thank you all for you help, I really appreciate it!
Alright, a new issue has arisen now that I’ve worked through everything else.
After squaring the CNC to the wasteboard, I ran another flattening pass and the wasteboard feels much smoother and flatter.
I ran my file and I noticed the depth of cut is slightly too deep. So I used the probe and verified the zero manually, and sure enough, it’s about 1mm too deep.
I run the corners probe on the bitzero v2, and use the 1/4 probing end mill to set the zeros. It goes off without a hitch, the “C” turns red when the probe touches the corners and then the Z, the X/Y are perfect but the Z is about a mm too deep. I pulled the Z up manually and the depth was perfect.
I verified that my machine is set right (Shapeoko XL/Z-Plus). What are some troubleshooting things I can do to figure this out?