There are a number of ways to do inlays, and a number of alternatives. Some of the simpler options can be done using just Carbide Create, while others require additional software, possibly just Inkscape, or specialized commercial software such as Vectric Vcarve or Amazon Canvas.
Carbide Create’s native facility with inlay is necessarily limited by the round endmills and their diameter for normal techniques, and its inability to flip designs. Symmetrical work can be done as shown in: Let’s make a coaster — basically one draws a symmetrical shape which will allow the endmill to get into all corners as discussed at: Inlay Work (Woodworking) — if the inlay and the stock material are the same thickness, then one doesn’t need to be able to flip one or the other, just cut both from the same side and then assemble.
One work-around for the inability to flip is to use the center of the stock for the origin (and place that at or near to the center of the machine), home / move the machine to that point, then reconfigure Grbl to reverse the X-axis, cut the part, then undo the reversal.
One technique for getting around the limitation of a round endmill and attendant detailing limits is to use a V endmill to cut both the inlay piece, and the pocket — the pocket needs to be cut from behind, and the inlay portion from the front, so as to get them to nest properly and to take advantage of the added detail the V endmill affords.
As noted above, it is possible to cheat the flipping in Carbide Create by instead using the center of the machine and reversing an axis, but for this discussion, we will flip the graphic and put both copies in a single file:
Next we need to know how thick the inlay material will be, and how wide we should expand the path — a 90 degree V endmill makes this simple, since to cut to a given depth, one needs the width of the V to be twice that:
So we offset each version of the dog to the outside twice, once to 0.25", and once to 0.5":
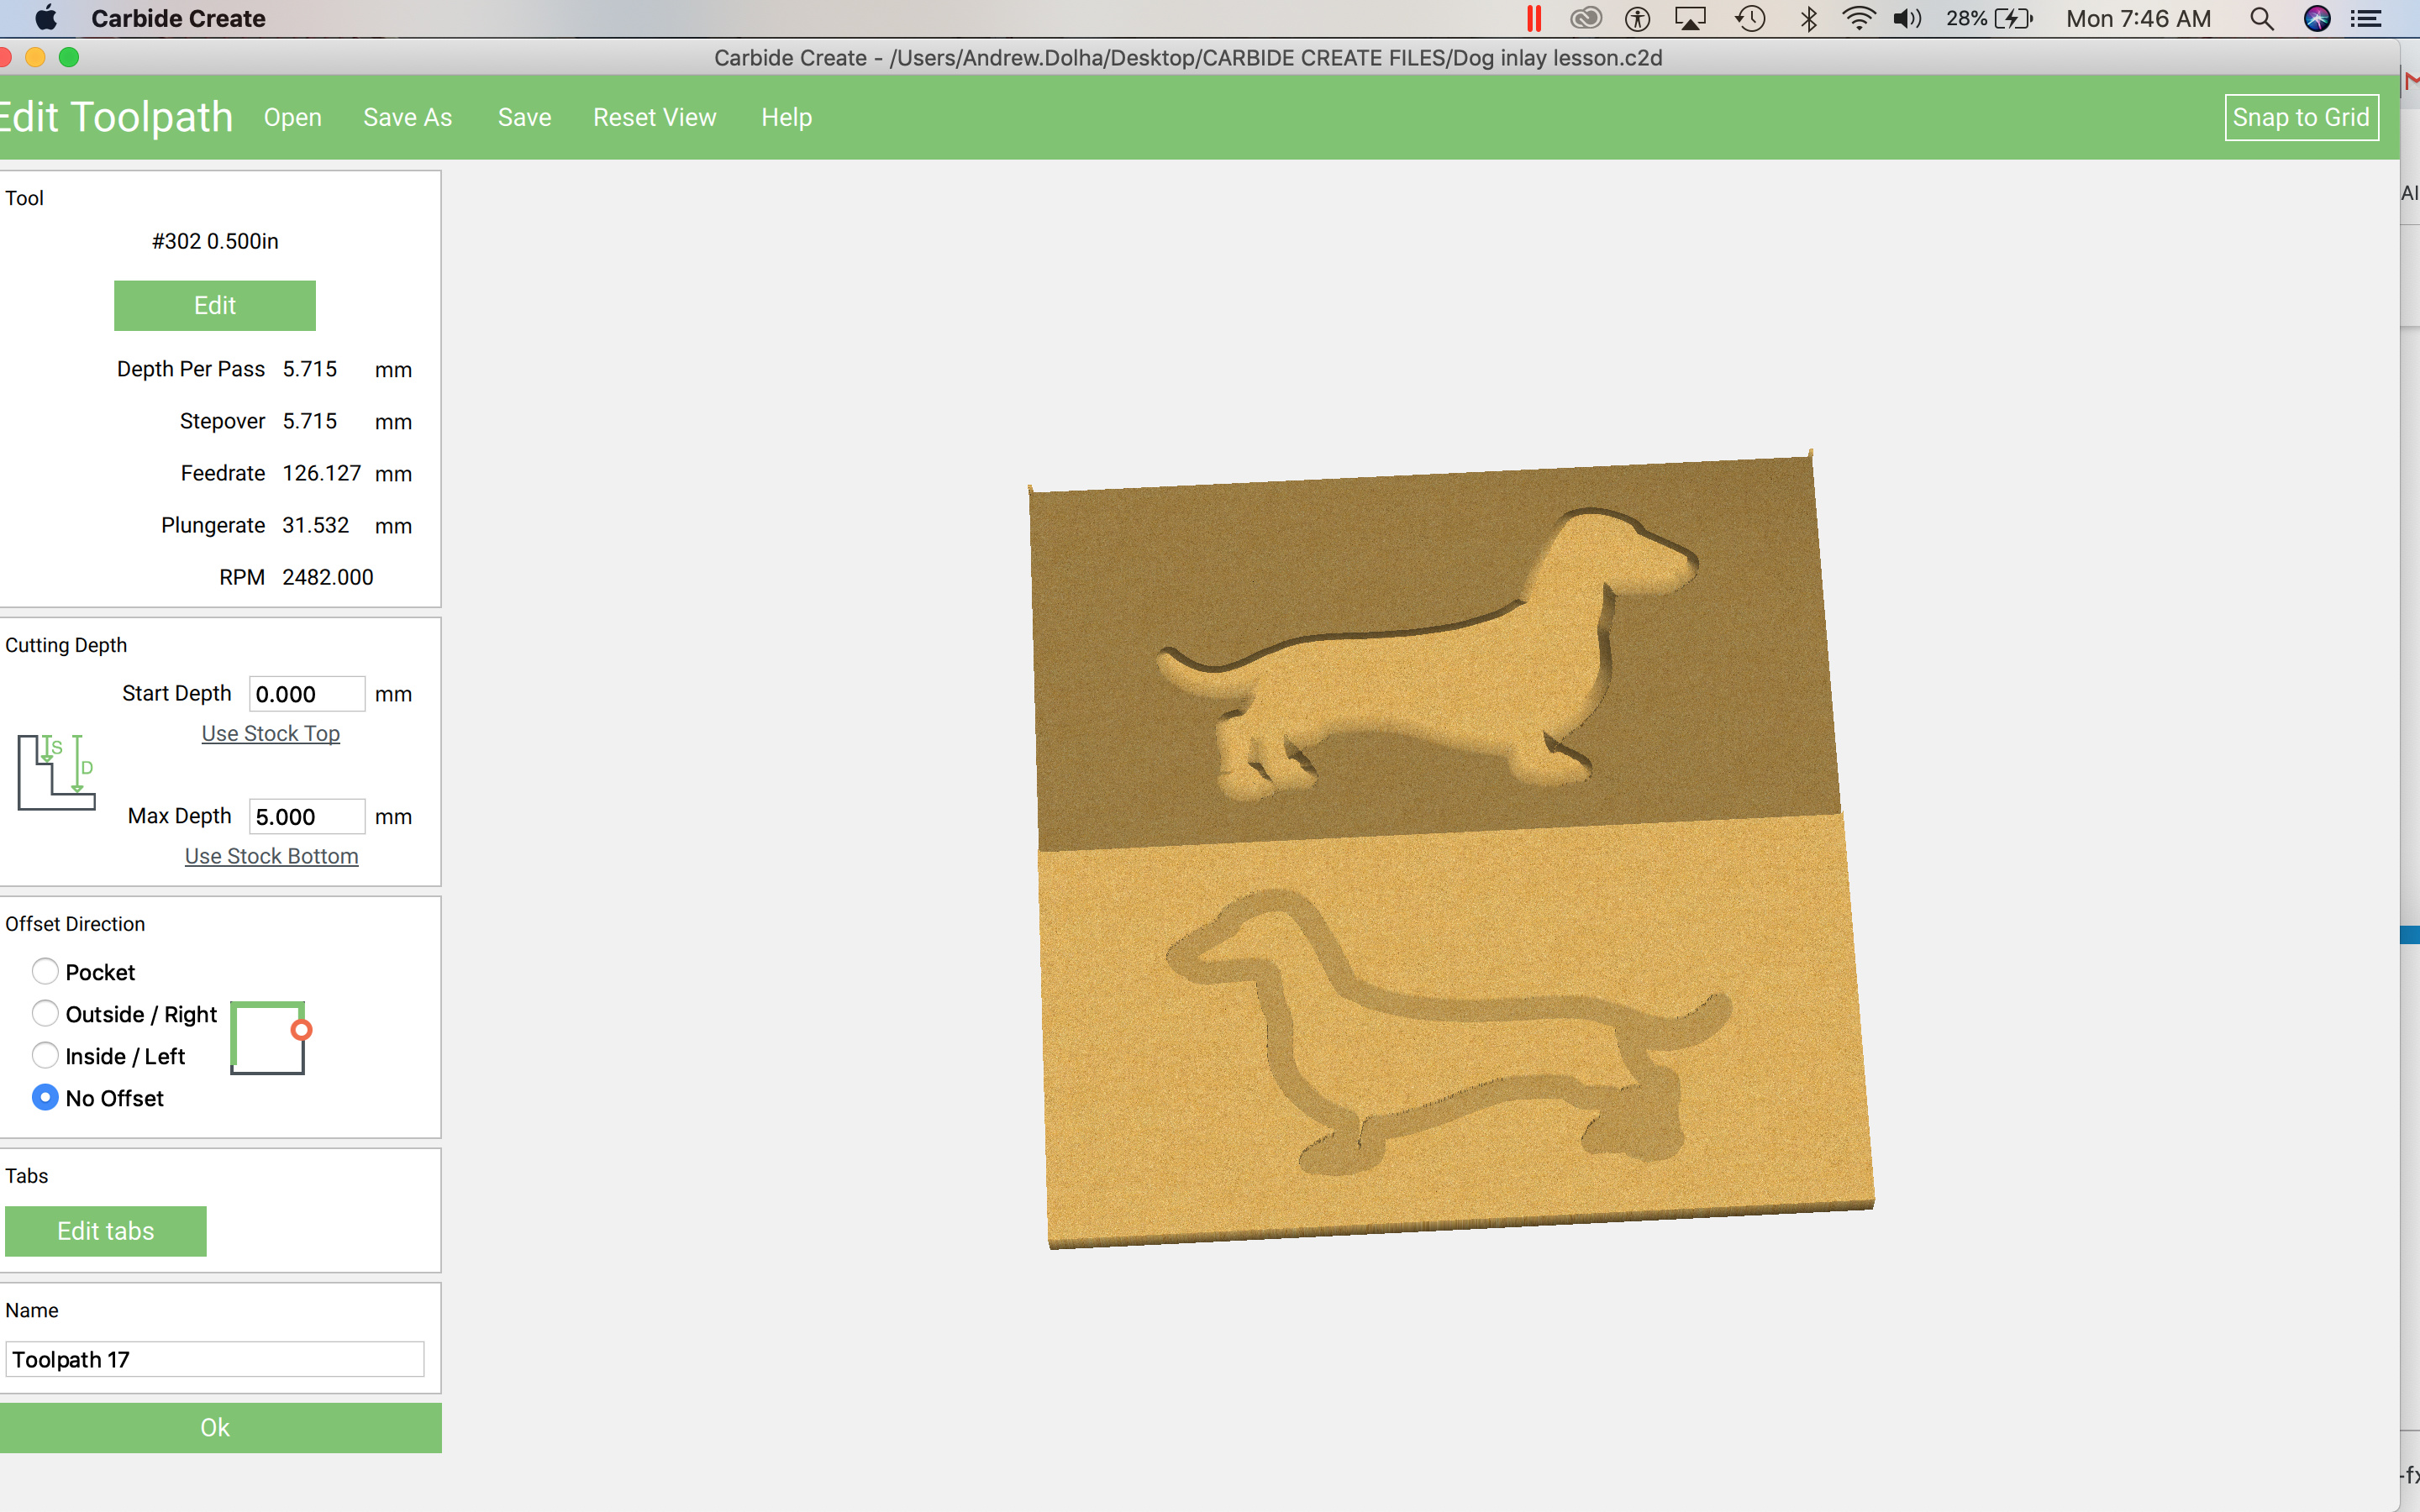
Then select the middle path and the surrounding rectangle and assign a pocket toolpath — this should probably be adjusted to be at least deeper than the inlay thickness by the expected glue line (calculating that is left as an exercise for the reader):
This may then be previewed to see:
(Note that the material which the inlay is cut from should actually be thicker than the 0.25" dimension — this way, if there are multiple small portions showing, they may all be manipulated as a single part which will be glued on from the back)
Next it turns out that the two additional offsettings weren’t needed — select the path which describes the desired inlay pocket and assign a no offset contour to it using a V endmill:
When that path is cut, it is important that one zero so as to cut all the way through (cheat the Z zero by at least the thickness of the glue line) — unfortunately, V endmills assigned to a follow path / contour toolpath do not preview properly, so one has to take it on faith that the resultant pocket will match up.
Hey Will. Can you explain the last step a little more? Are you referring to the bottom picture for the cutout that the inlay is going in to? Which path did you choose? I have 45 90 and 60 v-groove bits. I tried using the 90 after choosing contour and the innermost path. I know you said it doesn’t preview, but wouldn’t that just cut a v around the path still leaving the interior to put the insert into? And what do you mean by cheating the zero? Thanks very much for your time.
Hey Will, thanks for the response. I’m still being a little thick in the head with this. I know it doesn’t preview properly, but the bottom dog I’m assuming is where the inlay fits into. I put it on contour with no offset as you suggest using a vee bit, but how does the rest of the pocket get carved out to accept the inlay?
Sorry Will, I must be thinking of something different.
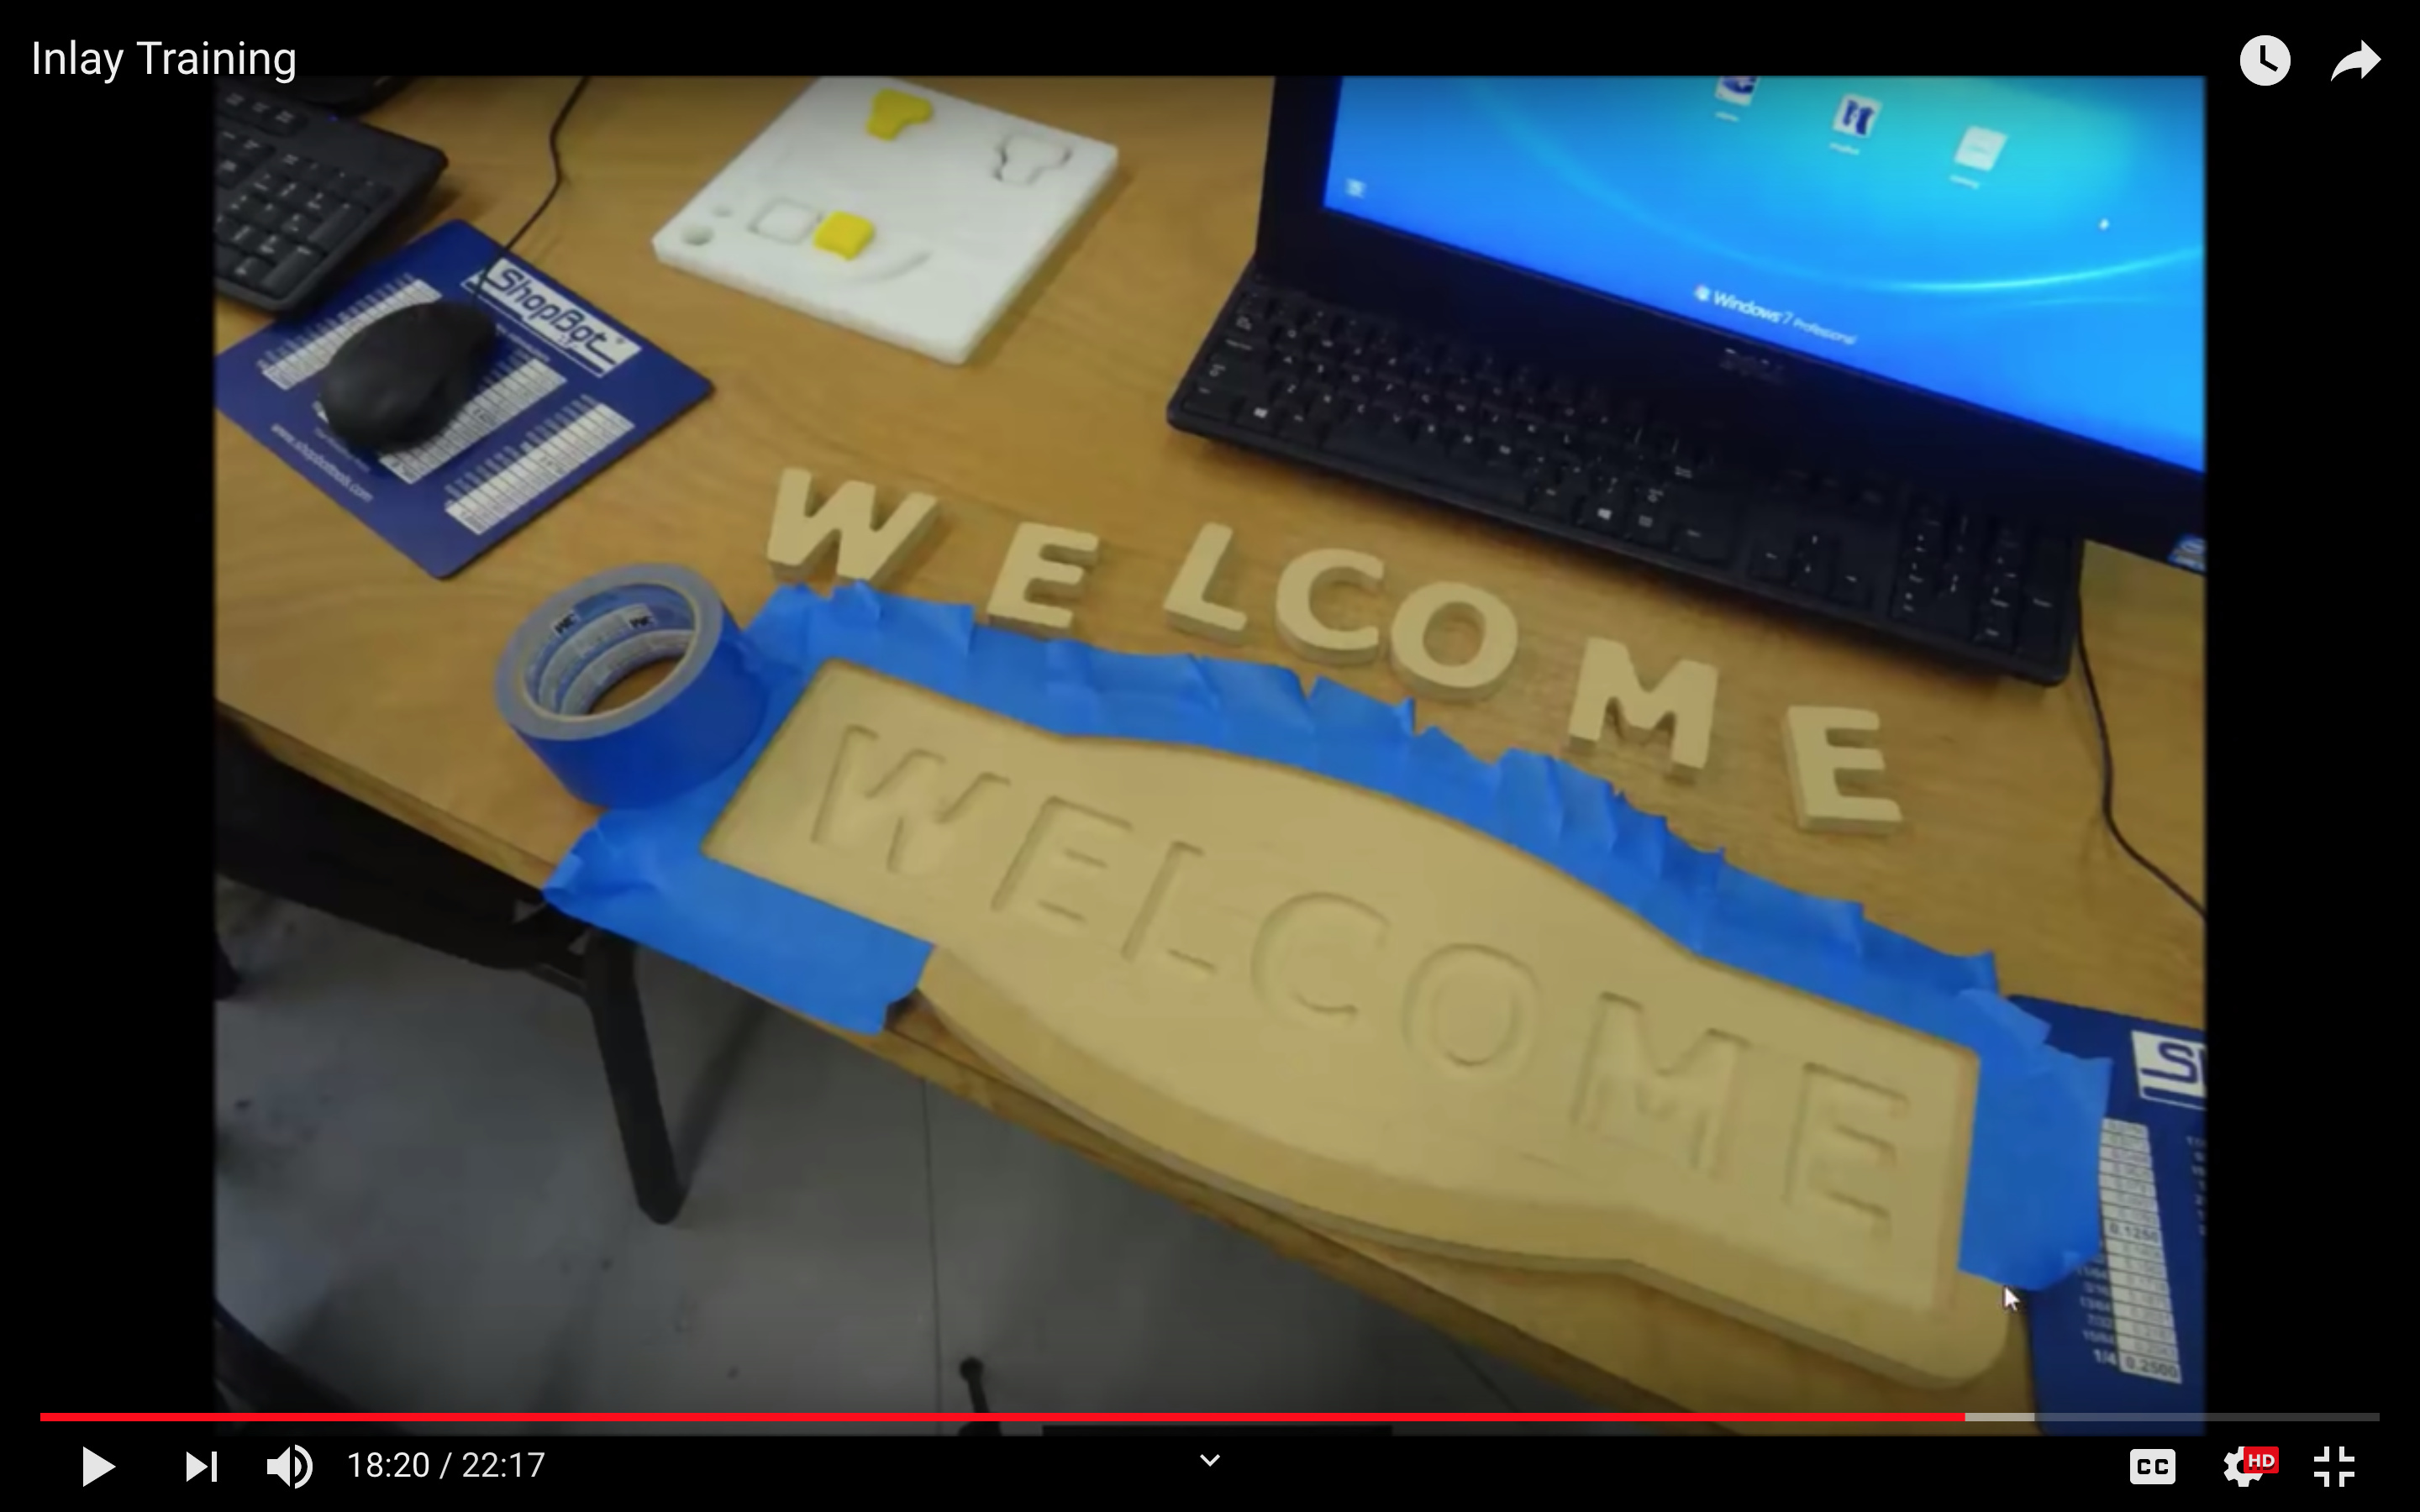
So, the bottom dog is cut all the way through? I thought the inlay (top) would sit in a shallow pocket then sanded like this picture. So, how will there be a pocket with a no offset cut?
Hi Will. I’m still stuck where Andrew was. When you invert the male portion and insert into the female, the access waste in the interior would need to be hollowed out. If the no offset contour cut using the vee bit were to cut all the way through, it doesn’t seem possible in the narrow areas like the legs. Not without using a very sharp angled bit or incredibly thin stock. Every thing I’ve read or watched indicates that you create a shallow pocket for the male portion to sit in, then sand or cut away access above the surface. The waste in the pocket is usually cut with an endmill to save time as apposed to clearing it with the vbit.
My best guess would be to offset inside to half the width of the vcut on the female piece. So say if the debth was .12 inches the width would be twice that with a 90bit. So the inside offset should be .12, the debth of the cut correct? Thank you in advance for any help. I am learning all of this from scratch.
One big step forward to this is the “Advanced V carve” feature in CC 460 (and 461) which is currently in beta, that allows for the “set a depth and clear with a flat endmill”
Ok, that will be a nice feature to have. Thanks again. The idea seems simple now if I understand correctly. The process is basically repeated except offset to the inside with an increase in debth for the glue line.