I have a big anniversary coming up and I would like to make a special gift box for her. In a rare bit of planning ahead, I have several months to work with (early November). What I want to do is a stretch for where I am currently, but not out of the park.
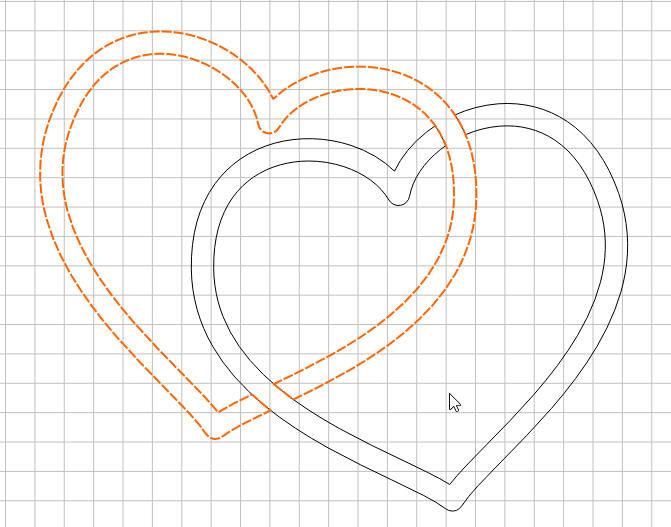
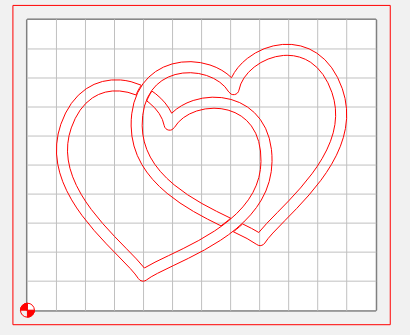
What I want to create is a nice box with an inlay top. Part of the inlay would be a pair of interlocking hearts. I know that this will involve some work with layers, but of course I am making it more complicated than that by having a figure that overlaps in one place and under laps in another. I think I need to break the figure up into two sets of drawings, one that is the “top” and one that would be layer underneath. At that point I can use the same technique as people have used for stacked text (at least I hope so).
There are other elements of the project idea that I haven’t sorted out, but at this stage I think it’s best for me to break this into pieces. As far as the inlay part goes I have been a failure at v-carve inlays despite reading multiple threads and watching some you tube videos. I have gotten old school inlays to work using small cutters. I think I’ll need to figure out the v-carve thing at some point. (The inlay part seems to always end up wider than the opening of the pocket).
That’s good, because you can always adjust & take a little more off.
When you’re ready & have a design let us know & someone (Will, myself, et.al. Lots of smart guys here ) will help you with how to set up the design & machine it. What software are you using to design & program?
I’m using CC. I see lots of others using different packages to do this, but a few that have used CC too.
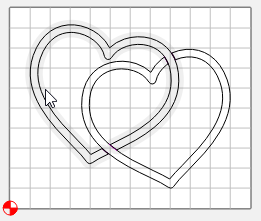
I have a start in CC that I can attempt to post. Interlocking hearts box.c2d (37.5 KB)
You need to make each heart it’s own closed vector by adding the ends where it intersects the other heart. I did this by copying each heart, trimming all but the small end for the other heart, then joining those small ends to the other heart.
I see what you did to close off the vectors. It didn’t occur to me to do this.
I would really like it to be an inlay, but if that turns out to be too challenging V-carving would look nice. I have utterly failed on my v-carve inlays. Using a straight bit has worked pretty well for me.
Any ideas are welcome. I am definitely giving myself enough time to sort out options.
You don’t need to worry about the intersection of the vectors of you’re making the hearts of two different species. Inlay the first heart by itself then carve the second and inlay. The intersection will happen (unless you really jack up your XY zero). You could use the same gcode for the two male inlay files.
Neil, I think you’re half right. You wouldn’t have to worry about the first inlay, since the second would cut through the gap. But the 2nd inlay would have to have the gap.
Paul, I also think it would look really nice as an inlay. For a V-carve inlay, which V bit would you like to use? I like the steeper 60° bit, but we can do it with whatever V bit you have.
Do you want to use 2 different species of wood for the inlays?
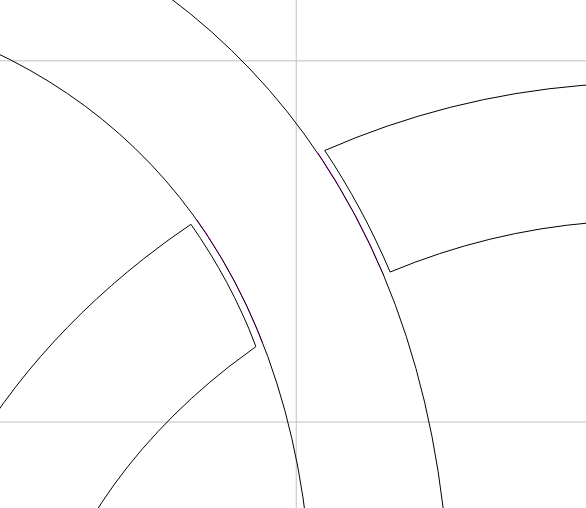
What happens on the outer edge?
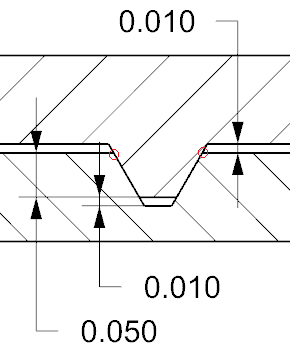
This is actually what you want. But only by a tiny bit. You want a very small gap at the bottom of the carved out portion, and between the top of the part and the base of the inlay. So that only the inlay is contacting the carved out groove, and there is a little gap for glue to squeeze in the pocket, and out the top.
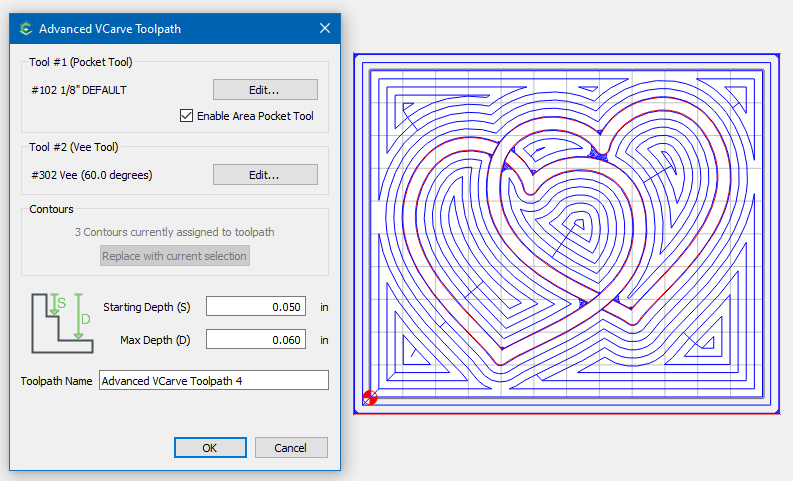
It needs to be narrow enough to actually fit in the pocket. I am also generally confused about how CC manages V-bits. I have been using advanced v-carve with a 1/8" bit for clearing and a 60 Degree V-bit. If I attempt to use a contour (just as an experiment) it assumes the tool is a 1/2" or something. I didn’t bother trying try a carve with that.
I’ll try to do a couple of experiments this weekend to see if I can get this to work as suggested
Here are my settings for the V-Carve. You should use advanced V-Carve with pocket tool enabled.
Even though it won’t use the pocket tool, it will make the extra passes with the Vee bit to clear out the bottom of the pocket. I left the default 0.008" stepover for the V-bit
Nice!
I think your last post is informative for any inlay! Thanks for that! I havent done any inlay yet, I want to, but reading this seems to make it straightforward.
Thank you! I am looking forward to trying this out this weekend. I am not sure what I am doing wrong with the v-carves. I have been successful with straight bits.
It’s a different concept to wrap your head around. It took me a while to get it.
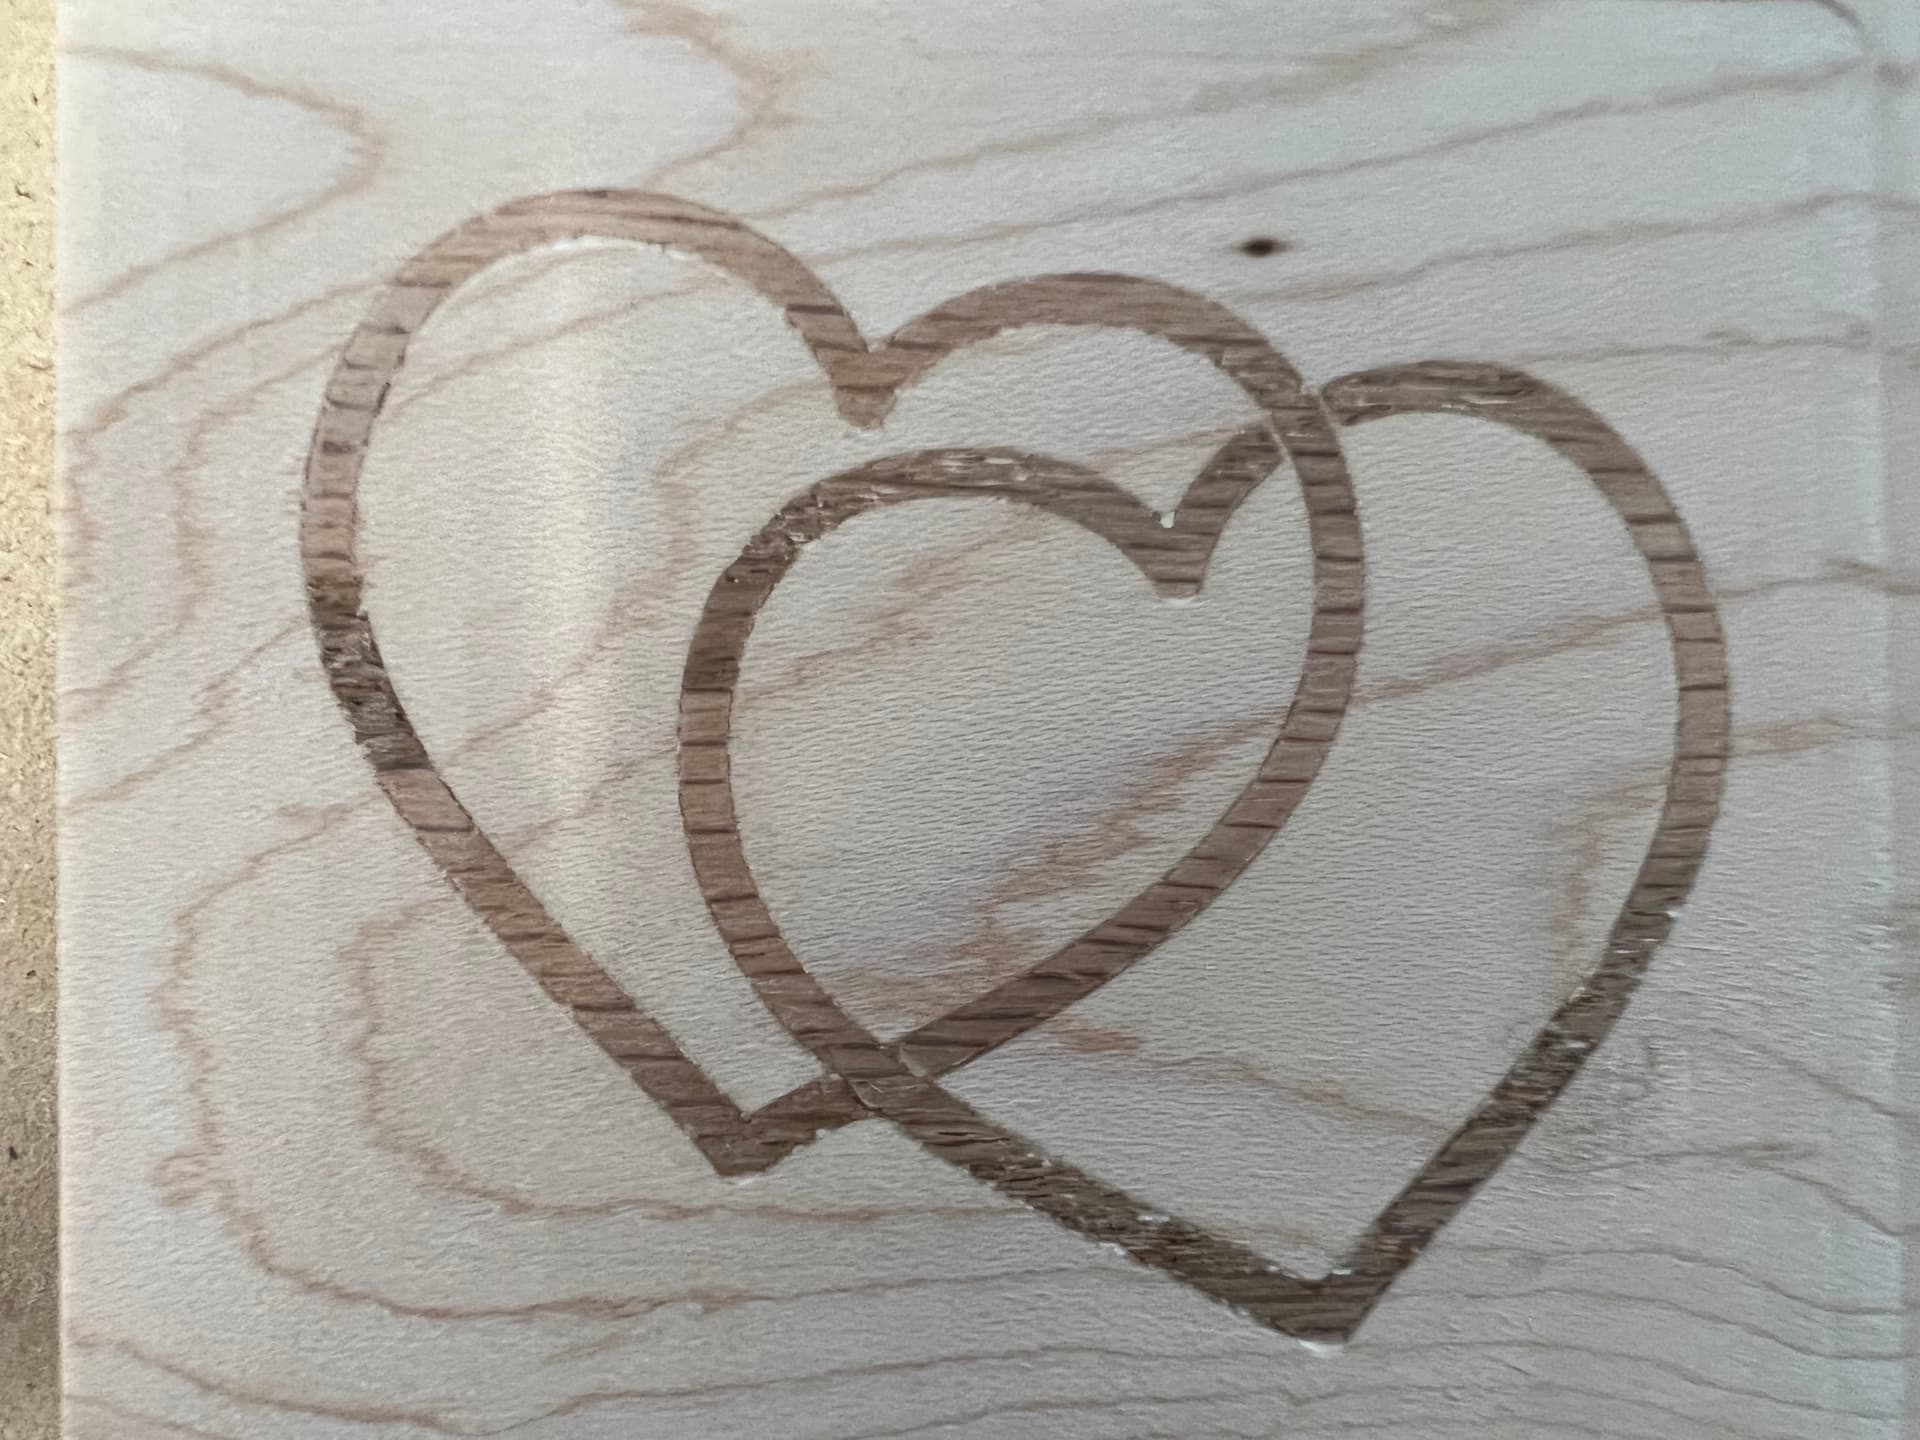
This is a nice part to get started on because the lines are all uniform width. This makes it easy to choose a depth and minimal gap size to insure the parts fit together correctly.
When there are varying widths, especially very thin/narrow details, it’s impractical to make the depth small enough to accommodate minute details. I think in this case I would opt for a bigger glue joint, and hand sand any ridges on the inlay side that developed a sharp top when cutting to allow a little gap.
Good luck. I look forward to you posting your results.
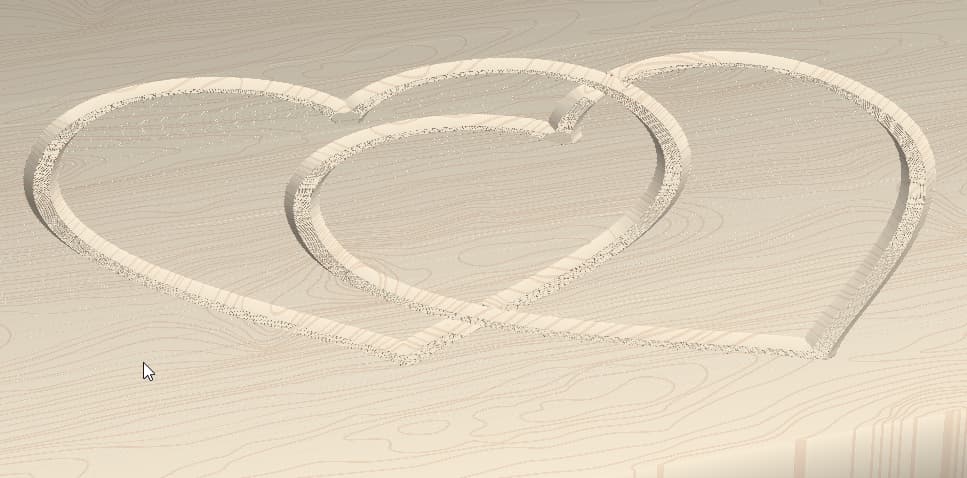
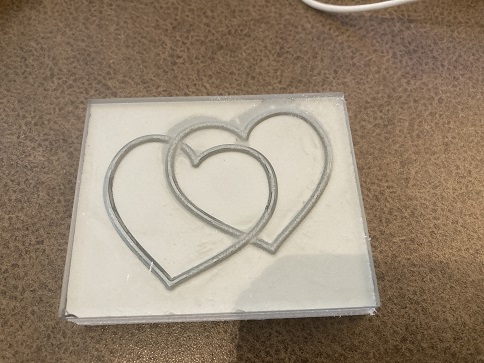
I had a chance to try out your file. I also updated carbide create to see if that might have had something to do with my weird experiences with V-bits. It certainly did for contours. As you can see it worked out pretty nice. I have been using oak for my inlay material (into maple). It really isn’t the best material as it gets pretty brittle. I was expecting some issues because of challenges I had with getting it glued down well. The inlay warped and separated I am surprised is came out looking as nice as it did.
Now I am thinking it would be fun to use to different woods in the inlay (and doubling my chances of messing it up
In the process of doing this, discovered that my machine is not squared right. That isn’t going to help.
Thanks again for everybody’s suggestions. I have to think about to sort of box to make now.