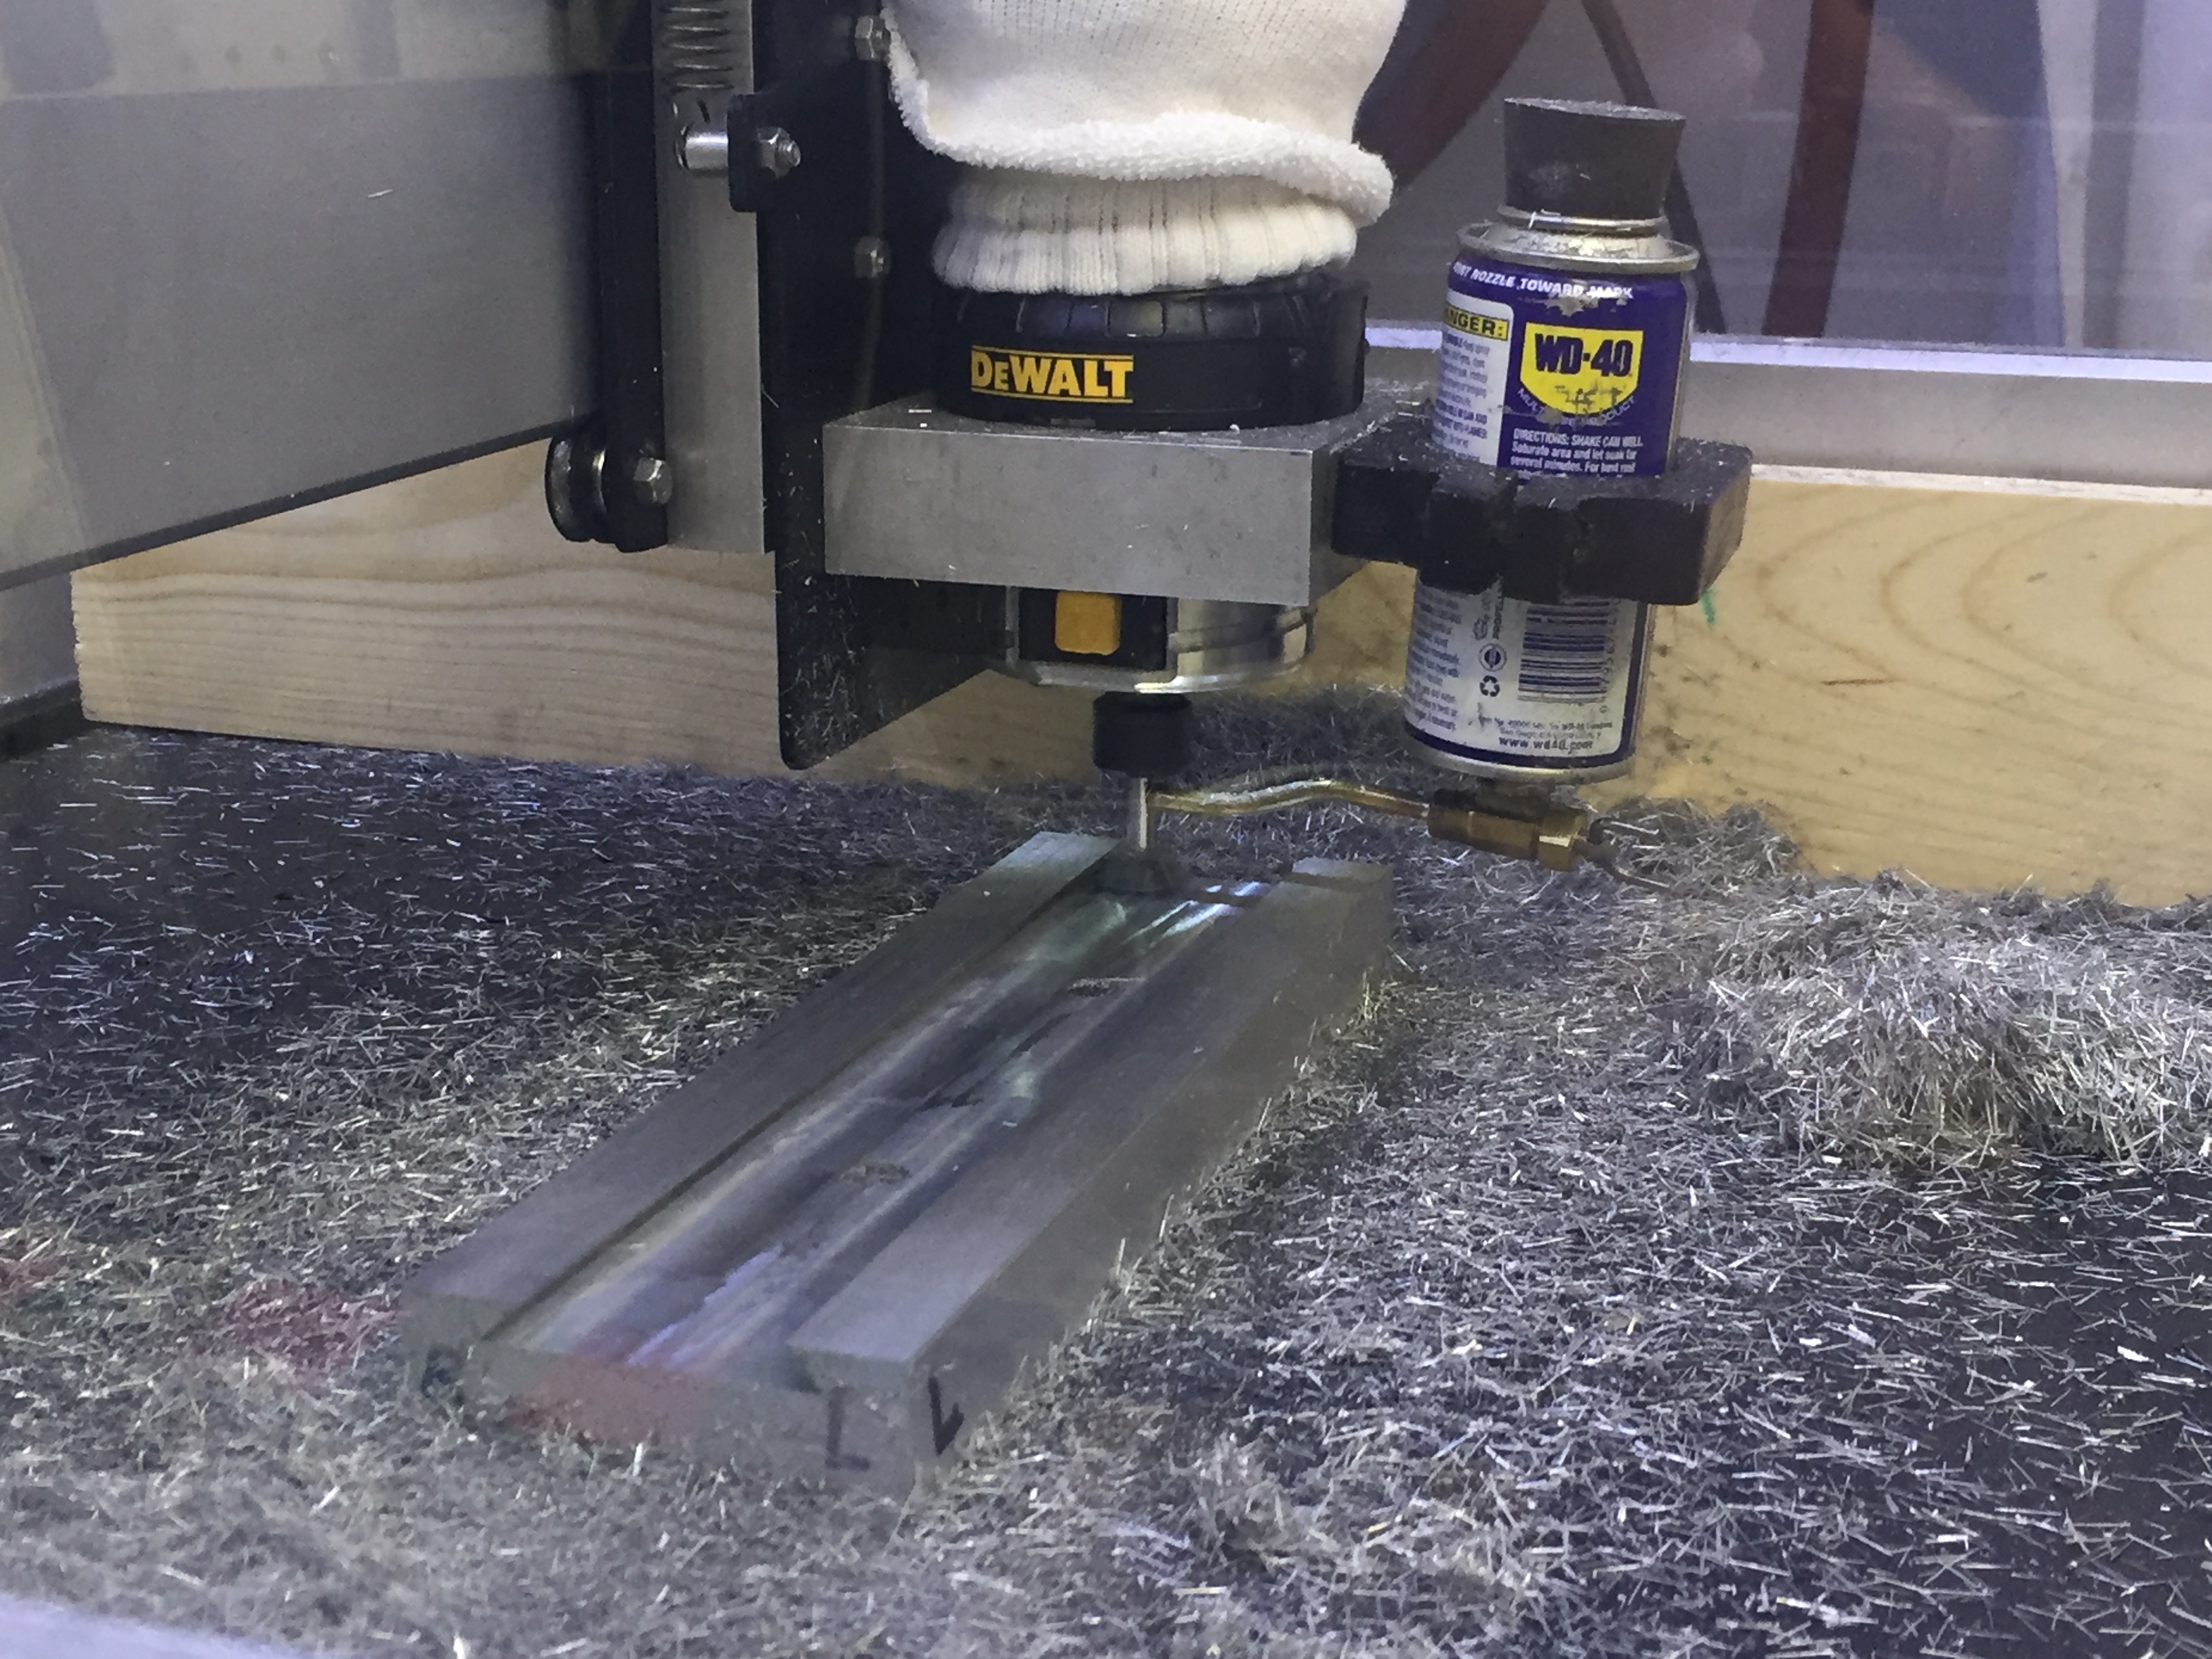
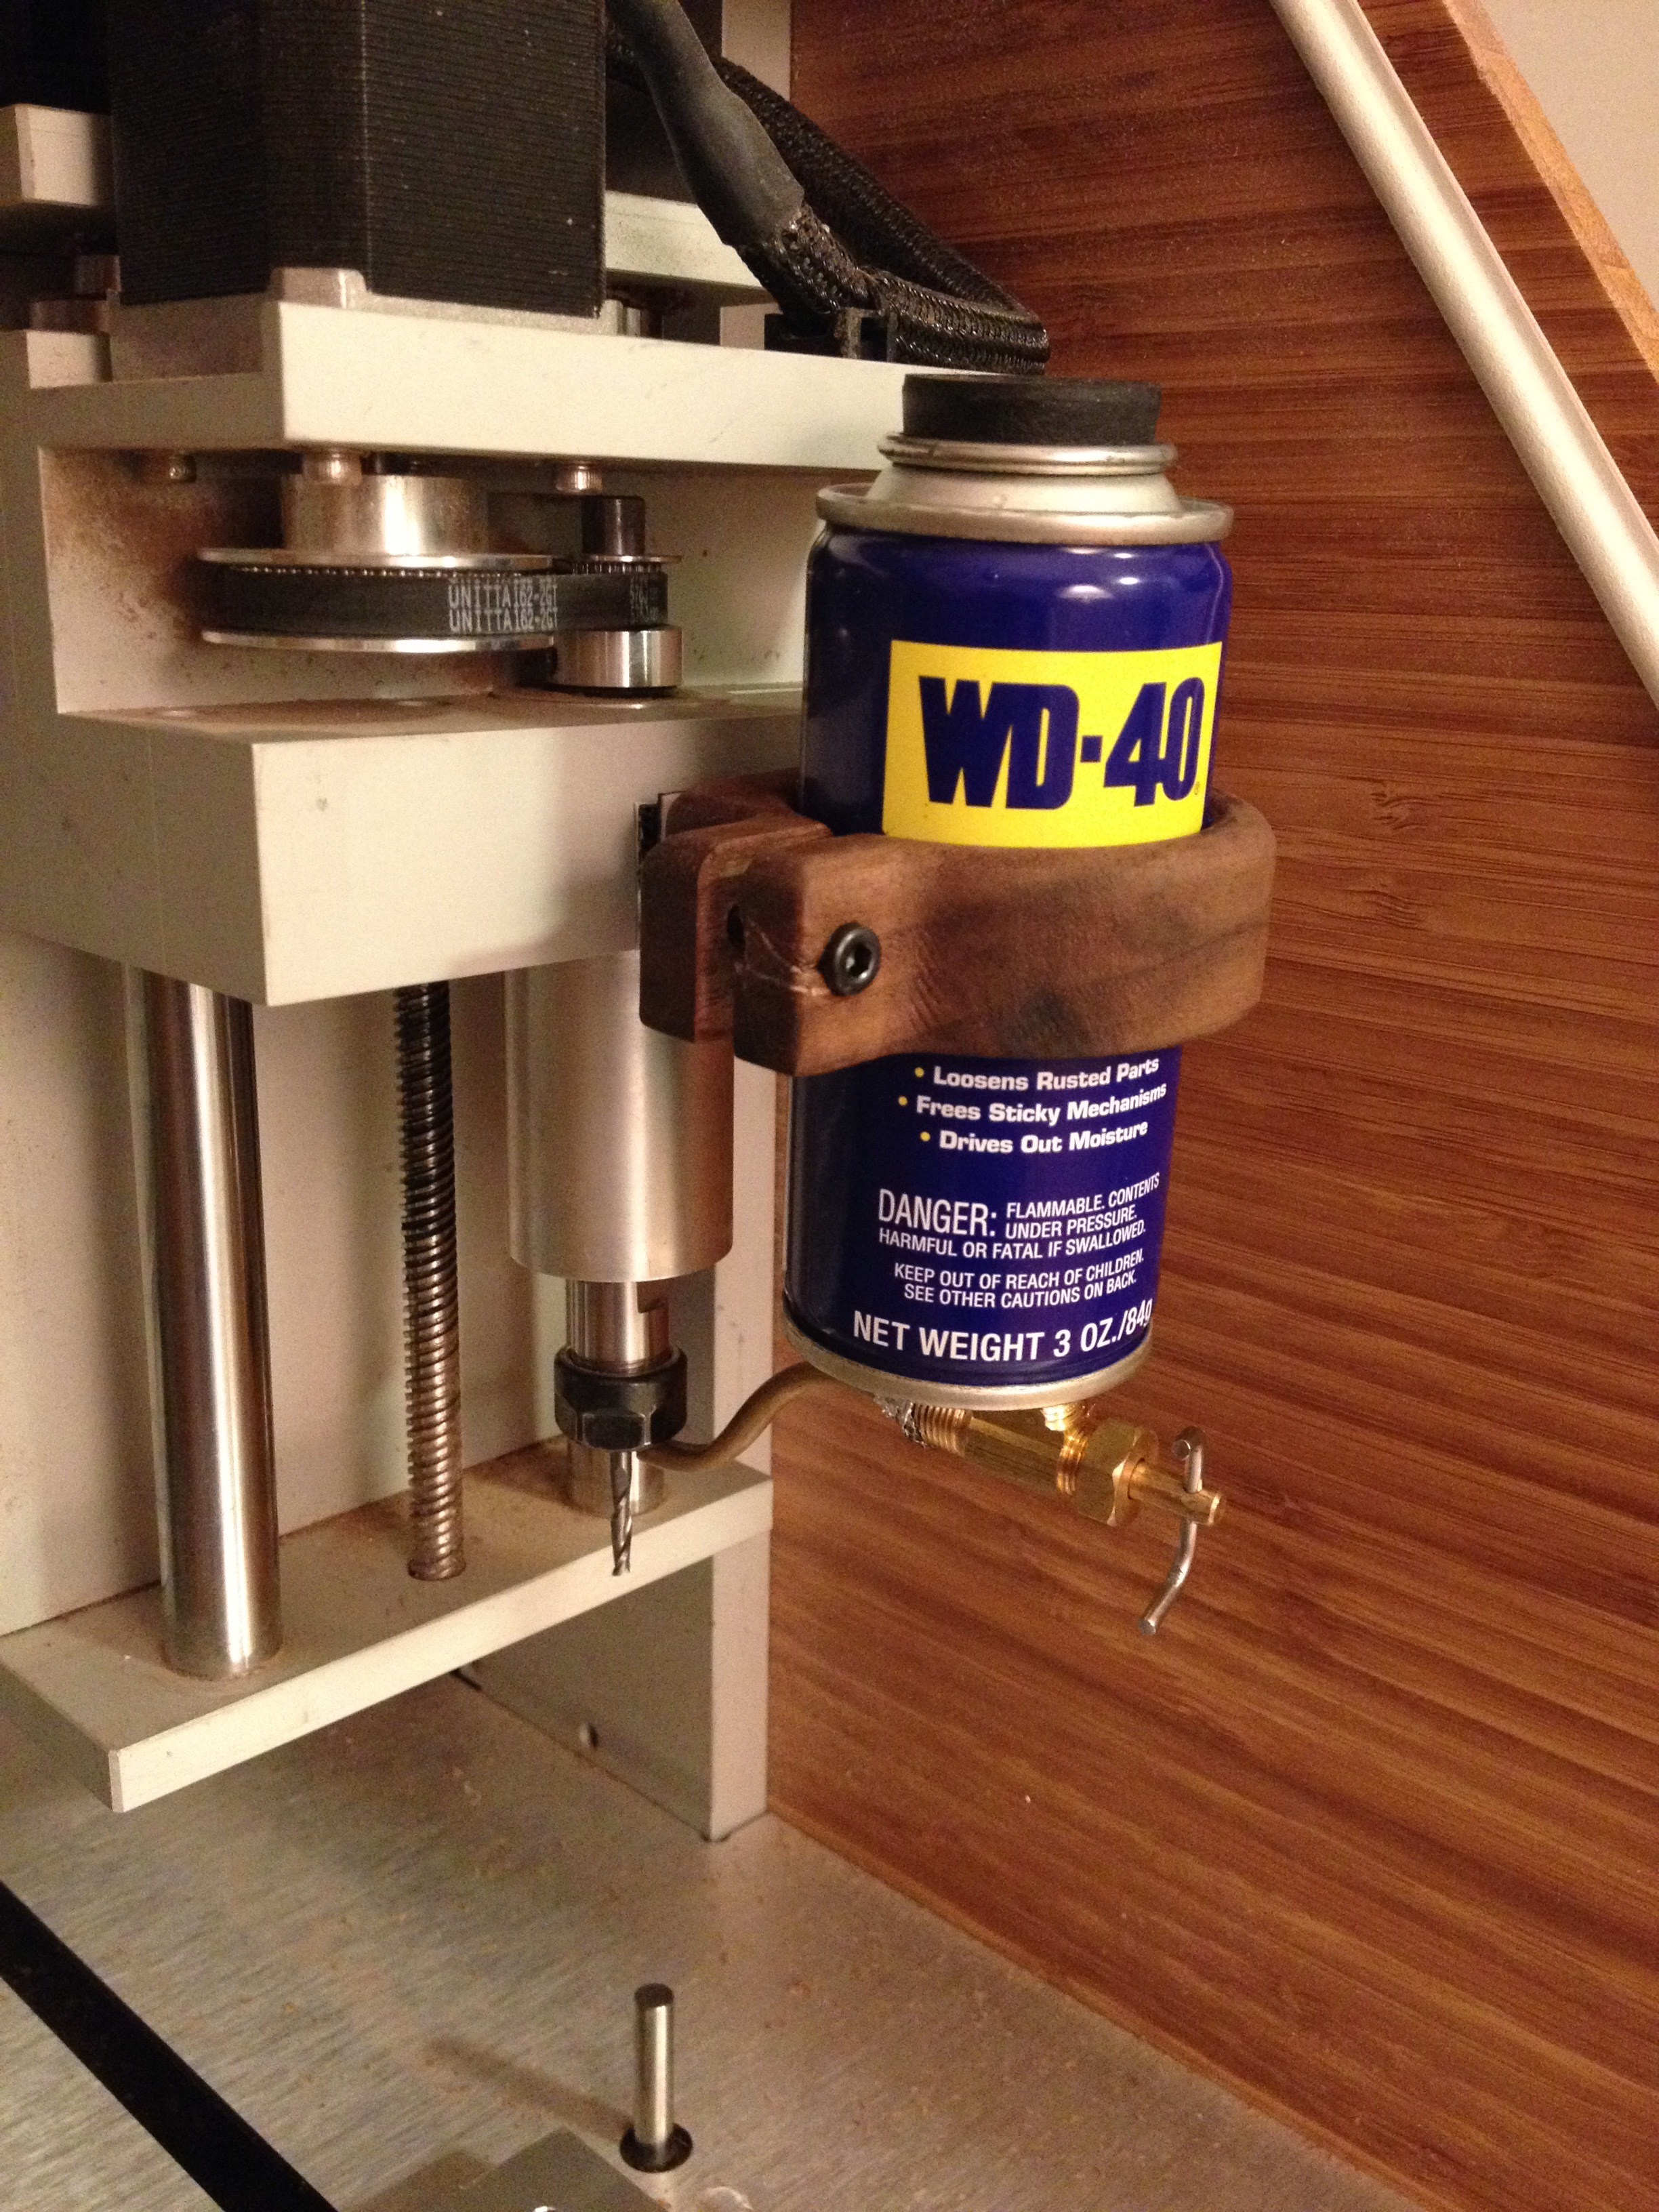
I got so tired of wasting WD40, spraying way too much, or forgetting to spray, etc, so I created this simple little device. It provides a little WD40 exactly where it needs to be in the right amount for cutter lubrication, and improved surface finish on Aluminum. You can mount this on any CNC make and model Hobby type CNC machine, you just need to make the appropriate mount.
Does it help cutters last? Well I am still using the SAME 1/4inch 4 flute end mill that I bought for the machine back in Nov 2015.
I HIGHLY recommend that you ONLY use coated cutters.
As always, leave me a message if you have any questions.
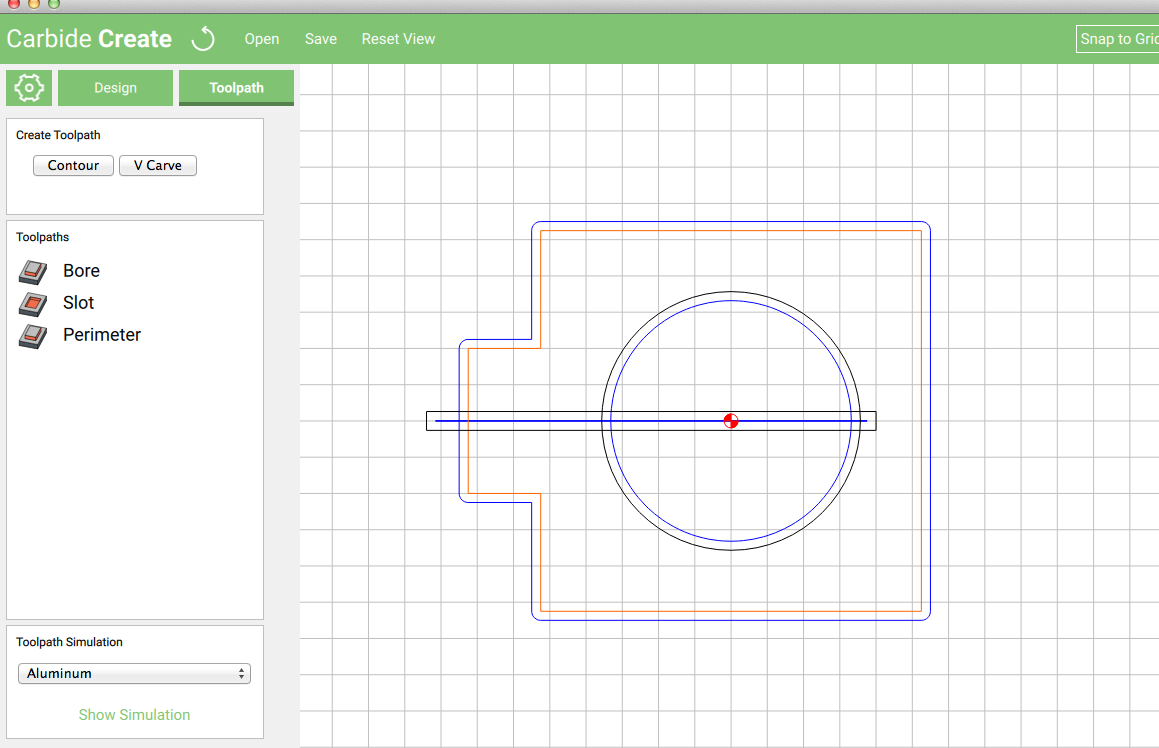
NOTE 1: The Carbide Create file does not have the 1/4 corner radii because after spending hours trying unsuccessfully to get them there…I just gave up. Use at your own risk
This is awesome, thanks for sharing with everyone. One question, how do you extract the slurry (if that’s the correct word)? Can a dustboot pull it out? Or do you need to plan your cuts somehow to account for it?
Good question. Since I’m only using a couple of drops of WD-40 a minute, and the chips are warm/hot almost 100% of the liquid evaporates leaving the chips nearly dry. Since this is a metal they have enough mass not to be blown around, so they stay in place so I don’t use a dust collector. If there are too many chips, I’ll push them into a pile (out of the way) and at the end of the job I sweep them up and put them a 5 gallon bucket and recycle them. I am about one third full on my second 5 gallon bucket by the way.
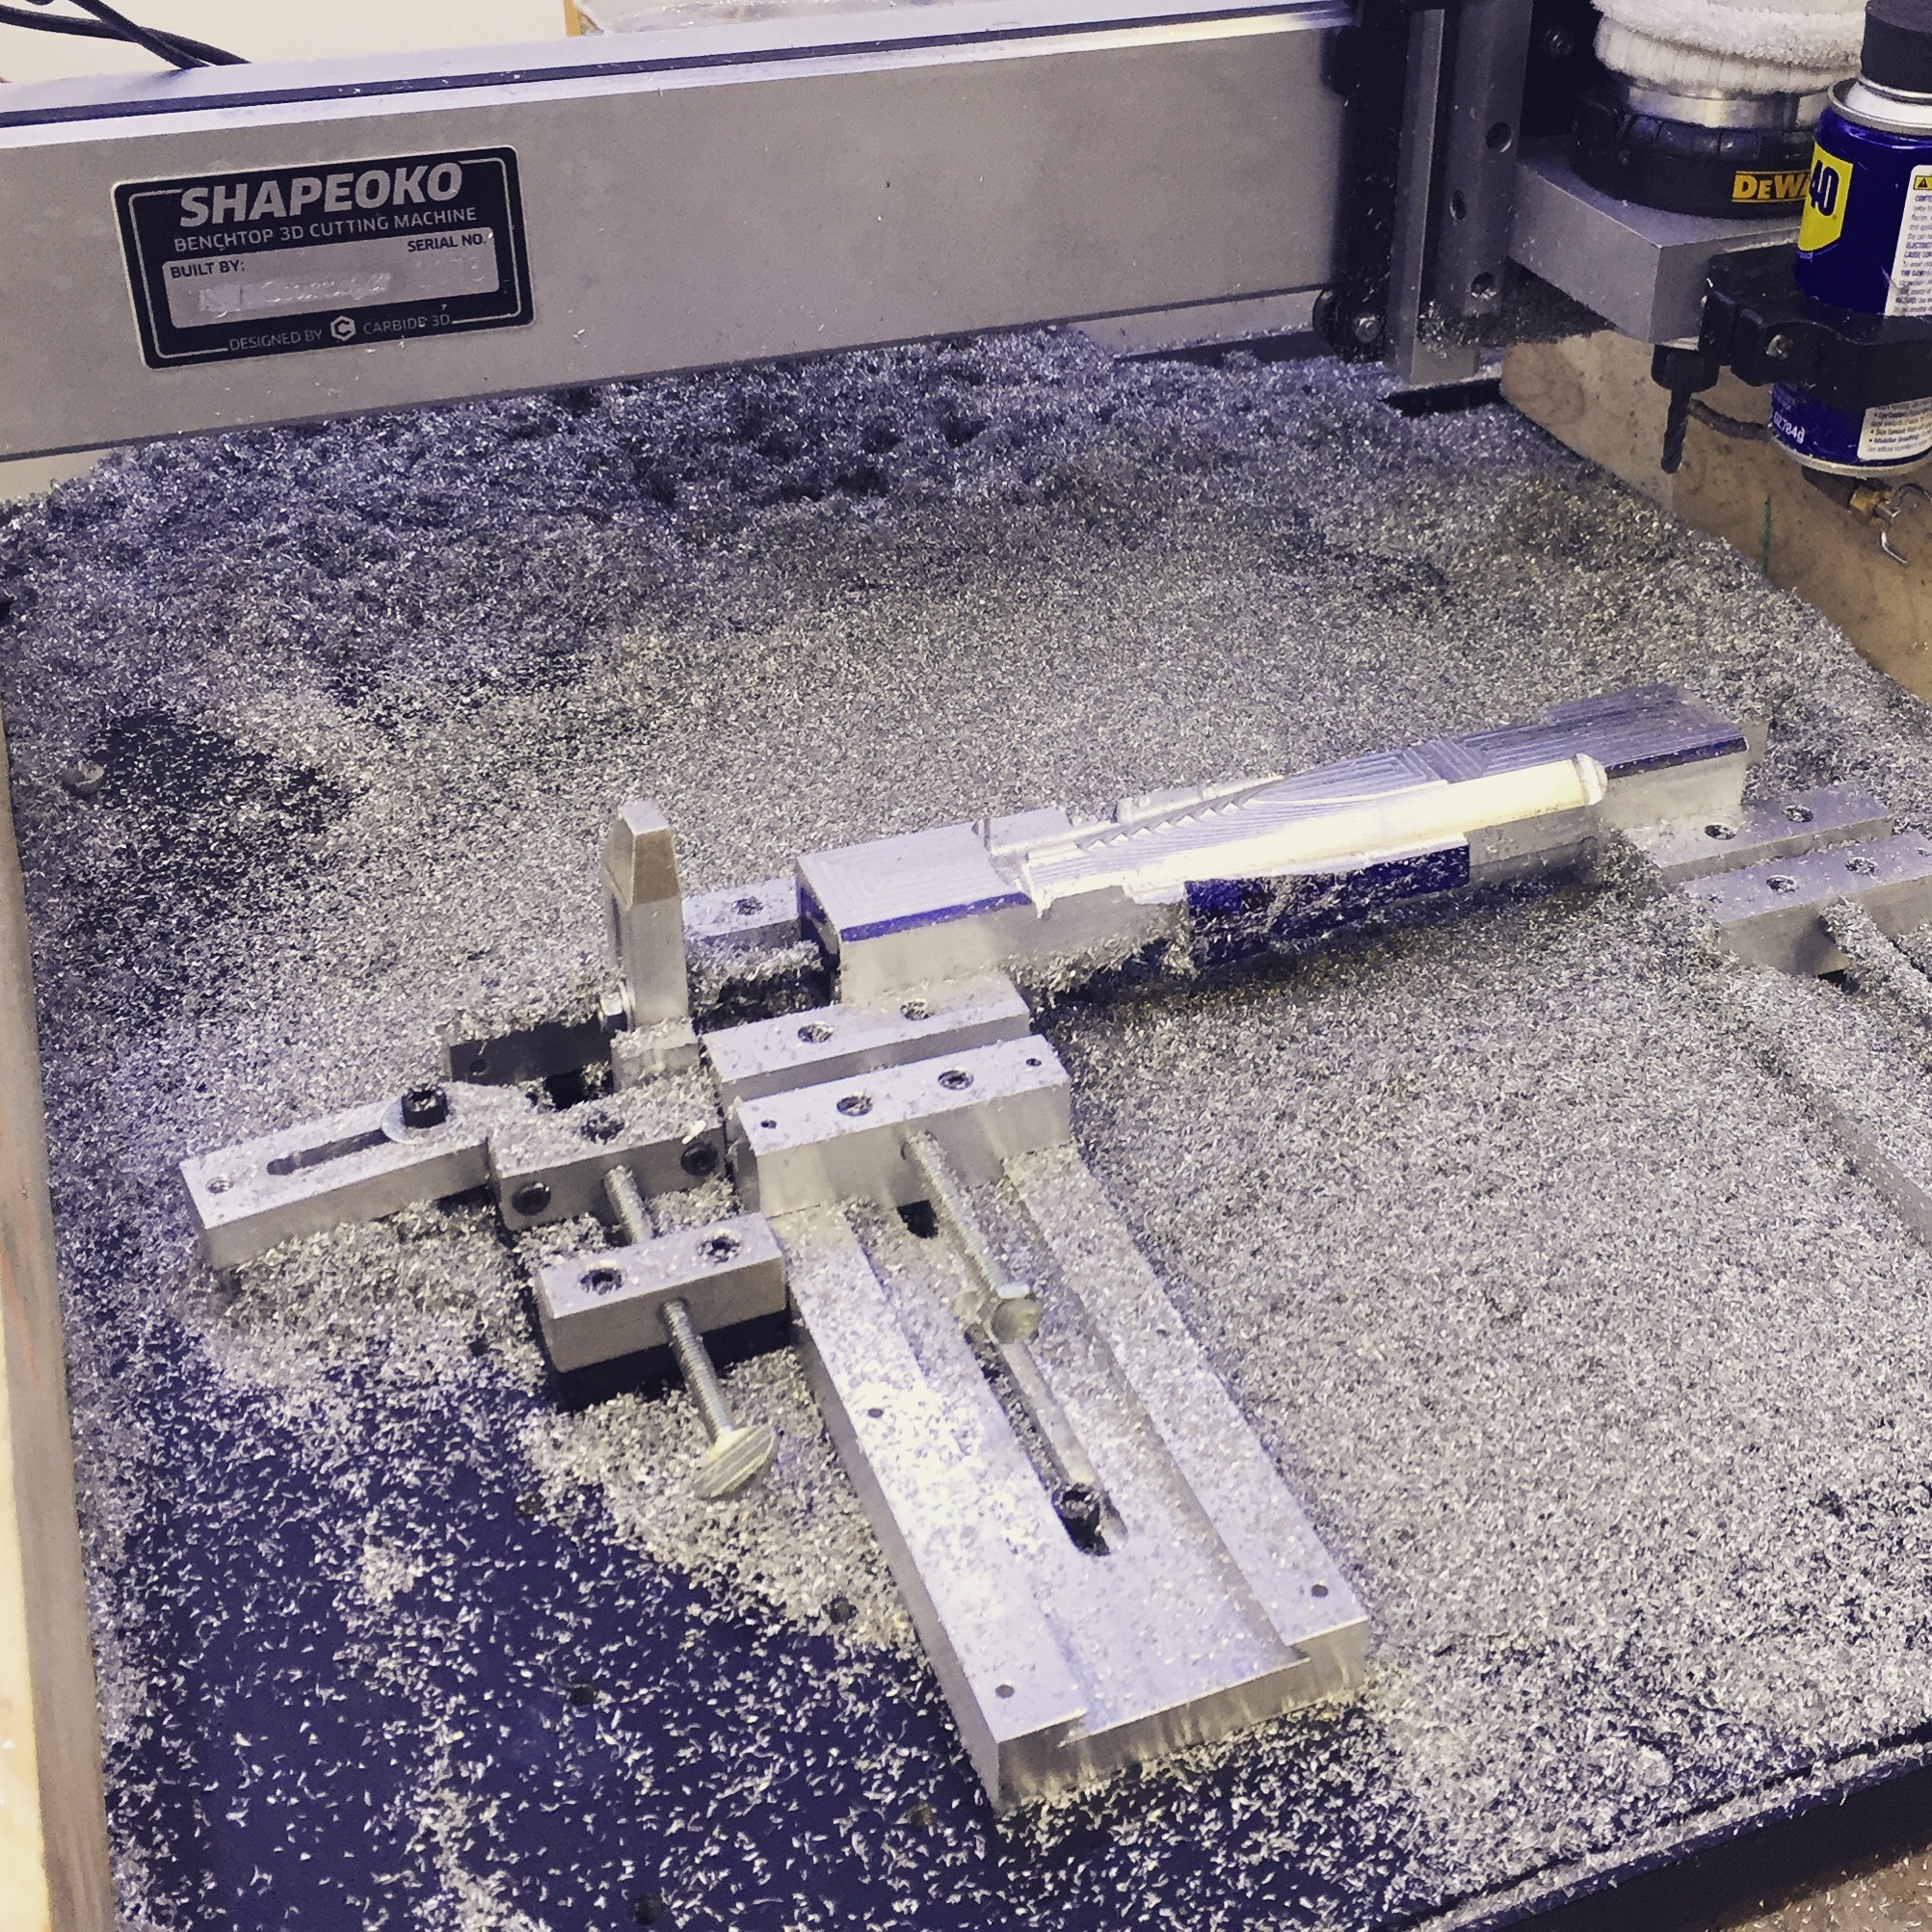
Note The 3/4 x 3.5 boards are used to keep the chips away from the lower Y-Axis V-Wheels
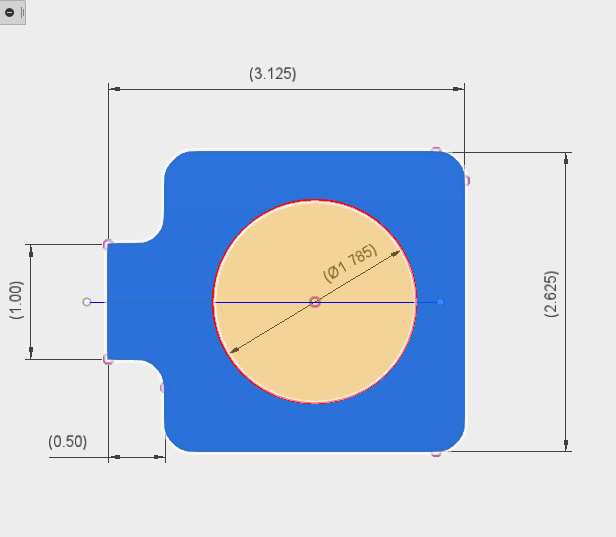
I’ve confirmed that this drip can will fit into the Nomad as well. I made a couple of changes to made sure it would fit by rounding the outer edge of the bracket and reducing the width to 0.3". I’ve also used some 3M dual lock Velcro instead of double sided tape so that I can detach the assembly to fill the drip can.
That’s a thing of beauty!! I love the velcro idea. I changed out the double sided tape to some nice strong magnets…which works great…except when machining steel, lol.
Remember to get some good coated end mills too, and enjoy. I’m looking forward to seeing your machining metal projects soon.