Just received my HDM and hello to everyone!

Hello everyone! I figured I’d make my first post here now that I’m an official HDM owner. I’ve honestly never owned a CNC before this and I went down a very deep rabbit hole of CNC machines before ultimately deciding on the HDM.

Like many others before me I seriously considered some other competitors like the Stepcraft and X-Carve. After falling in love with this community and seeing what the HDM is capable of I am confident that I made the right choice for my needs.

I am a racing driver at heart that loves nothing more than amazing engineering on cars. The purpose of this HDM for me is to create custom aluminum parts for me and my fellow racers. I plan to start out with wood as I’d like to make some carbon fiber molds before stepping up to aluminum and playing with that.

I know I have an incredible amount to learn and I’m excited to be apart of an amazing community and support system.

I’m still working on getting my machine fully setup and configured.(As well as a better table solution) In the mean time what’s everyone’s recommendations on lifting the machine by yourself? :rofl: I have an engine hoist I was considering using to try and hoist the machine up via the recommended lift points.

What has everyone else done?

5 Likes

Welcome VedemXCIX (John). I am also new to CNC, I have the Shapeoko Pro and have so far just done some simple projects, but plan on machining some aluminum for some wood working tools. Been a learning curve for me, but well worth it. At some point I hope to support my hobby with some revenue, but for now it’s time to learn!

2 Likes

My son & I lifted the machine onto the bench from the pallet on the floor.
How did you get it on the bench where it is now? If you can use the same method to place the pallet next to the bench, you can slide the machine off the pallet onto the bench.

If you’re planning to cut aluminum, I would consider replacing the MDF spoilboard with something waterproof. You’re going to want coolant / mist and wet MDF swells up like a sponge.
I’m currently considering Trex / composite decking material. ?? Needs to be done soon.

1 Like

It probably doesn’t matter in this case, but my understanding is that Trex still has some wood components mixed in there.

I rebuilt my deck 2 years ago and used this: https://www.weardeck.com/

They describe it as HDPE reinforced with fiberglass and then I think wrapped in PVC.

It is nice and for a deck can use 16” centers. I did cut a test piece on the machine and it cuts very nice. However, there is a very small hole structure that is exposed. Zoom up on the pic and you can see.

That may be a problem if you put moisture in there.

2 Likes

My Father-In law and I lifted the machine via the pallet onto where it is now. I’m just trying to save mine and his back by doing it with an engine hoist. :rofl:
I live out in the country a little ways so sometimes getting more hands out here to help move heavy objects isn’t always easy. Worst case I’ll wait till I can buy my friends over with pizza and beers!!

Thank you for the thoughts on the MDF board, I am getting ready to start construction on this:
https://www.etsy.com/listing/1025271503/cnc-enclosure-xxl-build-plans?ref=yr_purchases

This is what I decided would work best for where I want to put the CNC in my workshop and will give me room to dedicate storage for anything related to the HDM itself. This plan doesn’t have any material that goes ontop of the oak plywood that makes up the top deck that the machine sits on. But after your comment I’ll make sure to look into coatings or other materials I could replace this with.

4 Likes

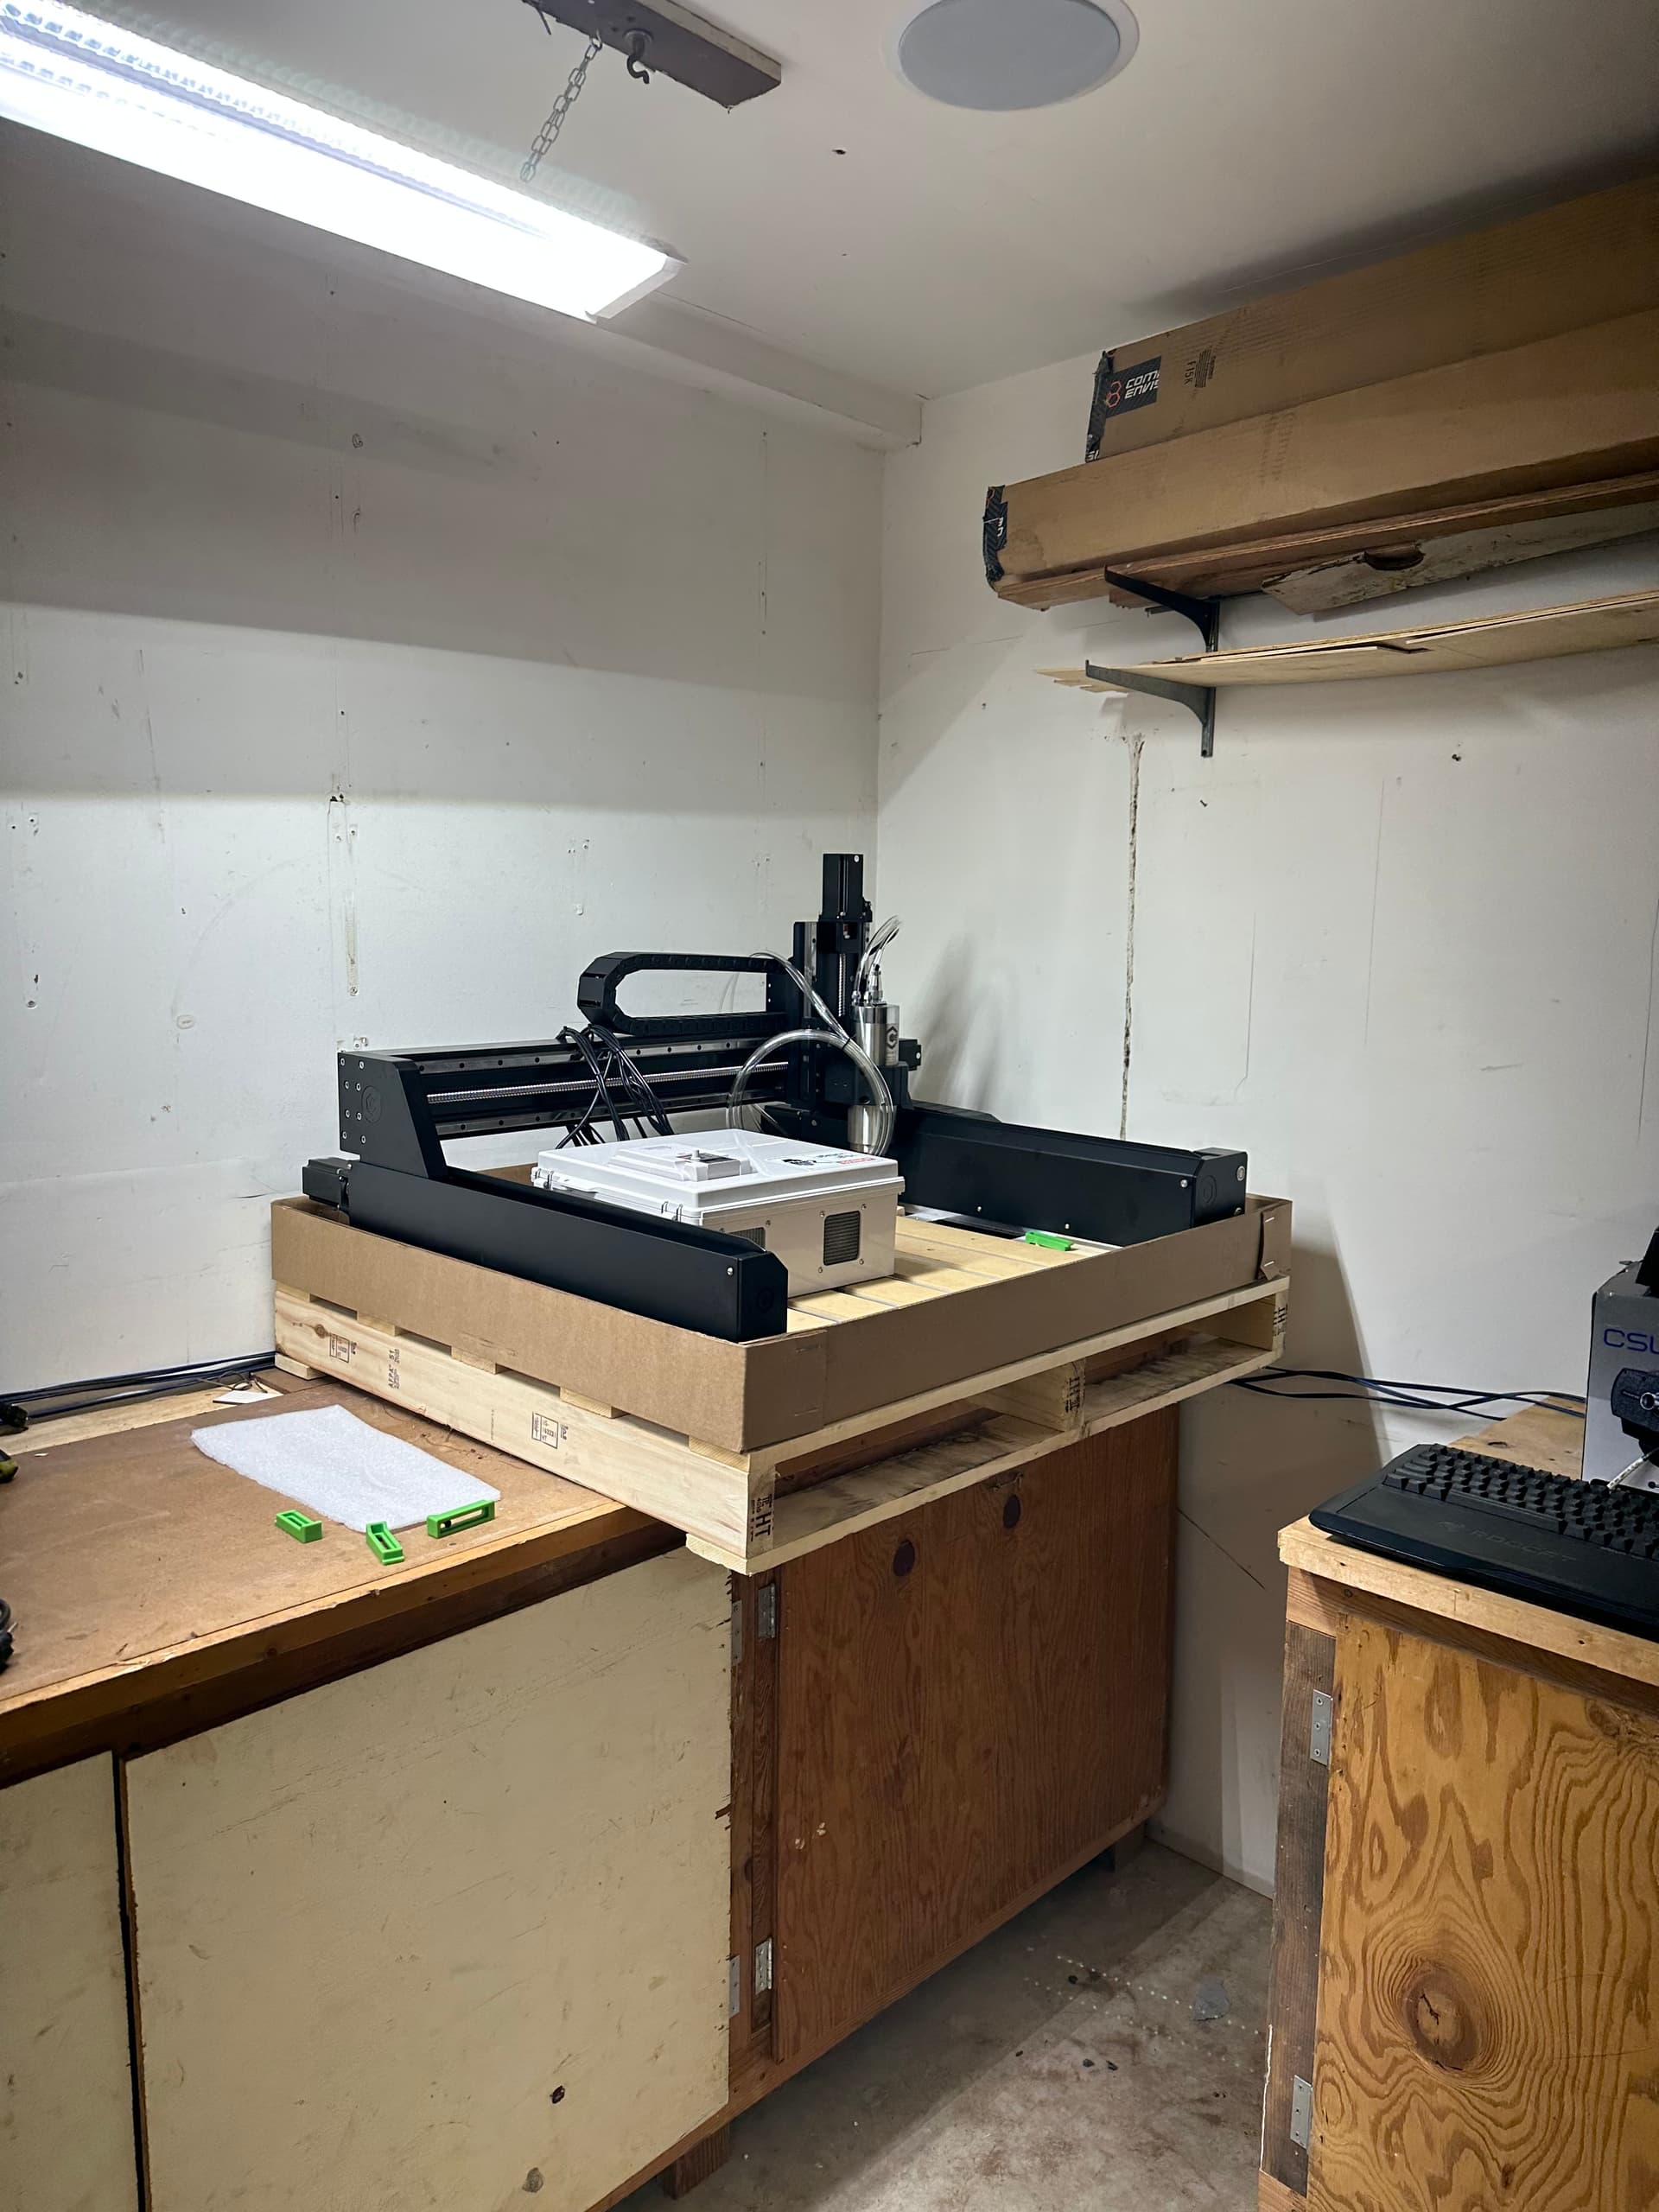
Figured I’d hop back here and update this thread! Over the past few weeks I got my HDM up and going for the most part.
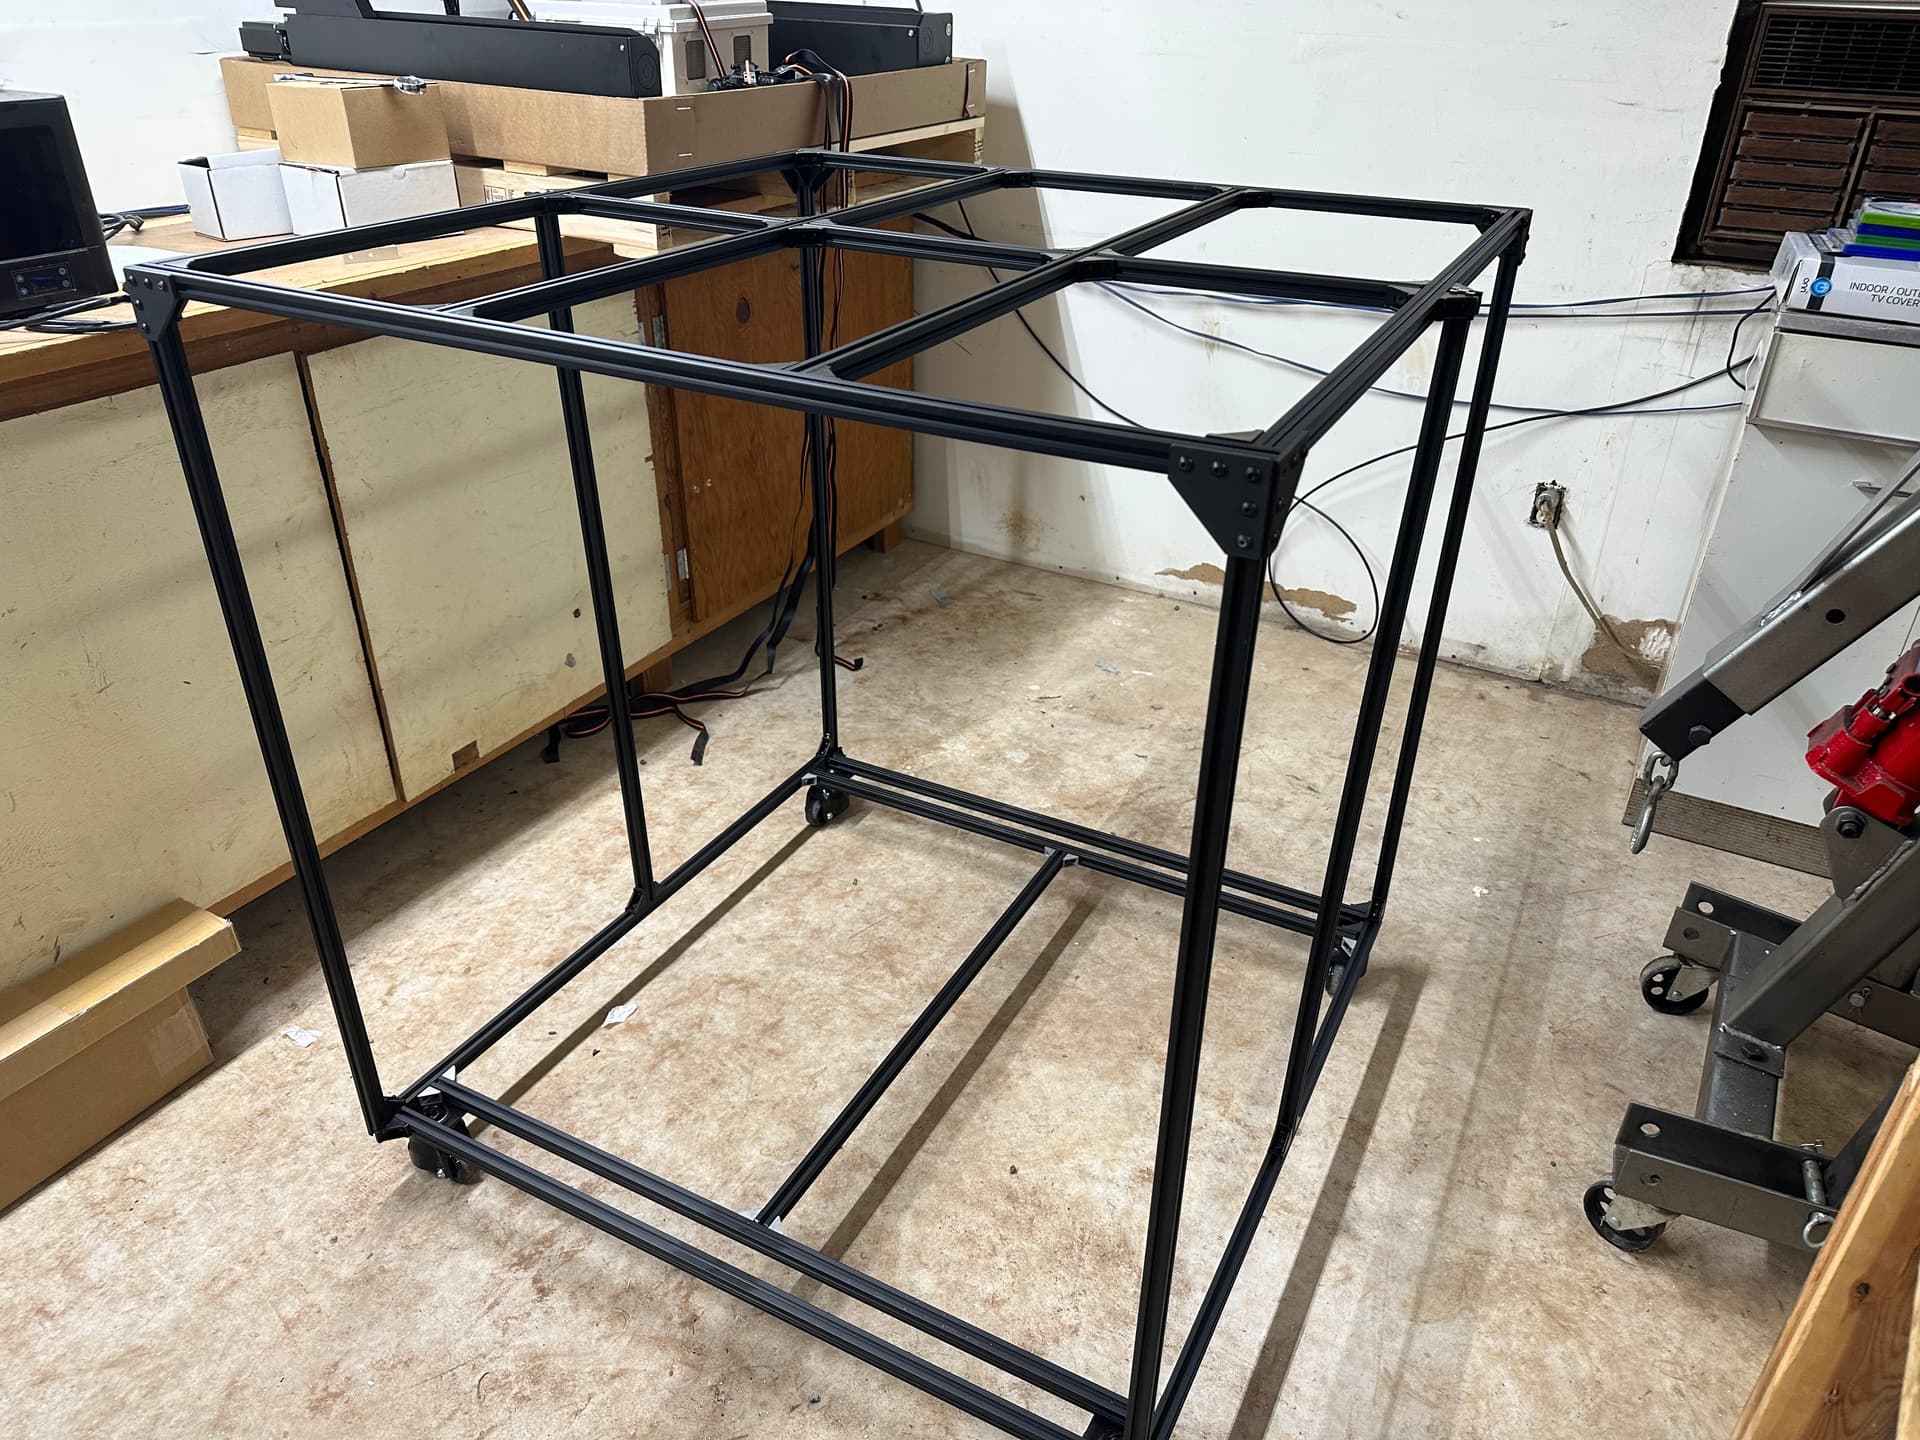
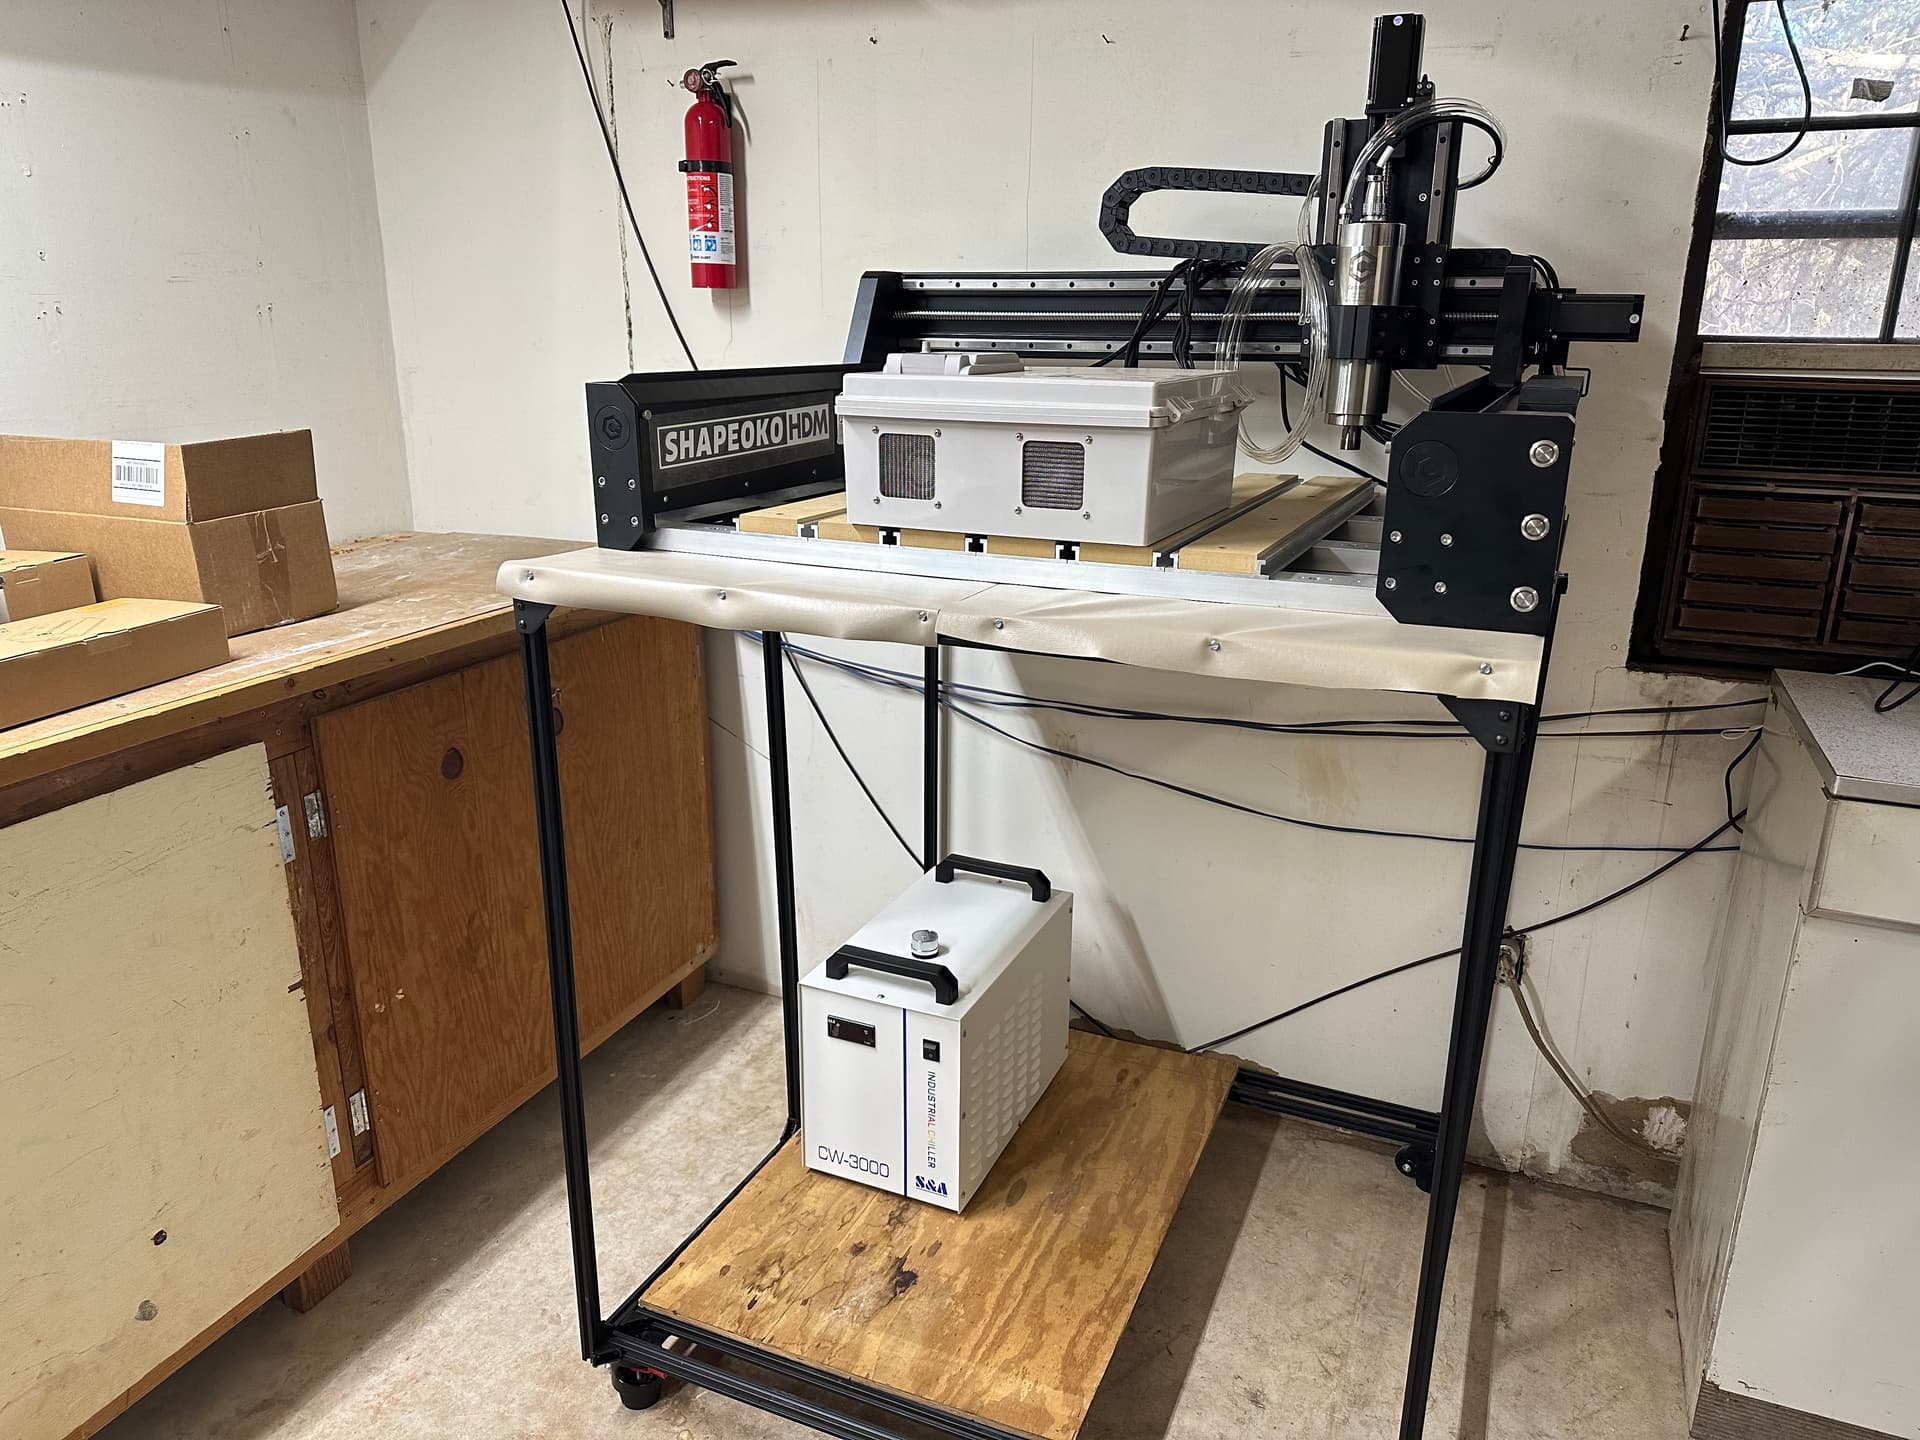
I built a desk for it out of extruded aluminum and am extremely pleased with how it came out.

Slapped on a whitewood top and used the leftover wood to mount the control box on the side.
I still plan to go back and add extra bracing to the whole desk to reinforce it. I may even bolt it to the wall as well to increase rigidity. I do plan to add another material ontop of the whitewood to help dampen and absorb vibrations. But I just had to go ahead and play with the machine so I went ahead and slid it across from the pallet it was on to the new work desk!

Soon, I plan to go back and update the main single width posts that I used for the main supports with double wide 2040 aluminum. But for the time being to get started and since I’ll mostly be doing wood to start out, the single posts will work. There is some extra bars that run horizontally to each corner that I added that are not pictured.

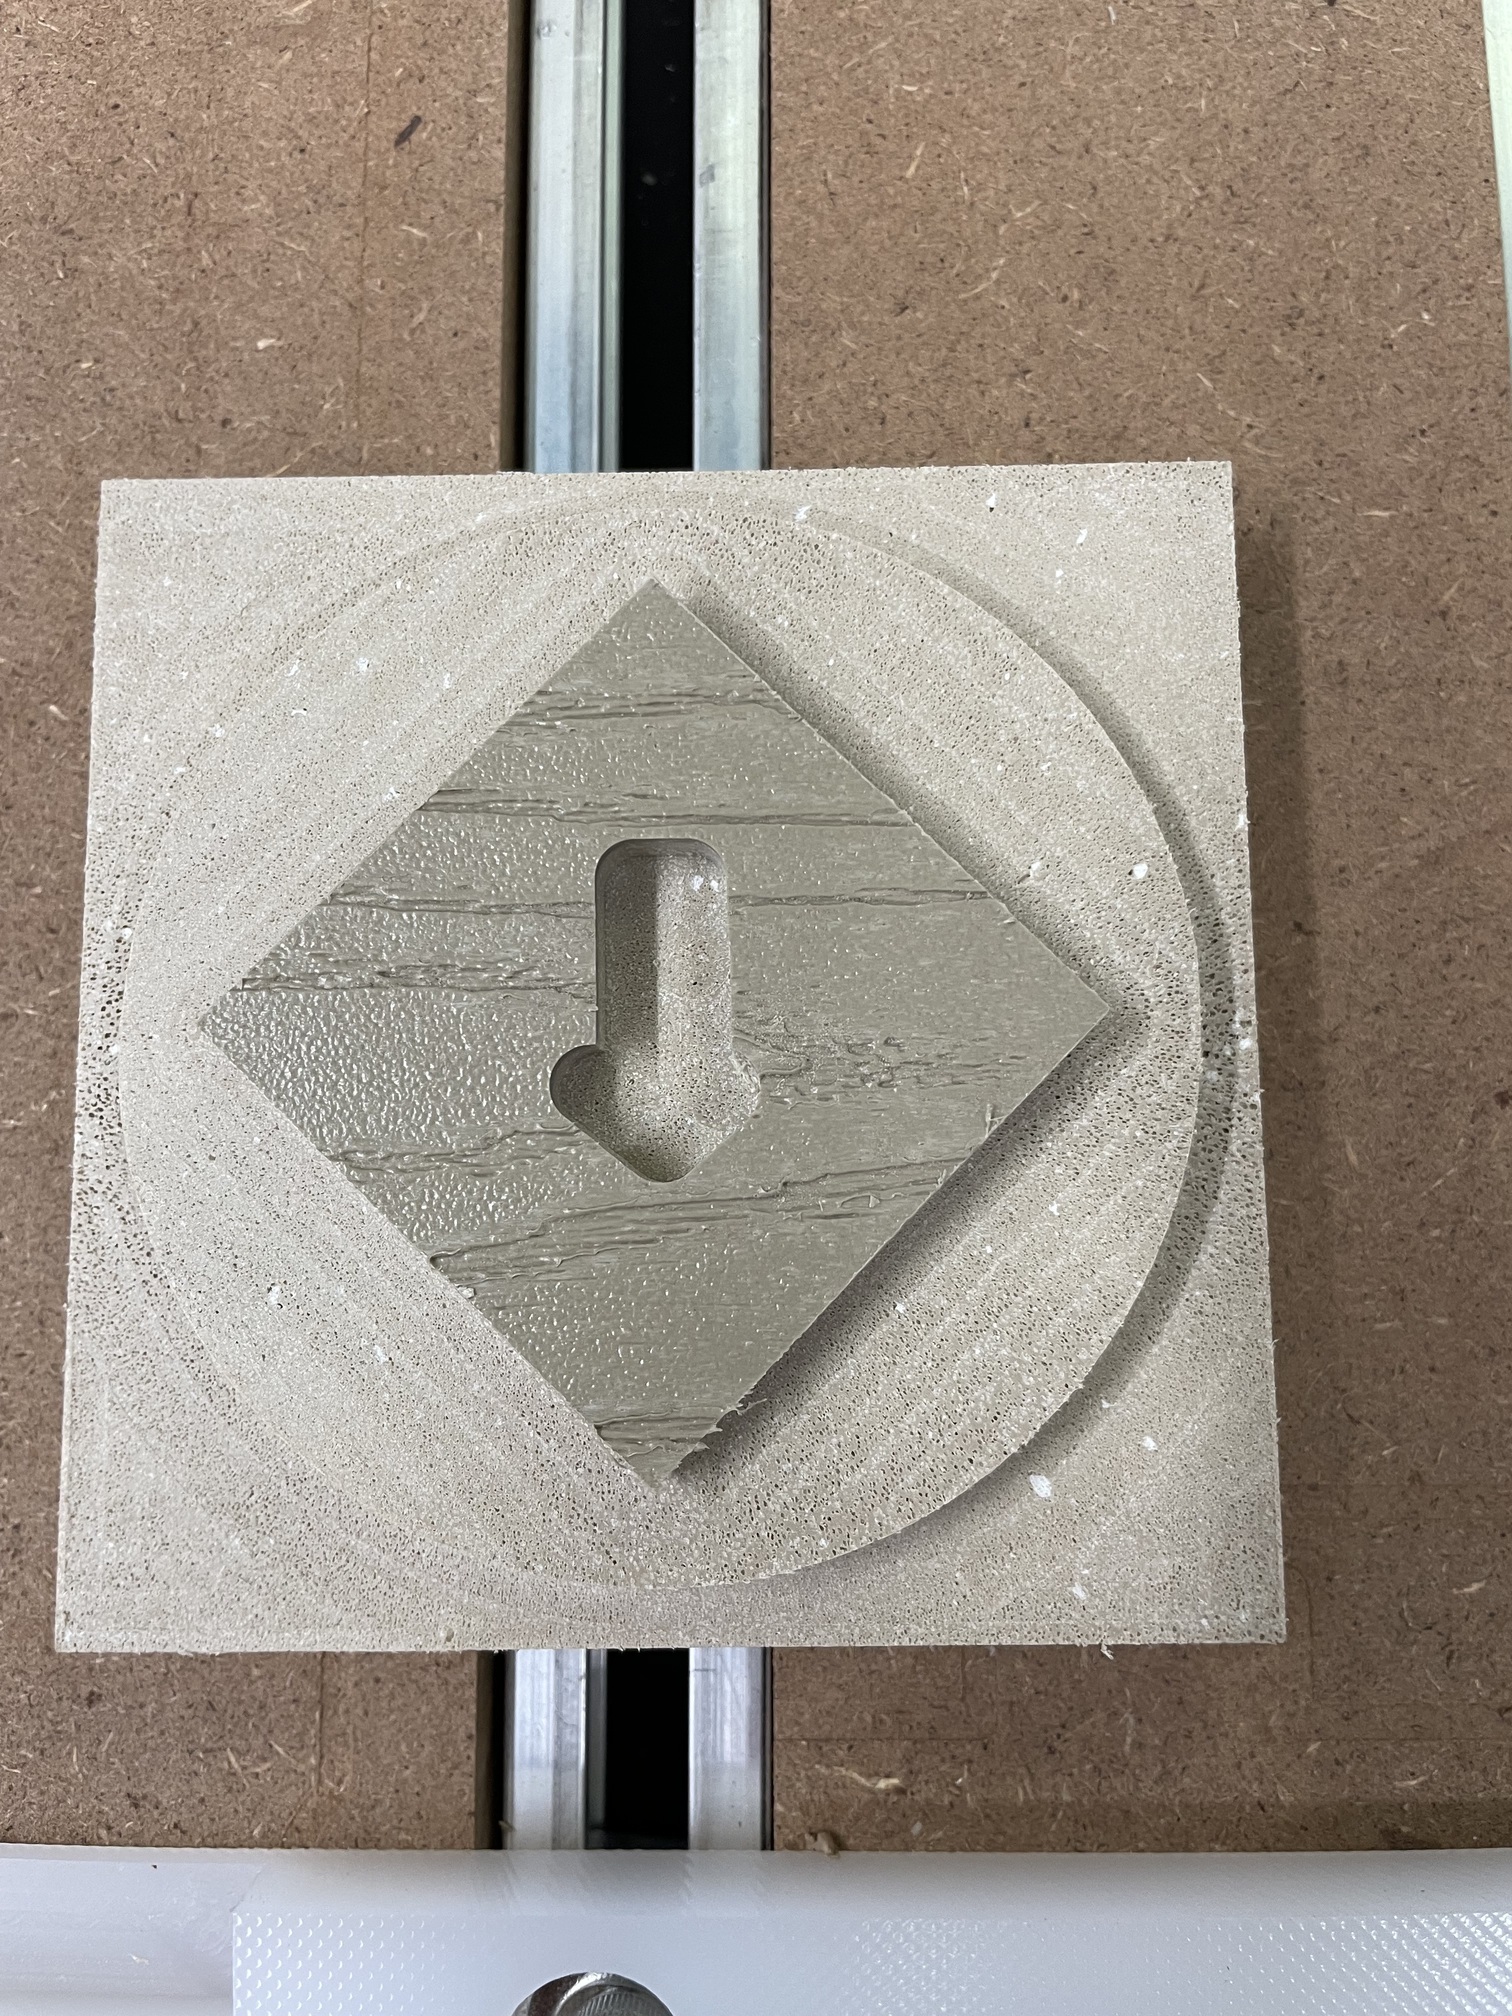
The current issue I’m facing is it seems like my Z height is unable to go all the way down. I’ve attempted to cut out some simple cams for fastening stock to the bed.

I’m unsure if the machine thinks the bed is higher than it actually is, or if my spindle is too high up on the bracket causing it to be offset.

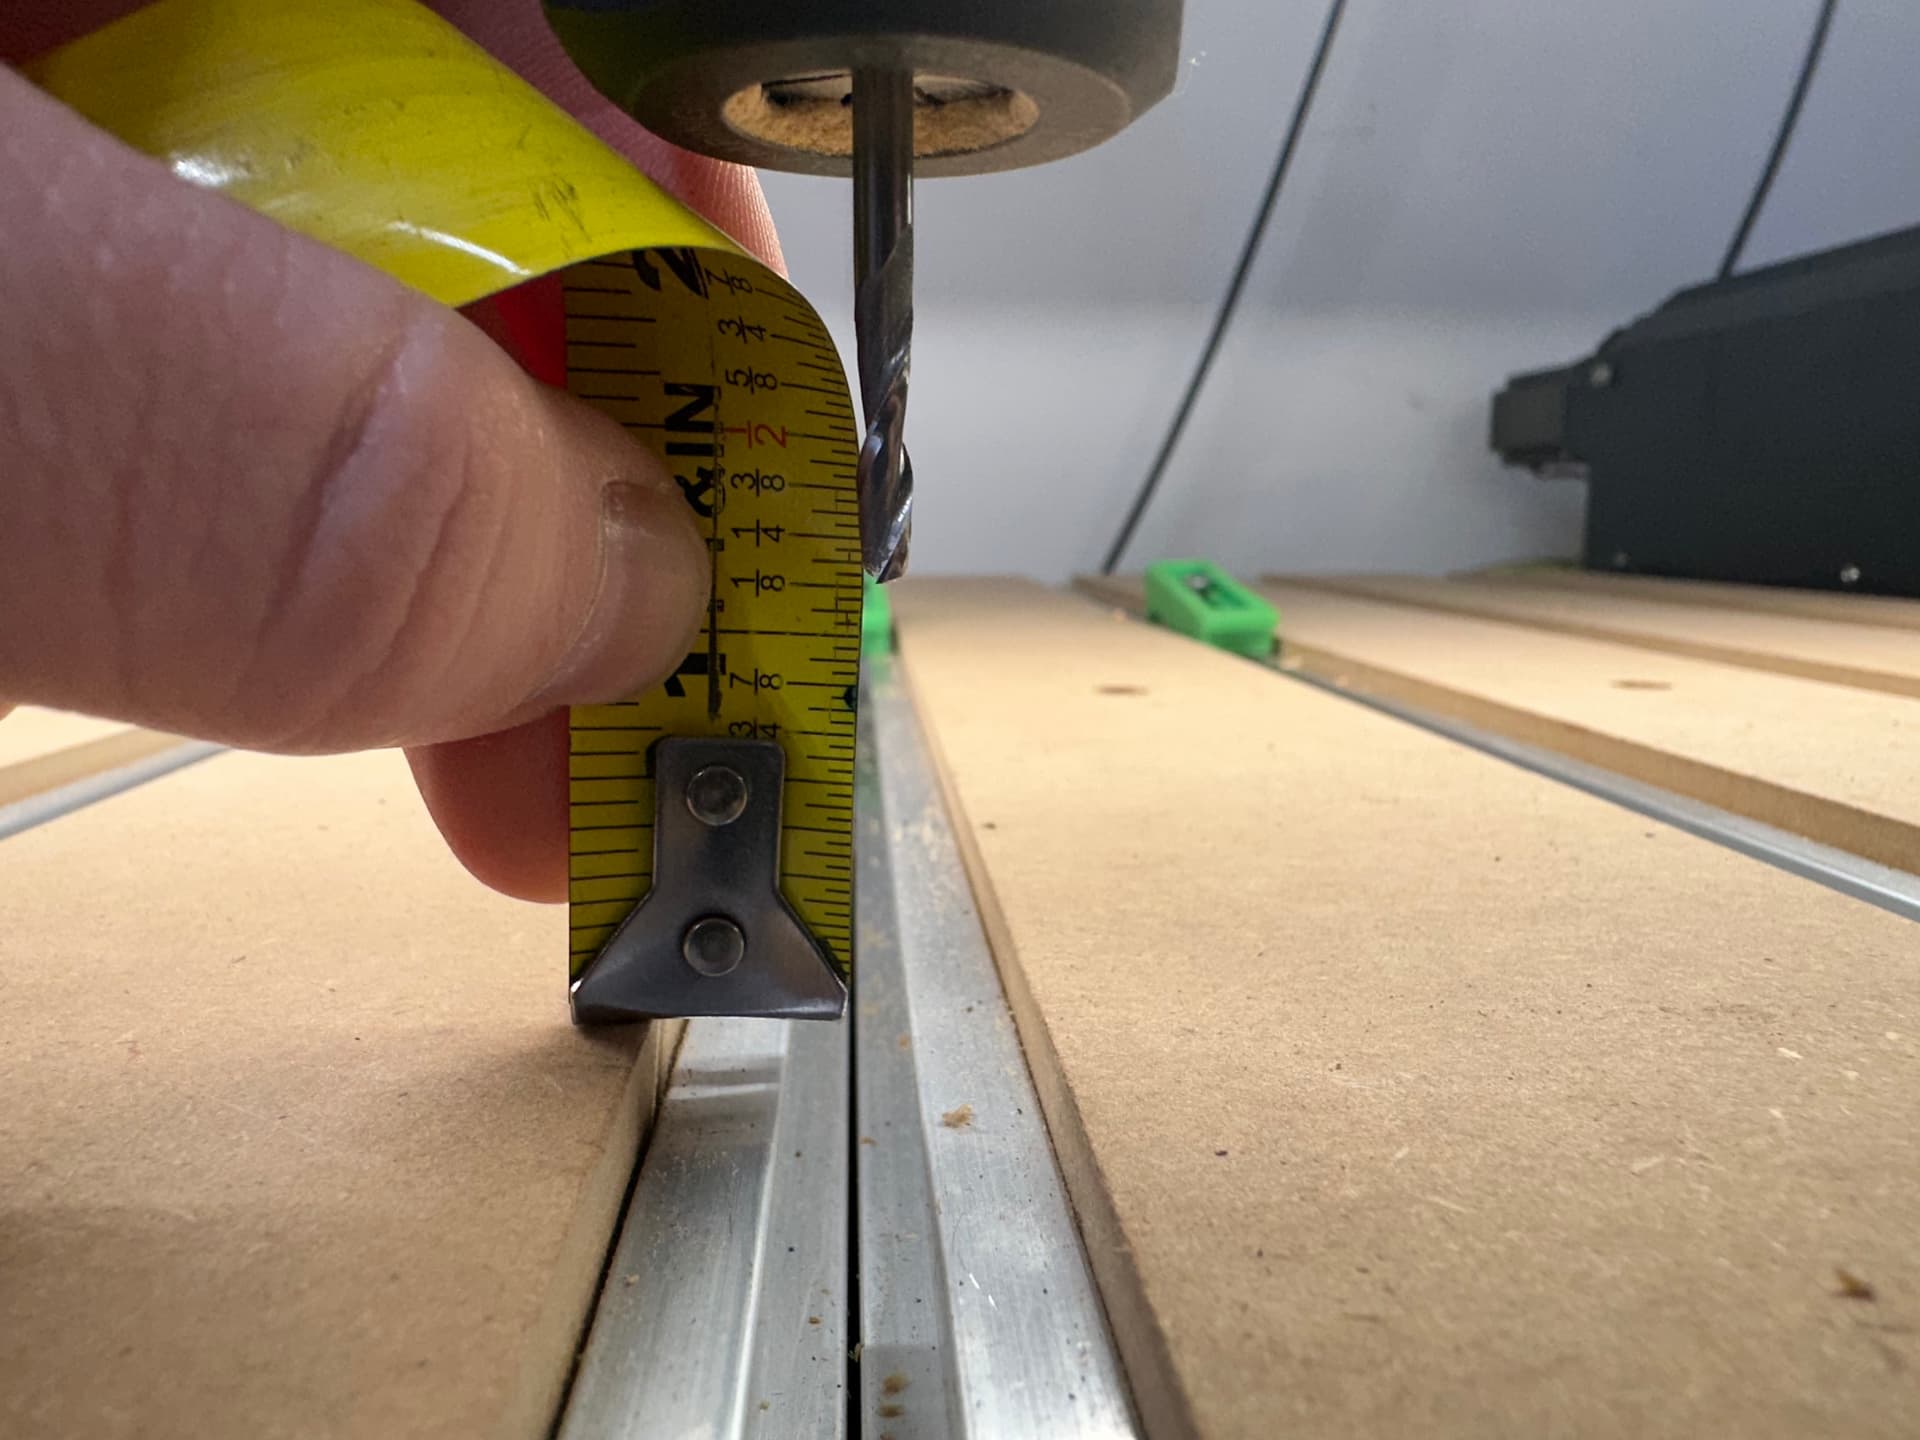
When jogging the machine with a #102 1/8" endmill, and after the height has been measured with the bit setter this is the lowest I am able to get the spindle to go. It looks like it’s off by right at 1 and one eighth of an inch.


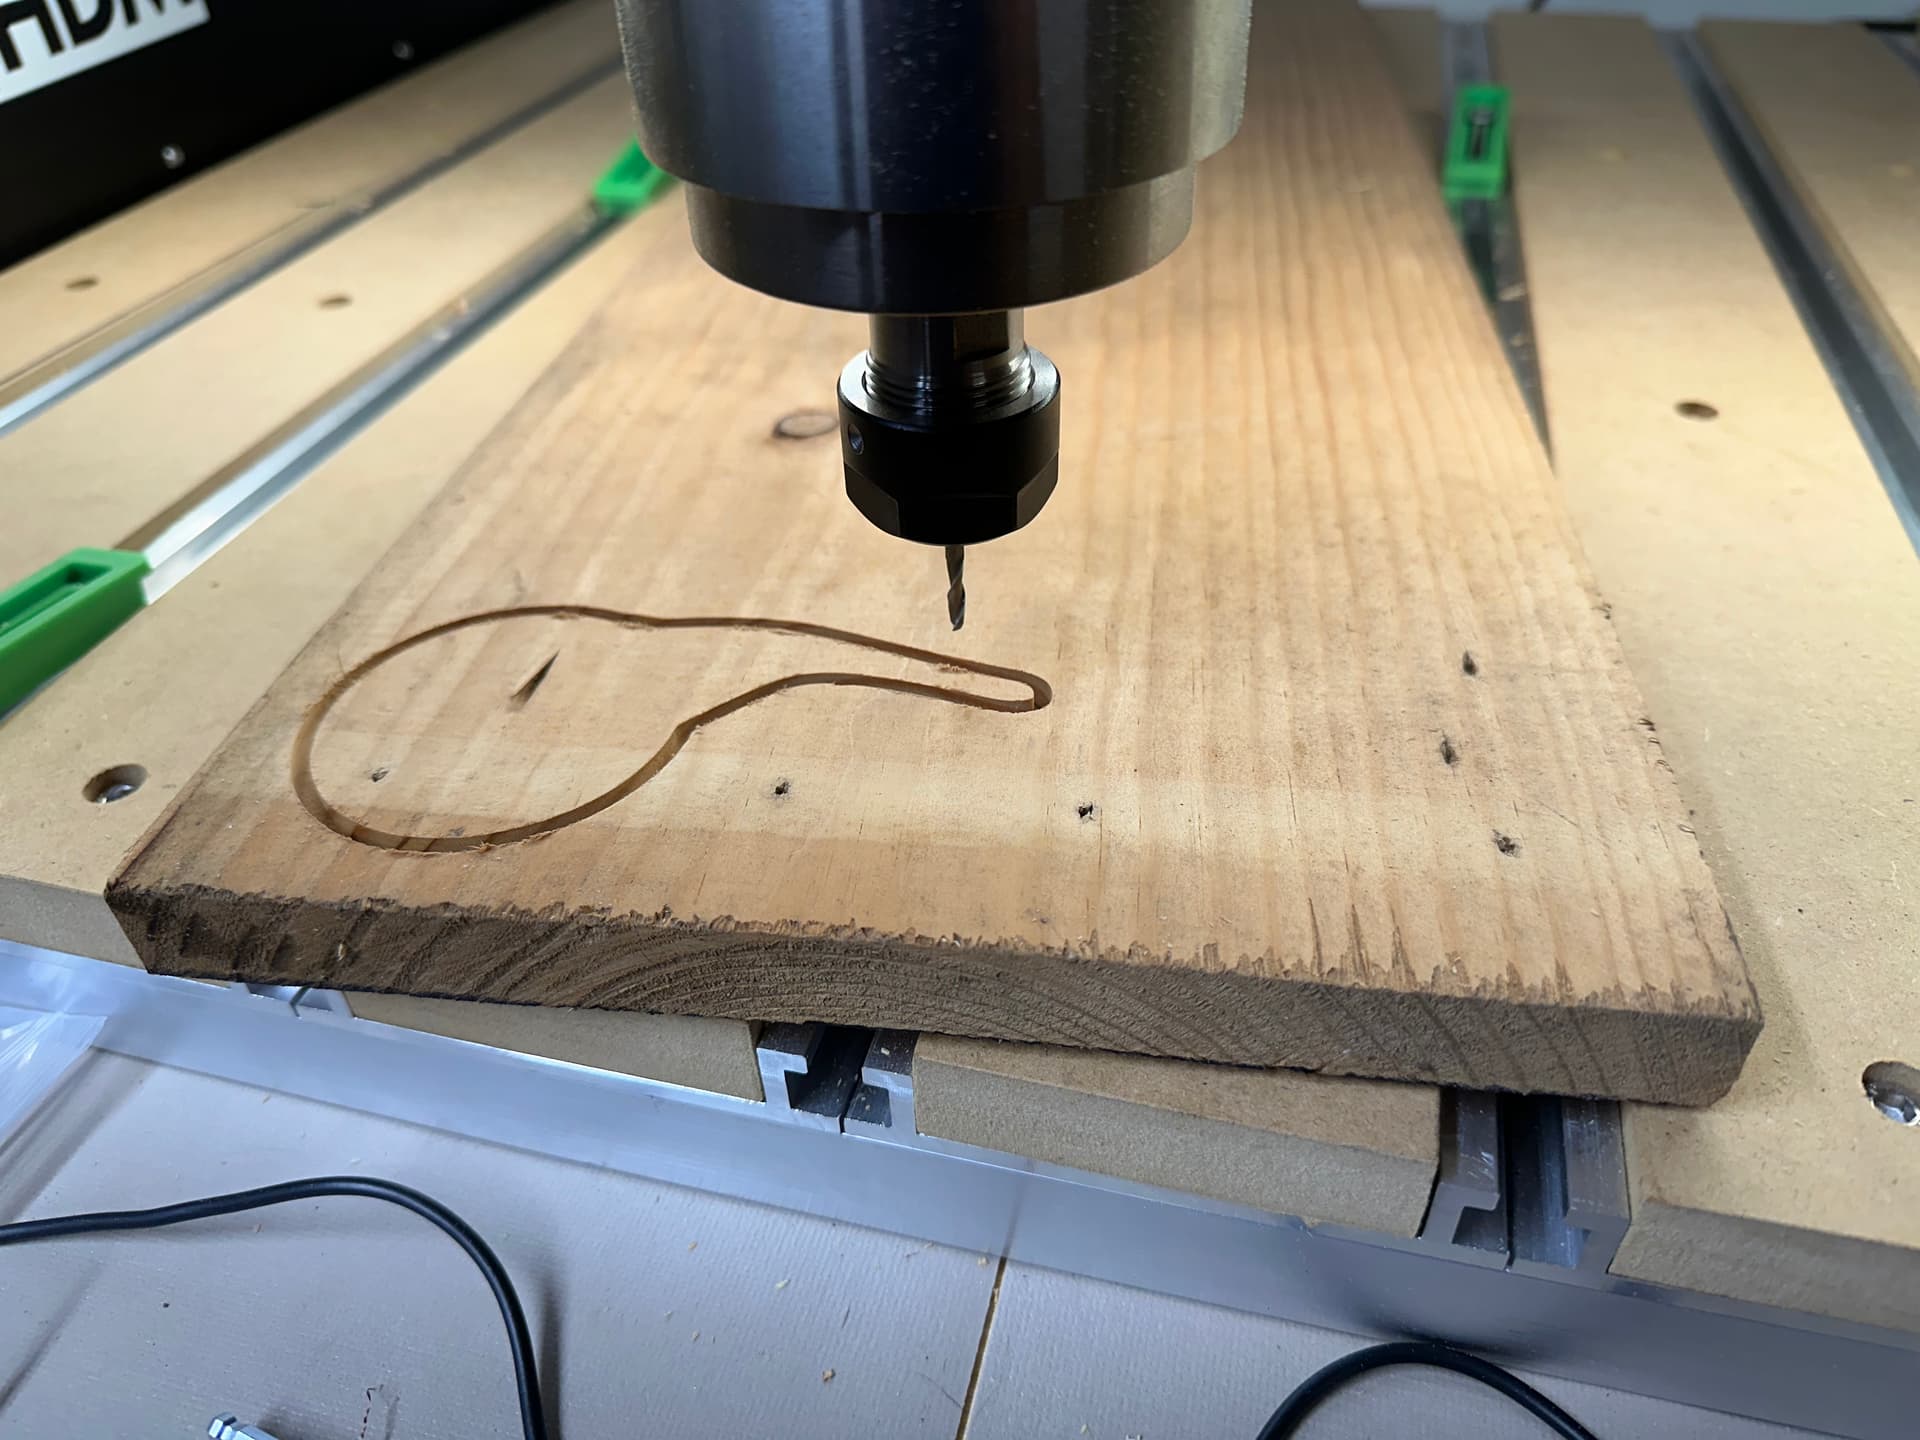
Whenever attempting to drill out some cams for securing stock to the bed, I was able to cut into the material however it told me that it would cut into the machine’s bed if I were to start the job. I double checked that I had my stock measurements correct within Carbide create, and confirmed that the stock thickness was correct(.75") and that the zero height is set to the top, and tool path zero is set to the Lower-left. I then probed it with my BitZero in that spot. I ended up running the job and ignored the error, ready to stop the machine if it did plunge into the bed.

The machine did not plunge into the bed and instead it bottomed out at a depth of 0.225" in the stock.
I then attempted to create another project from scratch in Carbide create and simply tried to etch letters into some leftover wood I had, using the same #102 endmill. With this project I seemed to have had the exact same issue as the first few passes did not touch the material.

I tried to look and see if there was a way for me to reset the height of the bed within Carbide Motion but I didn’t see any settings that allowed me to change and/or calibrate anything like that.

At this point, I’m unsure what my next best steps are. Is there anything else I should double check when setting up my job that may be causing these issues? Please let me know if there’s anything you guys recommend I try.

1 Like

My recommendation is to chuck up the shortest tool you plan on using, then lower the machine as much as is possible over one of the T-tracks, then loosen the spindle mount and lower it until the tool is just short of the top of the aluminum T-tracks, then tighten the mount holding the spindle at that height (and then re-set Z-axis zero).

Thank you Will! That was along the lines of what I was thinking may need to be done. I’ll give that a try and report back!

Will thank you so much for that tip! I figured this was something simple that was just from my lack of experience. I readjusted the height of the spindle just like you had described and it has completely fixed my issue! So much so that I messed up in my first attempt at a new cut and finally ruined my perfectly uncut spoil board! :rofl: Guess I can say the machine is finally broken in!

This topic was automatically closed 30 days after the last reply. New replies are no longer allowed.