It was the first time I tried zero at the bottom and I just had a little cleanup which I am sure is related to my material thickness measurement. But it was really like paper on the bottom.
Then I put the screws in and noticed the error of my ways. I did not appropriately account for the distance between the rails on the vertical and horizontal legs. Spacing on the horizontal was perfect though.
So, I need to go again and will probably use something better than MDF. I would like to try HDPE if I can find some.
Before I cut again I am curious if you have any lessons learned now that you have been using yours for a while. Anything you would do differently?
Do you think the pocket for the BitZero really needs to go all the way through? That seems to create a weak spot in the corner. If I left 1/8” in there would that help? The drop on the corner of the BitZero V1 is .121” so leaving an 1/8th you still allow registration on a 1/4” part.
I am not sure about the geometry of the V2. Maybe I should try to future proof.
After you get your spacing down you should be good. When I place my L bracket on the table I lightly tighten it down and jog the router over with an end mill. I jog back and forth and get the bracket square to the router. Then I tighten down and check it one more time.
I often use painters tape and super glue. So I put the material down and trace around it with a pencil. I then apply the painters tape to the spoilboard and on the back of the material and apply super glue. I make sure the 2" rows of painters tape line up on the spoilboard and the back of the material. I then apply about 1" S pattern on the tape and then place the material down and press it into place. Do not put too much glue or it will squish out and get on the spoilboard. If it does it is not a big deal but you can clean it up with a scraper or give a light sanding.
After I get the material in place I remove the L bracket if I will be cutting through the material on the sides that the material is against the L bracket. If you are going to come close then remove it but remember to put it back on before removing the material. If you forget which I often do then just line it up with the router again. You want the L bracket square to the router.
The first couple of years I had my SO3 I did top of material only. Often I would cut through to the spoilboard. By using the bottom I never get much cut through and so my time between making and replacing a spoilboard is much increased. It is called a spoilboard for a reason but I want to preserve it as long as possible. Plus I have a smooth surface to stick down my material and the painters tape.
In the plan the cam clamps were made in two different orientations. Either will work but the screws tighten up to the right so you want to have the clamp oriented so tightening up the bolt will also tighten the clamp. However you can never have enough clamps of any kind so use what ever you have but try to have them oriented so they tighten against the material when tightening up your bolt.
If not previously mentioned I had the clamps oriented so the long grain of the cherry i used was along the length of the cam clamp. You could orient them 90 degrees but long grain is stronger than the short grain (cross grain) so you wont snap a clamp in half if you really clamp down with excessive pressure.
I found a decent deal on a 1/2” piece of HDPE that should arrive today. Hopefully I can retry.
I typically use the XFasten tape which works really good.
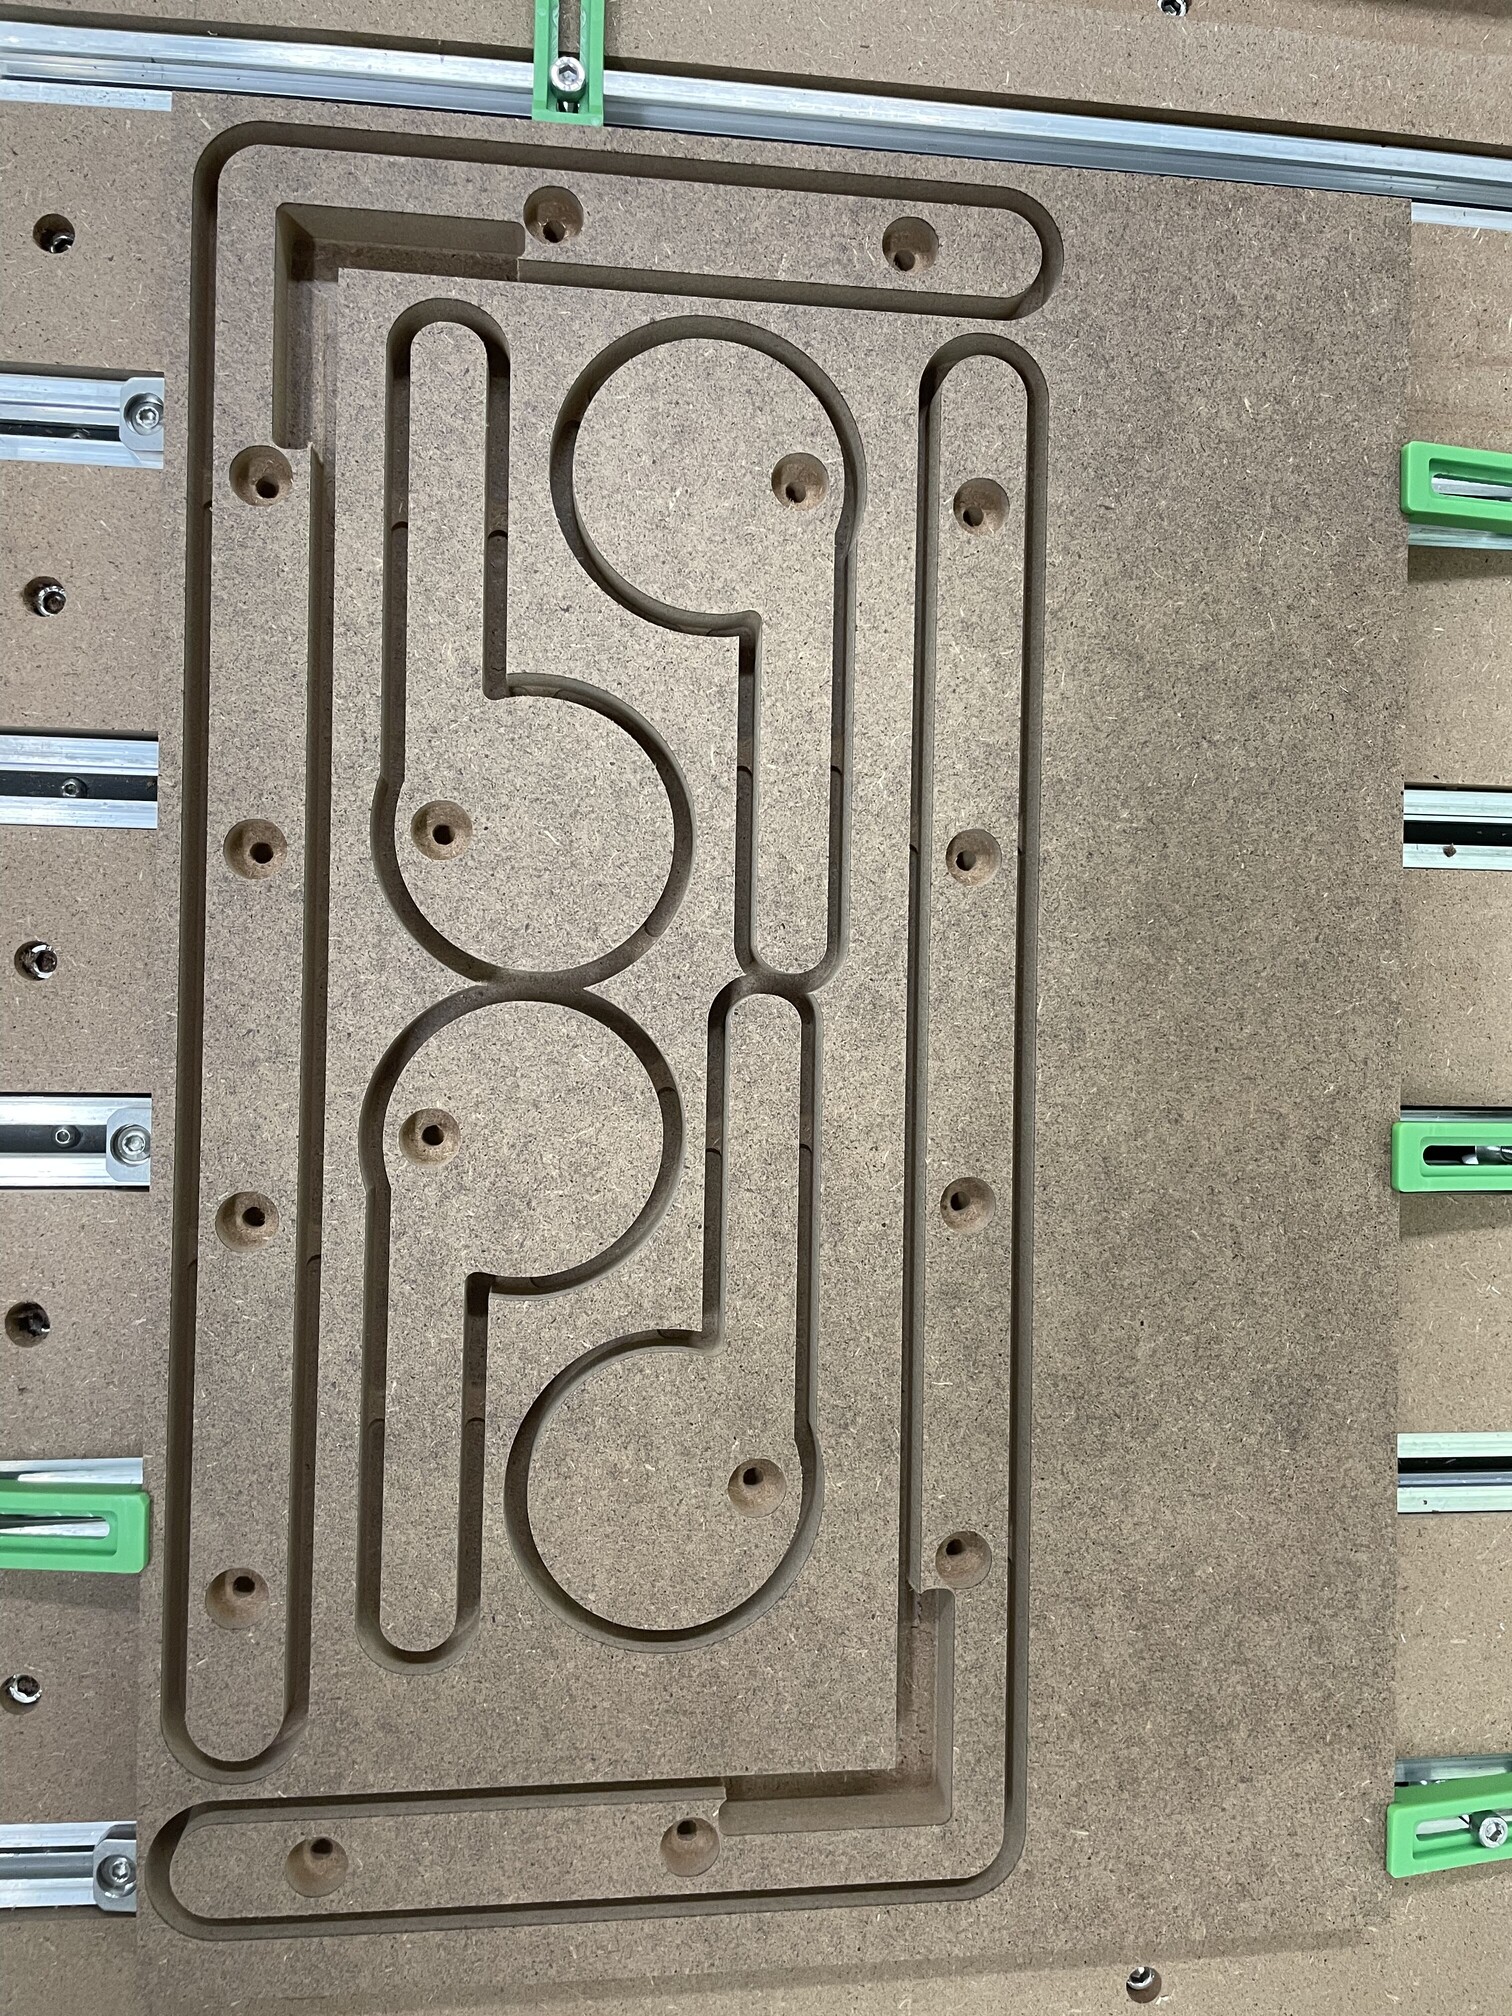
I made a strategical error a few week ago which put some small grooves in my spoilboard. I plan to reflatten and try my best to use bottom to zero in the future.
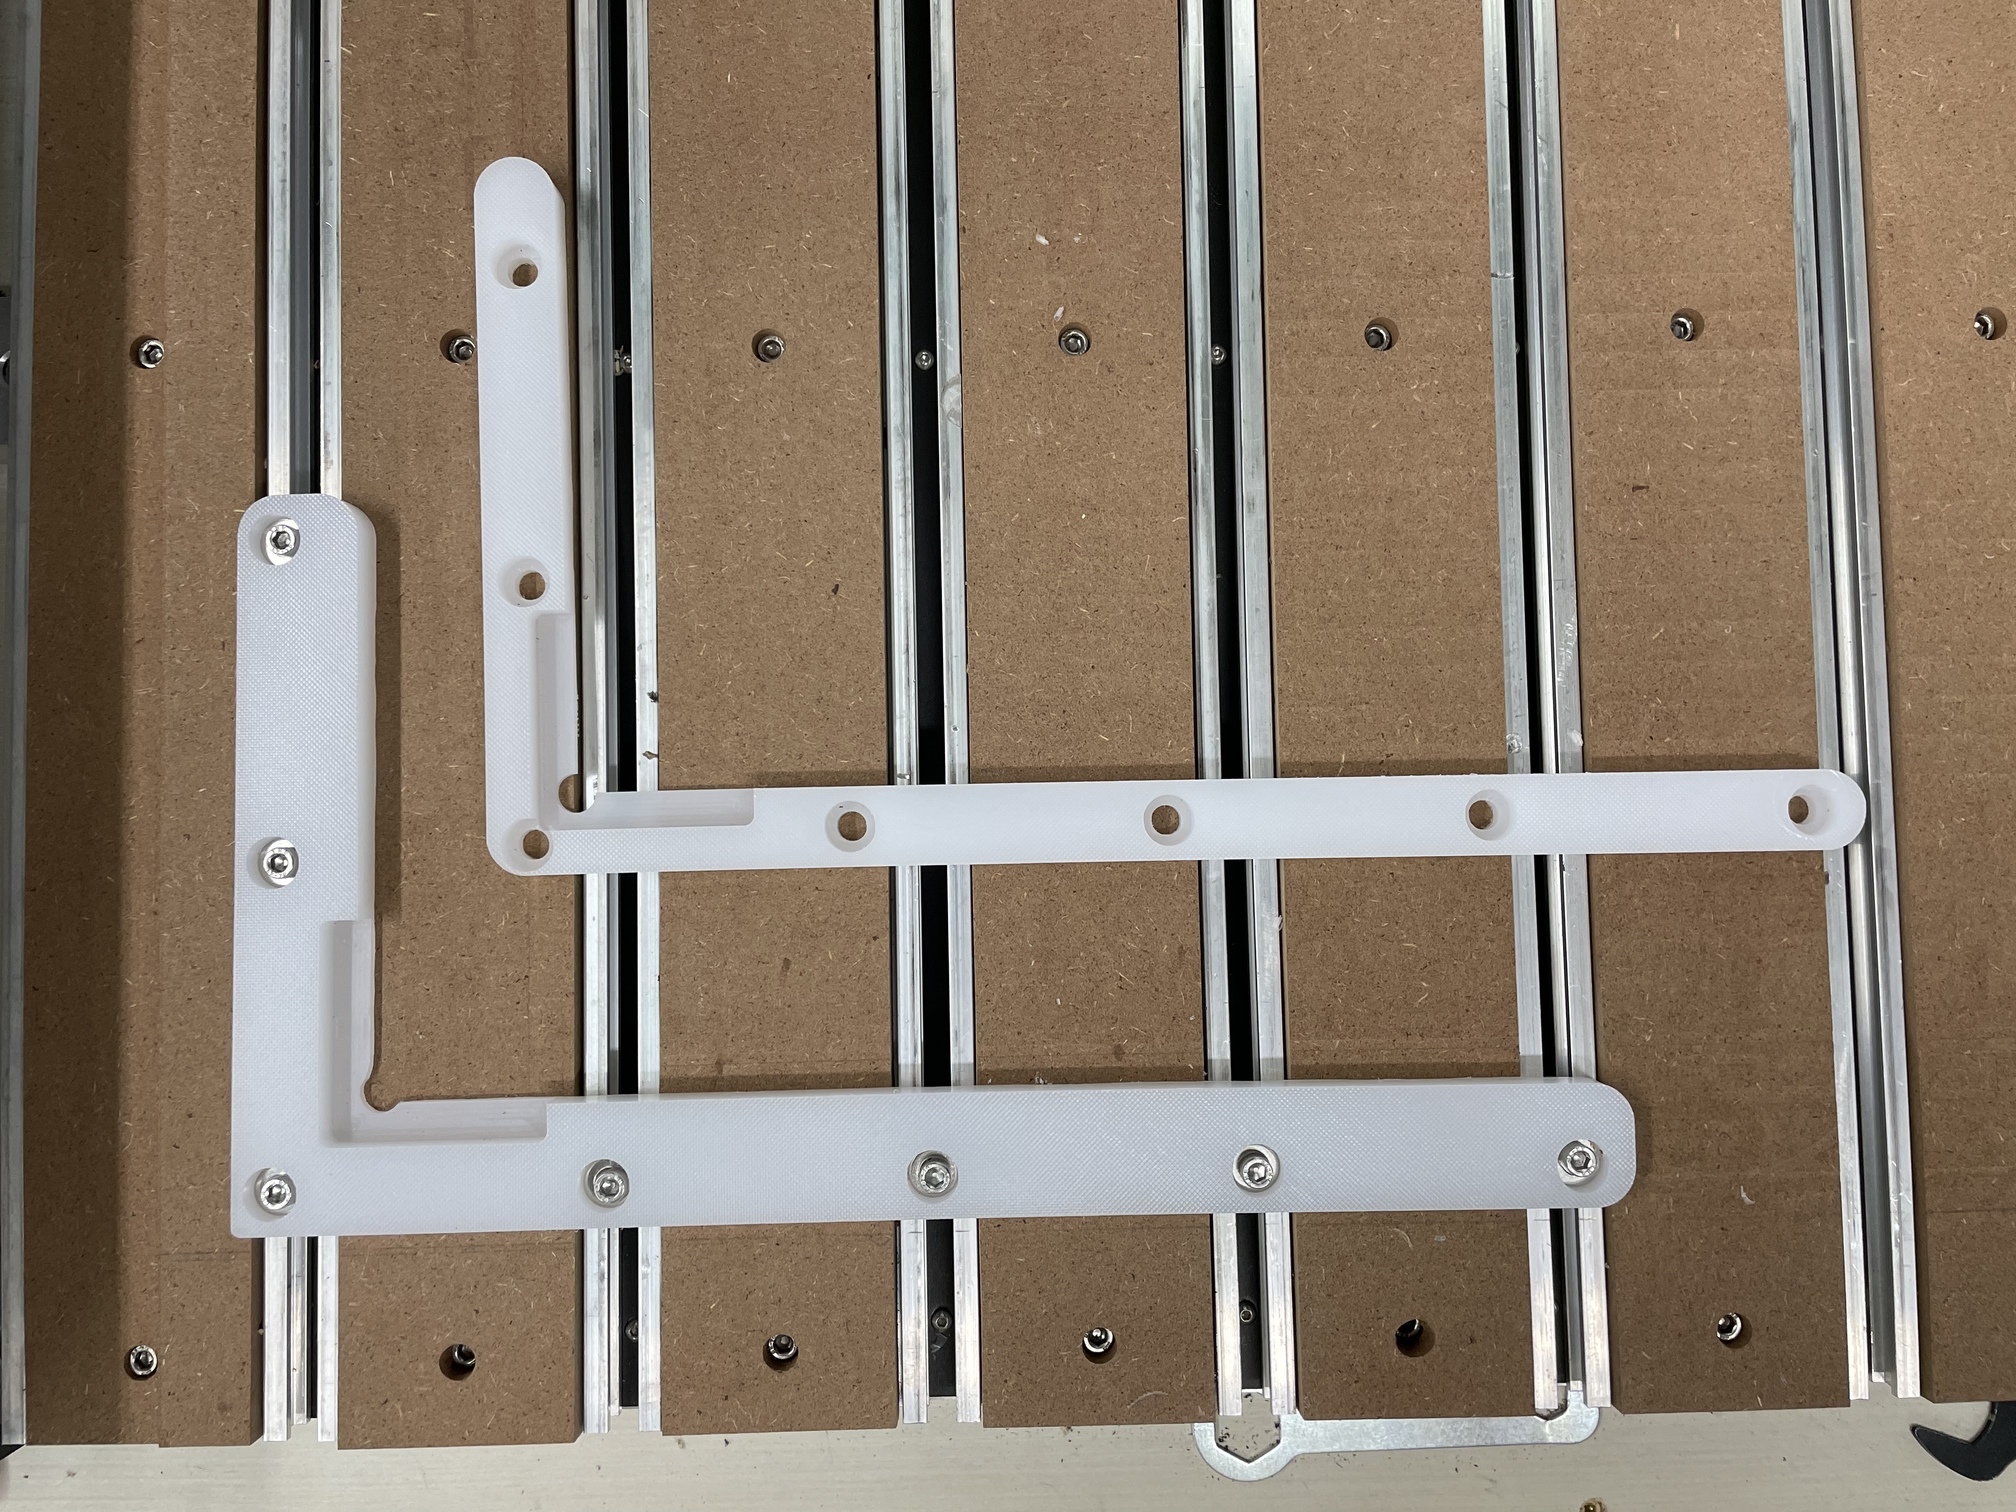
Iteration two is much better but still 2 issues. 1) the width of the angle nestles nicely between the MDF on the spoilboard which makes the vertical fall lower than the horizontal. 2) still not quite as rigid as I would like but once adjusted and tightened it would be fine.
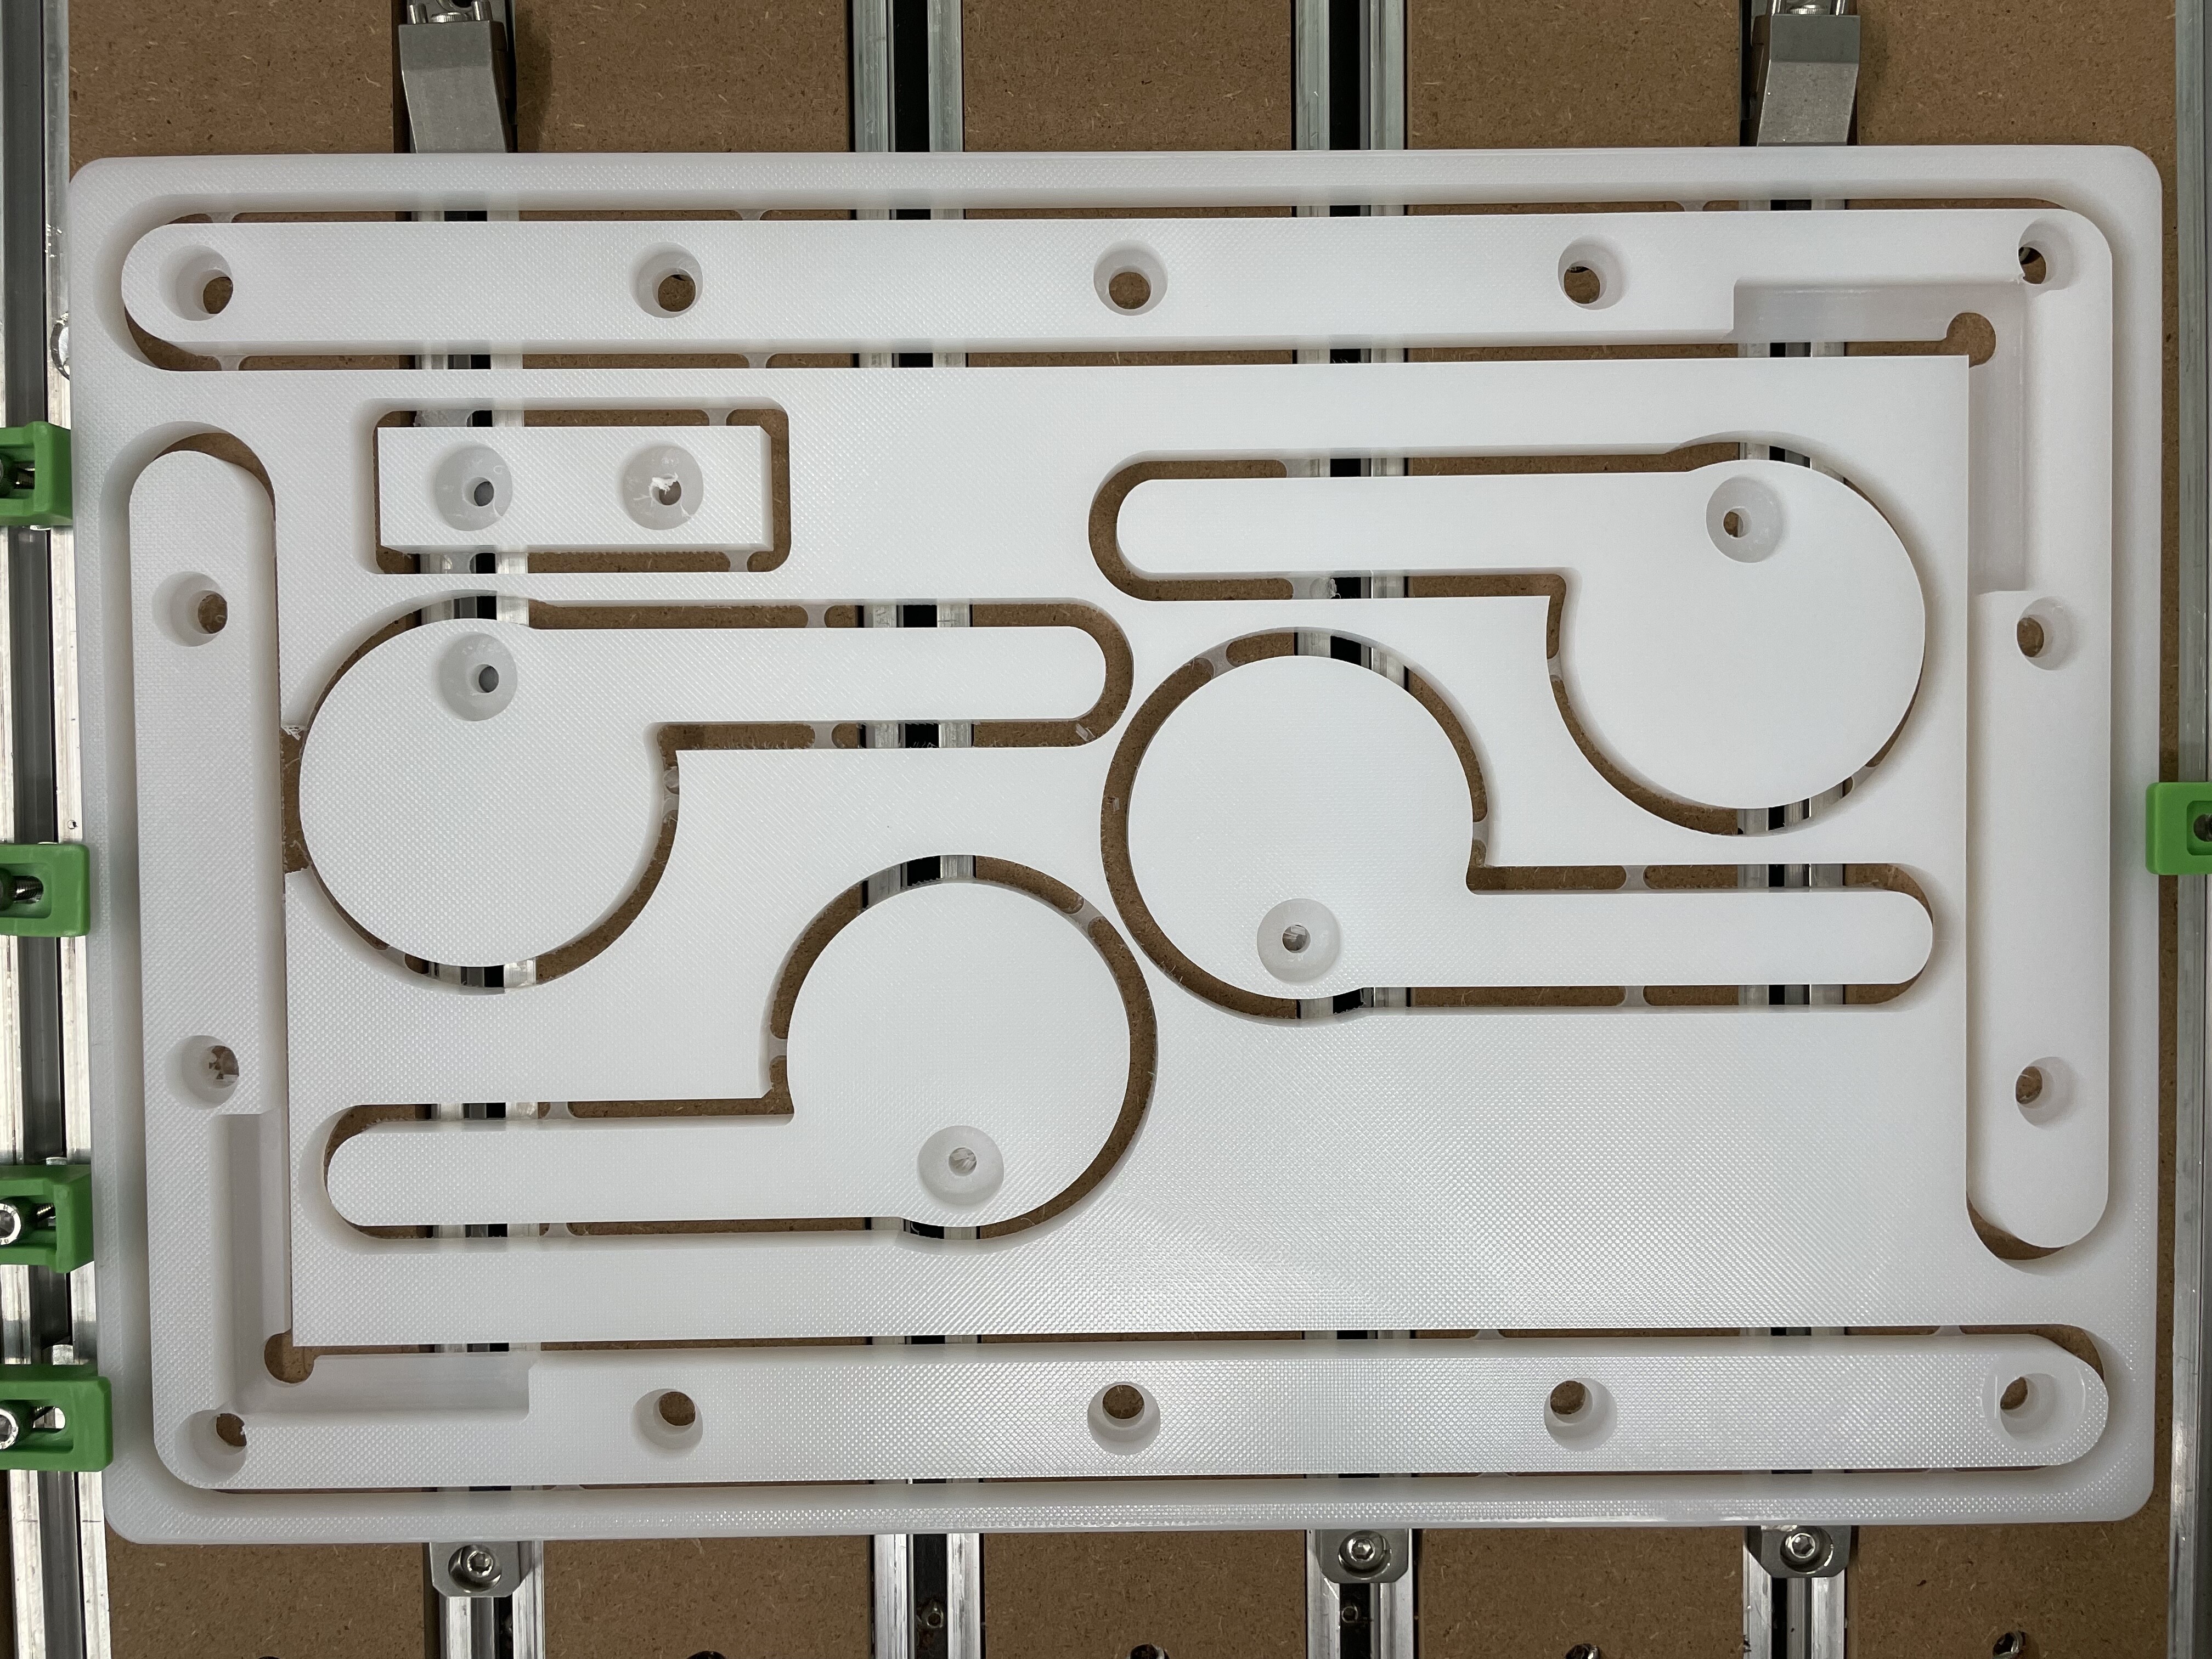
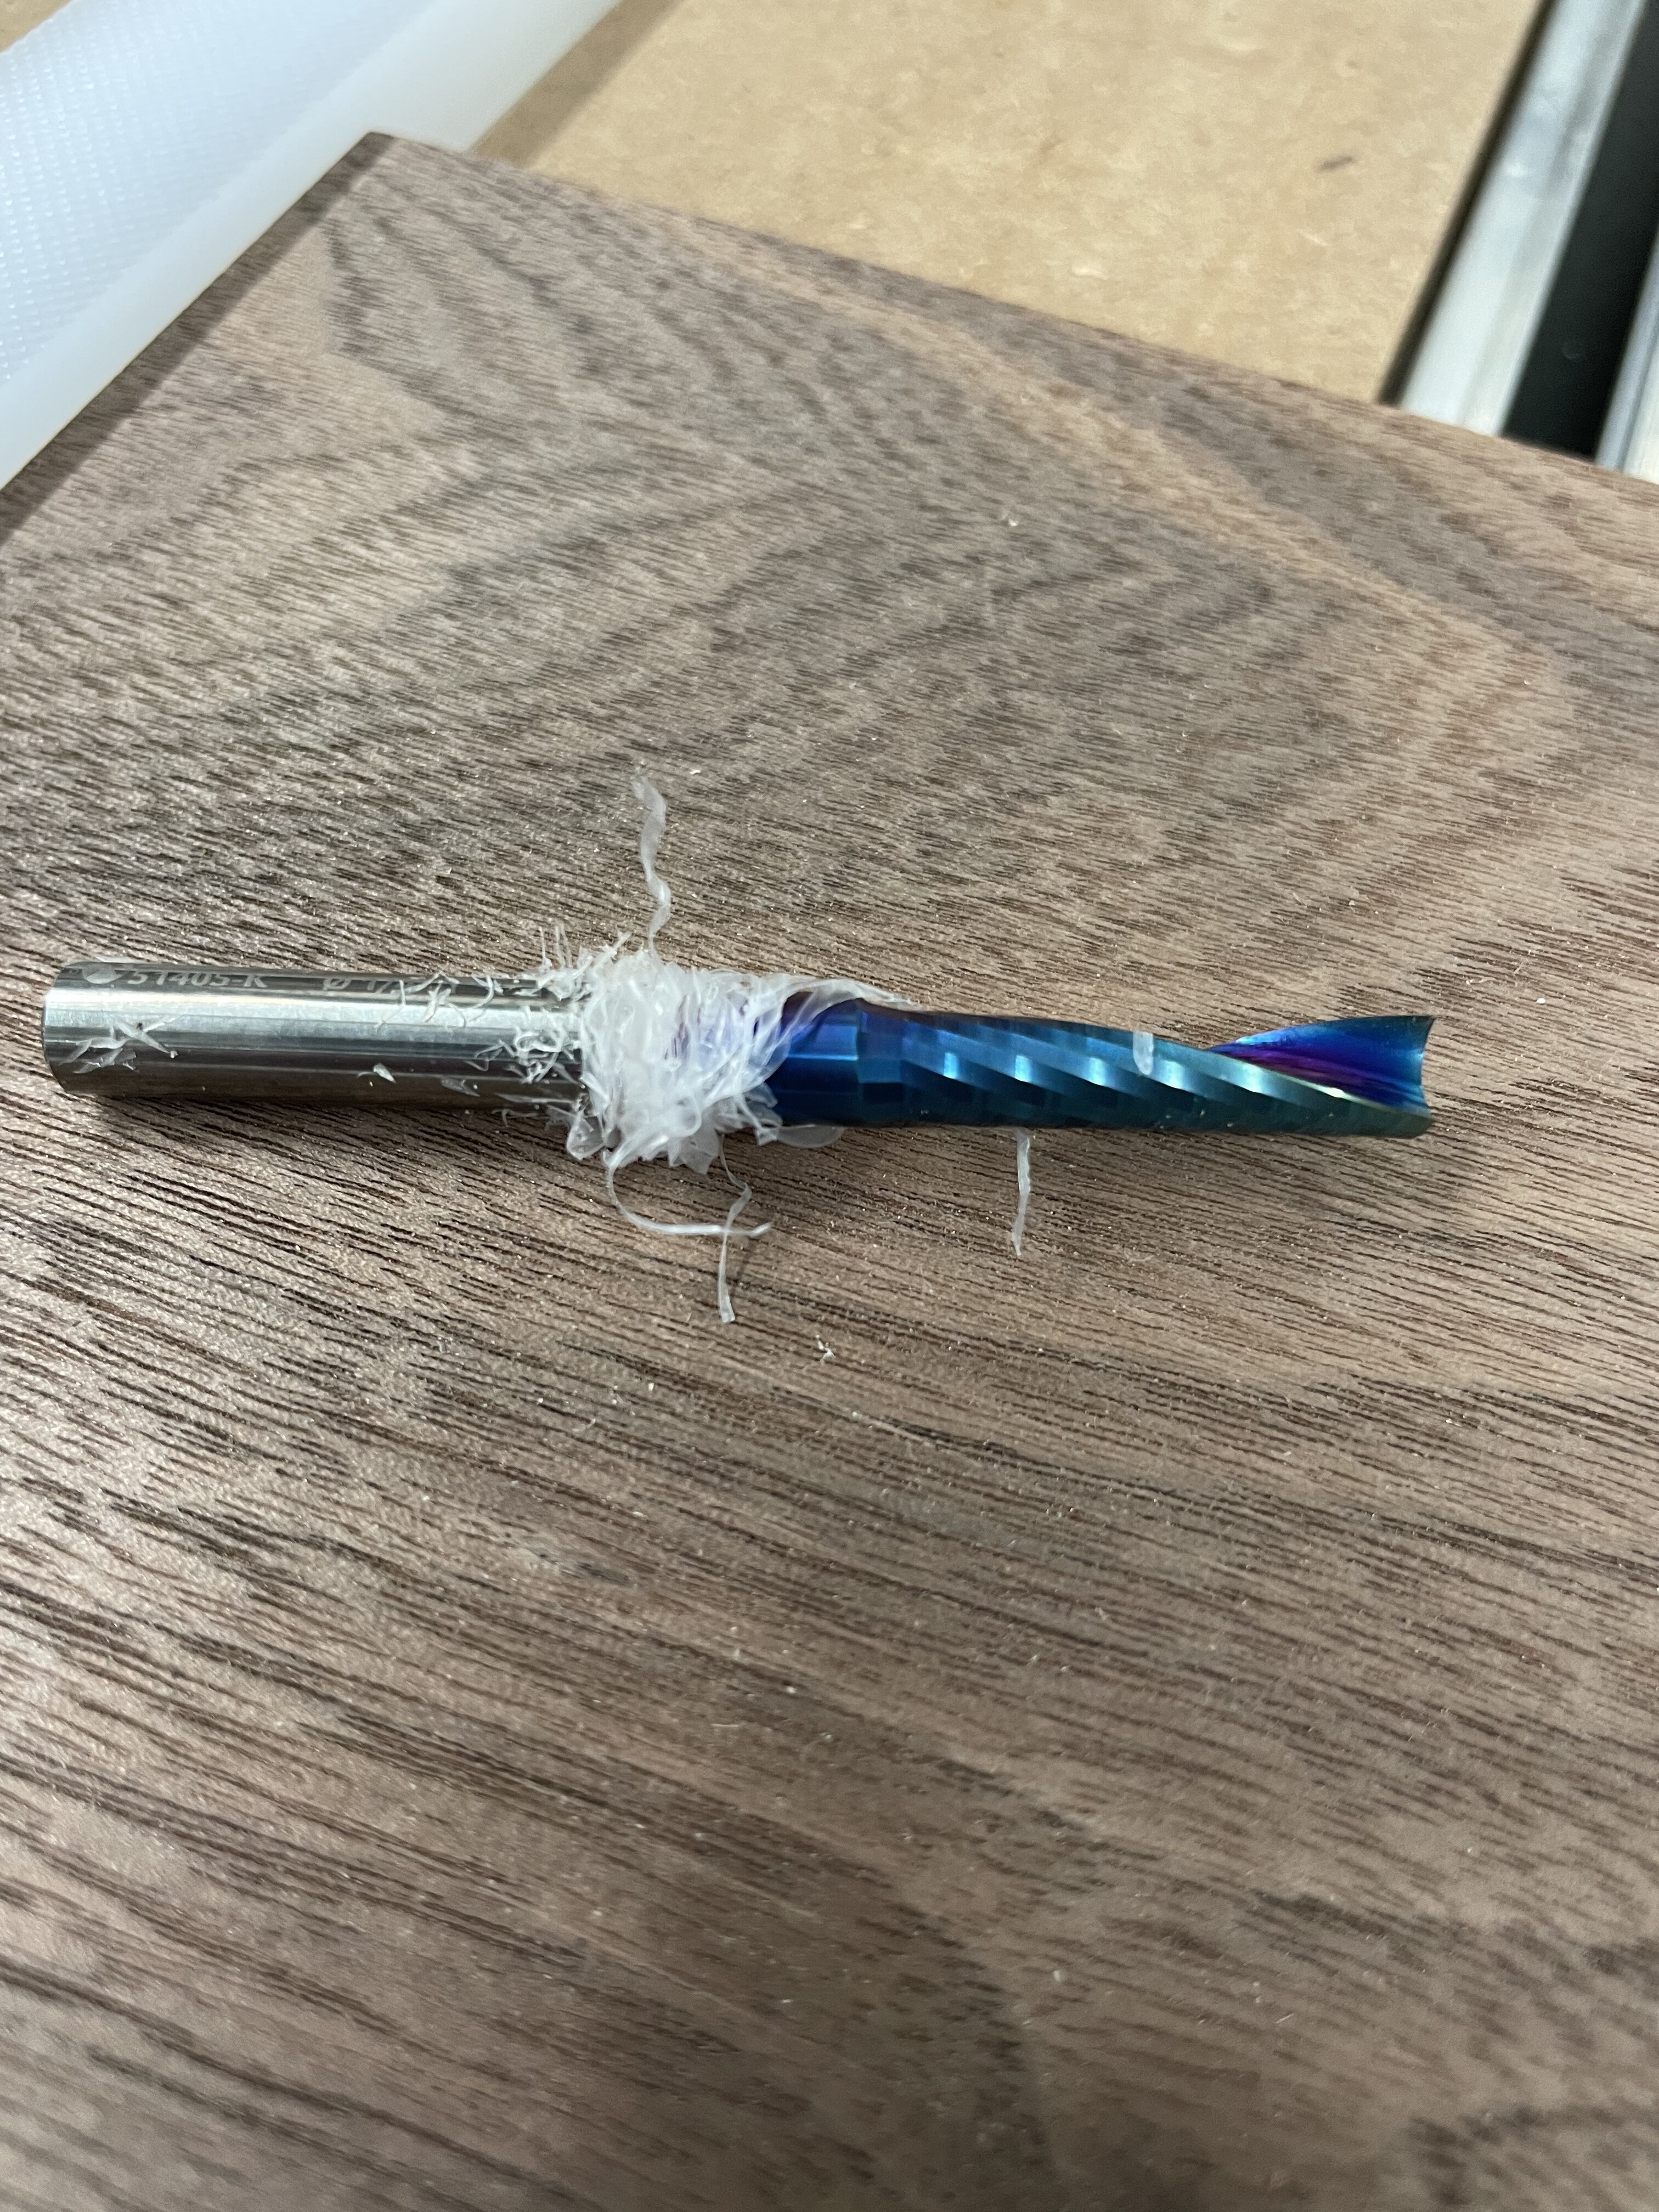
On the plus side, this was my first attempt at zero on the bottom with something that had consistent measurements and that went well. More importantly this was my first experiment with HDPE. I used the Amana 51405-K. I did get some strings wrapped around the bit and pushed a few times the clean. I used a feed rate of 120 and rpm of 18000. The cuts and pockets are very nice.
I think @KevBarn14 likes to say 3 tries and you get it right so I will order another cutting board blank today. It was a $13 lesson with much higher value.
I finally got to iteration 3. It is much better. I made the thickness of the bracket large enough to span the MDF slats on the Y axis. However, in all my brilliance I only grew the width toward the inside so the left edge is really unsupported. If I shifted all the holes 1/8” to the right that would have solved it. Oh well, it works for now.
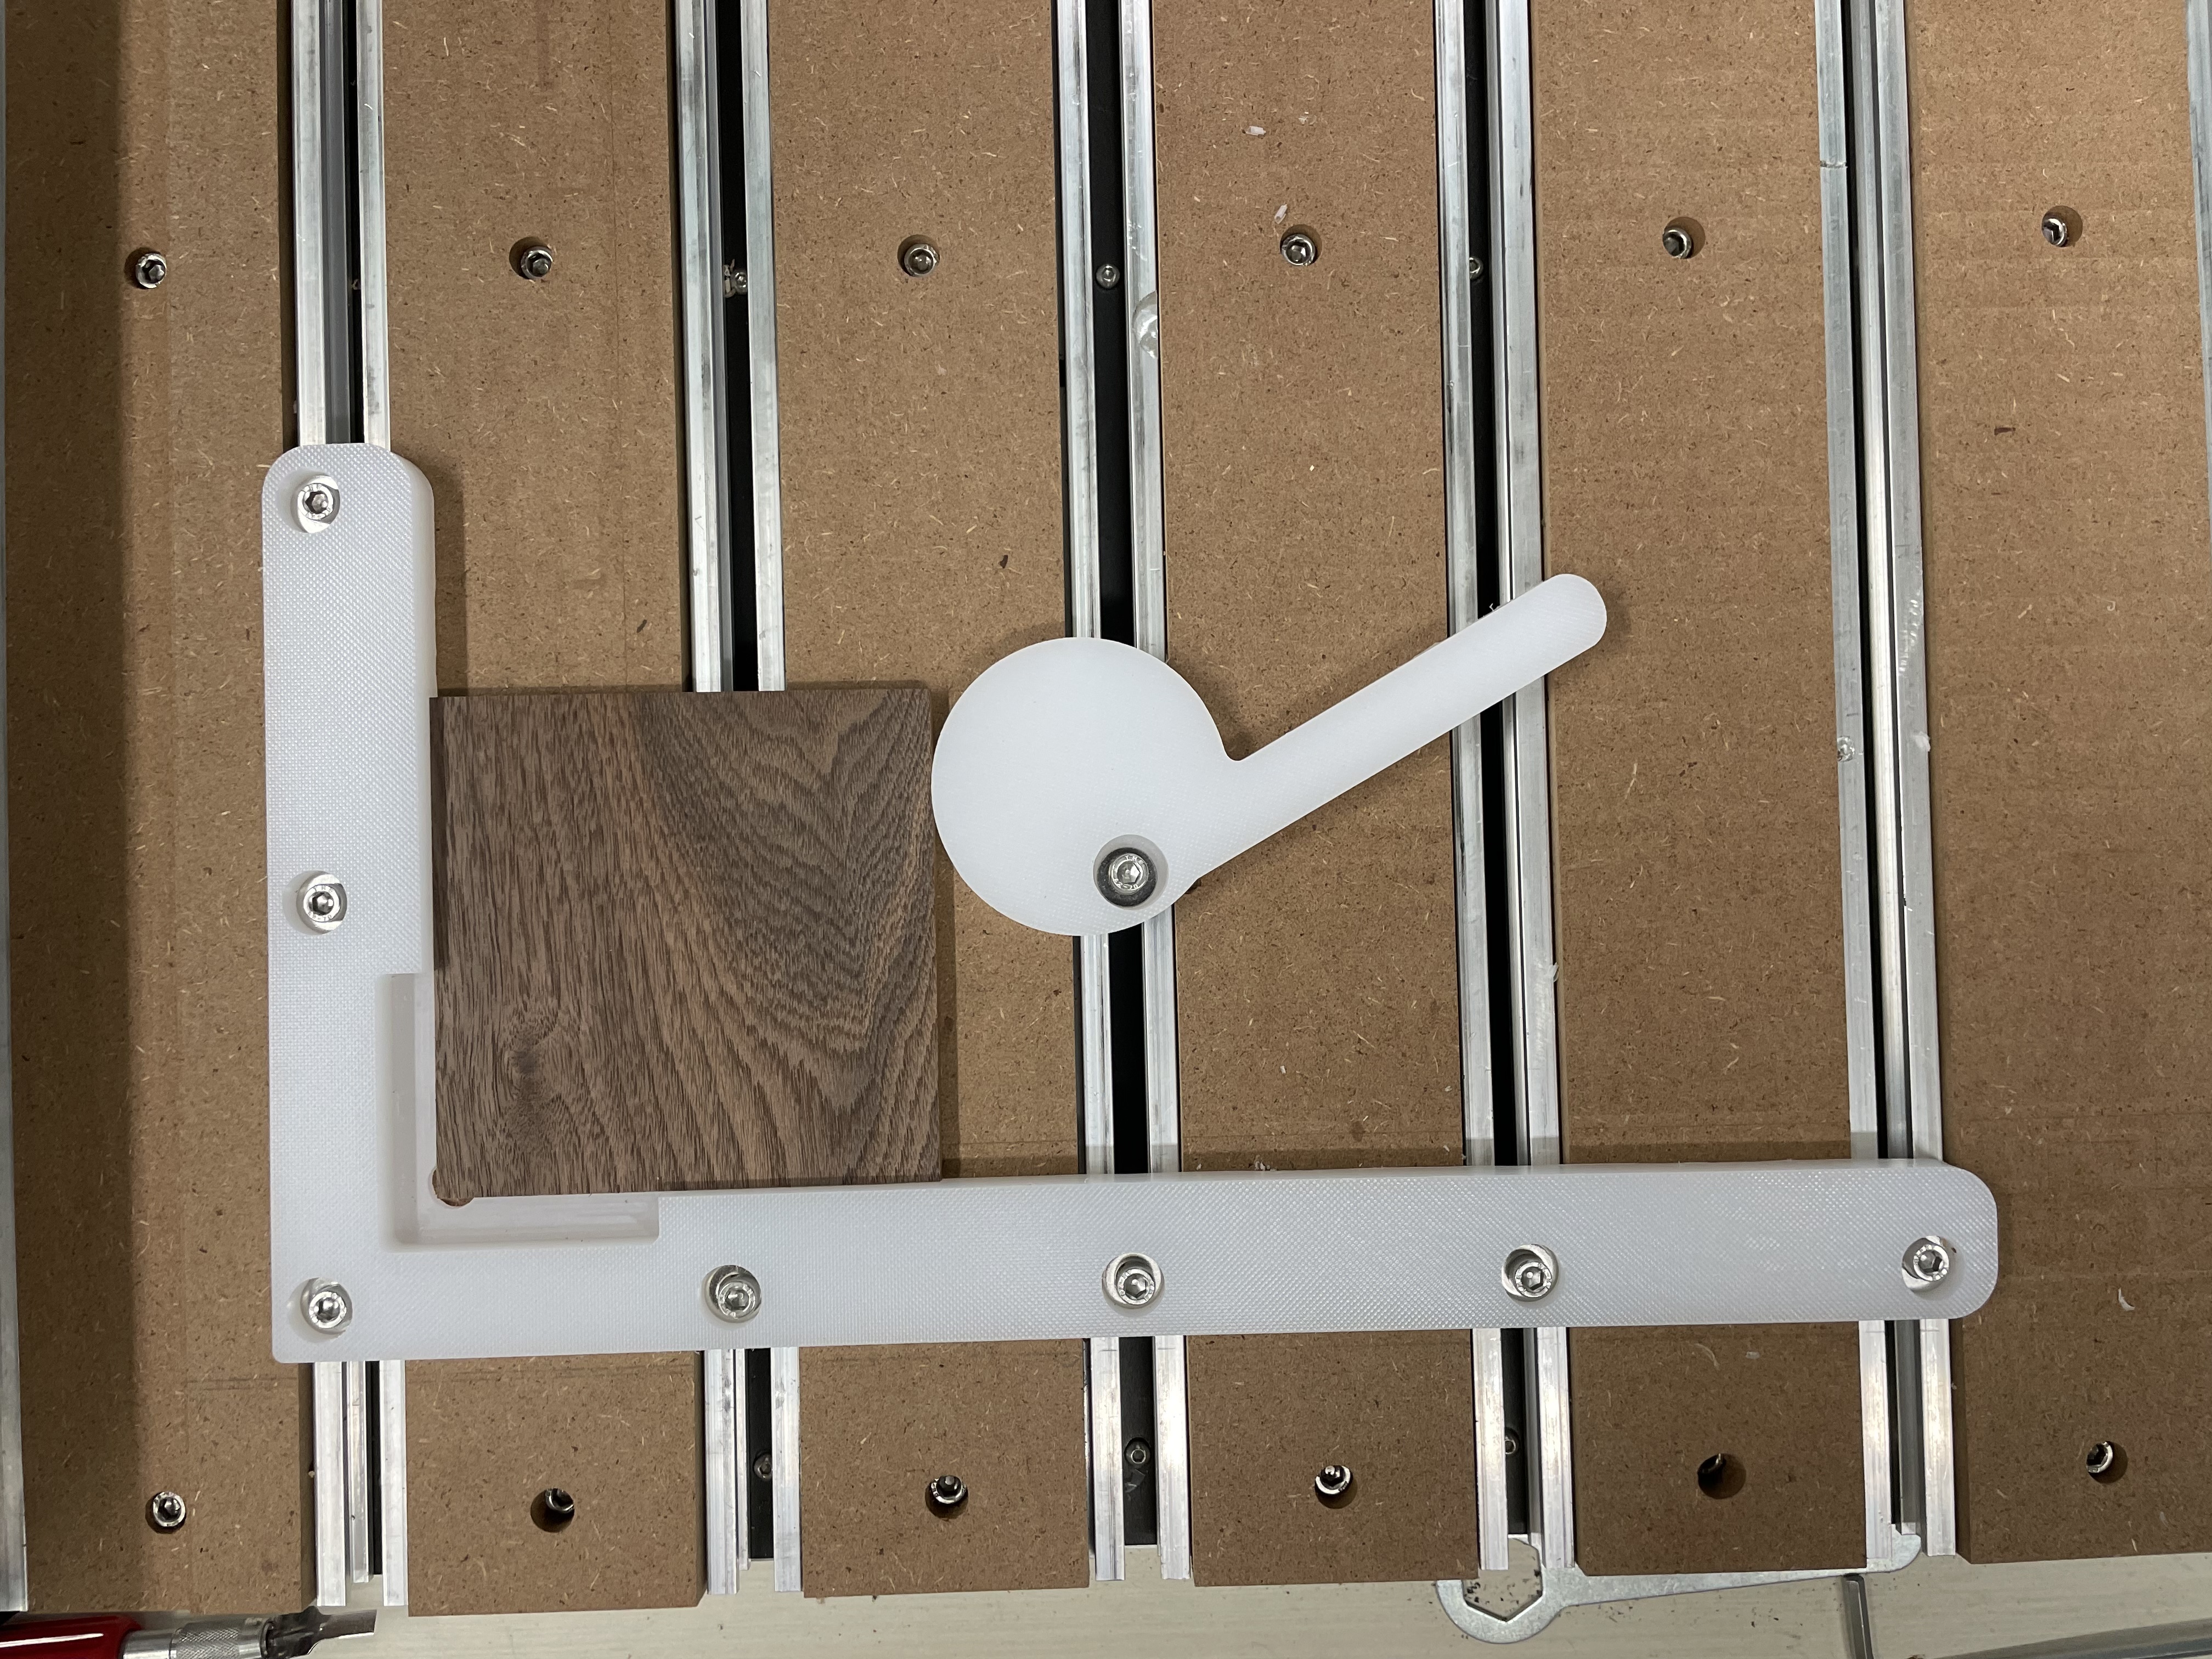
The cam clamp you have showing will work but the opposite one will work better. As you tighten the one shown it is trying to loosen the clamp. The cam clamps that rotate the direction of the tightening of the screw work better because it actually tightens better because of the direction of rotation of the hold down bolt. The one you show is tightening counterclockwise and the bolt is tightening clockwise.
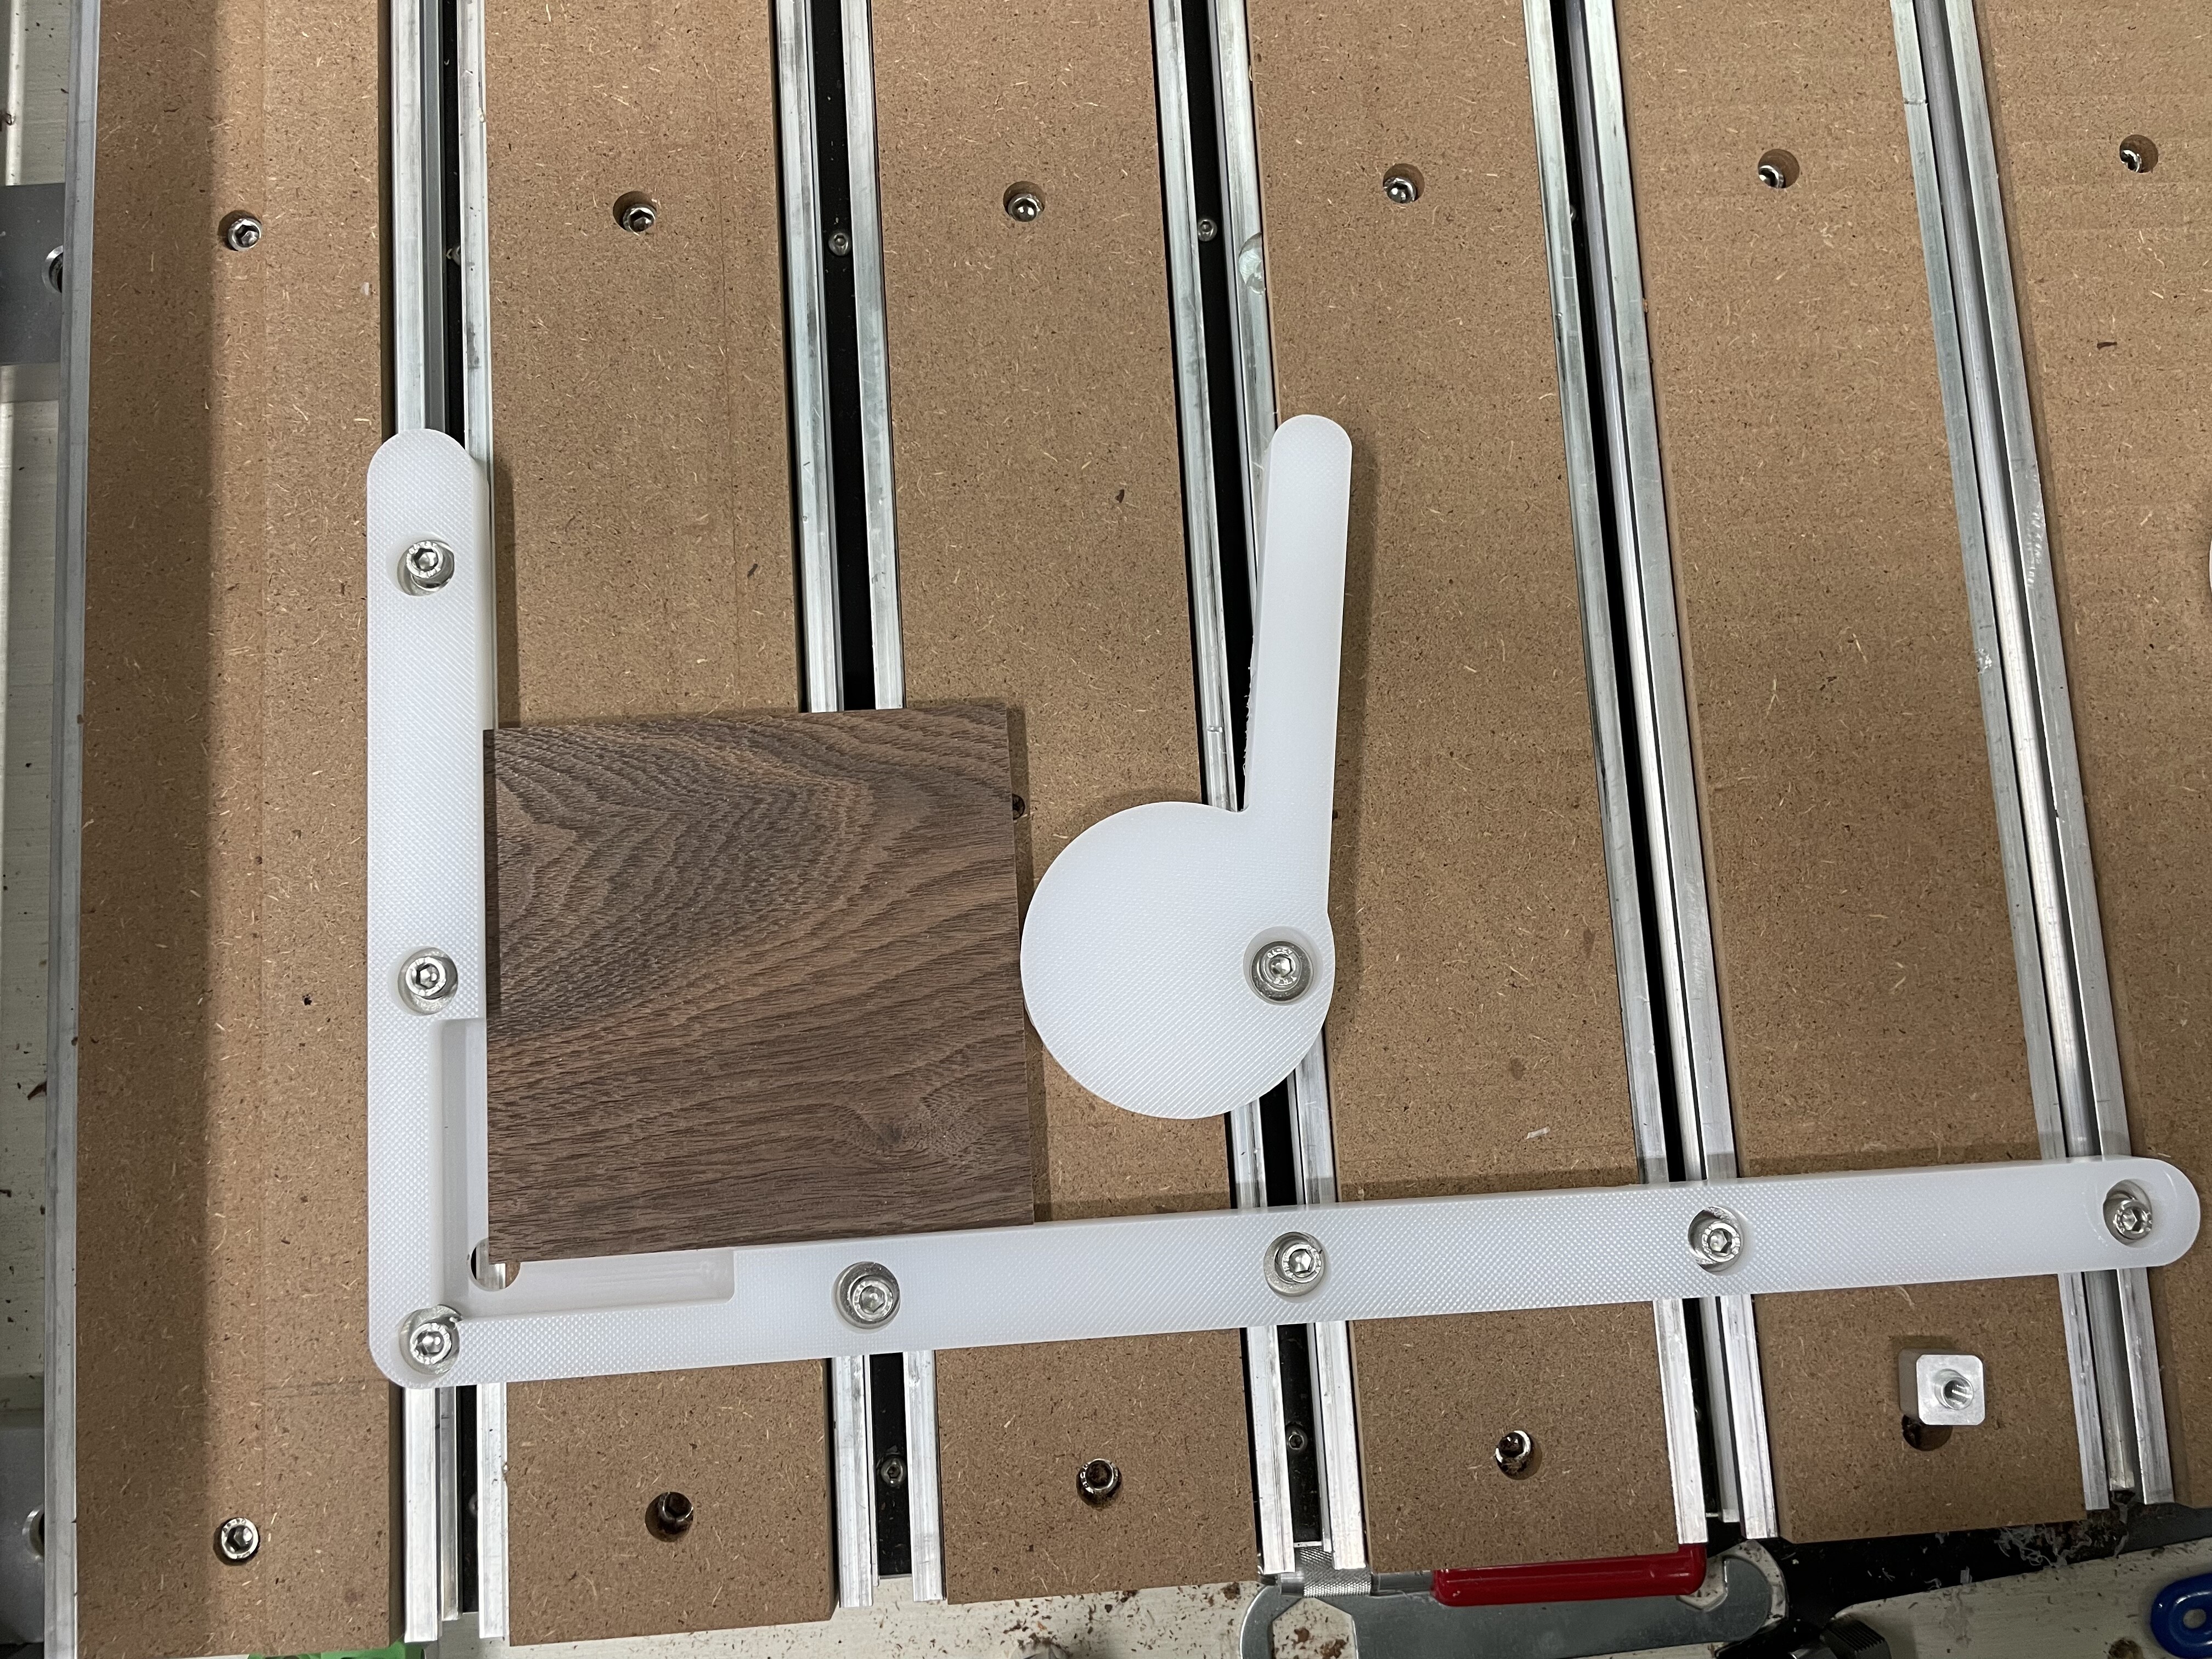
I have to admit that was a setup for a photo op, not real work. I will get them oriented properly for actual use.
I just spent some time re tuning the machine and am ready to flatten the spoilboard for what I hope will be the last time in a long time. I am embracing the zero on bottom. Regarding the tuning, I have the Y axis tuned to 56/57 and that is as good as I can get without jumping into the 70s. I did just tighten the one for X but haven’t seen any guidance on that one or if I did I completely missed it. I have the XXL Pro (not 5).
I tried once with just the cam clamp but that didn’t go so well. It came loose and I had to kill the job. I don’t know if I didn’t have it tight enough or maybe it was too slippery or just in the wrong position. Probably should have had at least 1 on the top and one on the side.
Good thing the board was wide enough and I was able to flip it over.
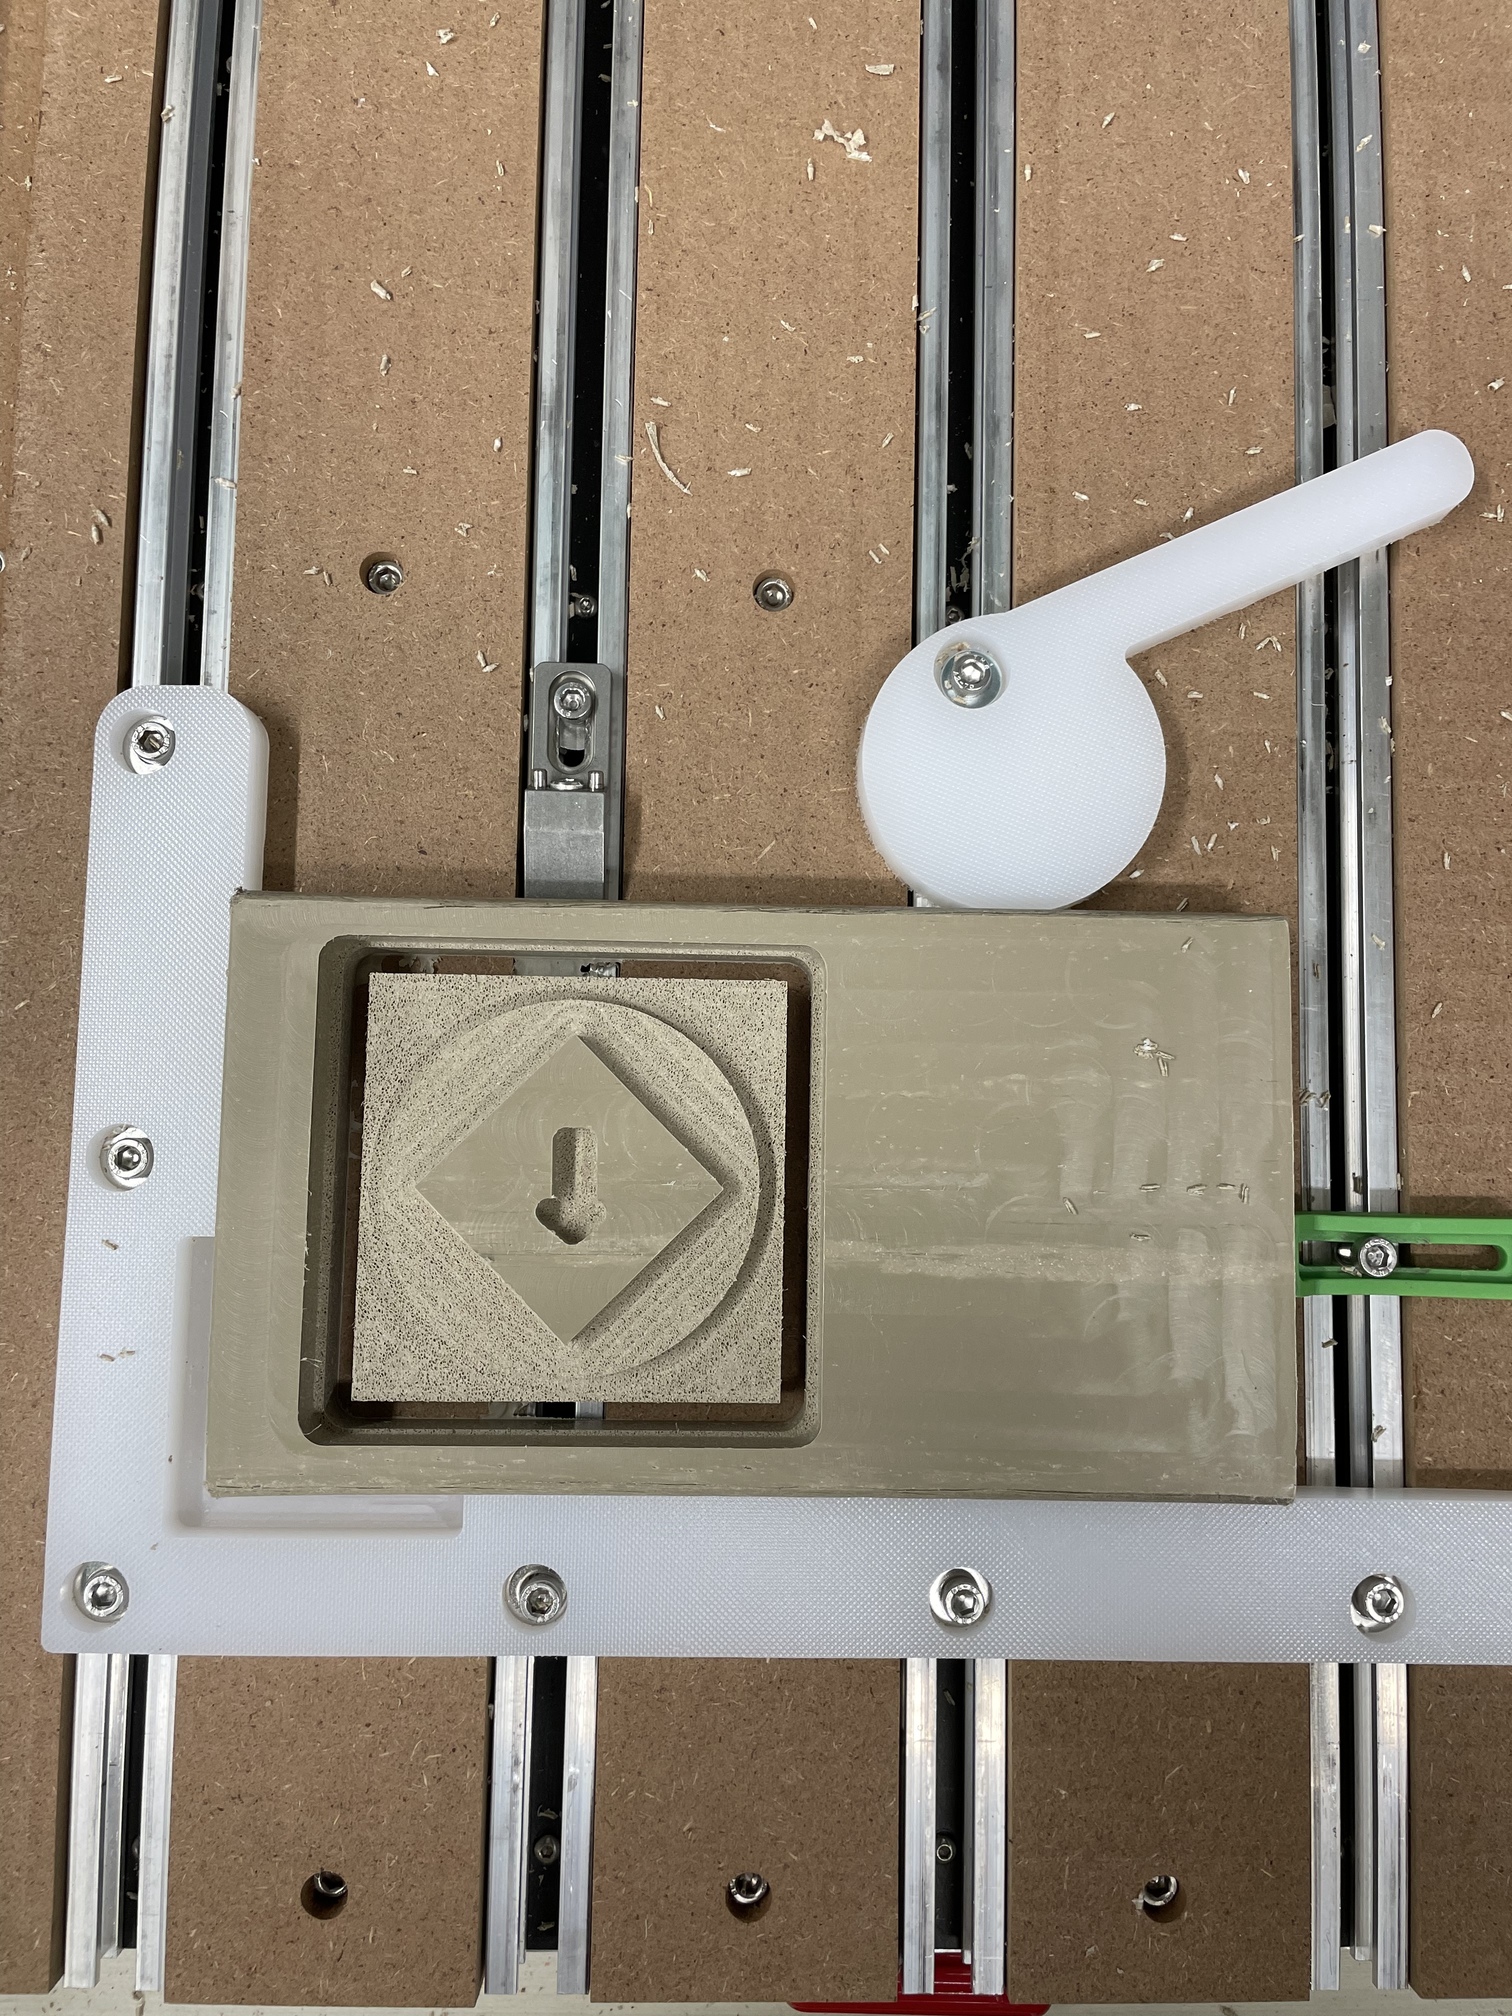
Still trying to figure out how to interpret the results of the diamond/circle/square.
I think the eccentricity of your cam is a bit too much, at least for my peace of mind. (Or is that “piece of mind”?) A higher value, like yours, gives you more range from a given anchored position but means there is very little rotation between holding and coming loose. It also lessens the contact surface between the cam and the stock. I’d move the pivot of your can closer to the center.
Another option is to put a dog in one of the slots to hole the cam’s lever in place.
My wooden ones have never come loose in 5 years. It may be the plastic you used. I have the tiger claw and gator tooth but seldom use them because of the lack of range for them. I also have the stops that work with the two. The L bracket and the cam clamps have worked for my 2" spacing on my spoilboard. As I mentioned in a post further up you want to tighten so the rotation is further tightened. Most of mine have been made of red oak but the last batch was cherry because I had a large cherry board. I think any hardwood would work. MDF would likely not work well due to its soft and pliable nature. Even poplar would work. I always try to orient the grain so the long grain in in line with the handle.
I just scrolled up and noticed the photo was not there so I added it. I guess I forgot.
Yes, the HDPE is slick and in this case the piece being clamped was as well. It was some fiberglass/resin PVC coated deck boards. I was looking for a stable material for the test.
I will probably cut a set of cakes out of walnut since I have a ton. The bracket in HDPE is nice given the footprint in wood would require a glue-up or plywood or two pieces with a joint. Hmm, the latter with a milled lap joint might be nice to try.