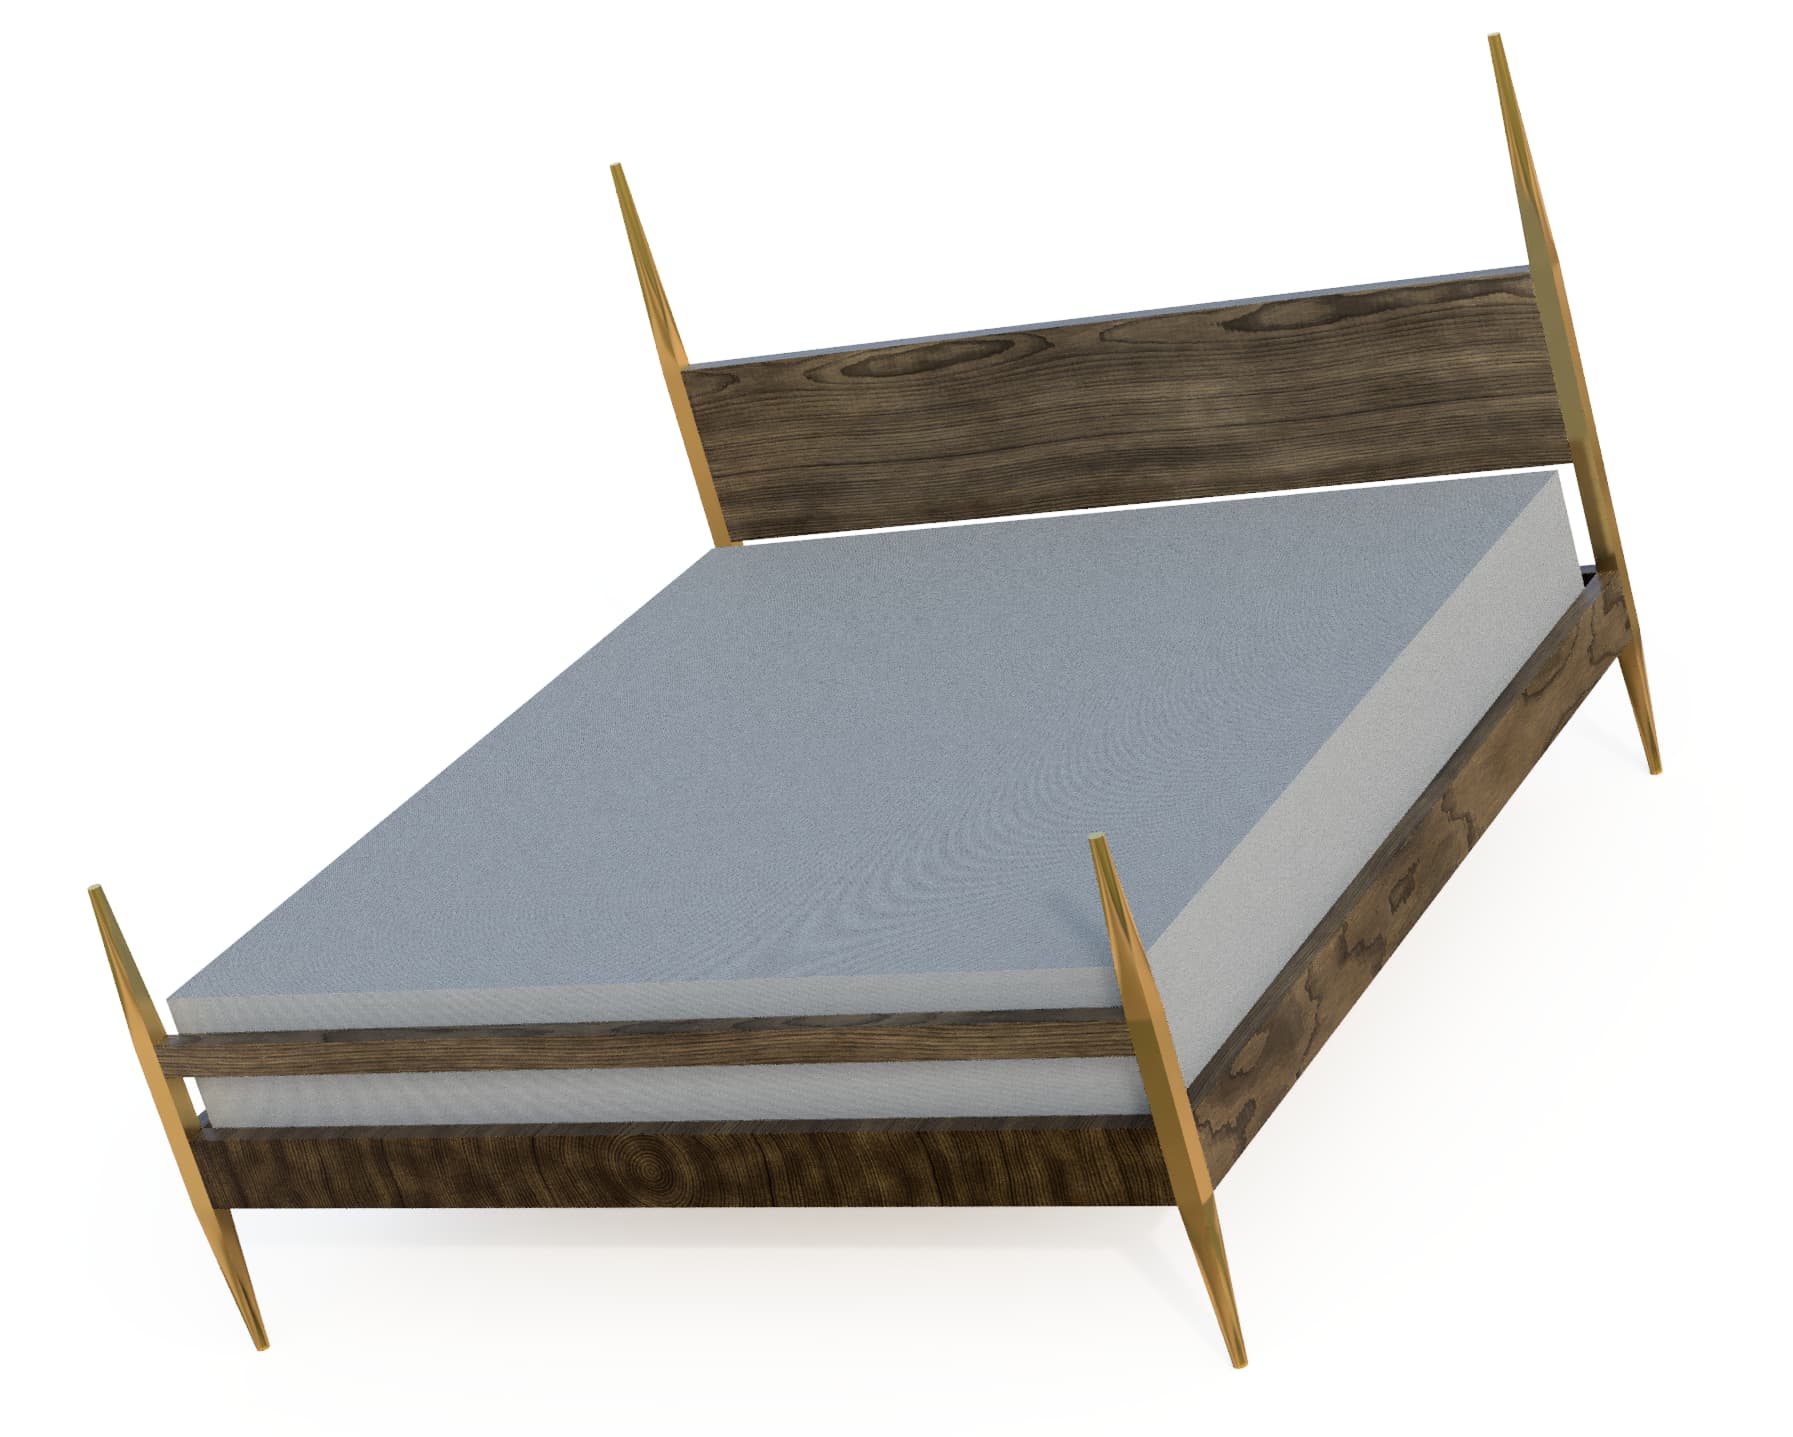
Taking on another project stretching the boundaries of what is “acceptable” on a the S3XXL and making some some brass legs for a king size bed I am making. Requesting a gut check on some of the feeds and speeds talked about below. Before you ask no I don’t own a lathe, and no I don’t want to buy one.
Brass stock is 1.75" x 1.75" going to a taper of 1" at the points.
I’m looking at some of @wmoy 's feed and speed recommendations on Materials Monday for aluminum and a 1/4" endmill and pretty much extrapolating that brass on my machine with aluminum bed and HDZ will fine in the slightly harder 360 Brass. Ergo, 3d adaptive clearing on the 201-Z cutter at 10k RPM i’m looking for a chip per tooth of .002 or 60ipm.
Finishing toolpath is being done on a 202-Z at 10k RPM 90ipm and a chip per tooth of .003 removing .02 axial and radial stock to leave.
Questions:
If I used a single flute endmill on the 3d adaptive clearing could I push faster and compensate with higher RPM to maintain a chipload of .002 ?
I have no idea how to get a nice surface finish in metals, some advice here would be nice, everything is getting sanded afterwards to look “brushed”, but it would be nice to minimize that work.
I’m a little afraid of the parallel tool path impacting the entire cutting length of the 202 cutter when its making its way up the leg to the “squared” portion… just watch the simulation for what I mean.
Is my stock to leave of .02 too much for the 202 cutter on the finishing pass to be taking off?
Any general tips, this will be my first time working with brass
PS I haven’t thought yet about work holding or location features on the piece
I’ll let the metalheads answer, but I can’t help commenting
Note the chipload may be 0.002 but at this 0.025" optimal load, chip thinning is such that you’ll only get 0.0012" chip thickness (which sounds perfectly fine to me in metals).
But my more general comment is that 3D adaptive roughing in metal with a #201 is…a dangerous game. Very easy to clog a 3-flute, so you would be better off using a ZrN-coated single flute anyway.
I hear that rock solid workholding (a vice, or enough tiger claw clamps ) is a prerequisite
It seems like it’s taking more than the entire cutting length ? e.g. #202 has a cutting length of 0.75", and half the leg is 0.875" height ? Theoretically you would rub the shank, but given the geometry of the piece it seems like you wouldn’t, in fact.
I would start with less stock to leave. The #202 can probably take it, but surface finish requirement calls for minimizing the amount of material to shave off
Good point. I’ve switched it to a 46376-k that I have with 1" CL.
I just watched one of @Vince.Fab videos on youtube and was reminded of that. I’ve also included a single flute recipe into the file… that scares me based on his video. The new single flute recipe has been added to the file. 22.3k RPM .003 chip load 67ipm optimal load of … .23" and a DOC of .03"… this operation results in a far faster machining time… but yeah scary.
I’m interested to see your progress with this as I made my own attempt at brass a short time ago. My machine is the xxl with belt z drive and no upgrades so I cant help you out with speeds or feeds. I will offer that in the end I was running about 1/3 of my aluminum speeds as I could tell the machine was struggling to much with chatter.
I had some good results going until my bit caught an edge too hard and lost steps. I was able to get it back to zero proper but as I found out later one of my v-wheels was broken and it was doomed from the start. Now I own a ft long piece of brass paperweight, roughly 60 bucks.
I will also suggest running the program with aluminum or wood several times unless you have a great deal on brass bar stock. That stuff is pricey!
I don’t have any metal cutting experience on the Shapeoko yet, but as a Taig lathe owner, I think brass is very pleasant to worth with. The hardness is higher than aluminum and I cannot hog as fast as say with aluminum, but it forms chips really well. My last part was a cylindrical sleeve 0.015" wall X 0.62" inner diameter X 0.5" long, bored/turned/parted from 0.75" diameter bar stock. I cannot imagine having as easy a time with anything but brass.
I haven’t done brass but in aluminum single flute is the way to go. Solid work holding 100% and climb cutting at all times works best for me. It’s better to cut shallow with a bigger step over and higher feeds VS trying to take deep DOC with a low step over. You want to reduce as much deflection as possible.
You can buy a few 6mm carbide single flutes for cheap and use a quality reducer to start. This way you can see how hard you can push without the fear of smoking a $40.00 mill. I get great results with the orange cap 6x 22mm and 6x15mm china mills.