Hello all I’m new to carbide 3d and new to the CNC world. I am working on a svg file that I down loaded and would like to make some changes to it to better fit are needs. attached is my design I’m working with.
new wheel cutout.c2d (40.4 KB)
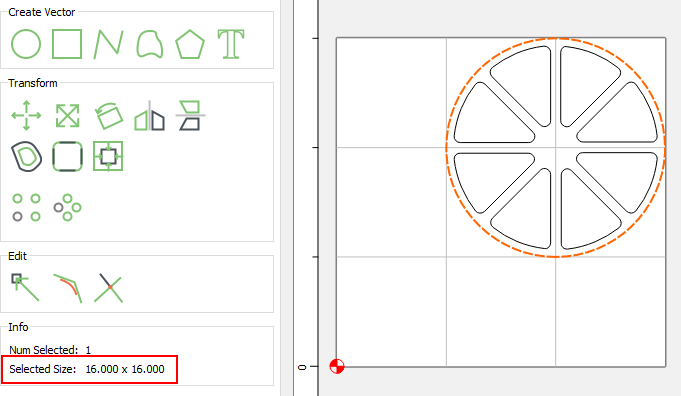
I need to make the lines between the outer ring and the wheel opening 1 cm I also need to make the spokes 1 cm can some tell me the best way to go about this.
Rather than try to measure & offset everything in the middle, I would just opt to create it from scratch.
Save the outside circle.
- Select the outside circle & note the size. (16 x 16)
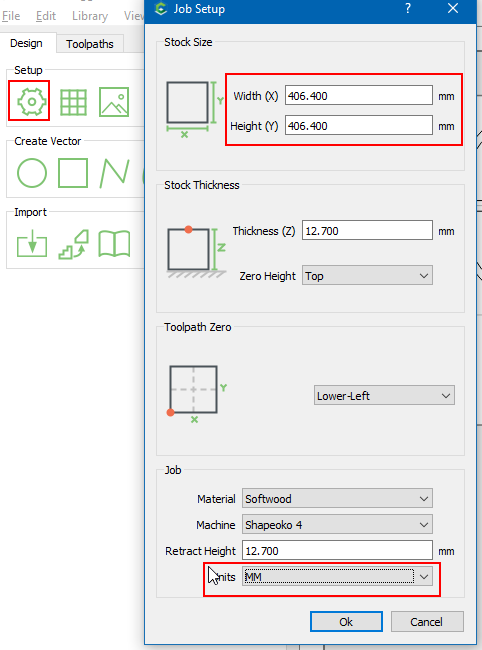
You specified your requirements in metric, so I’ll change the units to metric in the Job Setup dialog.
You could also use 0.3937" and leave the units in inches. Your choice.
2) Job Setup → Change the Stock Size to 16 x 16. Then change the units to metric.
Your stock size becomes 406.4 x 406.4
-
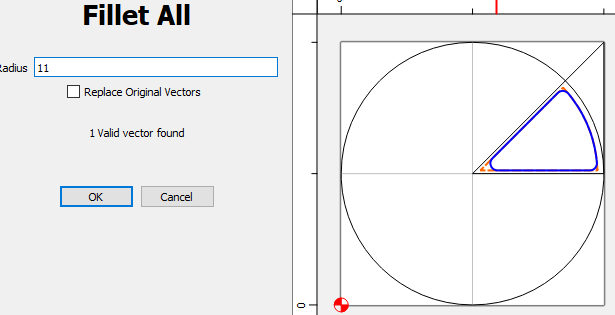
Delete everything but the outer circle. Oops, wait! First determine the size of the fillets (11mm)
I just drew a circle & adjusted the size until it fit. Could be a bit over 11. (11.25?) -
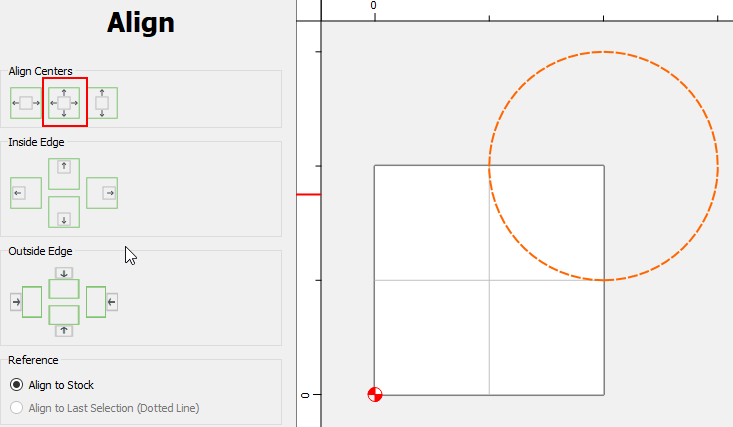
select the outside circle, Align Vectors
 , Align Centers & select the middle icon to center in your stock
-
Set the grid size
 to half the circle diameter (203.2).
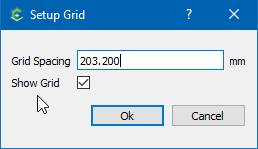
Now the grid snap point is in the center. -
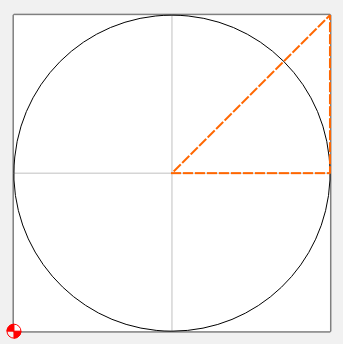
Create a polyline
 from the center to the middle of the right edge, then to the upper right corner, then back to the center
-
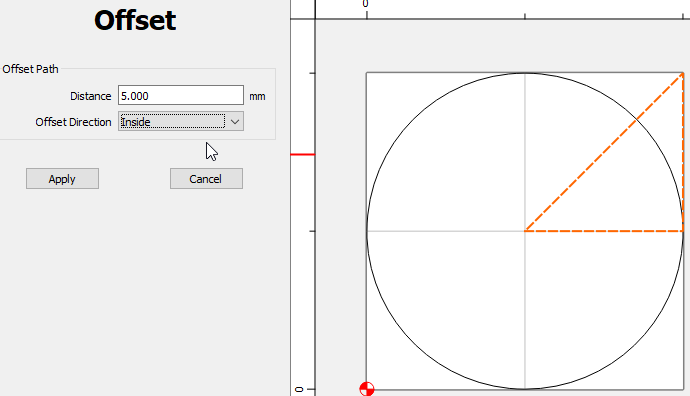
Offset
 to the inside the triangle you just made by 5mm
-
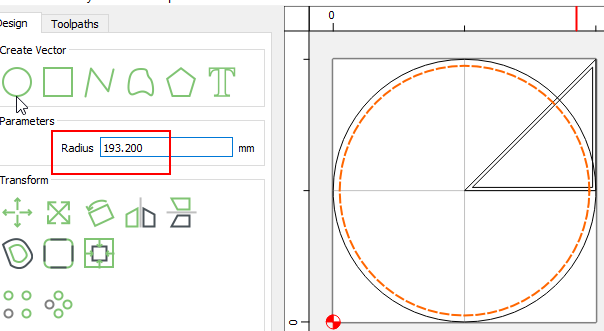
Create a circle
 from the center with a radius of 193.2 (The outer circle - 10mm)
-
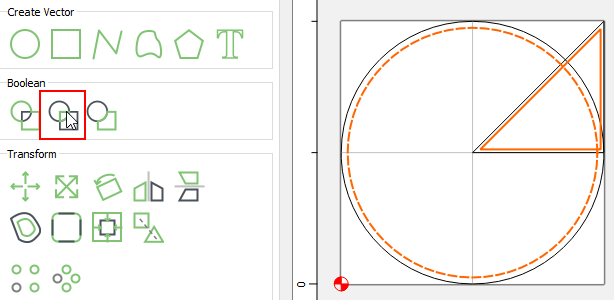
Select the inner circle and the triangle, and do a boolean intersection.
-
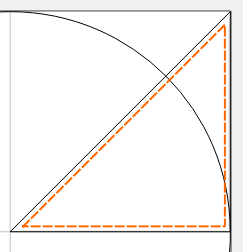
Apply the 11mm radii

-
Select the triangle & Circular Array

. Select center in window, or enter 203.2, 203.2. Number of items: 8
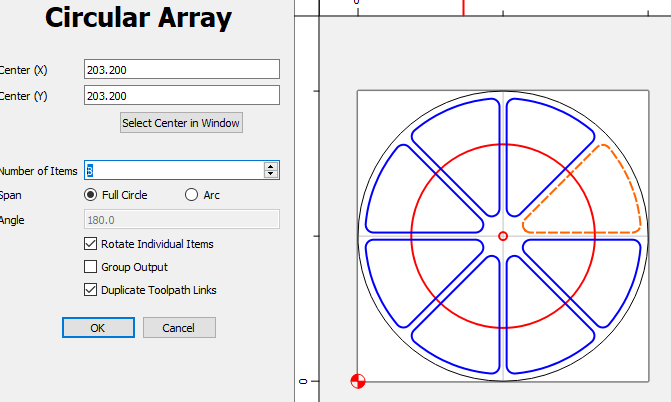
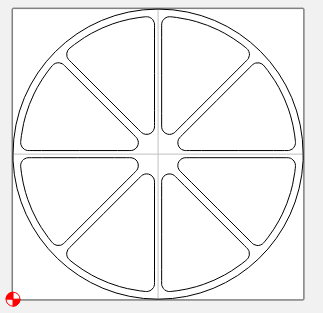
That’s it.
There are, of course, many ways to accomplish this in CC. One thing to note, that I didn’t use, is that if you offset a vector to the inside using a distance the radius of the fillets you want (11mm), then offset it back to it’s original size (outside, 11mm), you will end up with 11mm fillets.
If you want to work in inches, change the units back to inches before exporting G-Code
4 Likes
Thank you very much for the information. I’m not sure if i’ll be able to figure this out being that I’m new to all this but I will give it my best. thanks again for getting back to me with the help. ill let you know how it goes.
Added pictures.
Forgot to explain deleting the unwanted geometry, the original triangle, and the offset triangle without the fillets.
To create a circle, click the center, then any point on the circle. You can click anywhere for the second point, since as soon as you do you can change the radius.
1 Like
wow thanks so much. I worked on it last night as was able to flow your instruction and got a long was. the photos you posted will help greatly. I did have a hard time ting to figure out how to get rid of the stuff in the inter circle b ut with update ill follow your instruction and I sure I will figure it out. if I have questions ill be sure to reach out. thanks for you kindness and help with this. we are so looking forward to making this our new adventure.
No worries, glad to be of help. I got a lot of help when I first showed up here, too. And still do…
Sorry, to delete things select them. (CRL-A to select all, Shift-click to add or remove from selection), then delete (The delete key)
Hello Tod I wanted to take this time to say thanks again. we were able to get our project all cut out and with your guidance everything came out amazing. thanks again for taking your time to help us learn so much about our new shapeoko. we are looking forward to learning a lot more in the coming future.
This topic was automatically closed after 30 days. New replies are no longer allowed.