Now I am lost in your paint technique, Guy. You have spray cans sitting there, but you seem to be using a wipe on/off technique. 
1 Like
I’m assuming he’s painting the entire thing black to get the background color and then applying silver or gold leaf to the top surface. Stunning effect! He did a great job
Well, sure, I see the background effect, but he isn’t using a mask for the foreground color. Guy must be doing this top color manually. If so, that is even more amazing!
2 Likes
The finishing process:
- Primed with Rustolem flat red primer.
- Painted with Rustolem Flat Black rattlecan.
- Applied Rub and Buff silver leaf, gold leaf and antique gold with micro fiber cloth.
The Rub and Buff used about 1/4 inch long squeeze of product and 3-4 drops of mineral spirits mixed in a plastic lid from shoestring potatoes. I applied color with tightly held cloth a little at a time. What I mean is do not load up product on rag. Small amount and apply to project. If you have too much on rag you fill small lines with color. You fill some any way so just go slow and get an even application. You may have to go back over some areas.
See this YouTube video:
The Star Wars CNC Project
The video has links to image. All three images are under Common Use License for non-commercial use. Also see
sandyeggo.com under projects for images.
1 Like
You had me with this! ![]()
Guy, you have great patience.
I have been doing wood working for 40+ years. On thing you have to learn is patience. As many books have been written about wood working the finishing is 90 percent of the work. I saw a documentary about Facebook and it rise in popularity. The thing the documentary pointed out is the instant gratification of the “Like”. People crave the instant gratification and the feed back they receive from the “Like”. If you want to do great in wood working you have to have patience. I am not saying I dont like praise for my work but the work is what gives me satisfaction. Some times my experience leads to a lot of finished projects but I have also had to just throw some projects in the trash can and either move on or start over. A craftsman can figure out how to turn a mistake into a save but you also just have to scrap the project if the accumulation of errors ruins a project.
Patience is a virtue even in our modern society that craves instant results and adulation. Stay Calm and Machine on. I bought my Shapeoko to augment my wood working. I see people try to do everything on the CNC when more traditional efforts are easier and faster. Just dont get warped around the wheel trying to do everything on the CNC. Luckily I have a lifetime accumulation of woodworking machines and experience but the CNC has brought my projects to another level. I looked at a lot of other CNC machines and the Shapeoko is one of the best for a hobby wood worker. The support and this community is head and shoulders above other hobby machines.
7 Likes
I need to make a sign with this, to hang above my machine !
Thank you for the wise words.
1 Like
You inspired a great (can’t go shopping during the quarantine) birthday present for my son. I tried the Marvel and DC calendars with the new Advanced Vcarve function, CC build 467. #102 1/8" end mill for roughing, #302 60 degree Vcarve, #201 1/4" end mill for cutout, they’re 23" diameter. I’m very pleased with the results and my son loves them.

7 Likes
@LWSIV how much of a tube did it take to finish one of those?
Very little. Maybe 3/4 inch squeeze if tube then thinned with mineral spirits. I would squeeze about 1/4 inch then 3 or 4 drops of Ms. Thorough mixing on a plastic lid about 4 inches round. If you just need a little to finish drop some Ms on lid and you can get the thin layer left on lid to just finish up or touch up.
I did research about if you need to put clear coat over finished project. Consensus is no. Mine have dried for over a week and nothing rubs off. I guess you could say the Rub and Buff is thick paint and dries like paint.
It did not take very much at at all maybe 1/10th of a tube per plaque. The label claims 20 square feet of coverage, I’m sure you can do a lot more. I tried something different to apply the rub n buff, I applied it with a Brayer like you would for inking type or a surface plate. I did thin it a very little with mineral spirits to get the texture right but it worked great. It wasn’t fast but it was simple.
1 Like
You did outstanding work! were you ever able to get the files into google drive? If so would you be willing to share a link?
Not a lot of people left who know what that is.
Actually, I used several for years, did not know it had a name other than ink roller.
1 Like
I am traveling in Houston today. Will be home tomorrow. Do you want the svg or the cc files? If I forget pls feel free to poke me. I have a short attention span and I have a 3.5 hour drive tonight. Had a great Chinese dinner hope I don’t fall asleep at n the road. I usually do not drink caffeine after 17:00 because it keeps me awake. But I had 2 glasses to stay awake.
3 Likes
I put the files on google drive, so if you want them PM me and I will send you a link.
Thanks to @gdon_2003 for sharing! Made an 8" reduced version centering on Iron Man with a little different finish. I wanted the red and gold to fade together, so did a basecoat of Metal Cast red, then applied the gold, then hit it with a light coat of Metal Cast red again to finish.
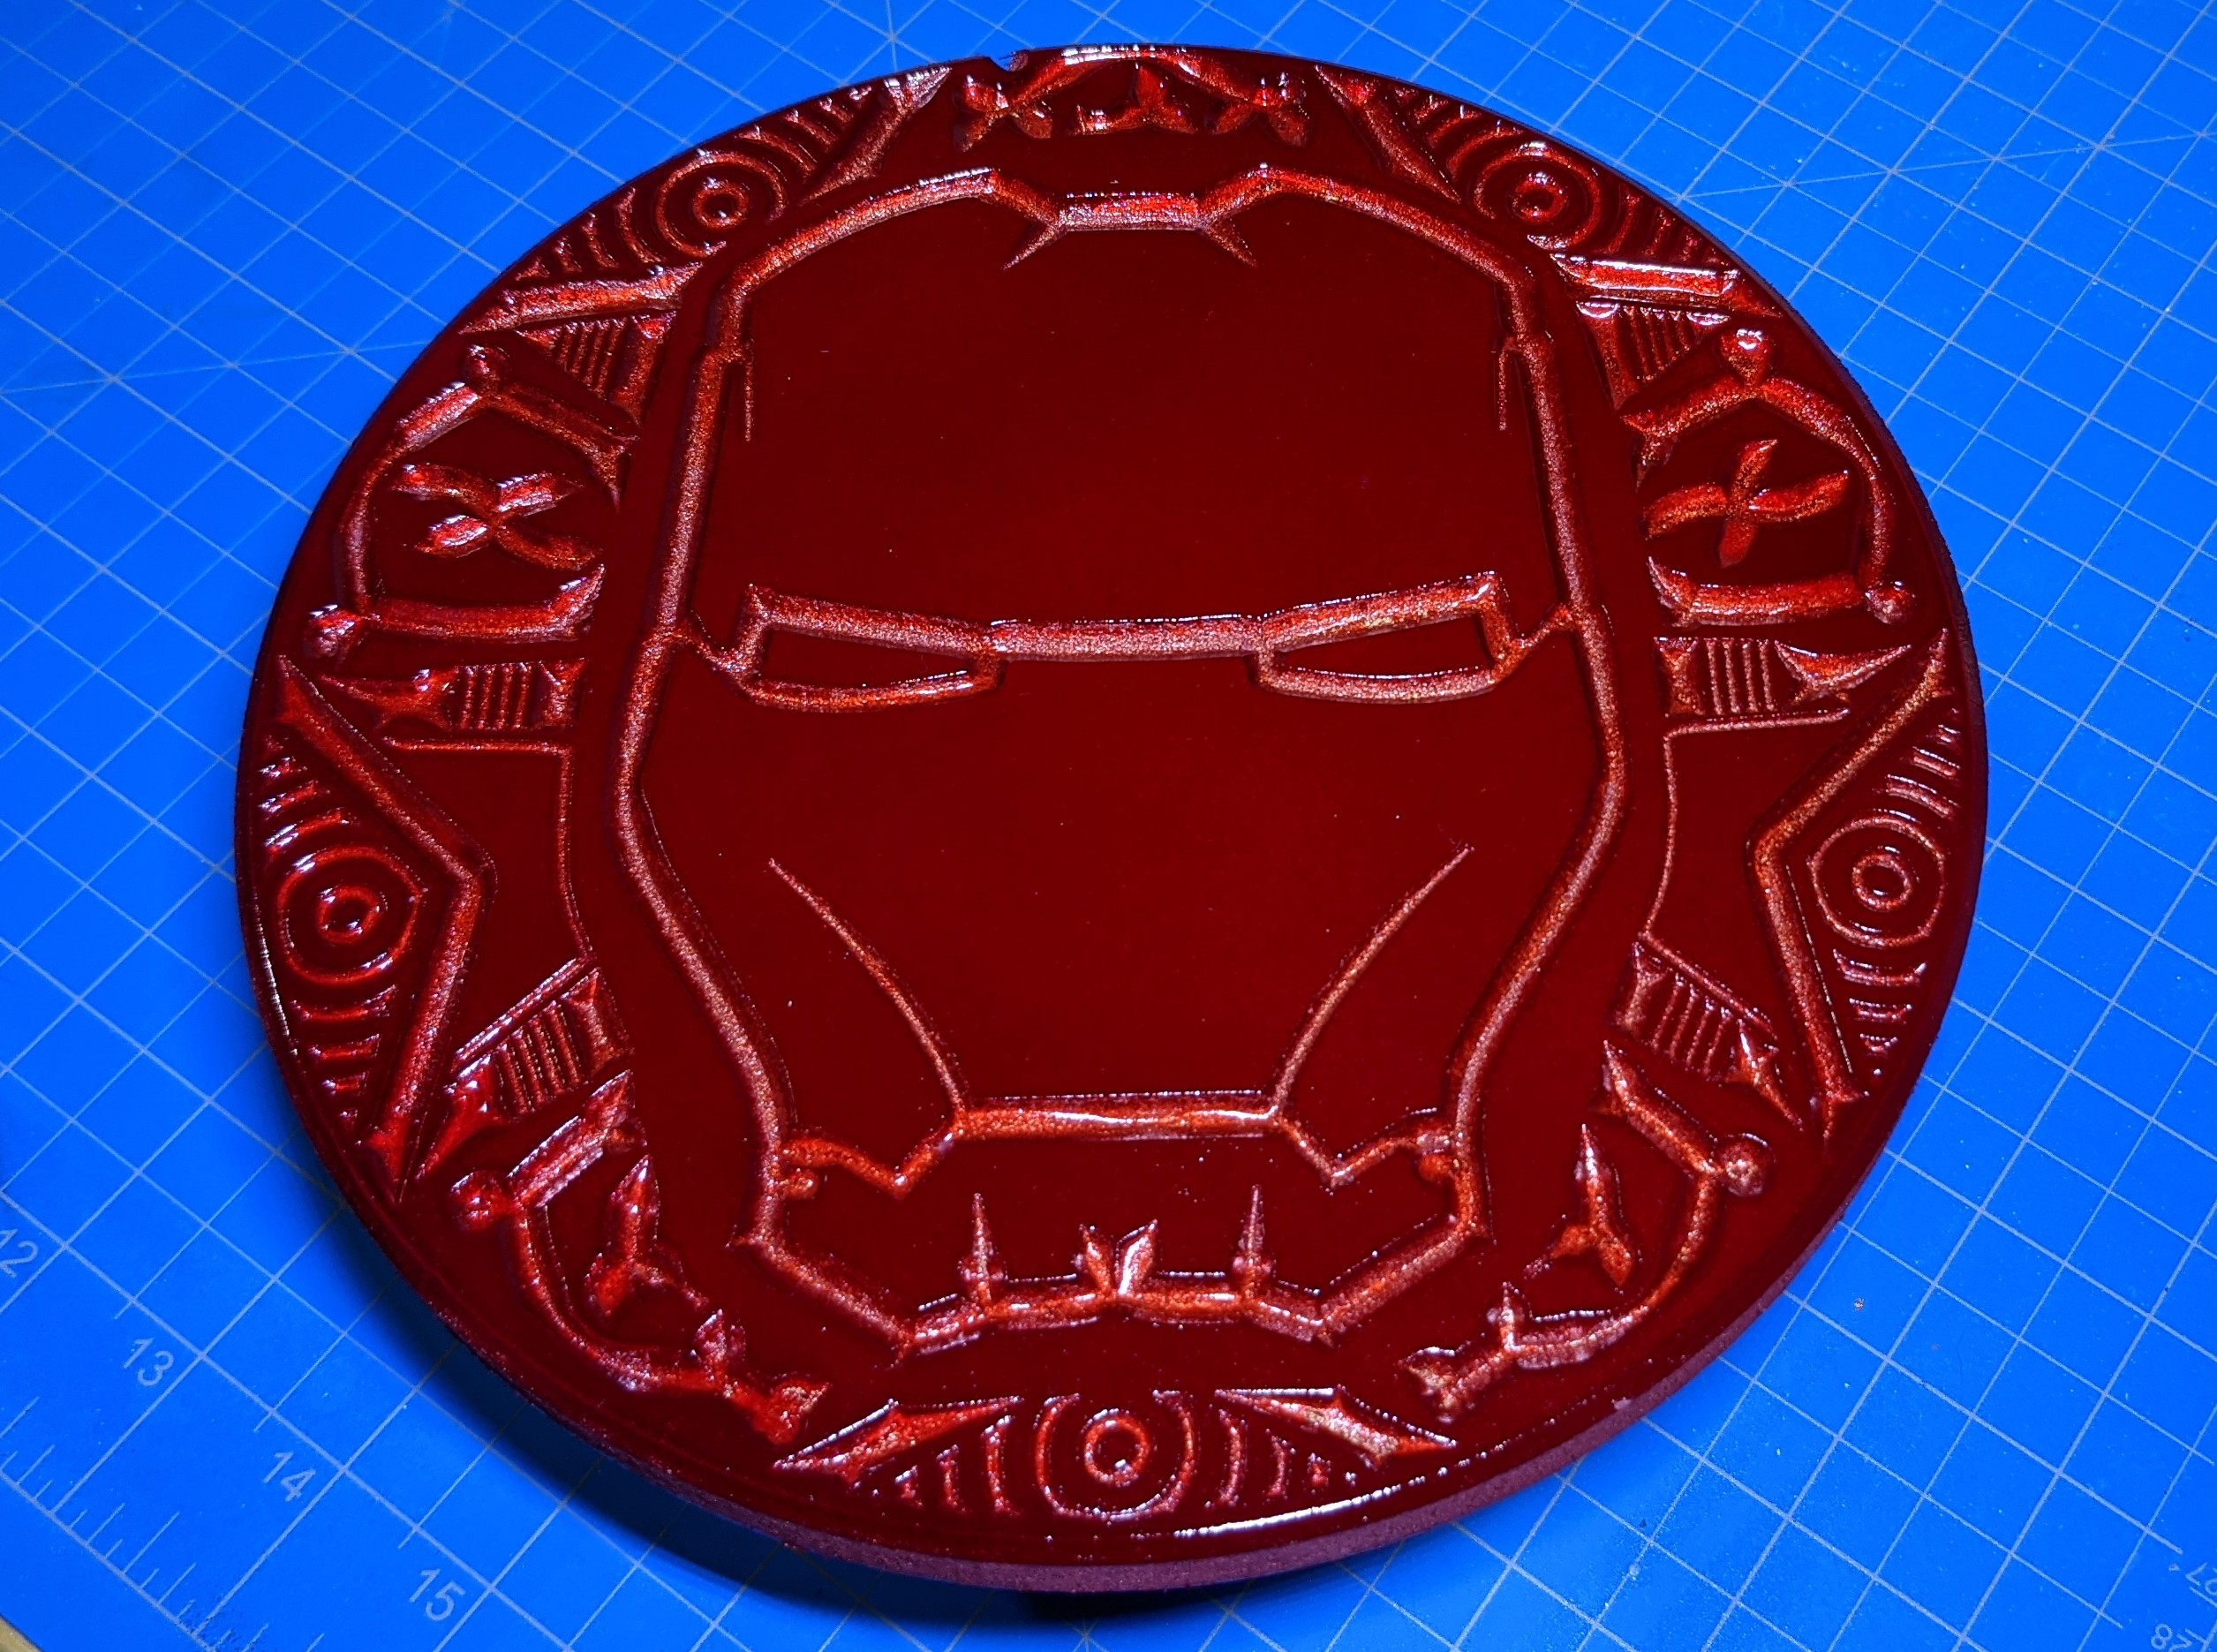
4 Likes
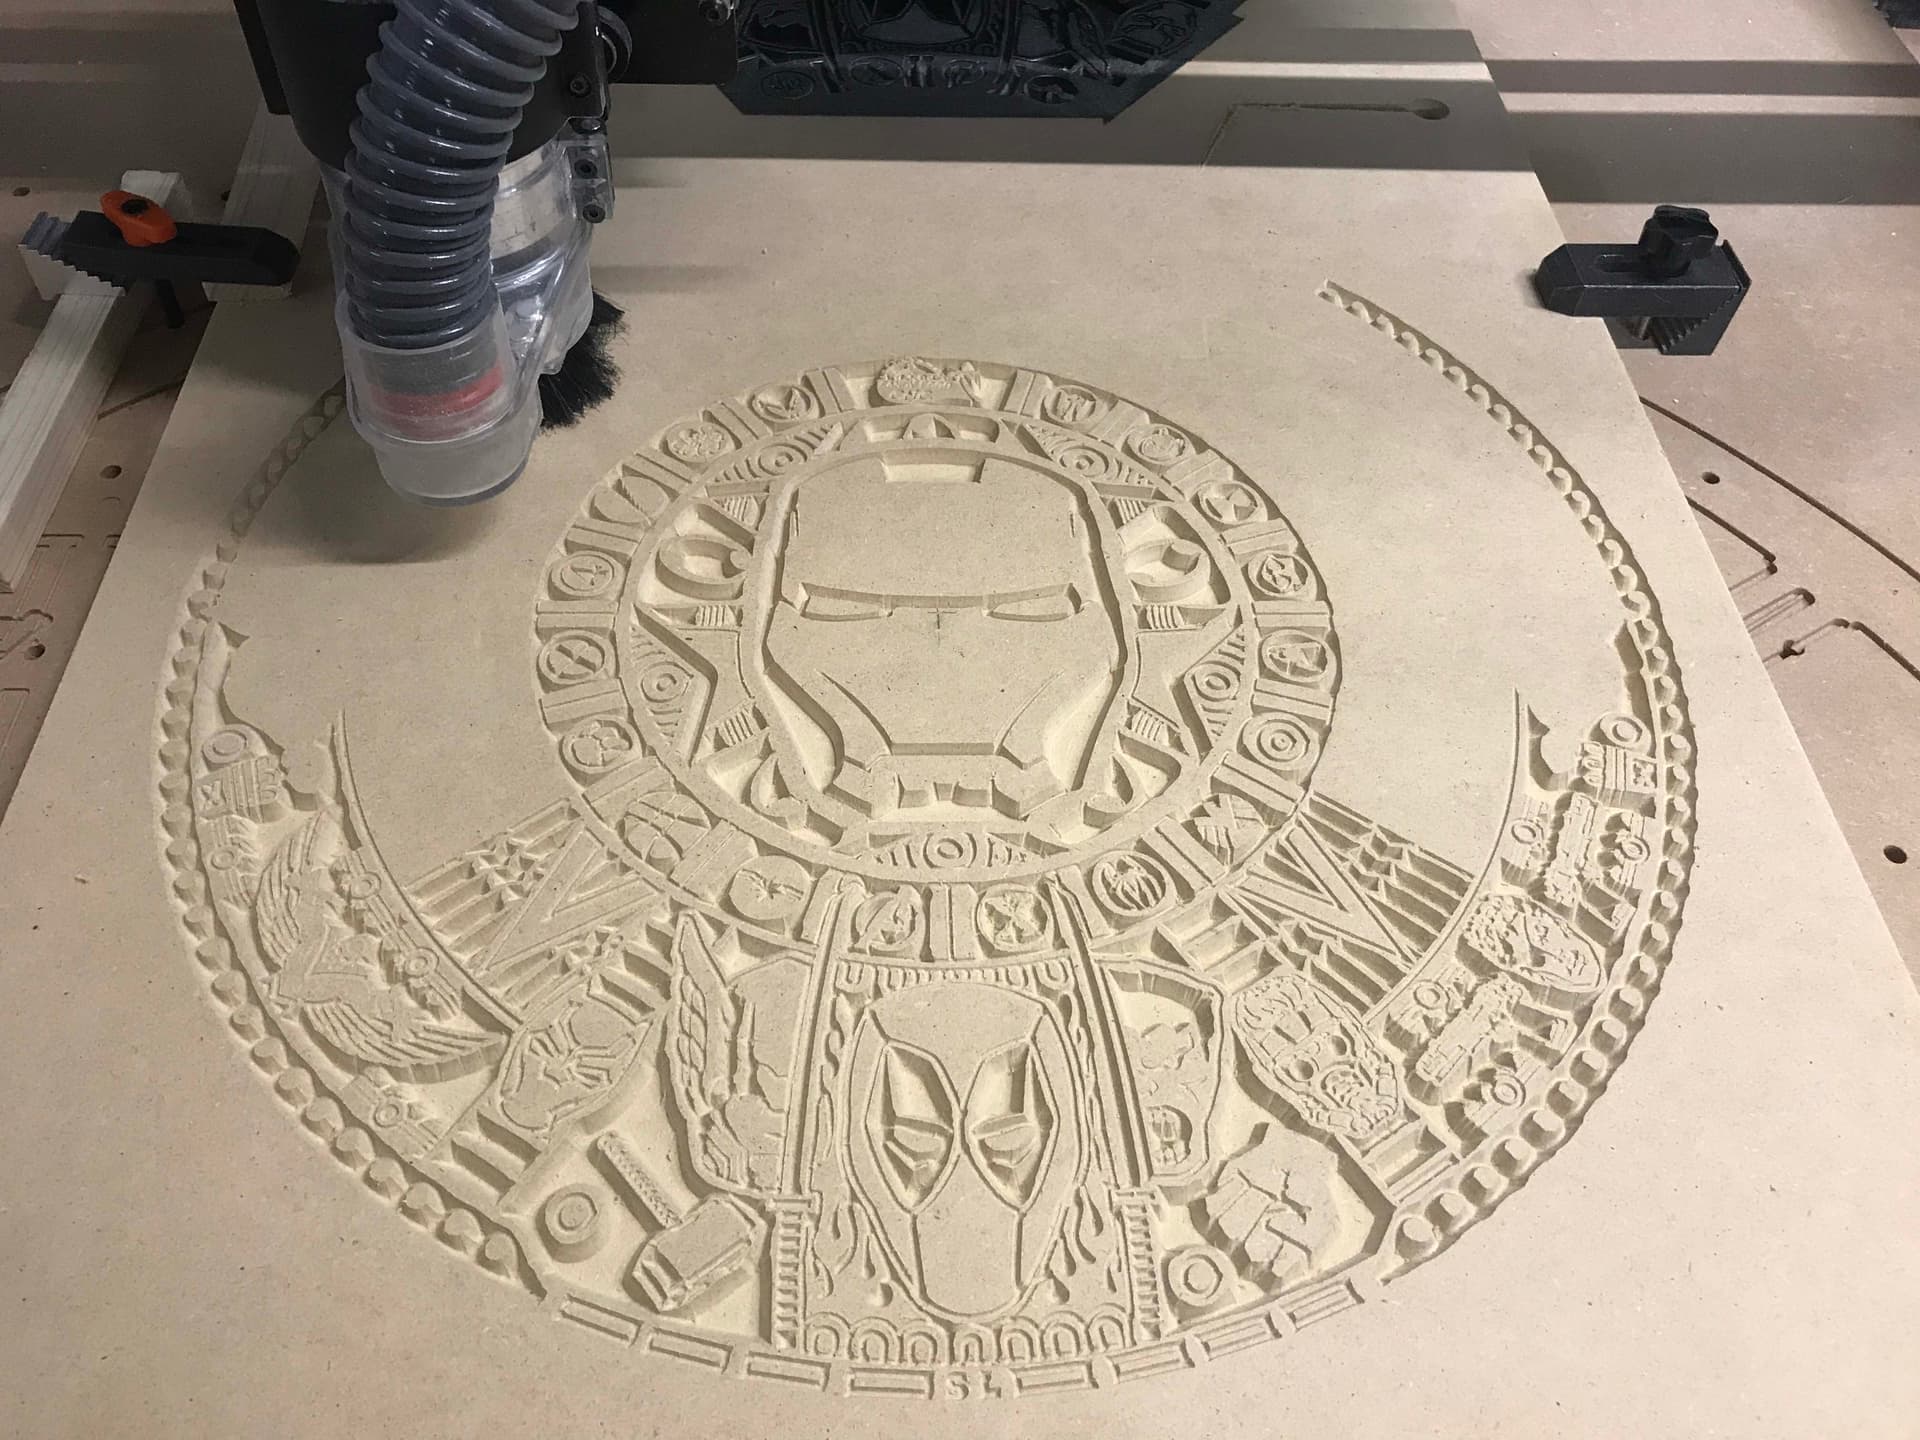
This is my first time posting, but I’ve been reading and following several threads here on the Carbide 3D Community, especially the Marvel Calendar thread. Huge thanks to @gdon_2003 for his help and recommendations so I could get this carve done.
I ended up making a Marvel Calendar that was 18" in diameter. Since the total carve was going to take about 7 hours and I wasn’t able to complete a 7-hour carve all at once, I broke the file up into 6 separate carves that were about 1 hr and 15 min each (middle, top, bottom, left, right and the perimeter cutout). For this carve, I used a 60-degree v-bit (except for the cutout, which was a 1/4" end mill) and carved it out of MDF.
Below are the cut settings that I decided to use since I needed a short carve time (I was on a compressed timeline). If I carve another one, I will probably change my settings so they’re not as aggressive, especially if I have more time to complete the carve. Here are the settings I used:
- MDF
- 60-degree v-bit (2-flute)
- 50 ipm
- 16,000 rpm
- some sections 0.2" per pass, others 0.1" per pass
- max carve depth 0.2"
- Advanced v-carve, max depth 0.2"
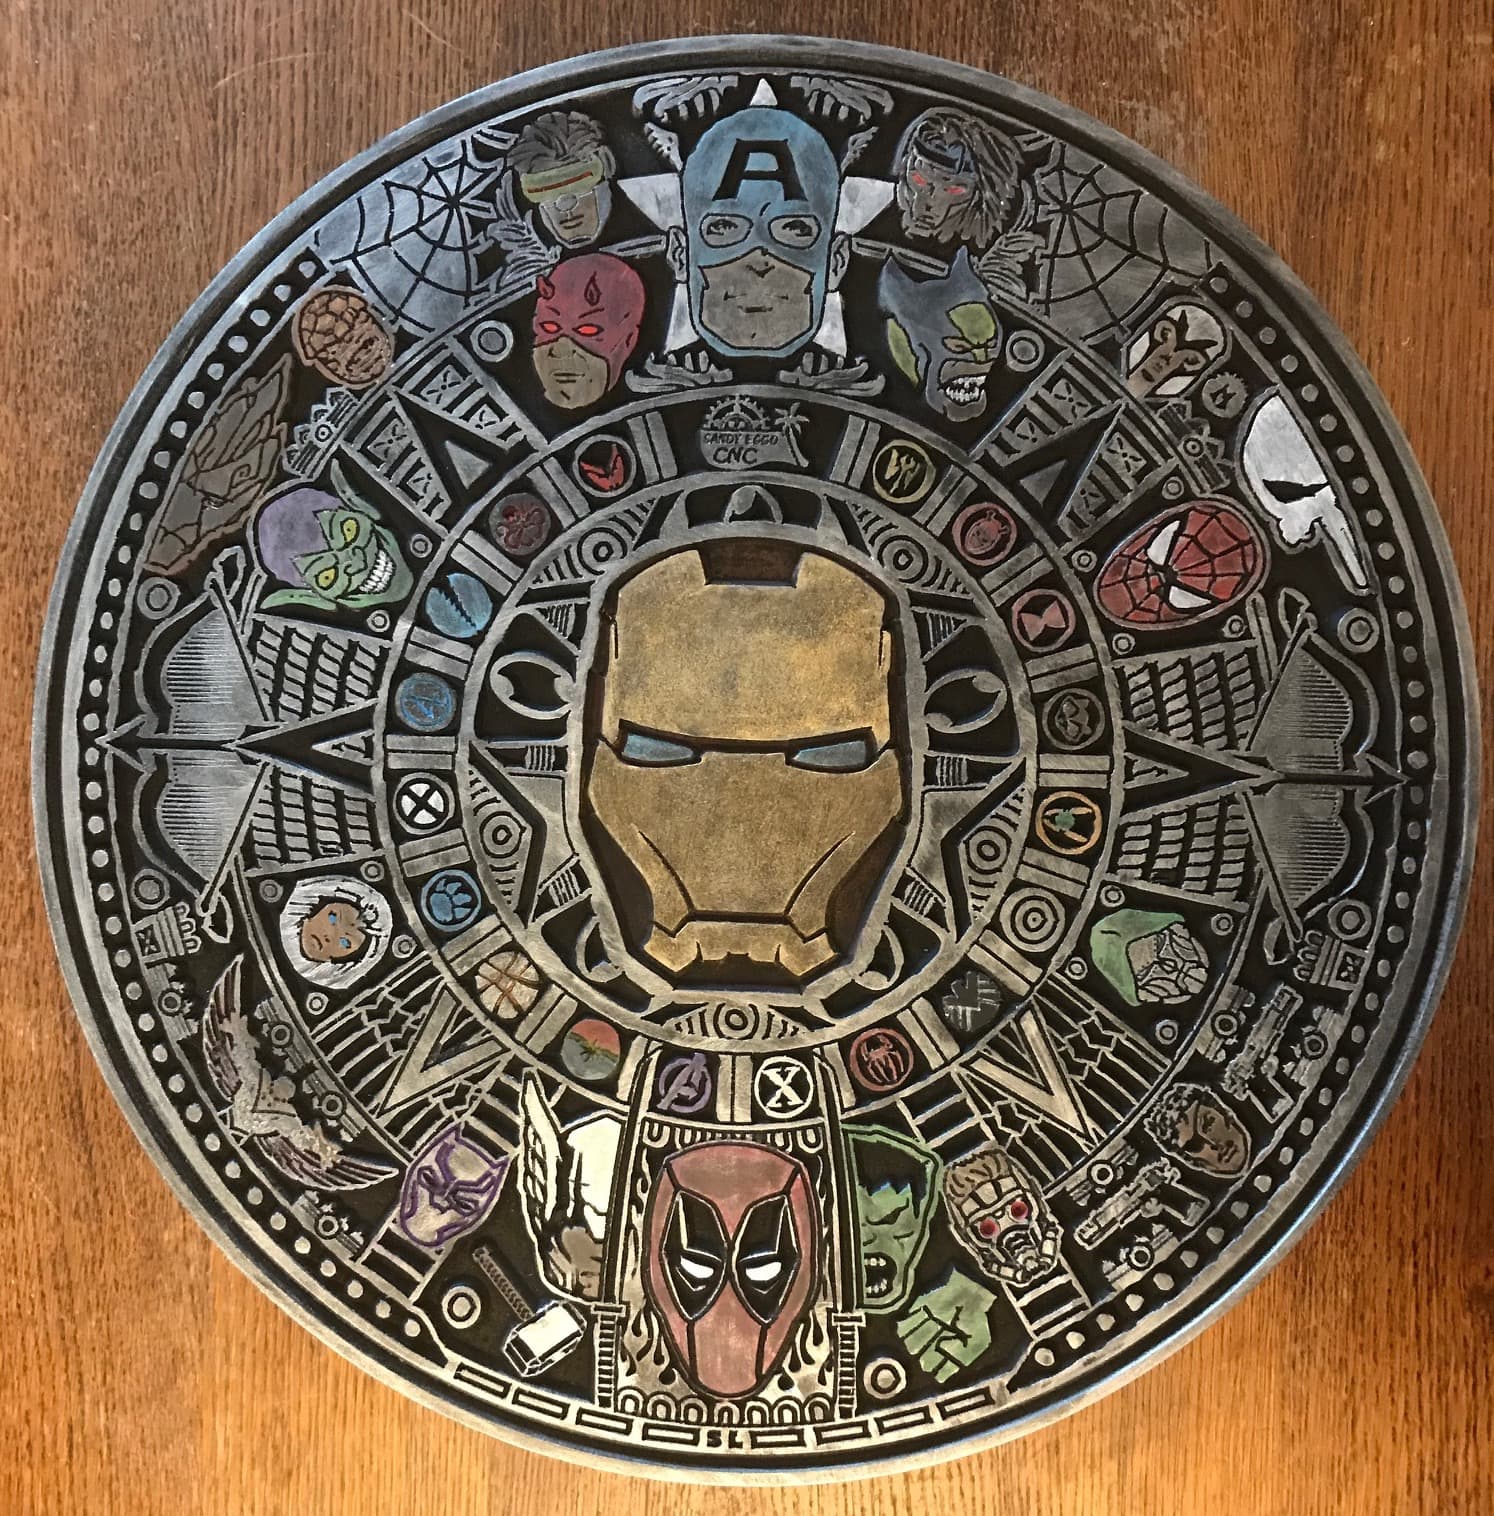
As you can see, I decided to add some color. I was debating on whether or not to add the color, but ultimately, the person it was for wanted and liked the color, so that made the decision easier. Thank you to everyone for their posts, comments and recommendations in this thread. It definitely was a big help in figuring out cut settings and how best to do this carve.
Carve in progress:
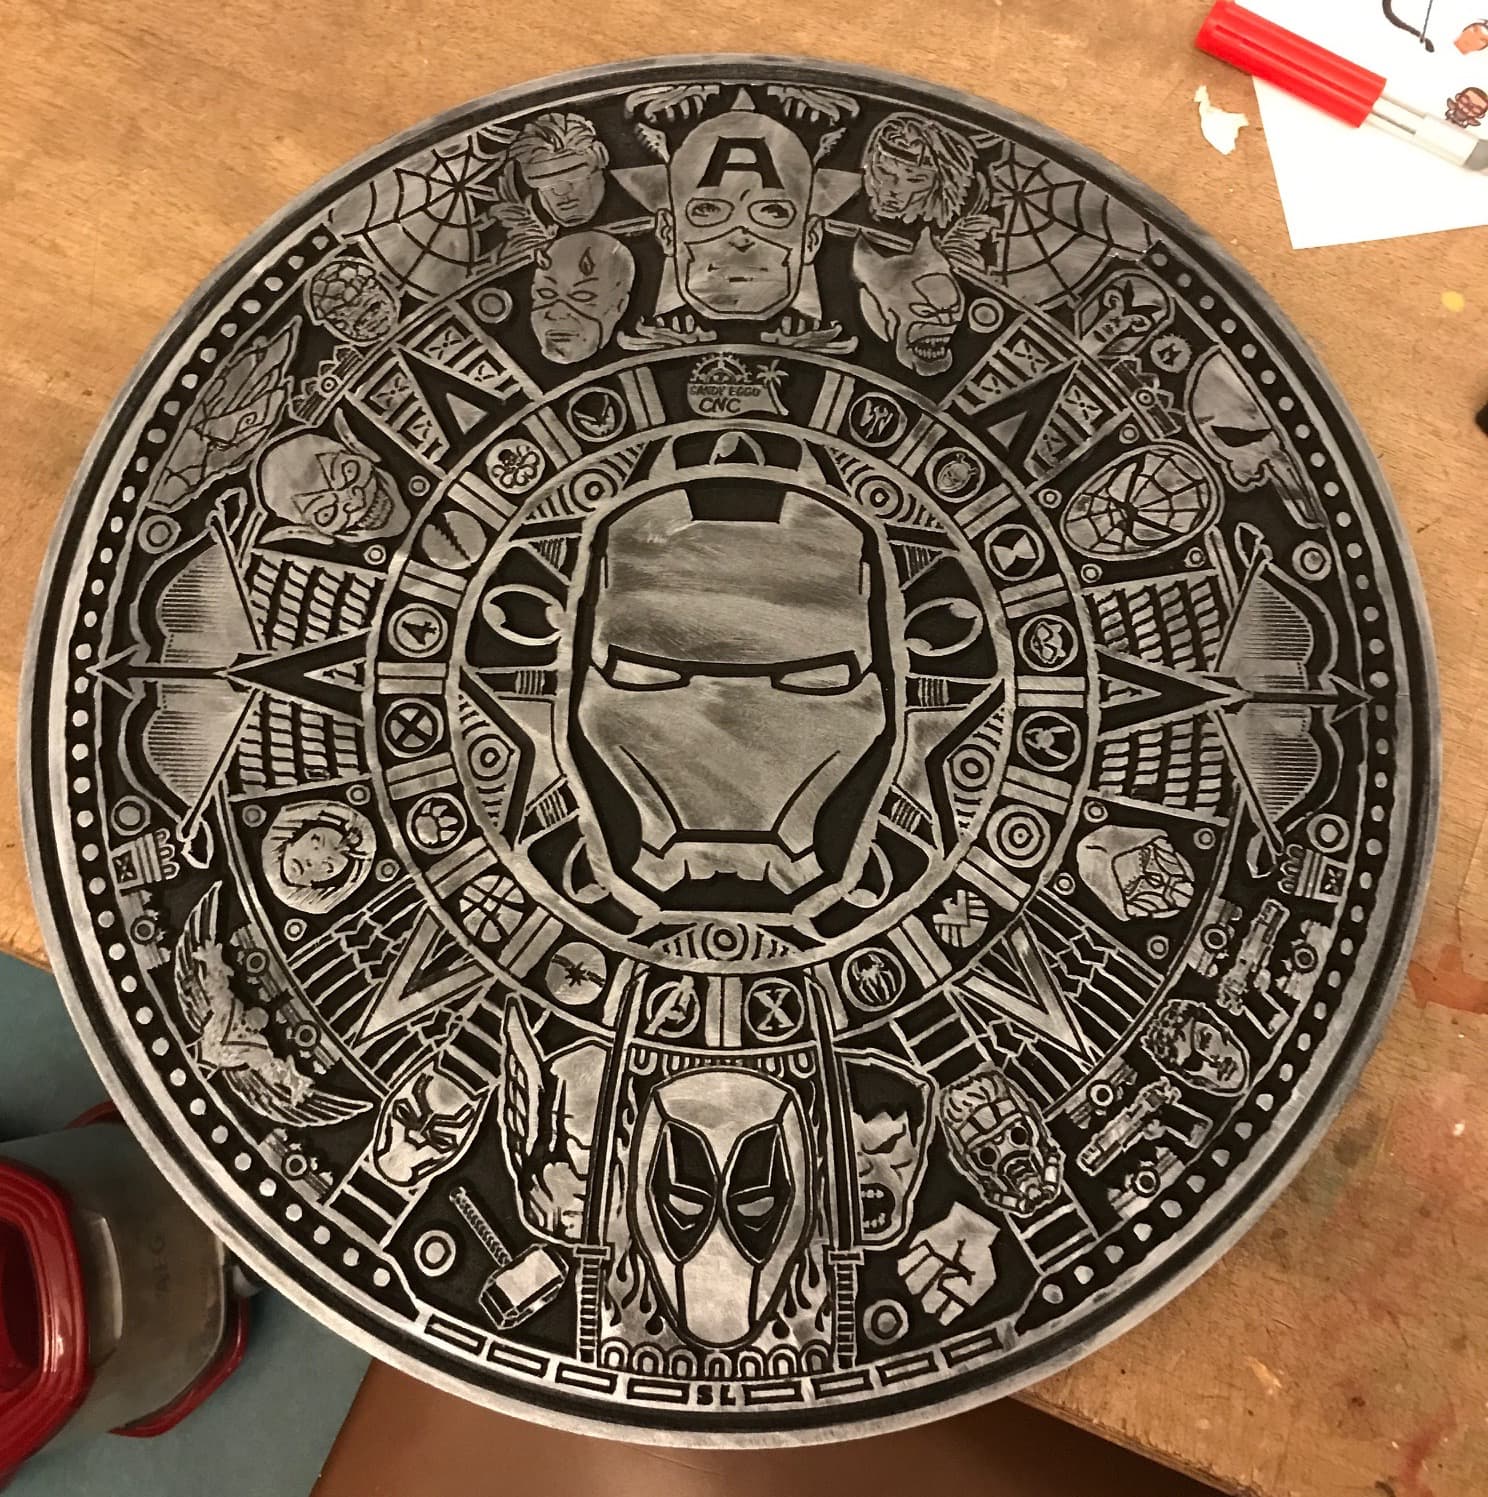
Black primer (spray paint) and dry-brushed with silver paint:
Final finish:
15 Likes
I know this was originally posted about a year ago…
First - the design and detail is incredible! ![]()
![]()
Second - you say you knocked the USB plug loose. My question is, can you pick up the cutting where it left off, or do you have to start over from the beginning?
I’m curious, because this happened to me. I had my computer sitting up about a foot higher than the surface of my S-Pro XXL, (I did this because sawdust was being put all over my keyboard). Anyway, I slid my computer over on the box and ‘blip’ the USB was unplugged. ![]()
I was more than half way through, and being a Newb, I didn’t know if I could pick-up where I left off. Sooo… Yay, I created my first piece of firewood!
.
Kevin, that looks awesome! Great work! 
1 Like
I usually run my laptop without power on battery only. However on long runs I will hook up power supply after a couple of hours. Not sure how long my hp would run on battery only but I did not want to find out.
The accidential unplugging of the usb was just a few minutes after starting a carve so I just started over. During long runs I check on project every 10 minutes and write on a pad the line number of gcode displayed on cm. I could edit gcode from last rapid move if necessary.
1 Like